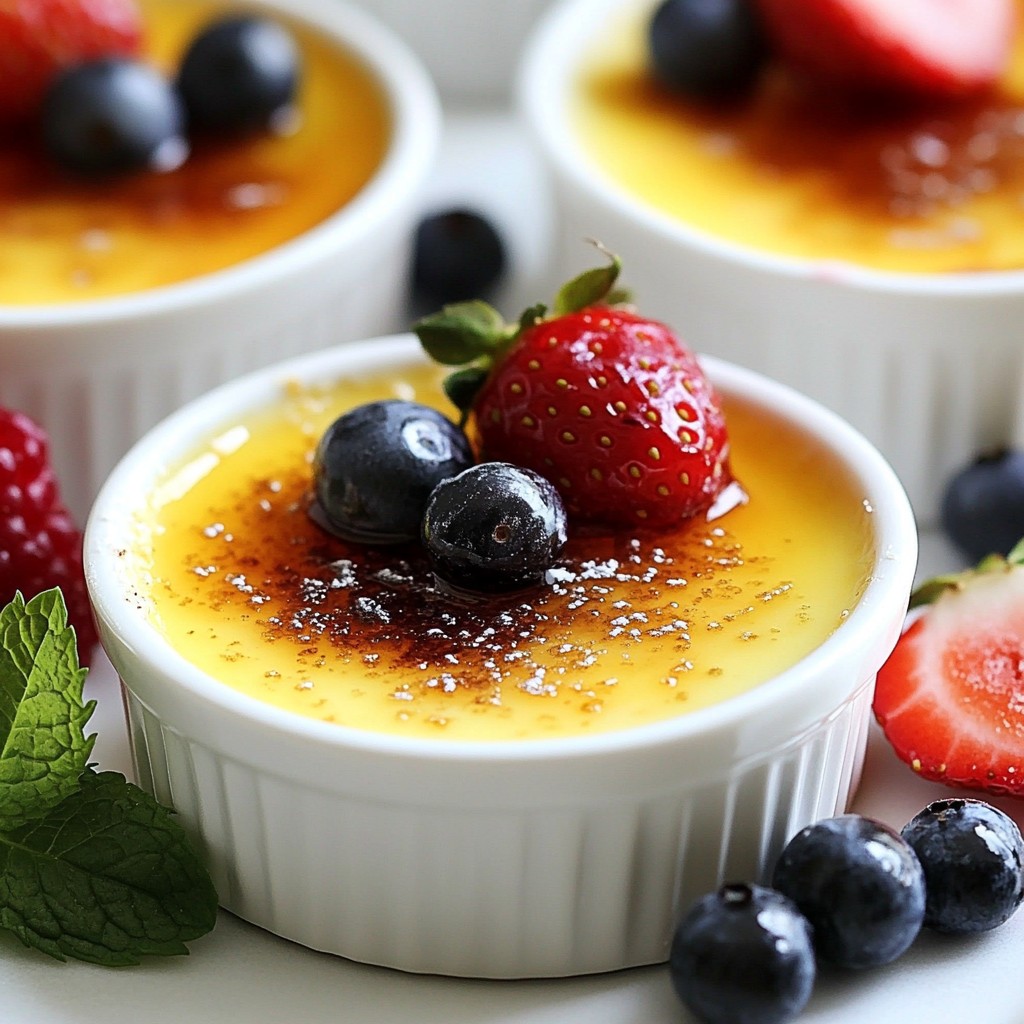
Indulging in homemade Vanilla Bean Crème Brûlée is easier than you think! This rich dessert features a creamy custard topped with a caramelized sugar crust. You’ll impress your friends and family with each delicious bite. I’ll take you through simple steps, share classic tips, and provide tasty variations to suit any palate. Get ready to unlock the secrets of this decadent treat that’s perfect for any occasion!
Why I Love This Recipe
- Decadent Flavor: The rich vanilla flavor combined with the creamy texture creates a dessert that is truly indulgent and satisfying.
- Elegant Presentation: This dessert is visually stunning with its caramelized sugar top, making it perfect for special occasions or dinner parties.
- Simple Ingredients: With just a handful of ingredients, this recipe is approachable and allows the natural flavors to shine through.
- Fun Technique: Using a kitchen torch to caramelize the sugar adds an element of excitement and a touch of culinary skill to the experience.
Ingredients
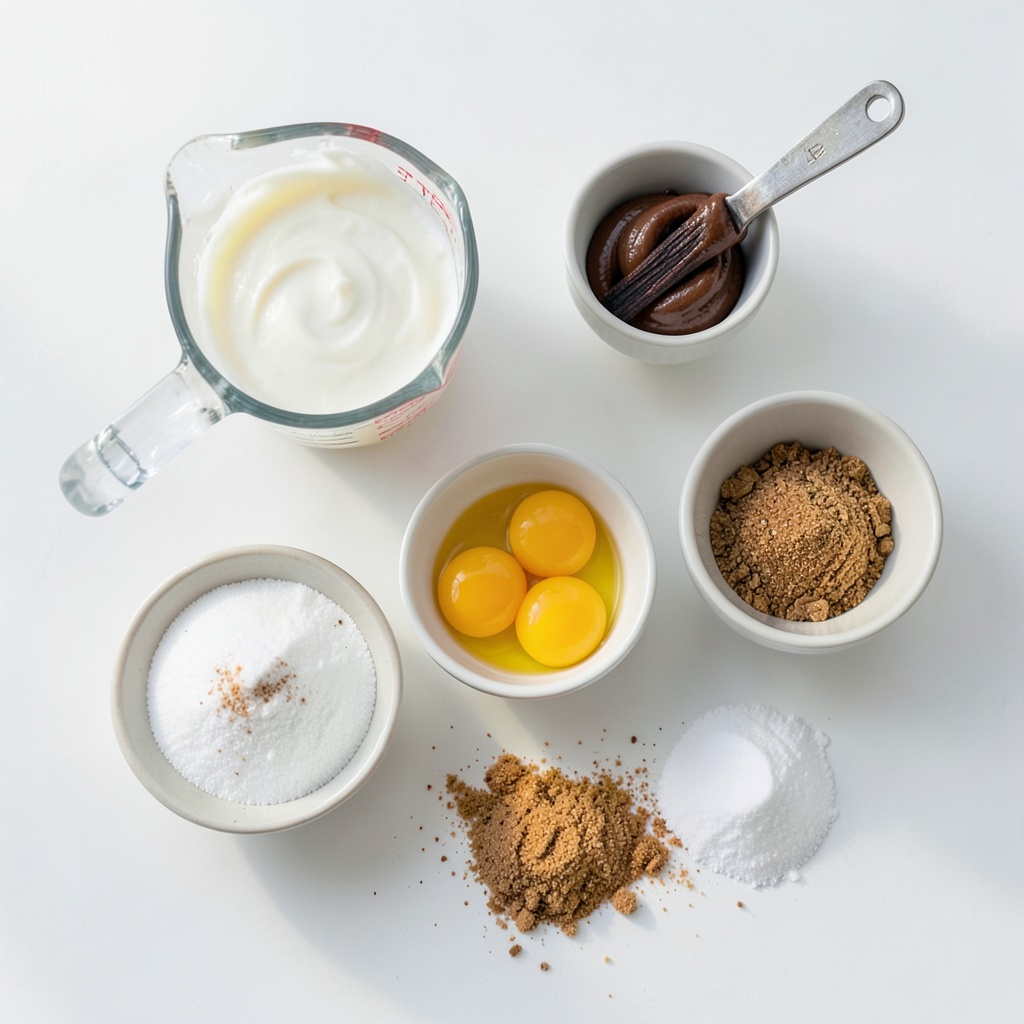
Detailed Ingredient List
- Heavy cream (2 cups)
- Vanilla bean paste or vanilla bean (1 teaspoon or 1 bean)
- Egg yolks (5 large)
- Granulated sugar (1/2 cup)
- Salt (a pinch)
- Brown sugar (2 tablespoons for caramelizing)
Measurement Tips
Converting measurements for larger batches If you want to make more crème brûlée, simply double or triple the ingredients. For example, use 4 cups of cream for double the recipe. Always keep the ratio of egg yolks and sugar the same.
Substituting ingredients (dairy-free options) For a dairy-free version, try using coconut cream. It gives a unique flavor. You can also use almond or cashew milk but make sure to adjust the sugar to taste.
Step-by-Step Instructions
Prepping the Oven and Ingredients
1. Preheat your oven to 325°F (160°C). This step is important for even cooking.
2. In a medium saucepan, mix 2 cups of heavy cream with 1 teaspoon of vanilla bean paste. If using a vanilla bean, split it and scrape the seeds into the cream. Heat this mixture over medium heat. Watch for it to almost simmer, then take it off the heat. Let it steep for 15 minutes to bring out the vanilla flavor.
Creating the Custard Mixture
1. While the cream steeps, take a large bowl. Whisk together 5 large egg yolks, 1/2 cup of granulated sugar, and a pinch of salt. Keep whisking until the mix is pale and thick.
2. Gradually pour the warm cream into the egg mixture. Whisk as you pour to temper the eggs, preventing them from curdling. If you used a whole vanilla bean, strain the mix through a fine mesh sieve. This step makes your custard nice and smooth.
Baking the Crème Brûlée
1. Evenly pour the custard into four ramekins. Place the ramekins in a deep baking dish. Fill the dish with hot water, reaching halfway up the sides of the ramekins. This water bath helps cook the custard gently.
2. Bake in your preheated oven for 30 to 35 minutes. The edges should be set, but the centers should jiggle slightly when shaken. Once baked, let them cool to room temperature. After cooling, refrigerate for at least 4 hours or overnight to let the flavors develop.
Tips & Tricks
Achieving the Perfect Custard Consistency
To get a smooth custard, avoid curdling the egg yolks. Start by whisking the egg yolks and sugar until light. This step is key. When you add the warm cream, do it slowly. Whisk constantly to mix the two. This technique warms the yolks without cooking them.
Cooling and chilling are also important. After baking, let the ramekins cool to room temp first. Then, put them in the fridge for at least four hours. This helps the custard set well. If you leave them overnight, the flavors deepen and taste better.
Caramelizing the Sugar
Using a kitchen torch is fun, but safety is key. Hold the torch at a distance from the sugar. Move it in a circular motion to melt the sugar evenly. Watch carefully as it turns amber.
If you don’t have a torch, there are other ways. You can broil the sugar in the oven. Just sprinkle the brown sugar on top and place it under the broiler. Keep an eye on it! It can burn quickly. Another option is to use a stovetop pan. Heat it on low, then place ramekins on it until the sugar melts.
Pro Tips
- Use Fresh Ingredients: Always opt for the freshest cream and eggs available, as they significantly enhance the flavor and texture of your crème brûlée.
- Temperature Matters: Ensure your cream is warm but not boiling when mixing with the egg yolks. This helps to create a smooth custard without scrambling the eggs.
- Perfect Caramelization: When caramelizing the sugar, move the torch continuously to avoid burning any one spot. Aim for an even, golden-brown layer for the best texture.
- Chill Thoroughly: Allow your crème brûlée to chill completely in the refrigerator. This step is crucial for achieving the right consistency and flavor development.
Variations
Flavor Combinations
You can play with flavors in crème brûlée. One fun way is to add citrus. Try using orange or lemon zest. This gives your dessert a bright and fresh taste. Just mix the zest into the cream while it heats. Let it steep for a few minutes before you make the custard.
Another great option is to add chocolate or coffee. For chocolate, melt some dark chocolate and whisk it into the cream. For coffee, brew a strong cup and mix it in as well. Both flavors create a rich and unique twist on this classic dessert.
Dietary Modifications
If you need a vegan option, you can still enjoy crème brûlée. Use coconut milk or almond milk instead of heavy cream. Replace egg yolks with silken tofu blended until smooth. Add a bit of cornstarch for thickening. Sweeten it with maple syrup or agave nectar. This way, you can have a creamy dessert without dairy or eggs.
For those looking for sugar-free alternatives, consider using a sugar substitute. Stevia or erythritol works well in crème brûlée. You can follow the same steps but replace the sugar with your chosen sweetener. Just remember to taste as you go to get the right sweetness.
Storage Info
How to Store Leftover Crème Brûlée
To store leftover crème brûlée, first, cover each ramekin with plastic wrap. This keeps out air and prevents the custard from absorbing other flavors in the fridge. Place the ramekins in the fridge for up to four days. Avoid covering the caramelized sugar. This way, it stays crisp and perfect for serving.
Freezing crème brûlée is not ideal. The texture can change when thawed. However, if you need to freeze it, do so before caramelizing the sugar. Wrap each ramekin tightly in plastic wrap, then place them in a freezer bag. You can freeze it for up to two months. When ready to eat, thaw in the fridge overnight.
Reheating Guidelines
To reheat crème brûlée, start by letting it sit at room temperature for about 30 minutes. This helps it warm evenly.
The best way to warm it is to place the ramekins in a water bath. Fill a baking dish with hot water and place the ramekins inside, ensuring the water reaches halfway up the sides. Heat in a 300°F oven for about 15-20 minutes.
If you need to caramelize the sugar again, sprinkle brown sugar on top after reheating. Use your kitchen torch to melt the sugar until it turns golden and bubbly. Let it cool for a minute before serving. Enjoy your delicious dessert!
FAQs
Common Questions About Crème Brûlée
What can I use if I don't have a kitchen torch? If you lack a kitchen torch, you can use your oven’s broiler. After adding brown sugar, place the ramekins on a baking sheet. Position them under the broiler for a few minutes. Watch closely to avoid burning the sugar. This method gives you a nice caramelized top, just like a torch.
How can I fix a custard that hasn’t set? If your custard hasn’t set, don’t worry. You can return it to the oven. Bake at 325°F (160°C) for another 10 to 15 minutes. Check if the edges are firm, but the center should still jiggle slightly. This gentle heat helps firm up the custard without overcooking.
Can I prepare crème brûlée in advance? Yes, you can prepare crème brûlée ahead of time. Make it a day before your event. After it cools, cover the ramekins and place them in the fridge. When you’re ready to serve, add the sugar and caramelize. This makes your dessert stress-free and delightful.
What is the difference between crème brûlée and flan? Crème brûlée and flan are both custard desserts, but they differ in texture and flavor. Crème brûlée has a rich, creamy base topped with a hard caramel layer. Flan is smoother and softer, often made with sweetened condensed milk. Each offers a unique taste experience.
In this post, we covered how to make delightful crème brûlée. You learned about essential ingredients, measurement tips, and clear step-by-step instructions. We also shared techniques to achieve the perfect custard and caramelize the sugar safely. Plus, we explored delicious variations and storage tips.
Enjoy your culinary journey with this classic dessert. You can impress friends and family while creating your own sweet memories.