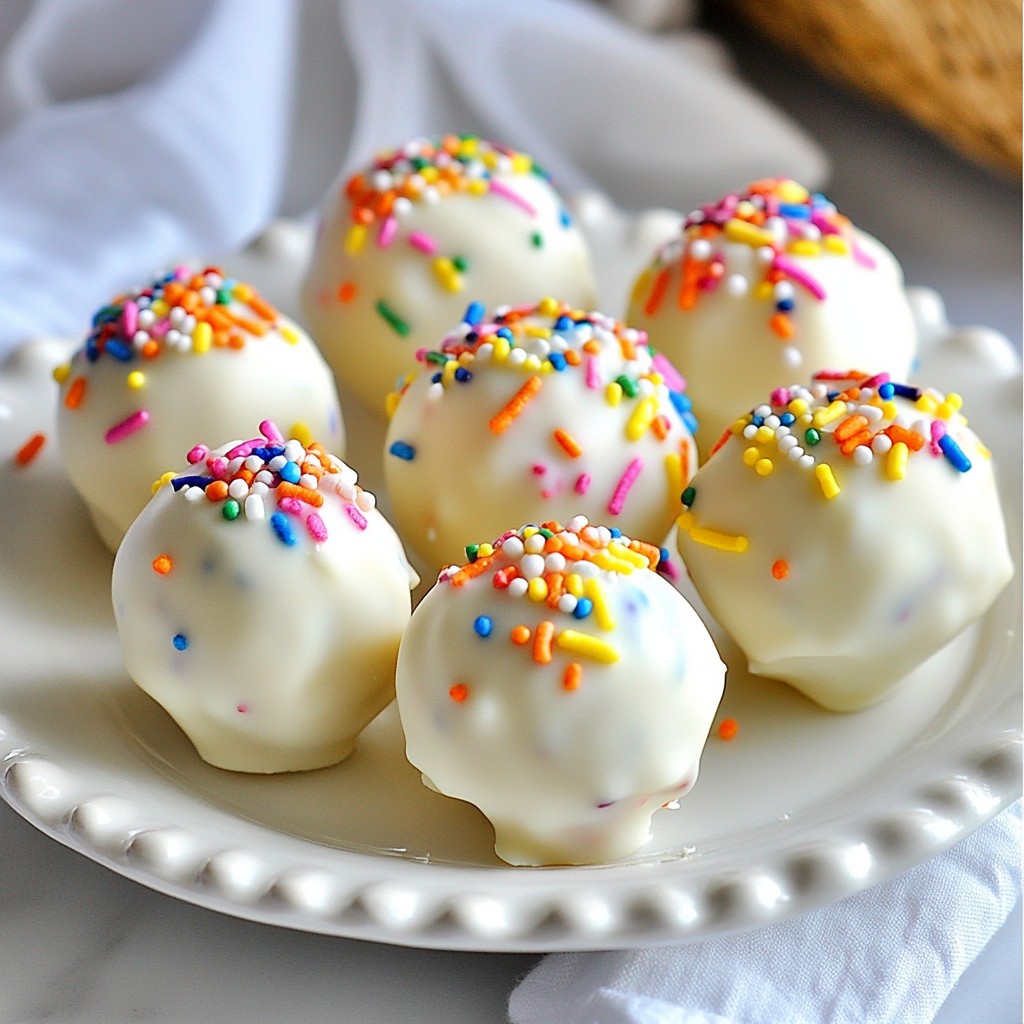
Get ready to make a fun and tasty treat without turning on your oven! These No Bake Birthday Cake Truffles are simple to whip up, and they scream celebration. With just a few easy ingredients like cake mix and peanut butter, you’ll create delightful bites that are perfect for any party. Let’s dive into this fun recipe and impress everyone with your no-bake skills!
Why I Love This Recipe
- Easy to Make: This no-bake recipe requires minimal effort, making it perfect for quick celebrations or last-minute treats.
- Customizable: You can easily switch up the sprinkles or even use different flavors of cake mix to make these truffles your own.
- Fun for All Ages: These truffles are a hit with both kids and adults, making them a great party snack.
- Deliciously Sweet: The combination of cake mix, peanut butter, and white chocolate creates an irresistible sweet treat.
Ingredients
Required Ingredients
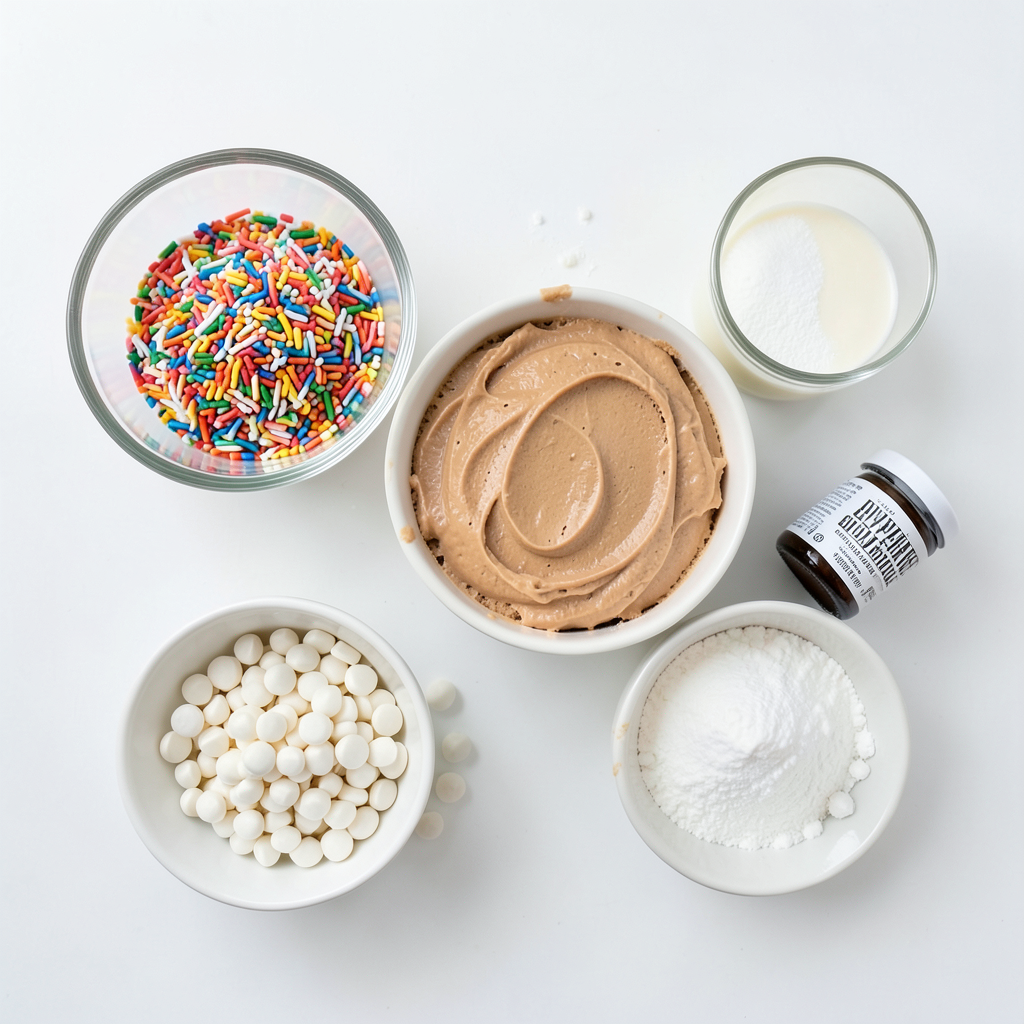
- 1 cup heat-treated vanilla cake mix
- 1/2 cup unsweetened almond milk
- 1/4 cup creamy peanut butter
- 1/4 cup powdered sugar
- 1/2 teaspoon vanilla extract
- 1/2 cup rainbow sprinkles (plus extra for coating)
- 1 cup white chocolate chips
Equipment Needed
- Large mixing bowl
- Parchment-lined baking sheet
- Microwave-safe bowl
To make No Bake Birthday Cake Truffles, gather all your required ingredients first. This makes the process smooth and fun. Use heat-treated vanilla cake mix for safety. Regular cake mix can contain raw flour, which we want to avoid.
You'll need unsweetened almond milk to keep the truffles moist. Creamy peanut butter adds a rich flavor and helps bind the mixture. Powdered sugar gives sweetness without making the dough gritty.
Vanilla extract enhances the cake flavor, while rainbow sprinkles add a festive touch. You'll also need white chocolate chips for coating, which gives a creamy sweetness.
For equipment, a large mixing bowl is key for mixing all the ingredients. A parchment-lined baking sheet helps with easy cleanup and prevents sticking. Lastly, a microwave-safe bowl is essential for melting the chocolate smoothly.
Having these ingredients and tools ready makes creating your truffles easy and enjoyable!
Step-by-Step Instructions
Mixing the Dough
First, grab a large mixing bowl. Add 1 cup of heat-treated vanilla cake mix. Next, pour in 1/2 cup of unsweetened almond milk. Then, add 1/4 cup of creamy peanut butter, 1/4 cup of powdered sugar, and 1/2 teaspoon of vanilla extract. Mix until smooth. You want a dough without dry lumps. This dough should feel soft yet hold together well.
Forming the Truffles
Now, it’s time to shape the truffles. Scoop out about one tablespoon of the dough. Roll it in your palms to make a ball. Place each ball on a parchment-lined baking sheet. Keep rolling until you form about 20 truffles. Make sure they are all similar in size for even coating later.
Chilling the Truffles
Once you have your truffles shaped, place the baking sheet in the refrigerator. Chill them for 30 minutes. This step helps the truffles firm up. Chilling makes them easier to coat later with chocolate. Enjoy the wait by dreaming up your next party!
Tips & Tricks
Ensuring Texture
Using heat-treated cake mix is key. It makes the truffles safe to eat. To heat-treat cake mix, spread it on a baking sheet and bake at 350°F for about five minutes. This process kills any harmful bacteria. Once cool, you can use it in your truffle dough. This step ensures a smooth and tasty texture.
Chocolate Coating Tips
Melting chocolate can be tricky. To melt white chocolate smoothly, chop it into small pieces. Place it in a microwave-safe bowl. Heat in 20-second bursts, stirring in between. This helps prevent burning. Once melted, dip the truffles quickly. The warm chocolate will coat them evenly. Allow any extra chocolate to drip off.
Presentation Tips
Presentation makes your truffles more fun. Arrange them on a colorful platter or tiered stand. You can add extra rainbow sprinkles around the base for a festive look. This adds color and charm to your display. Your guests will love the way they look, making them even more tempting to eat!
Pro Tips
- Use Heat-Treated Cake Mix: Ensure that the vanilla cake mix is heat-treated to eliminate any raw flour risks, making your truffles safe to eat.
- Chill for Firmness: Chilling the truffles before dipping them in chocolate helps maintain their shape and prevents them from falling apart during coating.
- Perfect Chocolate Coating: To achieve a smooth chocolate coating, make sure the white chocolate is fully melted and free of lumps before dipping the truffles.
- Decorative Presentation: Arrange the finished truffles on a colorful platter and add extra sprinkles around them for a festive and eye-catching display.
Variations
Flavor Customizations
You can change up the cake mix for fun. Try chocolate cake mix for a rich taste. Lemon cake mix adds a zesty twist. Strawberry cake mix brings a fruity flavor. Each mix gives a new spin to your truffles. Just ensure the cake mix is heat-treated for safety.
Topping Alternatives
The toppings can also change your truffles. Use dark chocolate instead of white for a bold taste. Milk chocolate gives a sweeter option. You can add chopped nuts like almonds or walnuts for crunch. Coconut flakes or crushed cookies can also work well. Let your imagination run wild!
Dietary Alternatives
Want a gluten-free or vegan treat? Use gluten-free cake mix for a safe choice. For vegan truffles, swap almond milk with coconut or oat milk. Replace peanut butter with almond or sunflower seed butter. Use dairy-free chocolate chips to keep it vegan-friendly. These options make it easy to share with everyone!
Storage Info
Best Storage Practices
To keep your no bake birthday cake truffles fresh, store them in an airtight container. Line the bottom with parchment paper to avoid sticking. Place a layer of truffles in the container, then add parchment between layers if stacking. This method helps keep the truffles from sticking together. Store the container in the refrigerator for best results.
Freezing Instructions
Yes, you can freeze cake truffles! First, chill them in the fridge for about 30 minutes. Then, place the truffles in a single layer on a baking sheet. Freeze until solid, which takes about 1 hour. After they are frozen, transfer them to a freezer bag or airtight container. They can stay in the freezer for up to 3 months.
Shelf Life
In the refrigerator, these truffles last about 1 week. Keep them in an airtight container to maintain freshness. If you notice any changes in texture or smell, it’s best to discard them. Enjoy these tasty treats while they are fresh for the best flavor!
FAQs
Can I make these truffles ahead of time?
Yes, you can make these truffles ahead of time. They are great for parties or events. I suggest making them up to two days in advance. Just store them in an airtight container in the fridge. This keeps them fresh and tasty. If you want, you can even freeze them! Just make sure to thaw them in the fridge before serving. This way, you can enjoy the fun without the rush.
What if I can't find heat-treated cake mix?
If you can't find heat-treated cake mix, don’t worry! You can heat-treat regular cake mix at home. Spread the cake mix on a baking sheet and bake it at 350°F for about 5-10 minutes. This kills any harmful bacteria. Let it cool before using it in your truffles. This step is very important for safety. You can also use cookie crumbs or crushed graham crackers as an alternative.
How to make these truffles more festive?
Making these truffles more festive is simple! You can use different colored sprinkles to match your party theme. Try adding mini chocolate chips, nuts, or even edible glitter for fun. Drizzle some melted chocolate on top for a fancy touch. You can also place the truffles in cute little cupcake liners. This makes them look even more special. Get creative and have fun!
You learned how to make delicious cake truffles with simple steps and fun ingredients. Start with heat-treated cake mix and mix it all together. Chill the truffles and coat them in white chocolate. Don't forget to try different flavors and toppings to match your taste. These treats are perfect for sharing or special events. With the right storage, they stay fresh and tasty for days. Enjoy making these fun and tasty snacks, and let your creativity shine!