Are you craving a sweet treat that’s both simple and delicious? Look no further than peanut butter banana ice cream. This creamy delight blends just a few healthy ingredients into a mouthwatering dessert you can whip up in no time. In this post, I’ll guide you through the easy steps and share tips, tricks, and variations to make this indulgence your own. Get ready to impress your taste buds!
Why I Love This Recipe
- Deliciously Creamy: This recipe creates a rich and creamy texture that feels indulgent while being healthy.
- Quick and Easy: With just a few simple ingredients and minimal prep time, you can whip up this treat in no time.
- Customizable: You can easily modify this recipe by adding your favorite toppings or trying different nut butters.
- Healthy Indulgence: This dessert is naturally sweetened and packed with nutrients, making it a guilt-free option for satisfying your sweet tooth.
Ingredients
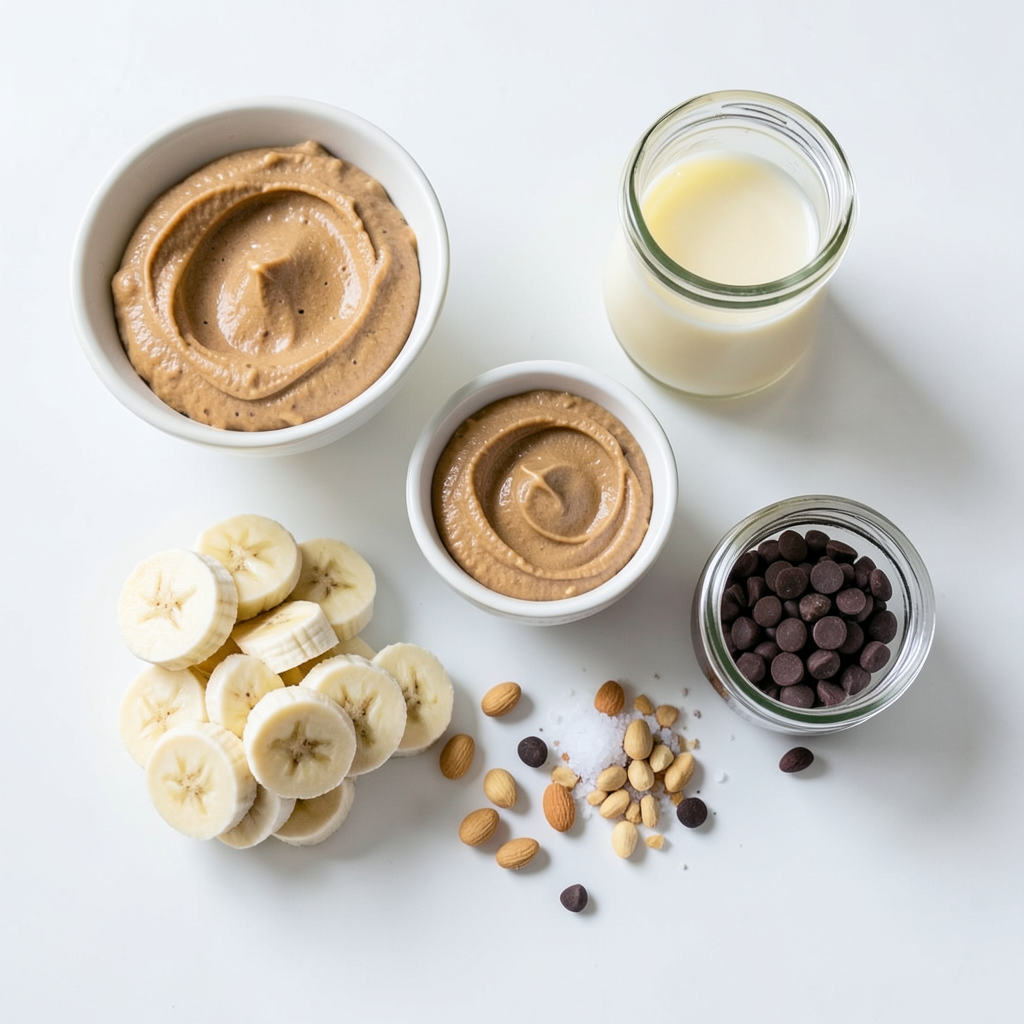
To make Peanut Butter Banana Ice Cream, gather these simple ingredients:
- 4 ripe bananas, peeled and sliced into discs
- 1/2 cup smooth, creamy peanut butter
- 1/4 cup honey or maple syrup (use maple syrup for a vegan alternative)
- 1 teaspoon pure vanilla extract
- 1/2 cup unsweetened almond milk (or any milk of your choice)
- A pinch of sea salt
- Optional toppings: chopped peanuts, dark chocolate chips, or an extra drizzle of honey
Each ingredient plays a key role. The ripe bananas provide natural sweetness and creaminess. Smooth peanut butter adds rich flavor and protein. Honey or maple syrup sweetens the mix, while vanilla extract enhances taste. Almond milk adds a smooth texture, and sea salt balances all the flavors. Optional toppings let you customize your treat.
Use ripe bananas for the best taste. They should be soft and sweet. This ice cream is easy to make and perfect for a hot day. Enjoy creating this simple and creamy delight!
Step-by-Step Instructions
Preparing the Bananas
To start, you need ripe bananas. Peel and slice them into discs. Lay the slices on a baking sheet lined with parchment paper. This helps keep them from sticking. Place the baking sheet in the freezer. Freeze the banana slices for about 2-3 hours. They should be completely solid before you blend them.
Blending the Ingredients
Once your banana slices are frozen, it’s time to blend. Transfer the banana slices to a high-speed blender or food processor. Add 1/2 cup of smooth peanut butter, 1/4 cup of honey or maple syrup, and 1 teaspoon of pure vanilla extract. Don’t forget a pinch of sea salt! Blend on high speed. Stop to scrape down the sides as needed. You want it to be creamy and smooth.
Adjusting Consistency
If your mixture feels too thick, don't worry. You can modify the thickness easily. Pour in a little more almond milk. Blend again after each addition. Keep going until you reach the creamy, soft-serve texture you love.
Chilling the Ice Cream
Now that you have a smooth mixture, pour it into an airtight container. Use a spatula to smooth the top. If you want a firmer texture, freeze it for 1-2 more hours. But if you like soft-serve, you can serve it right away!
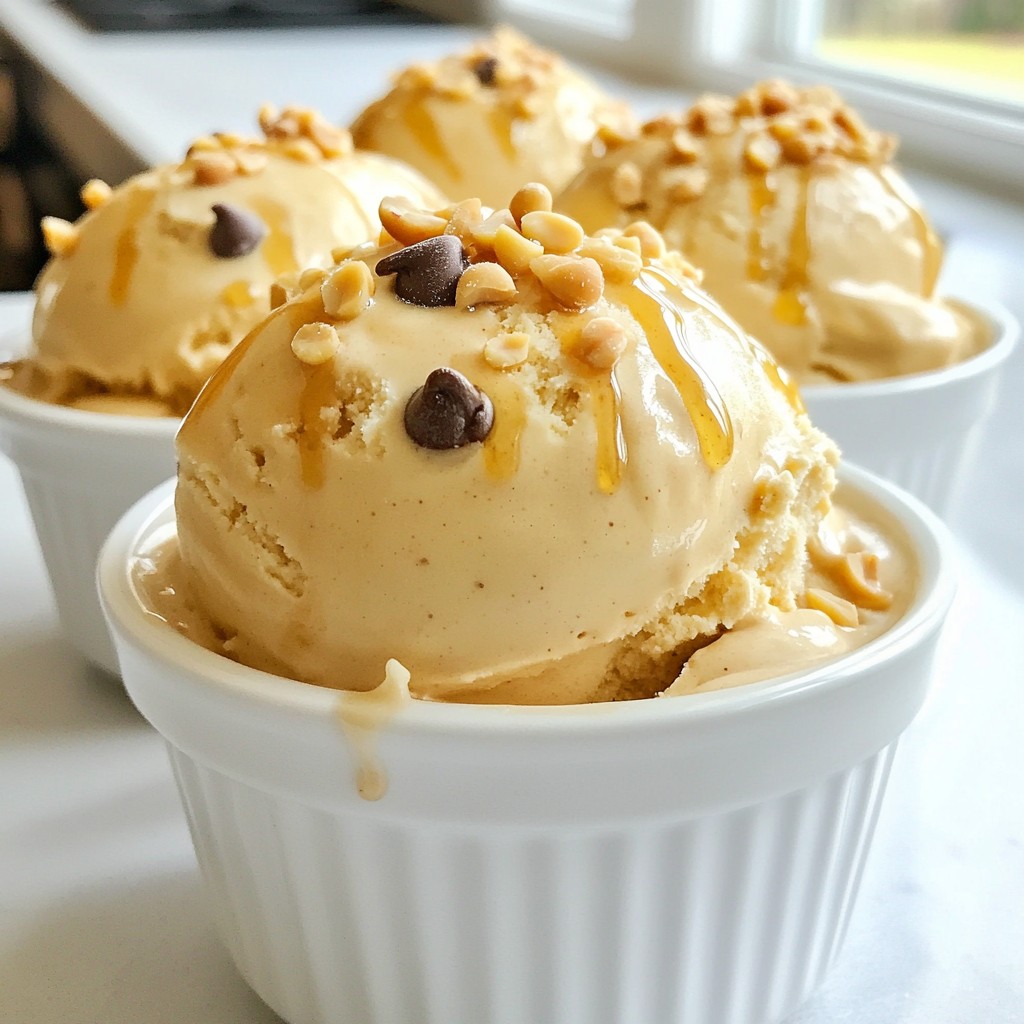
Serving Suggestions
Scoop the delightful ice cream into bowls or cones. For a fun touch, sprinkle your favorite toppings on top. You might try chopped peanuts, dark chocolate chips, or a drizzle of honey. Serve in colorful bowls to make it inviting. A fresh mint sprig can add a nice pop of color too!
Tips & Tricks
Perfecting the Ice Cream Texture
To get the best texture, blend the ingredients well. Start with frozen banana slices. Blend them with peanut butter and almond milk. This makes your ice cream creamy. Use a high-speed blender or a good food processor. These tools help mix everything smoothly. If the mix is too thick, add more almond milk. Blend again until it’s just right.
Health Benefits of Ingredients
Bananas are full of nutrients. They give you energy and are rich in potassium. Peanut butter adds protein and healthy fats. It makes the ice cream filling. Honey or maple syrup adds sweetness. If you want a vegan option, choose maple syrup. Both sweeteners have their perks, but maple syrup has fewer calories.
Flavor Enhancing Suggestions
Want to mix it up? Try adding cocoa powder for a chocolate twist. You can also add berries for a fruity flavor. When serving, top your ice cream with chopped peanuts or dark chocolate chips. Drizzle a bit of honey on top for extra sweetness. These toppings make your dessert even better!
Pro Tips
- Use Ripe Bananas: The riper the bananas, the sweeter and creamier your ice cream will be. Look for bananas with brown spots for optimal flavor.
- Experiment with Nut Butters: While peanut butter is delicious, try substituting with almond or cashew butter for a unique twist on flavor.
- Try Different Milk Alternatives: Feel free to use coconut milk or oat milk for a different texture and flavor profile in your ice cream.
- Customize Your Toppings: Get creative with toppings! Add granola, shredded coconut, or fresh berries for an extra layer of deliciousness.
Variations
Vegan Options
To make this ice cream completely plant-based, swap honey for maple syrup. You will keep the sweetness while ensuring it remains vegan. Use almond milk or any plant milk you like. This gives you a creamy base without dairy.
Flavor Variations
You can add cocoa powder or chocolate chips for a richer taste. Just blend in about two tablespoons of cocoa with the other ingredients. This gives a nice chocolatey twist. You can also mix in other fruits, like strawberries or blueberries. Just remember to freeze them first. This adds fun flavors and gives a fruity surprise!
Nut-Free Substitutes
If you need a nut-free option, use sunflower seed butter. It has a similar creamy texture and taste. You can also try soy nut butter. Both options work well and keep the ice cream smooth and tasty.
Storage Info
Best Storage Practices
To keep your peanut butter banana ice cream fresh, use airtight containers. This helps prevent ice crystals from forming. Make sure the lid fits tightly. You can also layer parchment paper on top of the ice cream before sealing.
When storing, freeze it right after blending. This keeps it creamy and delicious. Avoid leaving it out at room temperature for too long. It can melt too much, losing that perfect texture.
Shelf Life
How long does it last in the freezer? Peanut butter banana ice cream stays good for about 2 to 3 months. After that, it may lose flavor and texture. If you notice any freezer burn, it’s best to toss it. Always check the smell and taste before enjoying.
Re-Serving Tips
To restore texture after freezing, let it sit at room temperature for about 5-10 minutes. This softens it slightly. If it gets too soft, stir it gently with a spoon. You can also blend it again briefly to make it creamy. Enjoy your treat just like fresh!
FAQs
Can I use frozen bananas instead of fresh?
Yes, you can use frozen bananas. Frozen bananas make the ice cream extra creamy. They blend smoothly and give a nice texture. If you use fresh bananas, freeze them first. This helps achieve that soft-serve feel that everyone loves.
Is this ice cream really healthy?
This ice cream is a healthier treat. Bananas provide potassium and fiber. Peanut butter adds protein and healthy fats. Using honey or maple syrup offers natural sweetness. You can enjoy a tasty dessert without guilt.
Can I make this recipe without a blender?
If you lack a blender, you can still make this recipe. Use a fork to mash the frozen bananas. Mix in the peanut butter and sweetener by hand. It won’t be as smooth, but it will still taste great.
What are the best toppings for Peanut Butter Banana Ice Cream?
Popular toppings include chopped peanuts, dark chocolate chips, and honey. Chopped peanuts add crunch and flavor. Dark chocolate chips give a sweet surprise. A drizzle of honey adds extra sweetness. Choose your favorites to make each bowl special.
This blog post covered how to make delicious peanut butter banana ice cream. We explored the key ingredients, like ripe bananas and smooth peanut butter. You learned step-by-step instructions for preparing, blending, and chilling the mixture. I shared tips to perfect the texture and some fun variations. The health benefits of the ingredients make this treat guilt-free. It’s easy to customize and store, so enjoy your creation. Try different toppings or flavors to make it yours! Your homemade ice cream will impress everyone who tastes it.