If you're craving a sweet treat that's both easy to make and delicious, you've found it! This Peanut Butter Banana Ice Cream combines ripe bananas and creamy peanut butter for a dreamy dessert. Not only is it a fun recipe, but it also uses simple ingredients you probably have at home. Let’s dive into how to whip up this tasty treat that’s perfect for hot days or anytime you want a satisfying snack!
Why I Love This Recipe
- Healthy Indulgence: This ice cream is a guilt-free treat made with wholesome ingredients, allowing you to satisfy your sweet tooth without compromising your health.
- Quick and Easy: With just a few simple steps, you can whip up this delicious ice cream in no time, making it perfect for a quick dessert or snack.
- Customizable: Feel free to adjust the sweetness or mix in your favorite toppings, such as nuts or chocolate chips, to create your personal flavor combination.
- Kid-Friendly: This delightful treat is a hit with kids, making it a fantastic way to incorporate healthy ingredients into their diet while keeping dessert fun.
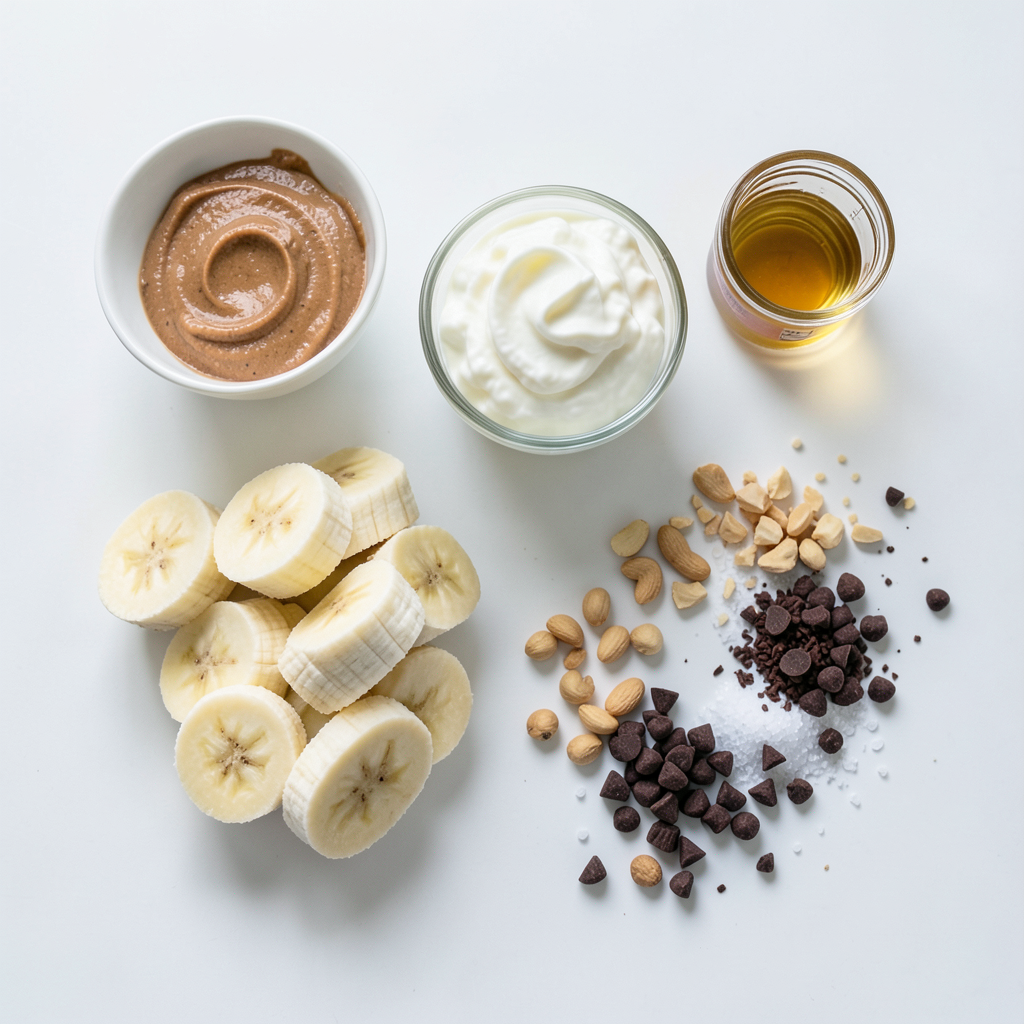
Ingredients
- 3 ripe bananas, sliced and frozen
- 1/2 cup smooth peanut butter
- 1/4 cup Greek yogurt (or dairy-free alternative)
- 2 tablespoons honey or maple syrup (optional)
- 1 teaspoon vanilla extract
- Pinch of sea salt
- Optional toppings: chopped peanuts, chocolate chips
Gather these ingredients. They are simple but key to making your ice cream rich and tasty. Using ripe bananas adds natural sweetness, making your treat delicious without too much added sugar.
Smooth peanut butter gives a creamy texture and nutty flavor. Greek yogurt adds a bit of tang and creaminess, but you can use coconut yogurt if you prefer dairy-free. Honey or maple syrup is optional, but it can enhance the sweetness to your liking.
A pinch of sea salt balances the sweetness. Don't forget the toppings like chopped peanuts or chocolate chips! They add a nice crunch and extra flavor. Keep these ingredients ready, and let’s make this creamy, dreamy dessert!
Step-by-Step Instructions
Preparing the Bananas
First, take your frozen bananas out of the freezer. Let them sit at room temperature for about 5 minutes. This softens them a bit. Softened bananas blend much easier and create a smooth texture.
Combining Ingredients
Next, grab your food processor. Add the softened banana slices, smooth peanut butter, and Greek yogurt into the bowl. If you want it sweeter, add honey or maple syrup. Don’t forget the vanilla extract and a pinch of sea salt.
Blending and Adjusting Flavor
Now, blend everything on high for about 2 to 3 minutes. Stop a few times to scrape the bowl. This ensures everything mixes well. After blending, taste the mix. If you like it sweeter, add more honey or syrup. Blend again to mix it in.
Freezing Process
Once blended, transfer the mixture into an airtight container. For added crunch, fold in some chopped peanuts or chocolate chips if you'd like. Smooth the top and seal the container tightly. Place it in the freezer for 2 to 3 hours. This helps it firm up nicely.
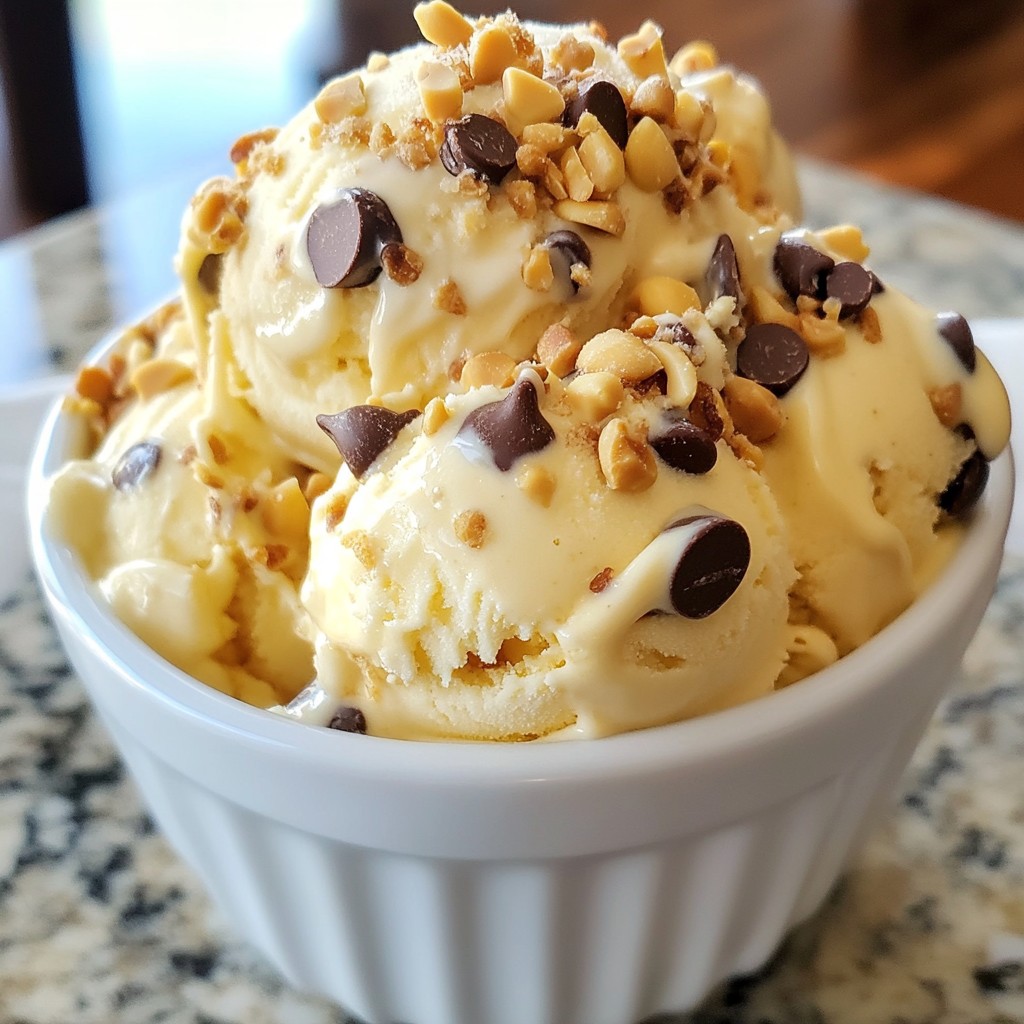
Serving Suggestions
Before serving, let the ice cream sit at room temperature for about 5 to 10 minutes. This makes scooping easier. Scoop the creamy ice cream into chilled bowls. You can top it with more chopped peanuts, a drizzle of peanut butter, or some chocolate chips for extra flavor. Enjoy your tasty treat!
Tips & Tricks
Tips for Blending
To make your ice cream creamy, blend well. Start with slightly softened bananas. Let them sit out for 5 minutes before blending. This step helps the bananas mix better. Use a good food processor. It will help you achieve a smooth texture. Blend on high for about 2-3 minutes. Stop every now and then to scrape down the sides. This ensures all the ingredients mix evenly.
Adjusting Sweetness Levels
You can easily change the sweetness. After blending, taste your mixture. If you want it sweeter, add more honey or maple syrup. Blend briefly to mix in the extra sweetness. Adjust it to your taste. Remember, you can always add more, but you can’t take it out. Start with less if you are unsure. You can always sweeten it later.
Presentation Tips
For a lovely presentation, serve your ice cream in chilled bowls. This keeps it cold longer. Top with chopped peanuts or chocolate chips for added crunch. A drizzle of peanut butter on top looks nice too. Get creative with your toppings. You can even add fresh banana slices or a sprinkle of sea salt. These small touches make your ice cream look gourmet. Enjoy your homemade treat!
Pro Tips
- Perfectly Ripe Bananas: Use bananas that are fully ripe with brown spots for the best sweetness and creaminess in your ice cream.
- Texture Variation: For a more textured ice cream, consider folding in some crushed cookies or granola along with the peanuts and chocolate chips.
- Quick Softening: If you forget to leave the bananas out to soften, you can microwave them for about 10-15 seconds to make blending easier.
- Flavor Boost: Experiment with adding a pinch of cinnamon or a tablespoon of cocoa powder for a unique flavor twist on your ice cream.
Variations
Vegan Option
You can easily make this ice cream vegan. Just swap the Greek yogurt with coconut yogurt. This change keeps it creamy and rich. Coconut yogurt adds a nice flavor too. Plus, it helps keep the ice cream dairy-free. You won’t miss the Greek yogurt!
Nut-Free Alternative
If you need a nut-free option, you can switch out the peanut butter. Sunflower seed butter works well and gives a similar taste. You can also try soy nut butter for a different twist. Both options will still make your ice cream smooth and tasty.
Flavor Additions
Want to mix things up? You can add other flavors or toppings to your ice cream. Consider adding a tablespoon of cocoa powder for a chocolate twist. Or, mix in some berries like strawberries or raspberries for a fruity touch. Chopped nuts or chocolate chips are great toppings too. They add crunch and fun to each scoop.
Storage Info
Best Practices for Freezing
To store peanut butter banana ice cream properly, use an airtight container. This keeps air out and prevents freezer burn. Make sure to smooth the top before sealing to limit air exposure. If you want to enjoy it later, you can also add a layer of plastic wrap on top before sealing the container.
Shelf Life
This ice cream stays good for about 1 to 2 weeks in the freezer. To check if it's still good, look for ice crystals or a dry surface. If the ice cream smells off or has changed color, it’s best to toss it. When it’s fresh, it should be smooth and creamy.
Re-Freezing Guidelines
You can re-freeze peanut butter banana ice cream, but it may lose some texture. If it melts, try to refreeze it as soon as possible. Let it sit out for a few minutes before scooping to make it easier to serve. Just remember, repeated thawing and freezing can affect the taste and texture.
FAQs
Can I use ripe bananas?
Yes, you can and should use ripe bananas. Ripe bananas add natural sweetness and creaminess to your ice cream. Their flavor is richer and more intense. This makes your ice cream taste even better. Plus, ripe bananas blend smoothly. You get a creamy texture that is hard to beat.
How can I make this recipe without a food processor?
If you don’t have a food processor, no worries! You can use a blender instead. A strong blender can mix the ingredients well. You may need to stop and stir a few times. You can also use a hand mixer. Just mash the bananas first, then mix the other ingredients in a bowl.
Can I make this recipe without yogurt?
Yes, you can make this ice cream without yogurt. For a dairy-free version, use coconut yogurt. You can also skip yogurt altogether. Just add a bit more banana for creaminess. This keeps your ice cream smooth and tasty.
This recipe for peanut butter banana ice cream is simple and fun. You blend frozen bananas with peanut butter, yogurt, and honey for a creamy treat. Experiment with flavors and toppings to make it your own. Remember to store in an airtight container to keep it fresh. With a few easy tweaks, anyone can enjoy this tasty dessert. So grab your ingredients and get blending. You’ll love your new ice cream creation!