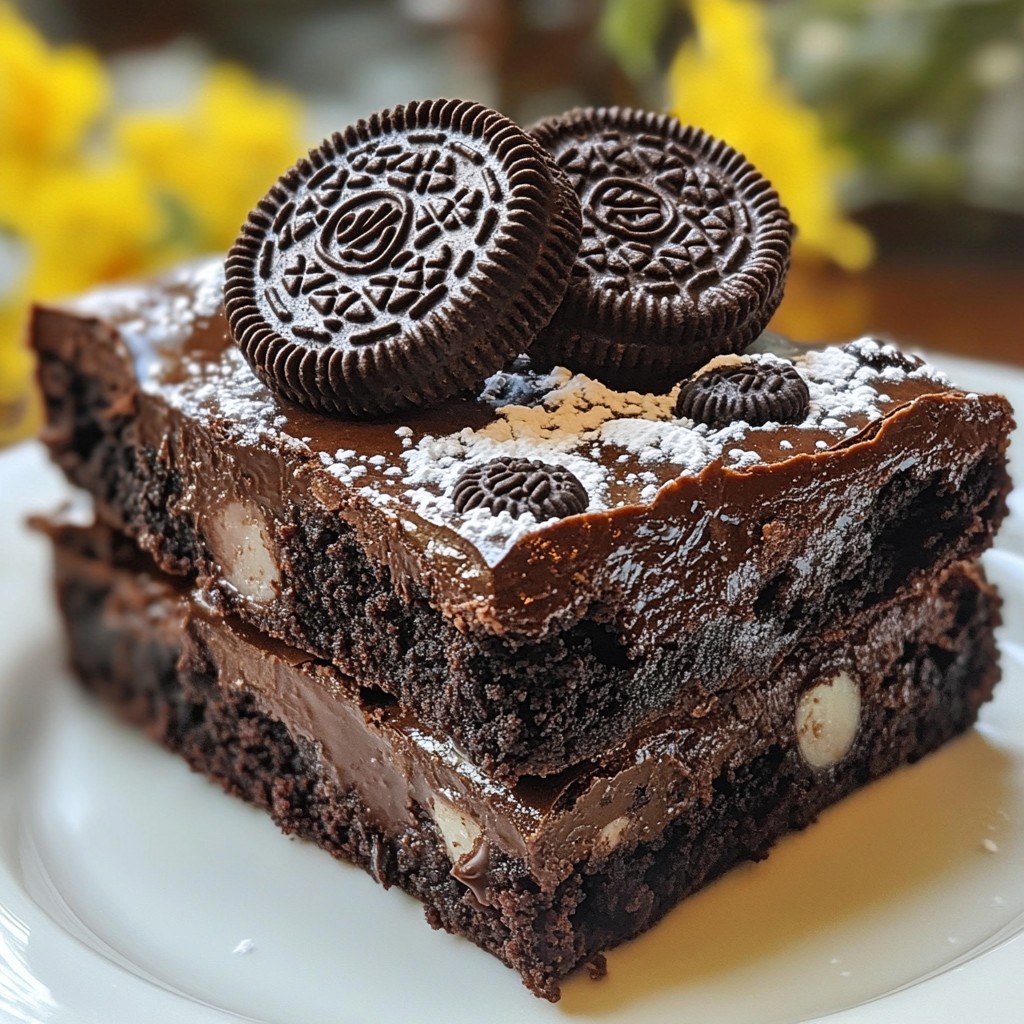
Craving a rich and chocolatey dessert? Look no further than these Chocolate Fudge Oreo Brownies! With a decadent blend of chocolate chips and crunchy Oreo pieces, this easy recipe guarantees satisfaction with every bite. Whether you're hosting a party or searching for a sweet treat, these brownies deliver all the indulgence you desire. Let’s dive into the simple steps that will make your baking experience a delicious success!
Why I Love This Recipe
- Decadent Flavor: The combination of rich chocolate and creamy Oreos creates an indulgent dessert that satisfies any sweet tooth.
- Easy to Make: This recipe requires simple ingredients and straightforward steps, making it perfect for bakers of all skill levels.
- Perfect Texture: The brownies are wonderfully fudgy, with the added crunch of Oreos that adds a delightful contrast.
- Great for Sharing: With 20 generous servings, these brownies are ideal for parties, gatherings, or simply treating friends and family.
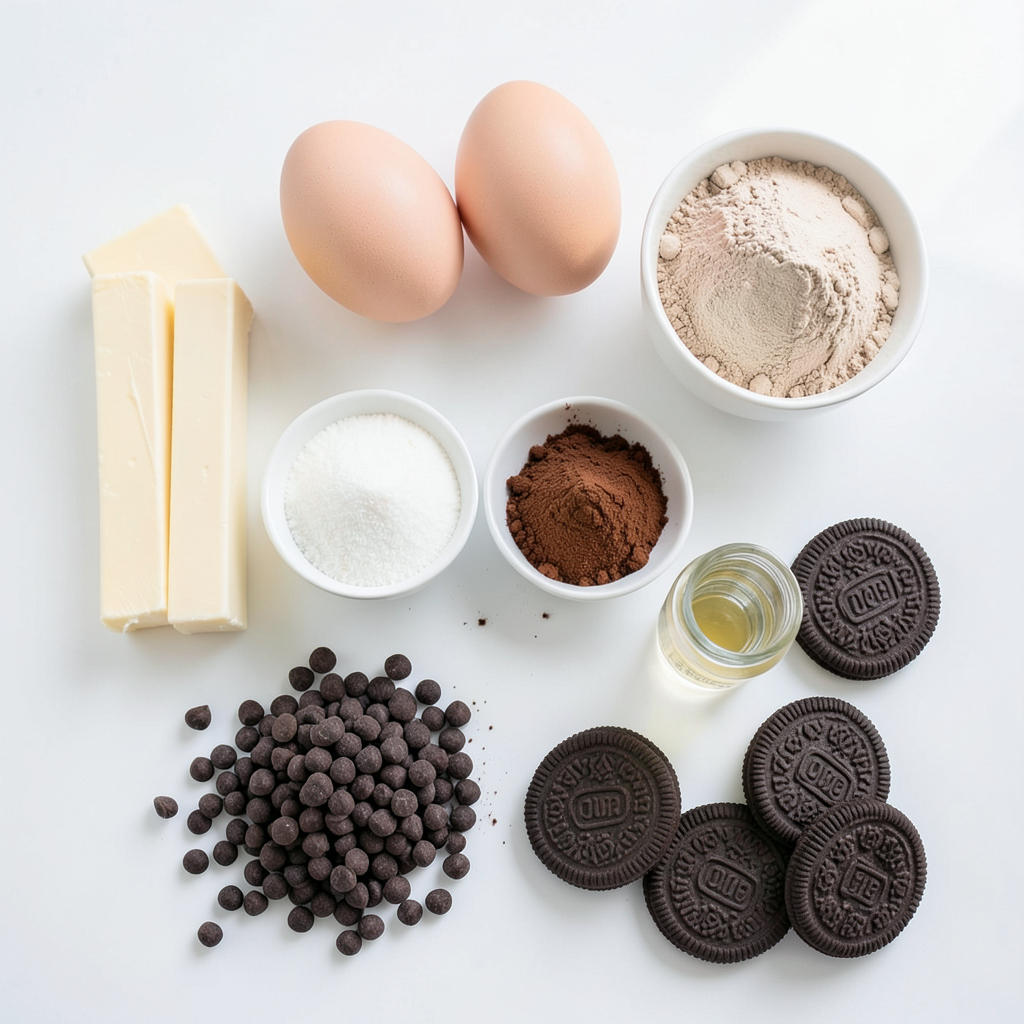
Ingredients
Here’s what you need to make rich and fudgy Chocolate Fudge Oreo Brownies:
- 1 cup (2 sticks) unsalted butter, cubed
- 1 ½ cups granulated sugar
- 1 cup packed brown sugar
- 4 large eggs, at room temperature
- 1 teaspoon pure vanilla extract
- 1 cup all-purpose flour
- ¾ cup unsweetened cocoa powder
- ½ teaspoon baking powder
- ½ teaspoon salt
- 1 cup semi-sweet or dark chocolate chips
- 15 Oreo cookies, coarsely chopped
- 8 whole Oreo cookies for topping
Each ingredient plays a key role in creating this tasty treat. The butter brings moisture and richness. The sugars add sweetness and help form that delicious crust. Eggs give structure and help the brownies rise.
Using both cocoa powder and chocolate chips gives a deep chocolate flavor. The chopped Oreos bring a fun twist and a crunchy texture. Whole Oreos on top make the brownies look fancy and inviting.
When you gather these ingredients, you set the stage for a dessert that everyone will love. Each bite will be a mix of smooth chocolate and crunchy Oreo goodness.
Step-by-Step Instructions
Preheating and Preparing the Pan
- Preheat oven to 350°F (175°C).
- Grease or line the baking pan.
Start by setting your oven to 350°F. This temperature ensures the brownies bake evenly. Next, take a 9x13 inch baking pan. Greasing it helps the brownies come out easily. You can also use parchment paper. Let the edges hang over for easy lifting later.
Melting the Butter and Mixing Sugars
- Melt unsalted butter on low heat.
- Combine with granulated and brown sugar.
In a medium saucepan, melt the cubed unsalted butter over low heat. Stir it every so often to prevent burning. Once melted, take it off the heat. Add granulated sugar and brown sugar. Mix until smooth. This step is key for a rich brownie base.
Adding Eggs and Vanilla
- Whisk eggs in one at a time.
- Incorporate vanilla extract.
Let the butter and sugar mix cool for a few minutes. Then, crack in the eggs one at a time. Whisk after each egg until fully mixed in. Finally, add vanilla extract for flavor. This combination gives the brownies their wonderful taste.
Mixing Dry Ingredients
- Sift together flour, cocoa powder, baking powder, and salt.
- Fold dry mixture into wet ingredients.
In a large bowl, sift together flour, cocoa powder, baking powder, and salt. Sifting helps break up lumps and mixes them well. Now, gently fold this dry mix into the wet ingredients. Be careful not to overmix; just stir until you don’t see any flour. This keeps the brownies fudgy.
Incorporating Chocolate Chips and Oreos
- Gently mix in chocolate chips and coarsely chopped Oreos.
Now comes the fun part! Fold in the chocolate chips and the chopped Oreo cookies. This adds extra chocolate and crunch to your brownies. Make sure they are evenly mixed throughout the batter.
Baking and Cooling the Brownies
- Spread batter in the pan and top with whole Oreos.
- Bake for 25-30 minutes and cool.
Pour the brownie batter into your prepared pan. Use a spatula to spread it evenly. For a special touch, press whole Oreo cookies into the top. This makes them look great and adds more flavor. Bake in the preheated oven for 25 to 30 minutes. Check for doneness with a toothpick. It should come out with a few moist crumbs. Once done, let the brownies cool completely in the pan. Use the parchment edges to lift them out. Then, cut into squares and enjoy!
Tips & Tricks
Achieving the Perfect Fudgy Texture
To get those rich, fudgy brownies, avoid overmixing the batter. Stir just until you see no dry flour. This keeps the brownies soft and gooey. Also, bake until they are just set. A toothpick should come out with a few moist crumbs. If you bake too long, they will dry out.
Storing Your Brownies
Store your brownies in an airtight container. Keep them at room temperature for up to four days. If you want to save them longer, freeze them. Wrap each brownie in plastic wrap and place them in a freezer bag. They will stay fresh for up to three months.
Presentation Suggestions
For a lovely finish, dust the brownies with powdered sugar. This adds a nice touch and makes them look fancy. Serve them warm with a scoop of vanilla ice cream. The cold ice cream pairs perfectly with the warm, fudgy brownie.
Pro Tips
- Use Room Temperature Eggs: Ensure your eggs are at room temperature for better emulsification, which helps create a fudgier brownie texture.
- Don’t Overmix the Batter: When combining the dry ingredients with the wet, mix just until combined to avoid tough brownies.
- Check for Doneness: Use the toothpick test; it should come out with a few moist crumbs for the perfect fudgy texture.
- Let Them Cool: Allow the brownies to cool completely before cutting; this helps them set and makes slicing easier.
Variations
Other Mix-Ins
You can boost your brownies with fun mix-ins. Here are some ideas:
- Nuts: Add chopped walnuts or pecans for crunch.
- Chocolate Chips: Use white chocolate chips or even peanut butter chips for a twist.
Dietary Adjustments
You can make these brownies fit your diet. Here are two easy swaps:
- Gluten-Free: Use almond flour or coconut flour instead of regular flour.
- Vegan Options: Substitute eggs with flax eggs and use plant-based butter.
Flavor Enhancements
Want to amp up the taste? Try these flavor boosters:
- Espresso Powder: Mix in a teaspoon for a rich, deep flavor.
- Extracts: Add a few drops of mint or almond extract for a unique twist.
Experimenting with these variations can lead to your new favorite brownie!
Storage Info
Best Practices for Freshness
To keep your brownies fresh, store them in an airtight container. This keeps moisture in and prevents them from drying out. You can place them at room temperature for up to three days. If you want them to last longer, refrigerate them. Just make sure to wrap them well to avoid any fridge odors.
Freezing Instructions
You can freeze your brownies if you want to save some for later. First, let them cool completely. Then, cut them into squares and wrap each piece in plastic wrap. Place the wrapped brownies in a freezer-safe bag or container. They can stay fresh for up to three months.
When you want to enjoy them again, take them out of the freezer. Let them thaw in the fridge overnight or at room temperature for a few hours. If you like, you can warm them in the microwave for a few seconds. This brings back that gooey texture!
FAQs
Can I use different cookie brands?
Yes, you can use other cookie brands. If you want a twist, try using Chips Ahoy or another chocolate cookie. These can add a nice crunch and flavor. You can also mix different cookies for fun. Just keep the texture similar to Oreos for the best results.
How do I know when the brownies are done baking?
Look for a few signs to check if your brownies are done. First, the edges should pull away slightly from the pan. Second, the top should look set and shiny. Lastly, use a toothpick; it should come out with a few moist crumbs. Avoid overbaking to keep them fudgy.
Can these brownies be made ahead of time?
Yes, you can make these brownies ahead of time. Let the brownies cool completely in the pan. Once cool, cover them tightly with plastic wrap or foil. They can last for up to a week at room temperature. To enjoy them warm, just reheat in the microwave for a few seconds.
You learned how to make delicious Oreo brownies with simple steps and tips. Gather your ingredients, carefully mix them, and bake. Remember to avoid overmixing for that fudgy texture. Store your brownies well to keep them fresh. You can even try fun variations and adjust for dietary needs. Enjoy sharing these treats with friends or keeping them for yourself. Now, it's time to bake and delight in every bite!