Are you ready to spice up your dinner? Let’s dive into my Zesty One-Pan Lemon Dill Chicken Thighs recipe! This dish is not only bursting with flavor, but it's also easy to make. You’ll love how quick it comes together in just one pan. Plus, I’ll share tips on fresh ingredients, cooking methods, and tasty variations. Trust me, this meal will become a favorite in your home!
Why I Love This Recipe
- Fresh Flavors: The combination of lemon and dill brings a bright, zesty flavor that elevates the dish, making it perfect for any season.
- One-Pan Wonder: This recipe is cooked entirely in one skillet, which means easy prep and clean-up—perfect for busy weeknights!
- Perfectly Juicy Chicken: By searing the chicken first and then roasting it, you achieve a crispy skin while keeping the meat tender and juicy.
- Versatile Side Options: Serve it with crusty bread or a fresh salad, allowing you to customize the meal to fit your occasion.
Ingredients
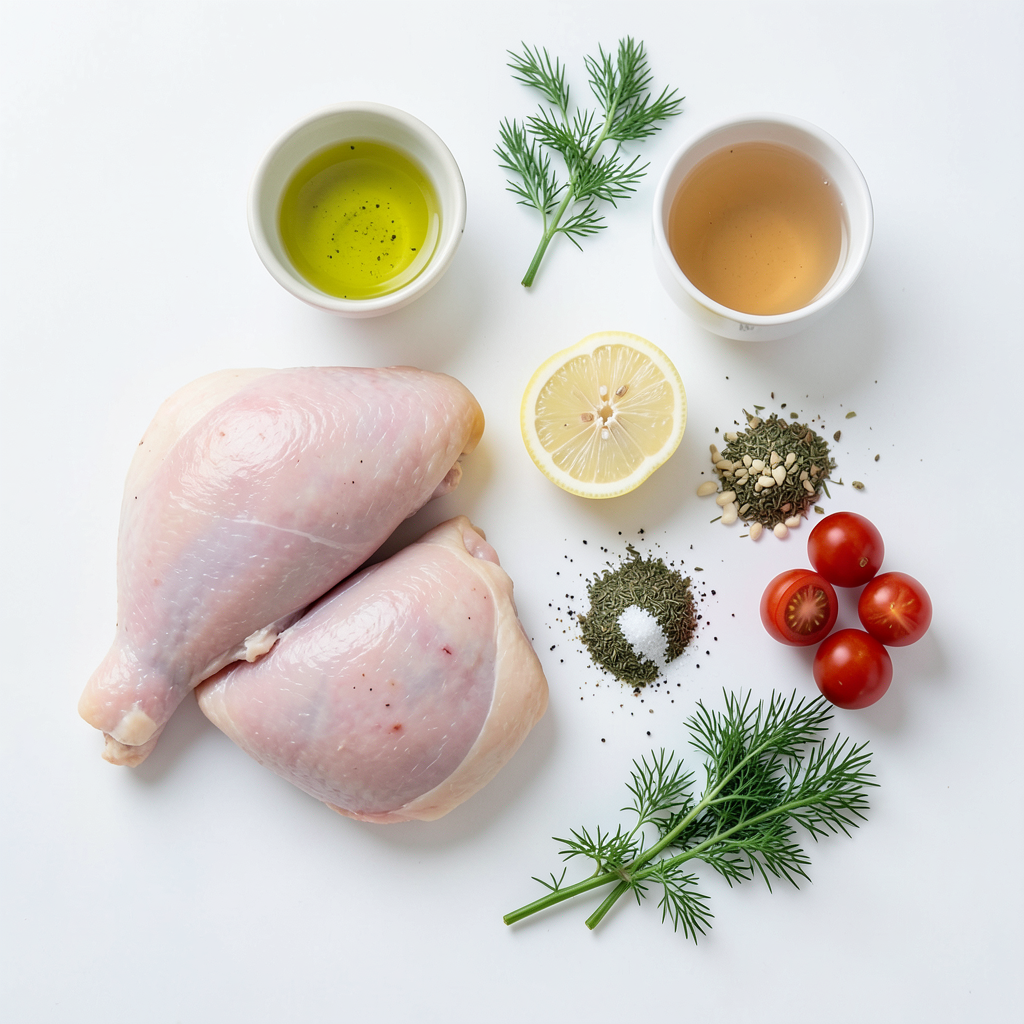
Full List of Ingredients
- 4 bone-in, skin-on chicken thighs
- 1 tablespoon extra virgin olive oil
- 2 fresh lemons (one for juicing, one for slicing)
- 3 cloves of garlic, minced
- 1 teaspoon dried dill weed (or 1 tablespoon fresh dill, chopped)
- 1 teaspoon coarse salt
- ½ teaspoon freshly ground black pepper
- 1 cup cherry tomatoes, halved
- 1 cup low-sodium chicken broth
- Fresh dill sprigs for garnish
Optional Ingredients
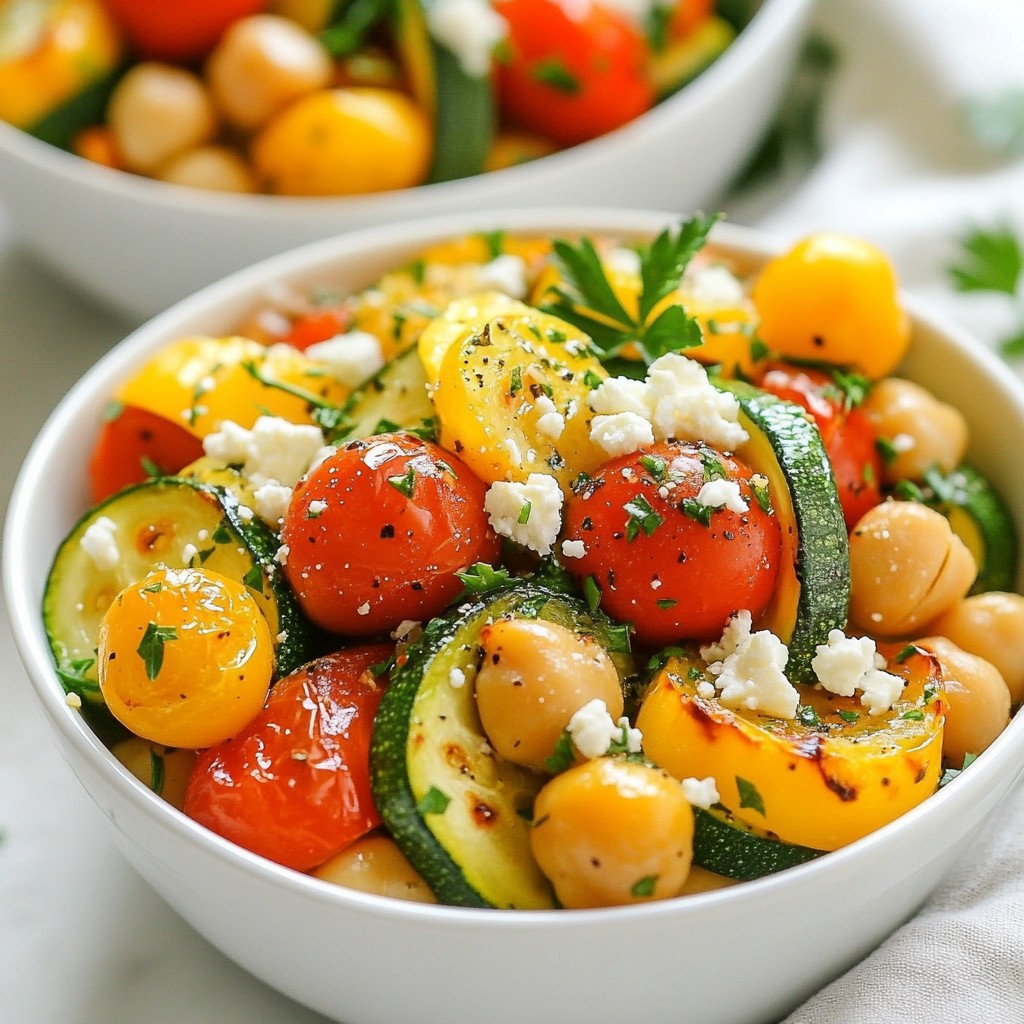
- Additional vegetables like zucchini or bell peppers
- A pinch of red pepper flakes for heat
- Fresh parsley for a different herb flavor
Tips for Selecting Fresh Ingredients
- Chicken Thighs: Look for thighs that are plump and have a rosy color. Avoid any that look dry or discolored.
- Lemons: Choose lemons that feel heavy for their size. A firm skin indicates juiciness.
- Garlic: Pick bulbs that are firm and have tight skins. Avoid any with soft spots.
- Tomatoes: Select tomatoes that are bright and firm, with a slight give when you squeeze them.
- Dill: Fresh dill should smell strong. Look for bright green, crisp leaves without any yellowing.
This recipe shines with fresh ingredients. Using quality items makes a big impact on taste.
Step-by-Step Instructions
Preparation Steps
1. Preheat your oven to 400°F (200°C). This sets the stage for cooking.
2. Grab a large, oven-safe skillet. Heat 1 tablespoon of olive oil over medium-high heat. Wait until it shimmers.
3. Pat the 4 chicken thighs dry with paper towels. This step is key for crispy skin.
4. Season both sides of the chicken with 1 teaspoon of salt, ½ teaspoon of black pepper, and 1 teaspoon of dried dill weed. Make sure to coat them well.
Cooking Method
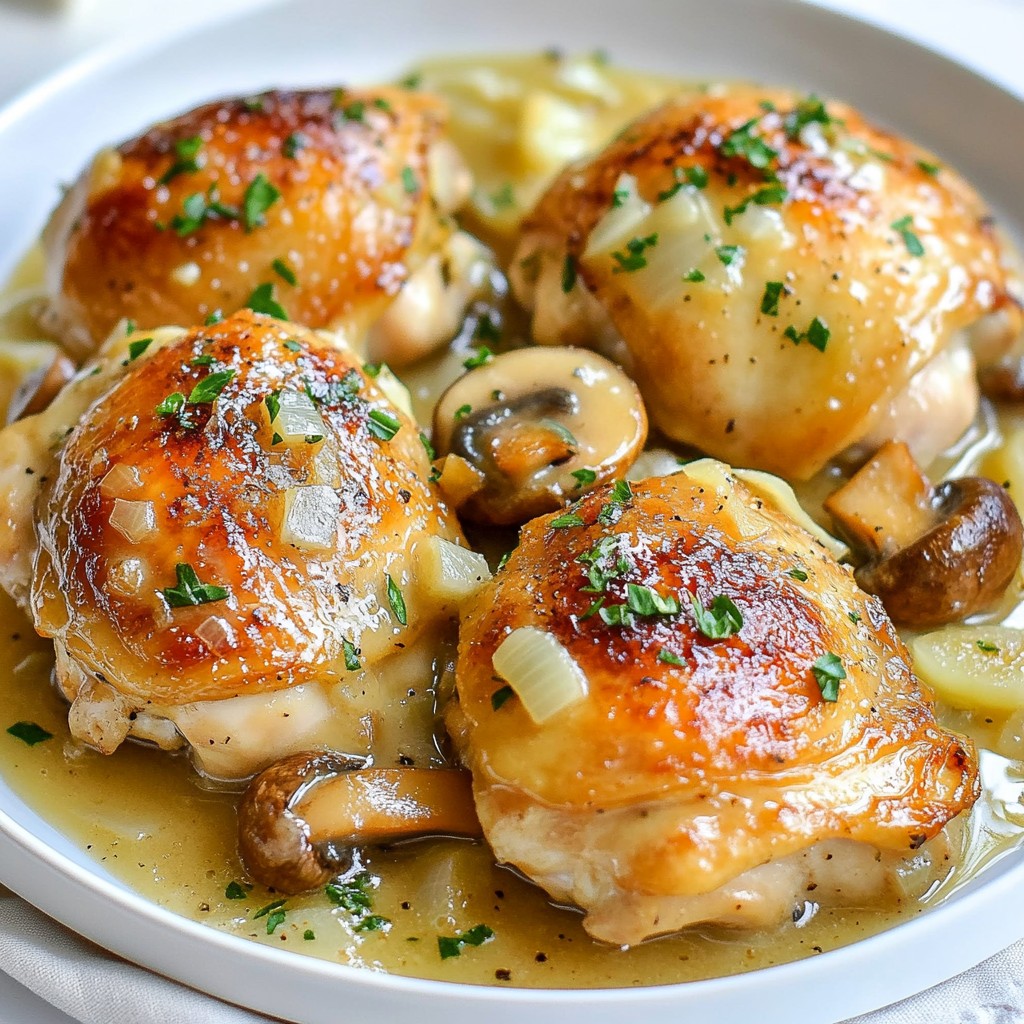
1. Once the oil is hot, place the chicken thighs skin-side down in the skillet. Sear them for about 5-7 minutes. Look for a golden-brown color on the skin.
2. Flip the chicken thighs over. Add 3 minced garlic cloves to the skillet. Sauté for about 1 minute, stirring often. Keep an eye on the garlic; it should not brown.
3. Squeeze the juice from one lemon over the chicken. This adds great flavor!
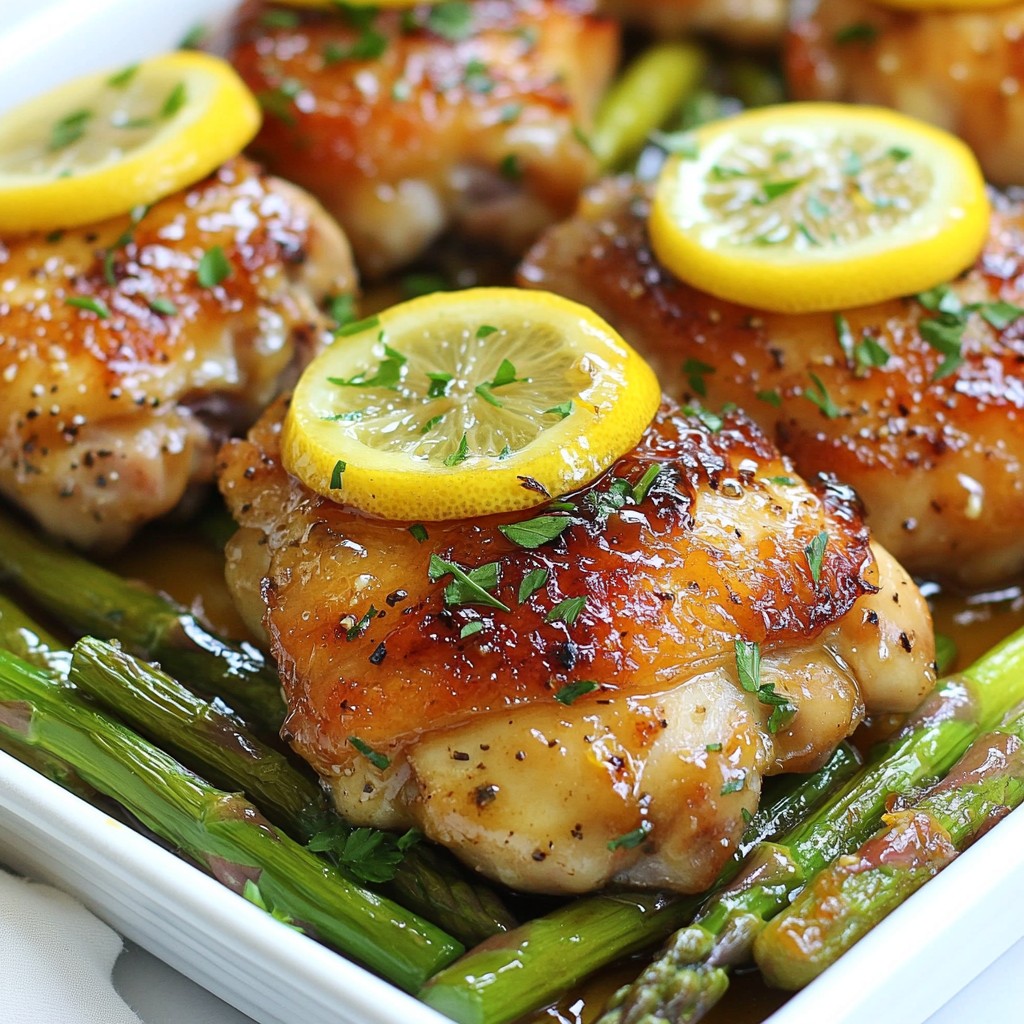
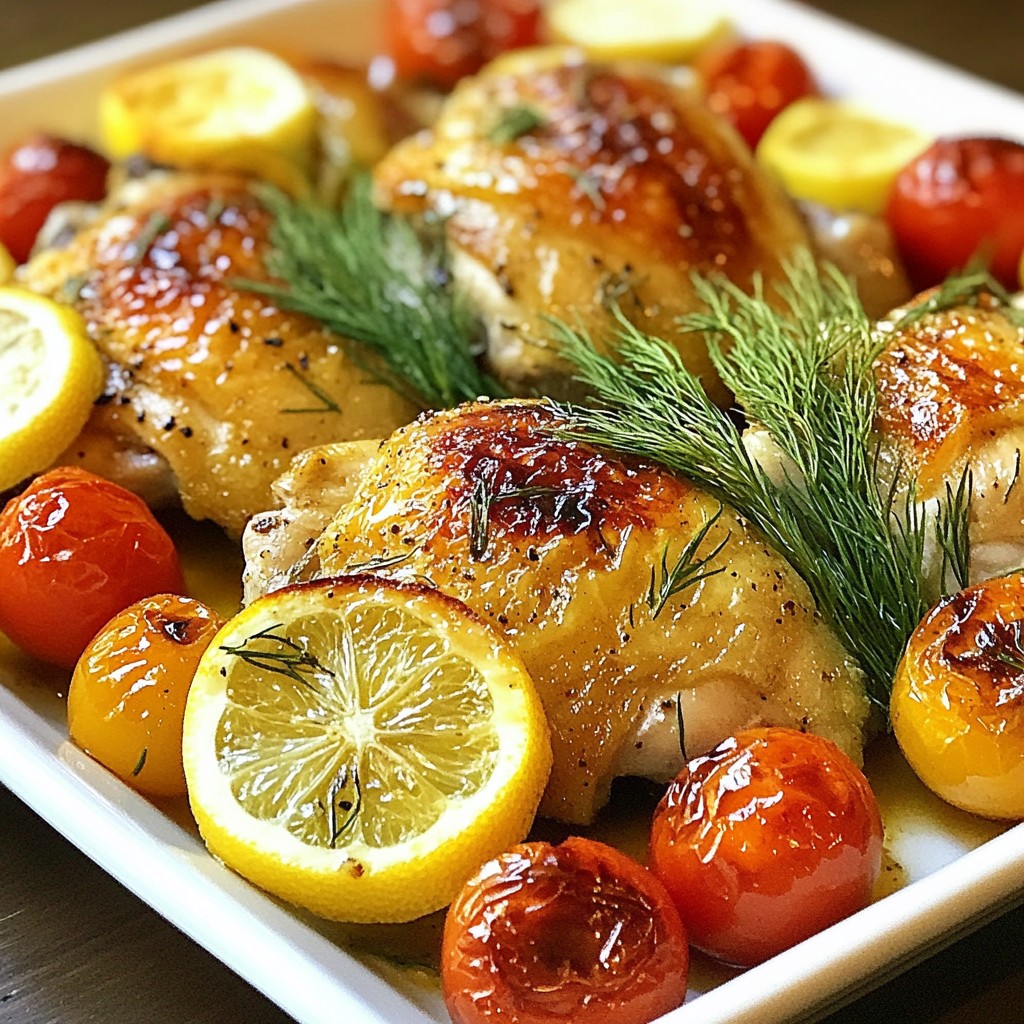
4. Arrange lemon slices and 1 cup of halved cherry tomatoes around the chicken. These add color and sweetness.
5. Carefully pour in 1 cup of low-sodium chicken broth. Avoid splashing it on the chicken skin, as this can ruin the crispiness.
6. Transfer the skillet to your preheated oven. Roast for 30-35 minutes. Check that the internal temperature reaches 165°F (75°C).
Finishing Touches
1. When done, take the skillet out of the oven. Let the chicken rest for a few minutes. This helps keep it juicy.
2. Garnish with fresh dill sprigs before serving. This adds a pop of color and flavor.
3. Serve the chicken thighs on a platter, surrounded by roasted tomatoes and lemon slices. Enjoy!
Tips & Tricks
Achieving Crispy Skin
To get that perfect crispy skin on your chicken thighs, start by drying them well with paper towels. Moisture is the enemy of crispiness. Season both sides with salt, pepper, and dill. When the oil is hot, place the chicken skin-side down first. Let it sear for 5-7 minutes without moving it. This step builds a nice golden-brown crust.
Enhancing Flavor
To boost the flavor, use fresh herbs when possible. Fresh dill packs a punch that dried dill cannot match. Squeeze fresh lemon juice over the chicken before roasting. This adds brightness and zesty flavor. Adding cherry tomatoes not only enhances the taste but also adds color. They roast beautifully and become sweet.
Cooking Time Adjustments
Cooking times can vary based on your oven and chicken size. Always check the internal temperature. Chicken should reach 165°F (75°C) for safety. If your chicken is browning too quickly, lower the oven temperature slightly. If using smaller pieces, reduce the cooking time to avoid dryness. Always let the chicken rest before serving to keep it juicy.
Pro Tips
- Pat the Chicken Dry: This step is crucial to achieving crispy skin. Moisture on the surface of the chicken will prevent it from browning properly.
- Use Fresh Herbs: If possible, opt for fresh dill instead of dried for a more vibrant flavor. Fresh herbs can elevate the dish significantly.
- Let It Rest: After removing the chicken from the oven, allow it to rest for a few minutes before serving. This helps retain the juices and enhances flavor.
- Garnish for Presentation: Don't skip the fresh dill sprigs for garnish. They add a beautiful touch and a burst of freshness that ties the dish together.
Variations
Alternative Proteins
You can switch up the chicken thighs for other proteins. Bone-in, skin-on chicken breasts work well. They stay juicy and cook similarly. You might also use turkey thighs, which are rich and flavorful. If you're feeling adventurous, try using duck. It adds a unique taste that pairs nicely with lemon and dill.
Vegetarian Options
For a meat-free meal, consider using hearty vegetables. Portobello mushrooms make a great substitute. They soak up flavors and have a meaty texture. You could also use chickpeas or lentils for added protein. Just sauté them in the skillet before adding the broth. This gives you a delicious, plant-based version of the dish.
Flavor Profile Adjustments
Adjusting flavors is easy with this recipe. If you love heat, add red pepper flakes for a spicy kick. You could also try fresh herbs like parsley or tarragon for a different taste. For a richer flavor, consider adding a splash of white wine to the broth. This change deepens the dish’s complexity. Don't be afraid to experiment and find your favorite version!
Storage Info
Refrigeration Guidelines
After you prepare your zesty chicken thighs, let them cool completely. Place them in an airtight container. They will stay fresh in the fridge for up to 3 days. This helps lock in that delicious lemon and dill flavor. If you want to enjoy them later, proper storage is key.
Freezing Instructions
For longer storage, you can freeze the chicken thighs. Wrap each piece tightly in plastic wrap, then place them in a freezer-safe bag. Squeeze out the air to avoid freezer burn. The chicken will keep well for about 3 months. When you’re ready to eat, just thaw it in the fridge overnight.
Reheating Suggestions
To reheat, set your oven to 350°F (175°C). Place the chicken thighs on a baking sheet. Cover them loosely with foil to retain moisture. Heat for about 15-20 minutes or until warm. You can also use a microwave, but the oven keeps the skin crispy. Enjoy your flavorful meal again!
FAQs
What is the best way to tell if chicken is cooked?
The best way to check if chicken is cooked is by using a meat thermometer. Insert the thermometer into the thickest part of the chicken thigh. The temperature should reach 165°F (75°C). If you don’t have a thermometer, look for clear juices when you cut into the chicken. If the juices run clear, the chicken is likely done. Always let it rest for a few minutes after cooking. This helps keep it juicy.
Can I use boneless chicken thighs for this recipe?
Yes, you can use boneless chicken thighs. They will cook faster than bone-in thighs. Reduce the cooking time by about 10-15 minutes. Keep an eye on the internal temperature to ensure they still reach 165°F (75°C). Boneless thighs are great for a quick meal, but bone-in thighs give more flavor and juiciness.
What can I serve with lemon dill chicken thighs?
Lemon dill chicken thighs pair well with many sides. Here are some ideas:
- A light salad with mixed greens and a lemon vinaigrette
- Roasted vegetables like carrots and zucchini
- Creamy mashed potatoes or rice to soak up the sauce
- Crusty bread for a delicious dip in the broth
These options will complement the bright flavors of the chicken and make a balanced meal.
In this blog post, we covered the key ingredients and steps for making lemon dill chicken thighs. I shared tips to get crispy skin and tasty flavors. You can try different proteins and adjust the taste to your liking. Lastly, I explained how to store and reheat the dish for future meals. Cooking can be fun and easy, especially with the right tips. Enjoy making this dish and make it your own!