Zesty Corn Salad Flavorful and Fresh Recipe Guide
![Fresh corn is the star of this salad. Use about 3 cups of corn kernels, which equals around 4 ears of corn. To get the best flavor, choose corn that is sweet and crisp. You can also use frozen corn, but fresh offers a better taste and texture. This salad needs vibrant veggies for color and crunch: - 1 cup cherry tomatoes, halved - 1 red bell pepper, diced - 1/2 red onion, finely chopped - 1 jalapeño pepper, minced (remove seeds for less heat) - 1/4 cup fresh cilantro, chopped These veggies add freshness and a mix of flavors. The tomatoes bring sweetness, while the jalapeño offers a nice kick. The dressing ties everything together. Here’s what you need: - 1/4 cup freshly squeezed lime juice (about 2 limes) - 2 tablespoons extra virgin olive oil - 1 teaspoon ground cumin - Salt and black pepper to taste This zesty dressing balances the sweet corn and veggies. The lime juice adds brightness, while cumin gives depth. Check out the [Full Recipe] for detailed instructions on making this delicious Zesty Corn Salad! To start, you need fresh corn. If you have fresh corn, fill a large pot with water. Bring it to a rolling boil. Once it boils, add the corn cobs and blanch them for about 3 minutes. After that, take them out and let them cool. When cool, cut the kernels off the cobs with a sharp knife. If you want to use frozen corn, just thaw it and drain any extra liquid. In a big mixing bowl, combine the corn kernels with cherry tomatoes, red bell pepper, and red onion. Make sure to mix them well. This way, you spread the flavors evenly throughout the salad. Take a small mixing bowl to prepare the dressing. Whisk together freshly squeezed lime juice, olive oil, ground cumin, and some salt and black pepper. Mix until all the ingredients blend together well. This zesty dressing will bring everything to life. Now, drizzle the dressing over your mixed vegetables. Gently toss everything together so that all the ingredients get coated in the dressing. This step is key for flavor. Taste the salad and adjust the seasoning if needed. If you want more zing, add more lime juice or salt. For the best flavor, let the salad sit for at least 15 minutes before serving. This wait helps the flavors mix well. You can find the full recipe for Zesty Corn Salad with a Kick! to guide you through the steps. To enhance the taste of your zesty corn salad, let it rest. After mixing, cover it and chill for at least 15 minutes. This time allows the flavors to blend. The lime juice and spices soak into the corn and veggies. You will notice a big difference in taste. If you have more time, letting it sit for an hour is even better. You can swap some ingredients based on your taste. Don’t have fresh corn? Use canned or frozen corn instead. If you want a milder flavor, skip the jalapeño or use a bell pepper. You can also replace cilantro with parsley or green onions if you prefer. For a tangy twist, try lemon juice instead of lime juice. Get creative with what you have on hand! A good-looking salad makes it more fun to eat. Serve your corn salad in a bright bowl. Top it with extra cilantro leaves for color. Add lime wedges on the side for a fresh touch. For a fun idea, layer the salad in mason jars. This not only looks nice but makes serving easy. Plus, it’s perfect for picnics or gatherings. Check out the Full Recipe for more ideas to impress your guests! {{image_4}} You can add protein to your zesty corn salad for more flavor and nutrition. Grilled chicken or shrimp works great. You can also use black beans for a plant-based option. Just rinse and drain a can of beans. Mix them in with the veggies for a hearty meal. Feel free to play with the veggies. You can use cucumbers for a cool crunch. Avocado adds creaminess and healthy fats. Try adding radishes for a peppery bite, or corn peppers for more heat. Any colorful veggie will brighten your dish and add taste. Switch up the dressing to keep things fresh. Try adding honey for sweetness or garlic for a kick. A splash of balsamic vinegar can bring a lovely tang. If you're feeling adventurous, mix in some salsa or a dash of hot sauce for extra zest. Explore the full recipe for more ideas! You can store Zesty Corn Salad in the fridge. Place it in an airtight container. This keeps the flavors fresh and vibrant. Make sure to eat it within three to five days. If you notice any changes in smell or color, it’s best to toss it out. You can freeze this salad, but it’s not ideal. Freezing changes the texture of the corn and veggies. If you want to freeze it, pack it tightly in a freezer-safe container. It can last up to three months. When you’re ready to eat it, thaw it in the fridge overnight. Reheating is not recommended for Zesty Corn Salad. It’s best enjoyed cold or at room temperature. If you must warm it, do so gently in a pan over low heat. Avoid overheating to keep the veggies crisp and fresh. For a quick fix, serve it on top of warm grains or proteins for a tasty twist. Yes, you can use frozen corn in this recipe. Just thaw the corn and drain any extra liquid. Frozen corn saves time, and it still tastes great. It’s a good option if fresh corn is not available. Try it out for a quick fix! The Zesty Corn Salad can last about 3 to 5 days in the fridge. Make sure to store it in an airtight container. If the salad starts to look watery, give it a quick stir. It’s best to eat it fresh, but leftovers make a tasty snack. This salad pairs well with many dishes. You can serve it with grilled meats, tacos, or fish. It also makes a great side for barbecues or picnics. Try it alongside some tortilla chips for a fun twist! Yes, Zesty Corn Salad is gluten-free! All the ingredients are naturally free of gluten. You can enjoy it safely if you have gluten intolerance. This salad is a light and tasty choice for everyone. This blog post covered the key ingredients, steps, tips, and variations for Zesty Corn Salad. You can use fresh corn, mix in your favorite vegetables, and create a tasty dressing. Remember to store it properly for the best flavor. Feel free to experiment with ingredients to suit your taste. Whether you add protein or unique dressings, enjoy this salad your way. Make it a staple for meals or gatherings. Embrace the freshness and flavor of this salad, and get creative!](https://goldendishy.com/wp-content/uploads/2025/06/9c485b94-0626-453a-9168-3540dee7db81.webp)
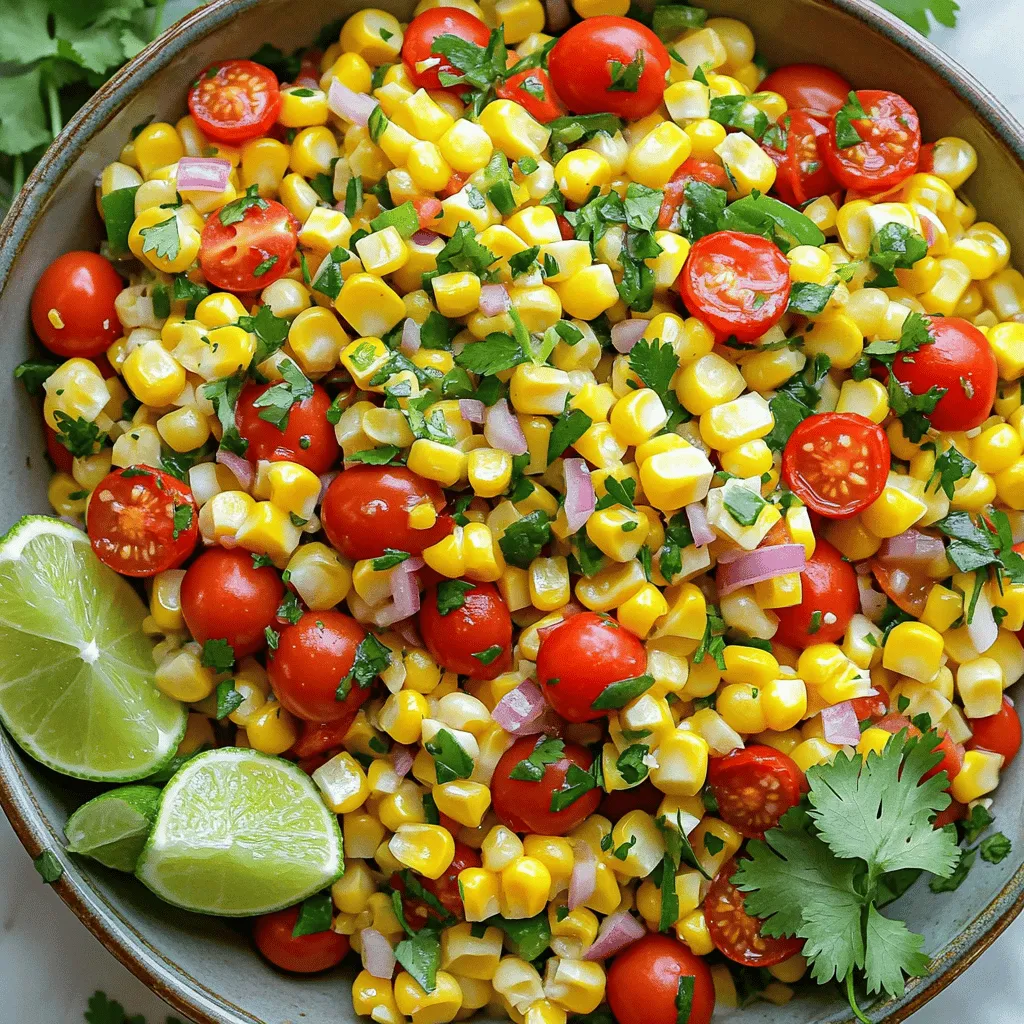
Get ready to brighten up your meals with my Zesty Corn Salad! This dish bursts with fresh flavors and colors, making it perfect for any occasion. You’ll love how easy it is to whip up, with simple ingredients you can mix and match. Whether you’re grilling out or prepping for a picnic, this salad brings the zing you crave.
Ingredients
Fresh Corn
Fresh corn is the star of this salad. Use about 3 cups of corn kernels, which equals around 4 ears of corn. To get the best flavor, choose corn that is sweet and crisp. You can also use frozen corn, but fresh offers a better taste and texture.
Additional Vegetables
This salad needs vibrant veggies for color and crunch:
– 1 cup cherry tomatoes, halved
– 1 red bell pepper, diced
– 1/2 red onion, finely chopped
– 1 jalapeño pepper, minced (remove seeds for less heat)
– 1/4 cup fresh cilantro, chopped
These veggies add freshness and a mix of flavors. The tomatoes bring sweetness, while the jalapeño offers a nice kick.
Dressing Components
The dressing ties everything together. Here’s what you need:
– 1/4 cup freshly squeezed lime juice (about 2 limes)
– 2 tablespoons extra virgin olive oil
– 1 teaspoon ground cumin
– Salt and black pepper to taste
This zesty dressing balances the sweet corn and veggies. The lime juice adds brightness, while cumin gives depth.
Step-by-Step Instructions
Preparing the Corn
To start, you need fresh corn. If you have fresh corn, fill a large pot with water. Bring it to a rolling boil. Once it boils, add the corn cobs and blanch them for about 3 minutes. After that, take them out and let them cool. When cool, cut the kernels off the cobs with a sharp knife. If you want to use frozen corn, just thaw it and drain any extra liquid.
Mixing the Vegetables
In a big mixing bowl, combine the corn kernels with cherry tomatoes, red bell pepper, and red onion. Make sure to mix them well. This way, you spread the flavors evenly throughout the salad.
Making the Dressing
Take a small mixing bowl to prepare the dressing. Whisk together freshly squeezed lime juice, olive oil, ground cumin, and some salt and black pepper. Mix until all the ingredients blend together well. This zesty dressing will bring everything to life.
Combining the Ingredients
Now, drizzle the dressing over your mixed vegetables. Gently toss everything together so that all the ingredients get coated in the dressing. This step is key for flavor.
Final Touches
Taste the salad and adjust the seasoning if needed. If you want more zing, add more lime juice or salt. For the best flavor, let the salad sit for at least 15 minutes before serving. This wait helps the flavors mix well.to guide you through the steps.
Tips & Tricks
Maximizing Flavor Infusion
To enhance the taste of your zesty corn salad, let it rest. After mixing, cover it and chill for at least 15 minutes. This time allows the flavors to blend. The lime juice and spices soak into the corn and veggies. You will notice a big difference in taste. If you have more time, letting it sit for an hour is even better.
Substitutions for Ingredients
You can swap some ingredients based on your taste. Don’t have fresh corn? Use canned or frozen corn instead. If you want a milder flavor, skip the jalapeño or use a bell pepper. You can also replace cilantro with parsley or green onions if you prefer. For a tangy twist, try lemon juice instead of lime juice. Get creative with what you have on hand!
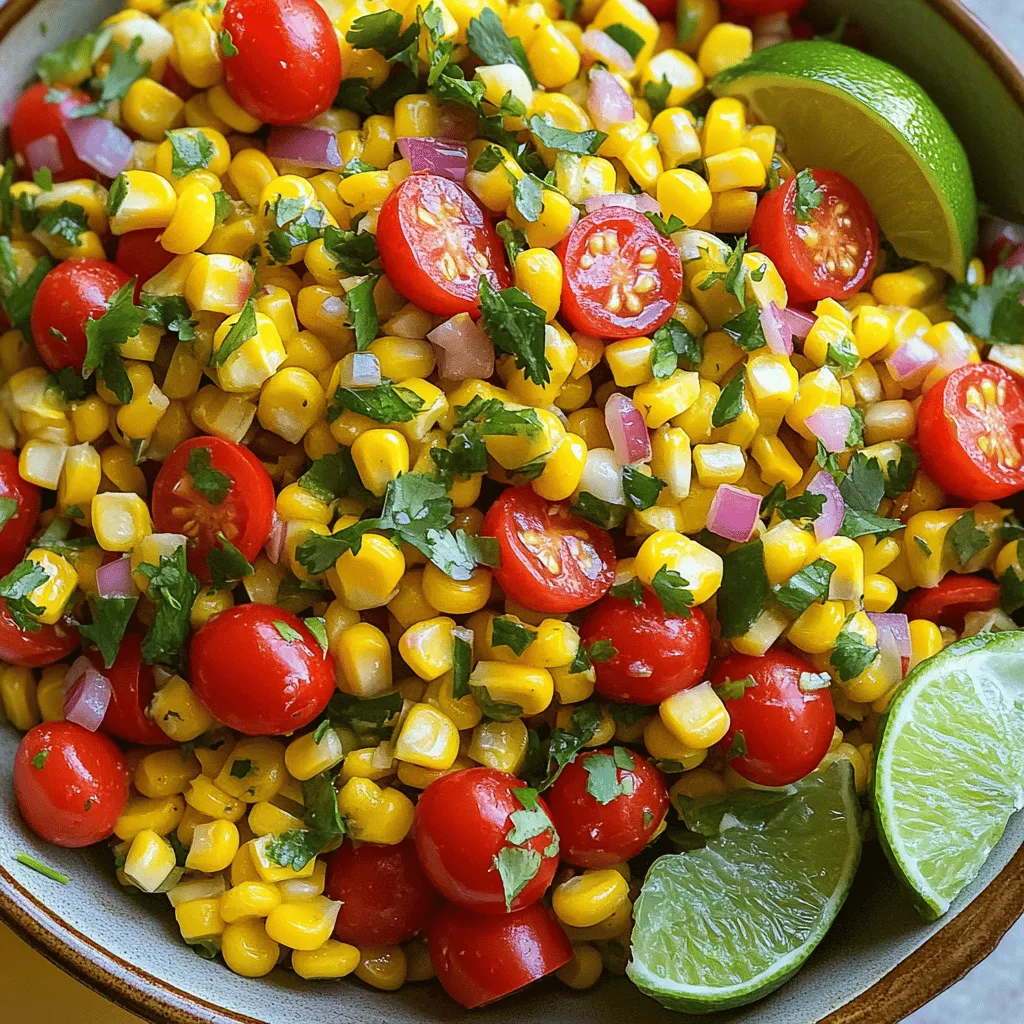
Presentation Suggestions
A good-looking salad makes it more fun to eat. Serve your corn salad in a bright bowl. Top it with extra cilantro leaves for color. Add lime wedges on the side for a fresh touch. For a fun idea, layer the salad in mason jars. This not only looks nice but makes serving easy. Plus, it’s perfect for picnics or gatherings.

Variations
Adding Protein
You can add protein to your zesty corn salad for more flavor and nutrition. Grilled chicken or shrimp works great. You can also use black beans for a plant-based option. Just rinse and drain a can of beans. Mix them in with the veggies for a hearty meal.
Different Vegetables
Feel free to play with the veggies. You can use cucumbers for a cool crunch. Avocado adds creaminess and healthy fats. Try adding radishes for a peppery bite, or corn peppers for more heat. Any colorful veggie will brighten your dish and add taste.
Unique Dressing Options
Switch up the dressing to keep things fresh. Try adding honey for sweetness or garlic for a kick. A splash of balsamic vinegar can bring a lovely tang. If you’re feeling adventurous, mix in some salsa or a dash of hot sauce for extra zest.
Storage Info
Refrigeration Guidelines
You can store Zesty Corn Salad in the fridge. Place it in an airtight container. This keeps the flavors fresh and vibrant. Make sure to eat it within three to five days. If you notice any changes in smell or color, it’s best to toss it out.
Freezing Options
You can freeze this salad, but it’s not ideal. Freezing changes the texture of the corn and veggies. If you want to freeze it, pack it tightly in a freezer-safe container. It can last up to three months. When you’re ready to eat it, thaw it in the fridge overnight.
Reheating Recommendations
Reheating is not recommended for Zesty Corn Salad. It’s best enjoyed cold or at room temperature. If you must warm it, do so gently in a pan over low heat. Avoid overheating to keep the veggies crisp and fresh. For a quick fix, serve it on top of warm grains or proteins for a tasty twist.
FAQs
Can I use frozen corn?
Yes, you can use frozen corn in this recipe. Just thaw the corn and drain any extra liquid. Frozen corn saves time, and it still tastes great. It’s a good option if fresh corn is not available. Try it out for a quick fix!
How long will the salad last in the fridge?
The Zesty Corn Salad can last about 3 to 5 days in the fridge. Make sure to store it in an airtight container. If the salad starts to look watery, give it a quick stir. It’s best to eat it fresh, but leftovers make a tasty snack.
What can I serve with Zesty Corn Salad?
This salad pairs well with many dishes. You can serve it with grilled meats, tacos, or fish. It also makes a great side for barbecues or picnics. Try it alongside some tortilla chips for a fun twist!
Is this salad gluten-free?
Yes, Zesty Corn Salad is gluten-free! All the ingredients are naturally free of gluten. You can enjoy it safely if you have gluten intolerance. This salad is a light and tasty choice for everyone.
This blog post covered the key ingredients, steps, tips, and variations for Zesty Corn Salad. You can use fresh corn, mix in your favorite vegetables, and create a tasty dressing. Remember to store it properly for the best flavor. Feel free to experiment with ingredients to suit your taste. Whether you add protein or unique dressings, enjoy this salad your way. Make it a staple for meals or gatherings. Embrace the freshness and flavor of this salad, and get creative!
![Fresh corn is the star of this salad. Use about 3 cups of corn kernels, which equals around 4 ears of corn. To get the best flavor, choose corn that is sweet and crisp. You can also use frozen corn, but fresh offers a better taste and texture. This salad needs vibrant veggies for color and crunch: - 1 cup cherry tomatoes, halved - 1 red bell pepper, diced - 1/2 red onion, finely chopped - 1 jalapeño pepper, minced (remove seeds for less heat) - 1/4 cup fresh cilantro, chopped These veggies add freshness and a mix of flavors. The tomatoes bring sweetness, while the jalapeño offers a nice kick. The dressing ties everything together. Here’s what you need: - 1/4 cup freshly squeezed lime juice (about 2 limes) - 2 tablespoons extra virgin olive oil - 1 teaspoon ground cumin - Salt and black pepper to taste This zesty dressing balances the sweet corn and veggies. The lime juice adds brightness, while cumin gives depth. Check out the [Full Recipe] for detailed instructions on making this delicious Zesty Corn Salad! To start, you need fresh corn. If you have fresh corn, fill a large pot with water. Bring it to a rolling boil. Once it boils, add the corn cobs and blanch them for about 3 minutes. After that, take them out and let them cool. When cool, cut the kernels off the cobs with a sharp knife. If you want to use frozen corn, just thaw it and drain any extra liquid. In a big mixing bowl, combine the corn kernels with cherry tomatoes, red bell pepper, and red onion. Make sure to mix them well. This way, you spread the flavors evenly throughout the salad. Take a small mixing bowl to prepare the dressing. Whisk together freshly squeezed lime juice, olive oil, ground cumin, and some salt and black pepper. Mix until all the ingredients blend together well. This zesty dressing will bring everything to life. Now, drizzle the dressing over your mixed vegetables. Gently toss everything together so that all the ingredients get coated in the dressing. This step is key for flavor. Taste the salad and adjust the seasoning if needed. If you want more zing, add more lime juice or salt. For the best flavor, let the salad sit for at least 15 minutes before serving. This wait helps the flavors mix well. You can find the full recipe for Zesty Corn Salad with a Kick! to guide you through the steps. To enhance the taste of your zesty corn salad, let it rest. After mixing, cover it and chill for at least 15 minutes. This time allows the flavors to blend. The lime juice and spices soak into the corn and veggies. You will notice a big difference in taste. If you have more time, letting it sit for an hour is even better. You can swap some ingredients based on your taste. Don’t have fresh corn? Use canned or frozen corn instead. If you want a milder flavor, skip the jalapeño or use a bell pepper. You can also replace cilantro with parsley or green onions if you prefer. For a tangy twist, try lemon juice instead of lime juice. Get creative with what you have on hand! A good-looking salad makes it more fun to eat. Serve your corn salad in a bright bowl. Top it with extra cilantro leaves for color. Add lime wedges on the side for a fresh touch. For a fun idea, layer the salad in mason jars. This not only looks nice but makes serving easy. Plus, it’s perfect for picnics or gatherings. Check out the Full Recipe for more ideas to impress your guests! {{image_4}} You can add protein to your zesty corn salad for more flavor and nutrition. Grilled chicken or shrimp works great. You can also use black beans for a plant-based option. Just rinse and drain a can of beans. Mix them in with the veggies for a hearty meal. Feel free to play with the veggies. You can use cucumbers for a cool crunch. Avocado adds creaminess and healthy fats. Try adding radishes for a peppery bite, or corn peppers for more heat. Any colorful veggie will brighten your dish and add taste. Switch up the dressing to keep things fresh. Try adding honey for sweetness or garlic for a kick. A splash of balsamic vinegar can bring a lovely tang. If you're feeling adventurous, mix in some salsa or a dash of hot sauce for extra zest. Explore the full recipe for more ideas! You can store Zesty Corn Salad in the fridge. Place it in an airtight container. This keeps the flavors fresh and vibrant. Make sure to eat it within three to five days. If you notice any changes in smell or color, it’s best to toss it out. You can freeze this salad, but it’s not ideal. Freezing changes the texture of the corn and veggies. If you want to freeze it, pack it tightly in a freezer-safe container. It can last up to three months. When you’re ready to eat it, thaw it in the fridge overnight. Reheating is not recommended for Zesty Corn Salad. It’s best enjoyed cold or at room temperature. If you must warm it, do so gently in a pan over low heat. Avoid overheating to keep the veggies crisp and fresh. For a quick fix, serve it on top of warm grains or proteins for a tasty twist. Yes, you can use frozen corn in this recipe. Just thaw the corn and drain any extra liquid. Frozen corn saves time, and it still tastes great. It’s a good option if fresh corn is not available. Try it out for a quick fix! The Zesty Corn Salad can last about 3 to 5 days in the fridge. Make sure to store it in an airtight container. If the salad starts to look watery, give it a quick stir. It’s best to eat it fresh, but leftovers make a tasty snack. This salad pairs well with many dishes. You can serve it with grilled meats, tacos, or fish. It also makes a great side for barbecues or picnics. Try it alongside some tortilla chips for a fun twist! Yes, Zesty Corn Salad is gluten-free! All the ingredients are naturally free of gluten. You can enjoy it safely if you have gluten intolerance. This salad is a light and tasty choice for everyone. This blog post covered the key ingredients, steps, tips, and variations for Zesty Corn Salad. You can use fresh corn, mix in your favorite vegetables, and create a tasty dressing. Remember to store it properly for the best flavor. Feel free to experiment with ingredients to suit your taste. Whether you add protein or unique dressings, enjoy this salad your way. Make it a staple for meals or gatherings. Embrace the freshness and flavor of this salad, and get creative!](https://goldendishy.com/wp-content/uploads/2025/06/9c485b94-0626-453a-9168-3540dee7db81-300x300.webp)


![- 1 bunch of fresh asparagus, trimmed (about 16-20 spears) - 1 cup freshly grated Parmesan cheese - 1/2 cup panko breadcrumbs - 3 cloves garlic, finely minced - 1 teaspoon garlic powder - 1/2 teaspoon fine sea salt - 1/4 teaspoon freshly ground black pepper - 2 large eggs, lightly beaten - 2 tablespoons extra virgin olive oil - 1 tablespoon fresh parsley, finely chopped For the best flavor, choose fresh asparagus that is bright green with firm stalks. Look for Parmesan cheese that you grate yourself. Pre-grated cheese often lacks the rich taste you want. When selecting panko breadcrumbs, ensure they are light and airy for that perfect crunch. It’s important to use fresh garlic for the best taste. Always measure your ingredients accurately for consistent results. Each serving of Garlic Parmesan Asparagus Fries offers a tasty balance of nutrients. These fries are low in calories and high in vitamins A and C. They provide healthy fats from olive oil and protein from eggs and cheese. One serving typically contains around 200 calories, 10g of protein, and 15g of fat. This makes them a healthier alternative to regular fries. Enjoy them guilt-free as a snack or side dish! To make Garlic Parmesan Asparagus Fries, start by gathering your ingredients. You will need fresh asparagus, Parmesan cheese, panko breadcrumbs, garlic, eggs, and olive oil. Next, preheat your oven to 425°F (220°C) and line a baking sheet with parchment paper for easy cleanup. In a shallow bowl, mix the panko breadcrumbs, grated Parmesan cheese, minced garlic, garlic powder, sea salt, and black pepper. Stir well to combine all the flavors. In another bowl, beat the eggs until they are smooth and a bit frothy. Now, take each asparagus spear and dip it in the egg mixture. Make sure to coat it well, but let any extra egg drip off. Then, roll the asparagus in the breadcrumb mix, pressing gently to ensure an even coat. Place the coated spears on your prepared baking sheet in a single layer. Drizzle the olive oil over the asparagus. This helps them get that nice crispy texture as they bake. Place the baking sheet in your oven. Bake the asparagus fries for about 15 to 20 minutes. Keep checking until they are fork-tender and the coating is a beautiful golden brown. Once done, take the baking sheet out of the oven. Let the fries cool for a few minutes. This step is important as it helps them crisp up even more. For a lovely presentation, serve your Garlic Parmesan Asparagus Fries on a long platter. Add a small bowl of marinara sauce or garlic aioli for dipping. This adds a tasty twist that everyone will love. Finally, sprinkle some fresh parsley on top for a touch of color and flavor. For the full recipe and more details, check out the [Full Recipe]. To get your Garlic Parmesan Asparagus Fries crispy, follow a few steps. First, use fresh asparagus. The fresher, the better! Next, coat each spear well with the egg and breadcrumb mixture. This helps the coating stick. Press the breadcrumbs onto the asparagus for a nice layer. Finally, drizzle olive oil over the fries. This adds flavor and aids crispiness. I’ve seen a few common mistakes in the kitchen. One is overcrowding the baking sheet. It causes steaming, making your fries soggy. Arrange the asparagus in a single layer. Another mistake is not preheating the oven. A hot oven ensures that the fries cook evenly. Lastly, don’t skip the panko breadcrumbs. They give the perfect crunch. Garnishing adds fun to your dish. Try these ideas to elevate your fries! First, sprinkle more parsley for color. You can also add lemon zest for a fresh taste. If you like heat, sprinkle some red pepper flakes on top. For a dip, serve marinara sauce or a creamy garlic aioli. These little touches make your Garlic Parmesan Asparagus Fries stand out. For the full recipe, check out the earlier section. {{image_4}} You can easily make these fries vegan. Instead of eggs, use a flax egg. Mix one tablespoon of ground flaxseed with three tablespoons of water. Let it sit for a few minutes to thicken. This mixture works great to bind the panko and cheese. For cheese, try using a vegan Parmesan. It adds flavor without dairy. This way, everyone can enjoy these tasty fries! To make Garlic Parmesan Asparagus Fries gluten-free, swap regular breadcrumbs for gluten-free panko. You can also use crushed nuts or almond flour. Both options give a nice crunch. Just ensure all your ingredients are gluten-free. This way, you can enjoy these fries without worry. Want to spice things up? Add some cayenne pepper or chili flakes to the breadcrumb mixture. This gives your fries a nice kick. You can also mix in some dried herbs like oregano or thyme. Fresh herbs like rosemary can add an amazing flavor too. Feel free to experiment and find your favorite taste! For the full recipe, check out the detailed instructions above. You can store leftover Garlic Parmesan Asparagus Fries in the fridge. Use an airtight container. They will stay fresh for up to three days. Make sure the fries are cool before sealing the container. This helps keep them crisp. To reheat, use an oven or air fryer. Preheat the oven to 350°F (175°C). Place the fries on a baking sheet. Heat for about 10 minutes. This keeps them crispy. Avoid using the microwave, as it makes them soggy. You can freeze these fries for later use. First, let them cool completely. Then, place them in a freezer-safe bag. Remove as much air as possible. They can last for up to three months. When ready to eat, bake from frozen at 425°F (220°C) for 20-25 minutes. Enjoy the crunch just like fresh! To make Garlic Parmesan Asparagus Fries, you start by preheating your oven to 425°F (220°C). Next, line a baking sheet with parchment paper. This helps with easy cleanup. Combine panko breadcrumbs, grated Parmesan cheese, minced garlic, garlic powder, sea salt, and black pepper in a shallow bowl. Mix them well. In another bowl, beat two eggs until they look frothy. Dip each asparagus spear into the eggs, letting the excess drip off. Roll them in the breadcrumb mix, ensuring they are coated evenly. Place the spears on the baking sheet in one layer. Drizzle olive oil on top. Bake for 15-20 minutes until crispy and golden. Finally, sprinkle fresh parsley on top for a nice finish. For the full recipe, check out the detailed instructions above. Yes, you can use frozen asparagus, but it may not be as crisp. Frozen asparagus tends to have more moisture. This can lead to soggy fries. If you use frozen asparagus, thaw and drain it well before coating. Pat it dry with a paper towel to remove excess water. This step helps keep the fries crispy when baked. If you need a substitute for Parmesan cheese, try nutritional yeast for a vegan option. It has a cheesy flavor and works well in this recipe. Grated Pecorino Romano offers a similar taste, though it is saltier. If you want a milder cheese, use grated mozzarella. Just remember, the flavor may change with these swaps, but they will still be tasty! This guide covers all you need for perfect Garlic Parmesan Asparagus Fries. We explored key ingredients, measurements, and nutrition. I provided step-by-step instructions to help you bake and serve. Plus, we shared tips for crispiness, mistakes to watch for, and fun garnishing ideas. In the end, try out variations like vegan or gluten-free. Proper storage can keep your fries fresh and tasty. With these insights, you can make delicious fries every time. Enjoy experimenting and sharing these yummy treats!](https://goldendishy.com/wp-content/uploads/2025/07/ccbce488-a3dc-4dce-b527-37d827ece95a-768x768.webp)


