Vegetarian Burrito Bowls Fresh and Flavorful Delight

Are you craving a meal that’s fresh, colorful, and packed with flavor? You’re in the right place! My Vegetarian Burrito Bowls bring together nutritious ingredients like brown rice, black beans, and vibrant veggies. They’re fun to make and even easier to customize. Whether you stick to the classic recipe or experiment with your favorite flavors, you’ll find a delightful dish in every bite. Let’s dive in and create your new go-to meal!
Ingredients
Main Ingredients
– 1 cup brown rice
– 1 can (15 oz) black beans, rinsed and drained
– 1 cup corn kernels (fresh, frozen, or canned)
Vegetables and Toppings
– 1 red bell pepper, diced
– 1 small zucchini, diced
– 1 cup cherry tomatoes, halved
– 1 ripe avocado, diced
– 1/4 cup fresh cilantro, chopped
Seasoning and Extras
– Juice of 1 lime
– 1 teaspoon ground cumin
– 1 teaspoon chili powder
– 2 tablespoons olive oil
– Salt and pepper to taste
– Optional toppings: Crumbled feta or cheddar cheese, sour cream or Greek yogurt
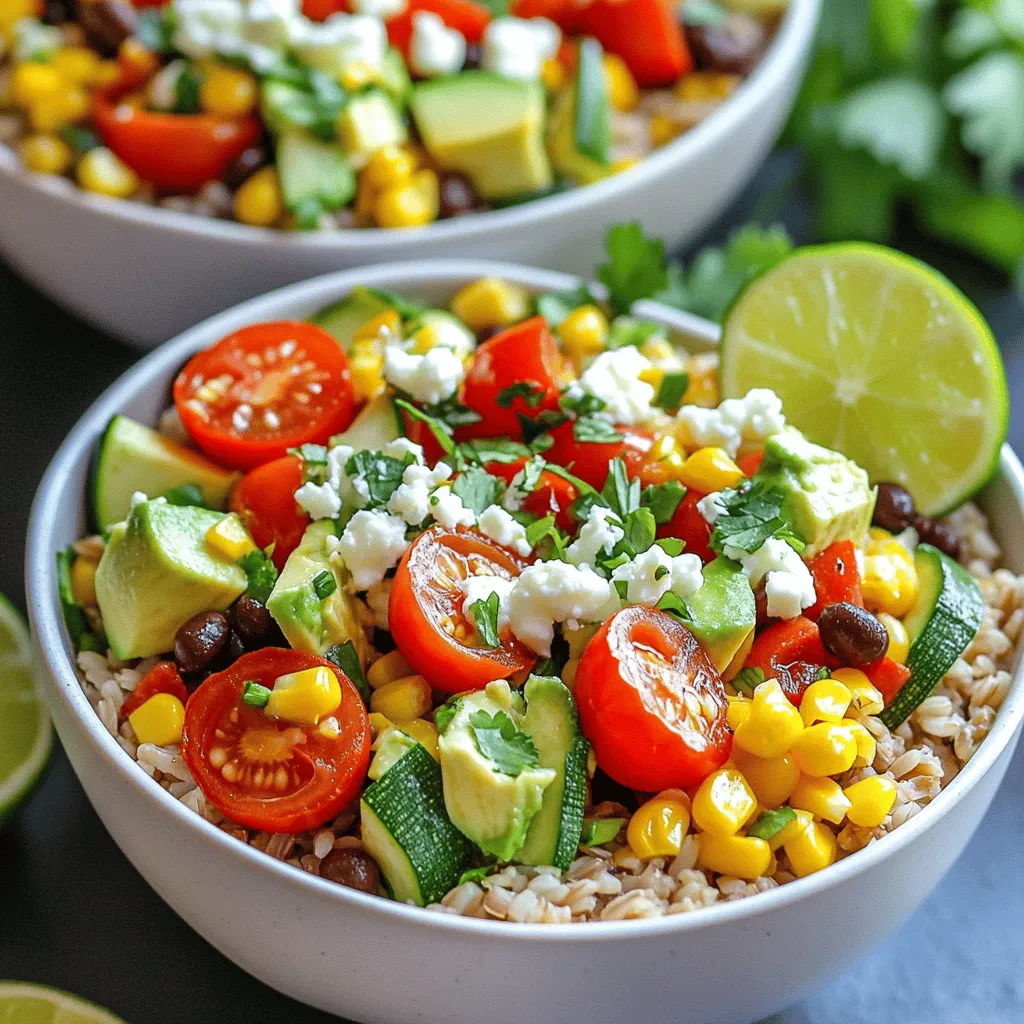
The vibrant flavors in these vegetarian burrito bowls start with simple, fresh ingredients. First, you need brown rice. It serves as a hearty base. The black beans offer protein, while corn adds a sweet crunch. You can use fresh, frozen, or canned corn, depending on what you have.
Next, you’ll want colorful vegetables. Diced red bell pepper and zucchini bring color and nutrients. The cherry tomatoes add juiciness and freshness. Don’t forget the avocado; it adds creaminess and richness. Fresh cilantro on top gives a burst of flavor.
For seasoning, lime juice brightens the dish. Ground cumin and chili powder add warmth and depth. Use olive oil to sauté the veggies and tie it all together. Salt and pepper will enhance all the flavors.
Finally, you can customize your bowls with optional toppings. Crumbled feta or cheddar cheese can add a nice touch. A dollop of sour cream or Greek yogurt makes it even creamier.The mix of textures and flavors will surely delight your taste buds!
Step-by-Step Instructions
Preparing the Rice
Start by cooking 1 cup of brown rice according to the package instructions. Once it is ready, fluff it gently with a fork. This helps keep the rice light and fluffy. Set it aside to cool slightly while you prepare the other ingredients.
Sautéing the Vegetables
Grab a large skillet and heat 2 tablespoons of olive oil over medium heat. Add the diced red bell pepper and zucchini to the skillet. Sauté them for about 5 minutes. You want the vegetables to be tender and bright. This step adds a fresh taste to your burrito bowl.
Combining Ingredients
Next, mix in 1 cup of corn and 1 can of black beans, rinsed and drained. Add 1 teaspoon of ground cumin, 1 teaspoon of chili powder, and salt and pepper to taste. Stir everything together and continue cooking for an additional 3 to 4 minutes. This will heat all the ingredients through and blend their flavors.
Assembling the Bowl
Now it’s time to assemble your bowl! Start with a generous scoop of brown rice as the base. Then, spoon the warm vegetable and bean mixture over the rice. This layer adds a colorful and tasty touch. Top it off with halved cherry tomatoes, diced avocado, and chopped cilantro for a bright finish.
Adding Freshness
For that extra zing, squeeze the juice of 1 lime over the assembled bowl. This will enhance the flavors and make your dish feel fresh and vibrant.
Optional Garnishments
If you want to add a little indulgence, sprinkle crumbled feta or cheddar cheese on top. You can also serve it with a dollop of sour cream or Greek yogurt for creaminess. These optional garnishes make the dish even more delightful.
Tips & Tricks
Cooking Tips
– Make rice in advance for quicker assembly.
– Opt for fresh ingredients for better flavor.
When you prepare the rice ahead of time, it saves you a lot of stress. Just cook it the day before or even earlier in the week. Store it in the fridge, and it will be ready when you need it. Fresh ingredients, like ripe tomatoes and crisp bell peppers, really make a difference in taste. The brighter the colors, the better the flavor!
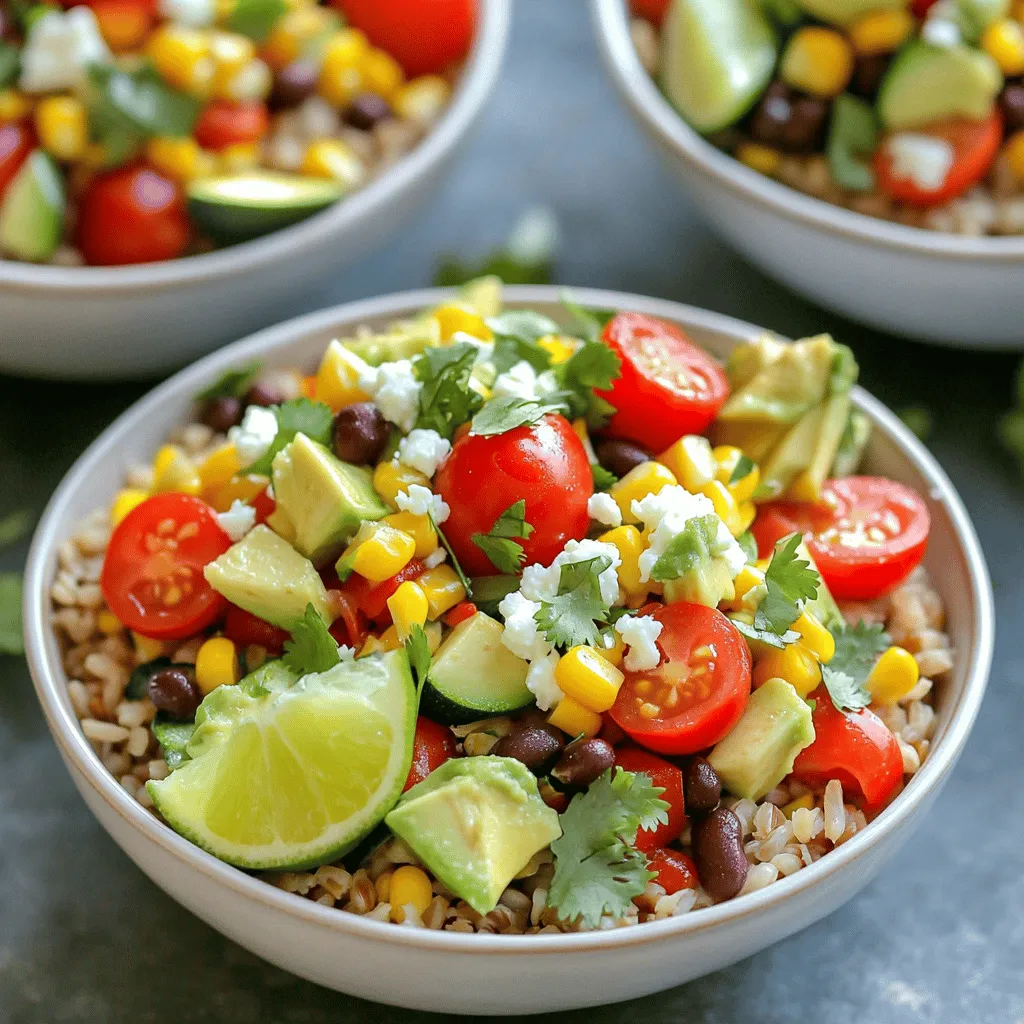
Presentation Suggestions
– Use wide, shallow bowls for serving.
– Arrange ingredients in sections for visual appeal.
Serving your burrito bowls in wide, shallow bowls helps everyone see all the delicious layers. When you arrange each ingredient in separate sections, it makes the meal look fancy and fun. You can even add lime wedges or a sprinkle of cilantro on top for an extra touch.
Flavor Enhancements
– Experiment with additional spices like paprika or cayenne.
– Add lime zest for an extra citrus kick.
If you want to spice things up, try adding paprika or cayenne. These spices can give your bowls a nice kick. For an extra burst of freshness, add lime zest. It brightens the dish and makes every bite more exciting.

Variations
Protein Additions
You can boost the protein in your burrito bowl easily. Grilled tofu adds a nice texture. It soaks up flavors well. Tempeh is another great choice. It has a nutty taste and is packed with protein. Both options are filling and tasty.
Lentils are a hearty substitute for meat. They are rich in fiber and protein. You can cook them quickly. Just add them to your veggie mix for an extra kick.
Grain Alternatives
Switching up your grains can change the whole dish. Quinoa is a fantastic choice. It’s fluffy and adds a nutty flavor. Cauliflower rice is a low-carb option. It gives a light and fresh feel to your bowl.
If you need a quick option, use white rice. It cooks faster and is always a crowd-pleaser.
Flavor Theme Variations
You can create different flavor profiles with a few tweaks. For a Mexican-style bowl, add jalapeños. They give a spicy kick. A chipotle sauce can add a smoky depth.
If you want a Mediterranean twist, try adding olives. Feta cheese complements the other flavors well. Both options open up new taste horizons.
Storage Info
Short-term Storage
Store leftover burrito bowls in airtight containers. This keeps the flavors fresh. You can refrigerate them for up to 3 days. Just make sure the lid is tight to prevent spills and keep them tasting great.
Freezing Instructions
For the best texture, freeze components separately. This way, your rice stays fluffy, and veggies stay crisp. You can store them in the freezer for up to 2 months. Just remember to label the containers with the date.
Reheating Tips
When you’re ready to enjoy your burrito bowls again, reheat them in the microwave or on the stovetop. If you use the microwave, add a splash of water. This little trick helps prevent drying out. Stir the mixture halfway through to heat evenly. Enjoy your delicious meal!
FAQs
Are vegetarian burrito bowls healthy?
Yes! Vegetarian burrito bowls are packed with nutrient-dense ingredients. Brown rice gives you fiber and energy. Black beans add protein and iron. Fresh veggies like bell peppers and zucchini bring vitamins. Avocado gives healthy fats. This mix makes a balanced meal.
Can I customize the ingredients in vegetarian burrito bowls?
Absolutely! You can swap or add vegetables as you like. Want more crunch? Toss in some shredded carrots or radishes. Prefer greens? Add spinach or kale. The options are endless. Make it your own!
How do I make vegetarian burrito bowls gluten-free?
To keep your burrito bowls gluten-free, check the labels. Ensure your beans and seasonings are certified gluten-free. Most canned beans are safe, but double-check. This way, everyone can enjoy your tasty dish.
What can I serve with vegetarian burrito bowls?
You can pair your burrito bowls with tasty sides. Tortilla chips add crunch and fun. Guacamole brings creaminess and flavor. A side salad makes it fresh and light. These sides enhance the whole meal experience.
How long do burrito bowls last in the fridge?
When stored properly, burrito bowls last for about 3 days. Use airtight containers to keep them fresh. If you want to eat them later, consider freezing some components. This keeps your meal ready for busy days.
This blog post covered everything you need for tasty vegetarian burrito bowls. We looked at key ingredients, from brown rice to fresh veggies. I shared step-by-step instructions for easy preparation and tips for storage and flavor.
Remember, you can mix and match ingredients to suit your taste. These bowls are simple, healthy, and fun to make. They can easily fit into any meal plan. Enjoy creating your own delicious burrito bowl!


![- 2 boneless, skinless chicken breasts - 1 teaspoon garlic powder - 1 teaspoon smoked paprika - 1 teaspoon dried oregano - Salt and freshly ground black pepper to taste - 1 tablespoon extra-virgin olive oil - 1 cup cooked quinoa or couscous - 1 cucumber, finely diced - 1 cup cherry tomatoes, halved - 1/2 red onion, paper-thin sliced - 1 cup creamy Greek yogurt - 2 tablespoons fresh dill, finely chopped - 1 tablespoon fresh lemon juice - Crisp lettuce leaves for serving - Medium-sized mixing bowl - Grill or grill pan - Spatula or tongs - Knife and cutting board - Serving bowls This simple list of ingredients and tools sets you up for a tasty meal. You can find the full recipe to guide you through each step. Start by making a simple rub. In a bowl, mix garlic powder, smoked paprika, dried oregano, salt, and pepper. Add olive oil to this mix. Rub it all over the chicken breasts. Make sure they are well-coated. For the best taste, let the chicken marinate for at least 30 minutes. If you have time, let it sit in the fridge overnight. This will make the chicken super tasty. While the chicken marinates, let’s make the tzatziki sauce. In a clean bowl, combine Greek yogurt, finely diced cucumber, chopped dill, and lemon juice. Stir well until everything blends nicely. Add a pinch of salt and pepper to taste. Set this aside. Letting it sit helps the flavors come together. Preheat your grill or grill pan to medium heat. Once it’s hot, place the marinated chicken breasts on the grill. Cook them for about 5-6 minutes on each side. You want the chicken to reach an internal temperature of 165°F (75°C). After grilling, take the chicken off the heat. Let it rest for about 5 minutes. This helps keep it juicy. After resting, slice the chicken into bite-sized pieces. Grab your serving bowls and start building your dish. Begin with a layer of cooked quinoa or couscous at the bottom. This will be the base of your bowl. Next, add the grilled chicken pieces on top of the quinoa. Then, layer on the diced cucumber, halved cherry tomatoes, and thinly sliced red onion. This adds a pop of color and flavor. Finally, drizzle the tzatziki sauce generously over everything. This brings a creamy contrast. If you like, add a handful of crisp lettuce leaves on top. This gives an extra crunch. Serve your Chicken Tzatziki Bowls in bright plates. It makes the dish look inviting. For a final touch, sprinkle some fresh dill on top and add a lemon wedge for extra zest. Enjoy your meal! To grill chicken that is juicy and flavorful, follow these tips: - Marinate Well: Use the spice rub with garlic powder, smoked paprika, and oregano. Let the chicken sit for at least 30 minutes. For best results, marinate overnight. - Use Medium Heat: Preheat your grill to a medium setting. This helps cook the chicken evenly without burning it. - Check Temperature: Use a meat thermometer to ensure the chicken reaches 165°F (75°C). This keeps it safe to eat. - Rest the Chicken: After grilling, let the chicken rest for 5 minutes. This keeps the juices inside. You can make tzatziki in different ways to suit your taste: - Add Spice: Mix in a pinch of cayenne or red pepper flakes for heat. - Use Different Herbs: Swap dill with mint or parsley for a fresh twist. - Try Other Veggies: Add grated carrots or chopped bell peppers for extra crunch. Presentation makes your Chicken Tzatziki Bowls shine. Here are some ideas: - Choose Colorful Bowls: Use deep plates to highlight the bright ingredients. - Layer Thoughtfully: Start with quinoa or couscous, then add chicken, veggies, and a drizzle of tzatziki. - Garnish: Add a sprinkle of fresh dill or a lemon wedge for a burst of color. These tips will help you create a delicious and beautiful meal that impresses everyone. For the complete recipe, check [Full Recipe]. {{image_4}} If you want a vegetarian twist, try using tofu or chickpeas. Tofu absorbs flavors well. Press and marinate it like the chicken. Cut it into cubes and grill or sauté until golden. Chickpeas also work great. Use canned or cooked chickpeas. Toss them in the same spices and roast in the oven. Both options are rich in protein and add a nice texture. You can swap grains in your Chicken Tzatziki Bowls for variety. Quinoa is high in protein and gluten-free. Couscous cooks quickly and is light on your stomach. Brown rice is hearty and adds fiber. Each grain brings a unique taste and texture. Try different grains each time for a fun twist! Add more fresh veggies to your bowl for color and crunch. Sliced bell peppers bring sweetness and crunch. Shredded carrots add a bright pop and extra nutrition. You can also use radishes for a peppery kick. Mix and match your favorites! This makes each bowl unique, fresh, and delicious. For the full recipe, check out the complete guide. After enjoying your Chicken Tzatziki Bowls, store leftovers in airtight containers. This keeps the chicken juicy and the veggies fresh. Place the chicken and veggies in one container. Store the tzatziki sauce in another. This helps prevent sogginess. You can keep the leftovers in the fridge for up to three days. To reheat the chicken, use a microwave or a skillet. If using a microwave, cover the chicken with a damp paper towel. This keeps moisture in and prevents it from drying out. Heat it for 30 seconds, check, and repeat if needed. If using a skillet, heat on low. Add a splash of water to keep it juicy. Cook until warmed through, about 3-4 minutes. Store your tzatziki sauce in a sealed container in the fridge. It stays fresh for about four days. If you notice extra water on top, just drain it off. Stir the sauce well before using it again. This keeps all the flavors mixed and tasty. For longer storage, you can freeze tzatziki in ice cube trays. Once frozen, transfer the cubes to a freezer bag. This way, you can enjoy it later in your Chicken Tzatziki Bowls or other dishes. If you don't have Greek yogurt, you can use regular yogurt. You can also try sour cream. Both will give a creamy texture, but they may taste a bit different. For a dairy-free option, use coconut yogurt or a blended cashew cream. These options keep the dish rich and tasty. You can marinate the chicken for at least 30 minutes. For better flavor, marinate it overnight. This gives the spices time to soak in. The longer, the better! Just keep it in the fridge to stay safe. Yes, you can make this dish ahead of time. Prepare the chicken and tzatziki sauce a day before. Store them in separate containers in the fridge. When you're ready to eat, just grill the chicken and assemble your bowls. It saves time and tastes fresh! Chicken Tzatziki Bowls taste great with various sides. Try a simple Greek salad with tomatoes and olives. Pita bread with hummus is also a good match. You can add roasted veggies or a light soup for extra flavor and nutrition. Yes, this dish is gluten-free if you use quinoa. Couscous is not gluten-free, so skip it if needed. Always check the labels on your ingredients to be sure. Enjoy this tasty meal without worry! This blog post covered how to make tasty Chicken Tzatziki Bowls. We explored essential ingredients, step-by-step instructions, and helpful tips. I shared fun variations, storage info, and answers to common questions. Now, you can impress your friends with this easy dish. Enjoy the fresh flavors and simple steps. With practice, you’ll make perfect bowls every time. Dive in and have fun in the kitchen!](https://goldendishy.com/wp-content/uploads/2025/06/3644d9ce-b609-47a4-b270-daf6d08e9407-768x768.webp)

![- 1 cup green or brown lentils, thoroughly rinsed - 1 tablespoon coconut oil - 1 medium onion, finely chopped - 3 garlic cloves, minced - 1-inch piece of fresh ginger, grated - 1 can (14 oz) full-fat coconut milk - 2 ripe tomatoes, diced - 1 tablespoon curry powder - 1 teaspoon ground cumin - 1 teaspoon ground turmeric - 1 cup vegetable broth (use low-sodium if preferred) - 2 cups fresh spinach or kale, chopped - Sea salt and freshly ground black pepper to taste - Fresh cilantro, chopped (for garnish, optional) To make this Easy Vegan Lentil Curry, you need a few key items. The lentils are the base. They bring protein and texture. I prefer green or brown lentils because they hold their shape well. Rinsing them removes dust and ensures you start with clean lentils. Next, the coconut oil adds a rich, creamy taste. It helps sauté the onion, garlic, and ginger. These three ingredients create a fragrant base. They add depth and warmth to the curry. Tomatoes add sweetness and acidity. They balance the creamy coconut milk perfectly. The spices—curry powder, cumin, and turmeric—bring warmth and flavor. They transform the dish into a vibrant, colorful meal. For added nutrition, I recommend spinach or kale. These greens are packed with vitamins. They also bring a lovely color to the curry. Finally, fresh cilantro adds a bright, fresh flavor. You can use it as a garnish or mix it in for extra taste. For the full recipe, check out the detailed instructions. This dish is not only simple but full of flavor! - Heat 1 tablespoon of coconut oil in a medium pot over medium heat. - Once the oil is hot, add 1 finely chopped onion. Sauté for about 5 minutes. The onion should become soft and clear. - Next, add 3 minced garlic cloves and 1-inch grated ginger. Cook for 1 to 2 minutes. You want the kitchen to smell amazing! - Now, add 2 diced tomatoes, 1 tablespoon of curry powder, 1 teaspoon of ground cumin, and 1 teaspoon of ground turmeric. - Stir and cook this mix for about 2 to 3 minutes. This step helps the spices release their lovely flavors and soften the tomatoes. - Add 1 cup of rinsed lentils to the pot. Then, pour in 1 can of full-fat coconut milk and 1 cup of vegetable broth. - Stir well to combine, then bring the mix to a gentle boil. Once it boils, turn the heat down and cover the pot. Let it simmer for 25 to 30 minutes. Check the lentils to see if they are tender and creamy. - After the lentils are cooked, fold in 2 cups of chopped spinach or kale. Cook for about 5 minutes. The greens should be bright and wilted. - Taste the curry and add sea salt and freshly ground black pepper to make it just right for you. For the full recipe, you can check out the details above. Enjoy your cooking! You can adjust spices to suit your taste. If you love heat, add more curry powder. A dash of lime juice brightens the dish. It adds a fresh twist that wakes up the flavors. To save time, use pre-cooked lentils. They cook faster and save you at least 20 minutes. Vegetable broth can boost flavor without much work. It gives your curry a rich taste. Serve your curry in shallow bowls. A sprinkle of cilantro on top creates a nice look. Pair it with fluffy rice or warm naan. This makes your meal more filling and fun to eat. For the full recipe, check out the details above. {{image_4}} You can change the type of lentils in your curry. - Red lentils cook faster and give a smoother texture. - Black or French lentils add more firmness and bite. Using different lentils can change the dish's look and feel. I find red lentils to be a great option for a quick meal. They break down nicely, making the curry creamy. Black lentils keep their shape, adding a nice texture. Spices can make your curry unique. - Try garam masala or chili powder for a spicy kick. - Fresh herbs like cilantro or mint can brighten the flavor. Experimenting with spices can lead to exciting new tastes. Garam masala adds warmth and depth, while chili powder can increase heat. Fresh herbs not only taste great but also add color to your dish. Adding extra vegetables boosts nutrition and flavor. - Carrots or bell peppers add sweetness and crunch. - Swap kale for other leafy greens like Swiss chard. Incorporating more veggies is a fun way to customize your curry. Carrots add a lovely sweetness, while bell peppers bring crunch and color. Swiss chard can be a great substitute for kale and offers a different taste profile. To keep your Easy Vegan Lentil Curry fresh, store leftovers in an airtight container. This method helps maintain flavor and texture. You can keep it in the fridge for up to 4 days. If you want to save it for later, freeze portions for up to 3 months. Just make sure to label the container with the date. When you're ready to enjoy your curry again, reheat it on the stove. Add a splash of vegetable broth to keep it creamy and delicious. Stir it often to ensure even heating. If you're in a hurry, you can microwave it too. Do this in short bursts, stirring frequently to avoid hot spots. Always check for signs of spoilage before eating. Look for any off smells or changes in color. If your curry looks or smells strange, it’s best to discard it. Safety first! Enjoy your meal knowing you stored it well. For the full recipe, check out the earlier sections. - Prep time: 10 minutes, Total time: 40 minutes Making this curry is quick and easy. You will spend about 10 minutes getting ready. Cooking takes an additional 30 minutes. This means you can enjoy a tasty meal in just 40 minutes! - Yes, the flavors meld nicely if made a day ahead You can make this curry in advance. If you prepare it a day before, the flavors will blend well. This makes the dish even tastier when you eat it later. - Great with rice, quinoa, or naan for a hearty meal This curry pairs perfectly with many side dishes. Rice is a classic choice, but quinoa works well too. You can also serve it with warm naan for a filling meal. - Yes, all ingredients are naturally gluten-free You will be glad to know this recipe is gluten-free. All the ingredients, like lentils and coconut milk, do not contain gluten. This makes it a safe choice for anyone avoiding gluten. For the full recipe, check out the [Full Recipe]. This Easy Vegan Lentil Curry is tasty and simple to make. You learned about the main ingredients, step-by-step instructions, flavor tips, and storage info. Customization options, like different lentils and spices, let you make it your own. This dish is perfect for meal prep and serving with rice or naan. Remember to store leftovers properly and watch for spoilage signs. Enjoy this dish that is not only healthy but full of flavor! You will love experimenting with it for your next meal.](https://goldendishy.com/wp-content/uploads/2025/06/33b3e4d2-4af0-4f09-8df6-36adfea2fbd1-768x768.webp)
