Teriyaki Salmon Bowls Fresh and Flavorful Meal Idea

Are you looking for a fresh and flavorful meal that’s easy to make? Teriyaki Salmon Bowls are packed with taste and nutrition, perfect for any night of the week. In this guide, I’ll walk you through the simple steps to create a delightful dish that includes tender salmon, vibrant vegetables, and aromatic rice. Let’s dive into the ingredients and get your cooking started!
Why I Love This Recipe
- Fresh Ingredients: This recipe highlights the freshness of salmon and vibrant vegetables, making it not only healthy but also visually appealing.
- Quick and Easy: With a total preparation time of just 25 minutes, this dish is perfect for busy weeknights when you want a satisfying meal without the fuss.
- Flavorful Sauce: The homemade teriyaki sauce adds a delightful sweetness and umami flavor that perfectly complements the salmon and vegetables.
- Customizable: You can easily swap out the vegetables or add your favorite toppings, making it a versatile dish that can be adapted to your taste.
Ingredients
Fresh Ingredients for Teriyaki Salmon
– 2 fresh salmon fillets
– 1 cup cooked jasmine rice
– 1 cup broccoli florets
– 1 red bell pepper, thinly sliced
– 1 medium carrot, peeled and julienned
Essential Sauces and Oils
– 3 tablespoons low-sodium soy sauce
– 2 tablespoons honey
– 1 tablespoon rice vinegar
– 1 tablespoon sesame oil
Garnishes and Extras
– 2 green onions, finely chopped
– Sesame seeds for garnish
– Lime wedge (optional)
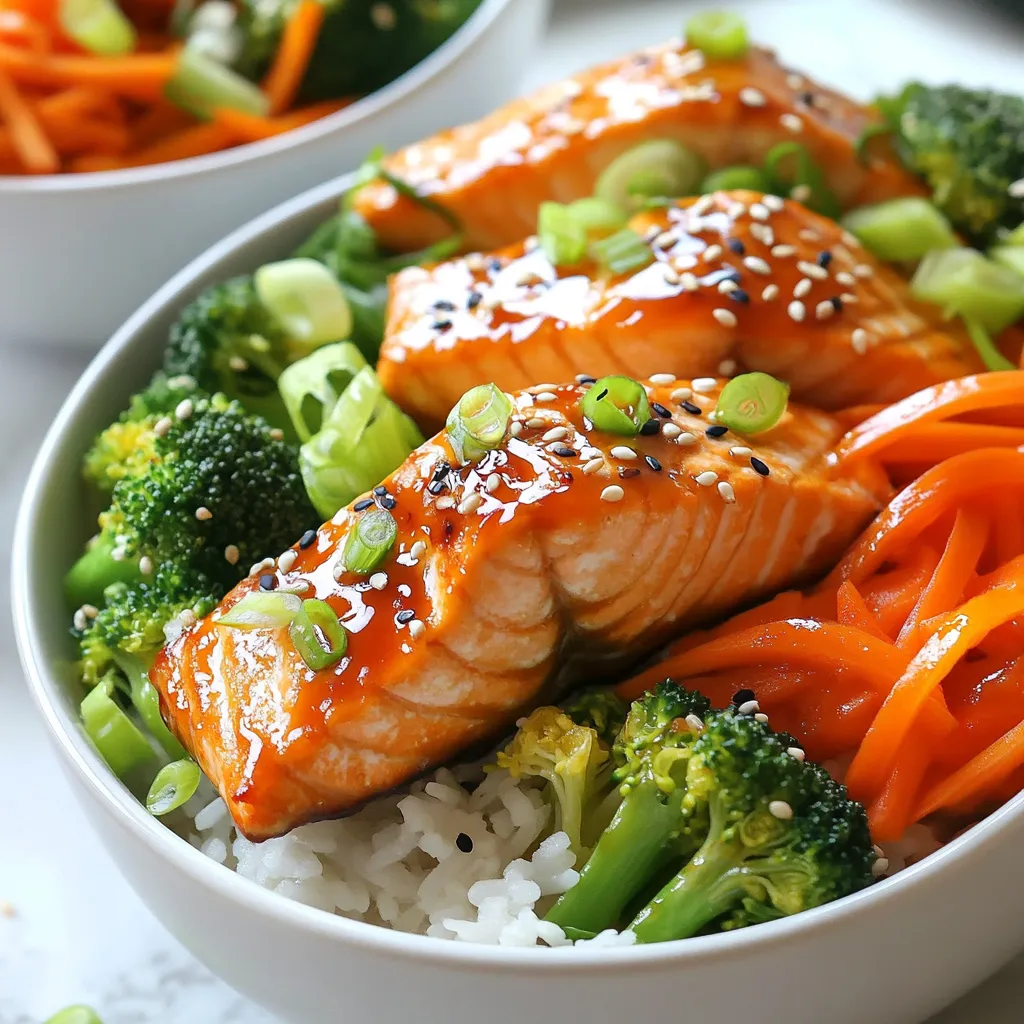
In this tasty dish, fresh salmon is the star. You want good-quality salmon fillets for the best flavor. I love using bright, crisp vegetables like broccoli, red bell pepper, and carrot. They add color and crunch. Cook jasmine rice to create the perfect base for your bowl.
The teriyaki sauce combines soy sauce, honey, rice vinegar, and sesame oil. This mix brings a sweet and savory taste that pairs well with salmon. The garnishes are a must. Chopped green onions and sesame seeds give the dish a lovely finish. A lime wedge adds a zesty kick, making each bite even better. Enjoy this fresh and flavorful meal idea!

Step-by-Step Instructions
Preparing the Teriyaki Sauce
To start, grab a small mixing bowl. In it, whisk together these ingredients:
– 3 tablespoons low-sodium soy sauce
– 2 tablespoons honey
– 1 tablespoon rice vinegar
– 1 teaspoon minced garlic
– 1 teaspoon freshly grated ginger
Mix them well until everything blends. Set this teriyaki sauce aside for later use.
Cooking the Salmon
Next, heat 1 tablespoon of sesame oil in a non-stick skillet over medium heat. When the oil is hot, gently place the salmon fillets skin-side down in the pan. Let them cook undisturbed for about 4 to 5 minutes. This helps the skin get nice and crispy.
After that, carefully turn the salmon fillets over. Pour half of the teriyaki sauce over the top of the fish. Cook for another 3 to 4 minutes. Make sure to baste the salmon with the sauce a few times. It will be done when the fish flakes easily with a fork.
Steaming the Vegetables
While the salmon cooks, prepare your veggies. Take 1 cup of broccoli florets, 1 red bell pepper (thinly sliced), and 1 medium carrot (peeled and julienned). Place them in a pot to steam. Steam the vegetables for about 5 minutes. You want them to be tender but still vibrant in color.
Assembling the Bowls
Now it’s time to put everything together. Start by placing ½ cup of cooked jasmine rice into each bowl. This will be your warm base.
On top of the rice, arrange the steamed vegetables to make the bowl colorful. Then, add a salmon fillet on top of the vegetables in each bowl. Finally, drizzle the remaining teriyaki sauce over everything.
To finish, sprinkle chopped green onions and sesame seeds on top. This adds flavor and a nice crunch. Enjoy creating this fresh and delicious teriyaki salmon bowl!
Tips & Tricks
Perfecting the Salmon
To cook salmon well, timing is key. If your fillets are thick, cook them longer. Thinner fillets need less time. Generally, you should cook salmon for about 4-5 minutes on one side and 3-4 minutes on the other.
For crispy skin, start by placing the salmon skin-side down in a hot pan. Don’t move it for the first few minutes. This helps the skin get nice and crunchy.
Enhancing Flavor
To boost flavor, try adjusting the teriyaki sauce. Add more honey for sweetness, or more soy sauce for saltiness. You can also make it spicy by adding fresh minced ginger and garlic. Both bring warmth and depth to your dish.
Presentation Ideas
When you serve your bowls, think about how they look. Place the jasmine rice in the center. Then, layer the colorful veggies on one side and the salmon on the other. Drizzle with teriyaki sauce for a shiny finish.
For extra flair, add sesame seeds and chopped green onions on top. A lime wedge on the side adds a pop of color and flavor. Enjoy the vibrant look of your meal!
Pro Tips
- Fresh Salmon Selection: Choose bright pink salmon fillets with firm flesh and a clean ocean smell for the best flavor and texture.
- Perfectly Cooked Salmon: Cook the salmon skin-side down for a crispy texture and only flip it once to keep it intact and moist.
- Colorful Veggies: For an appealing look, use a variety of colorful vegetables and arrange them in a pattern on the rice.
- Extra Sauce Option: If you love a saucier dish, double the teriyaki sauce recipe to drizzle more over your bowl.

Variations
Alternative Proteins
You can switch salmon for chicken or tofu. Chicken thighs work well and have rich flavor. For a plant-based option, try firm tofu.
– Cooking chicken: Sear it in sesame oil until golden. Cook until it reaches 165°F.
– Cooking tofu: Press to remove water, then cut into cubes. Sauté in oil and add teriyaki sauce.
These swaps give you tasty options for every diet.
Vegetable Substitutes
Feel free to add other vegetables to your bowls. Snap peas, zucchini, or bok choy are great choices. You can also use seasonal veggies.
– Spring: Asparagus or peas add freshness.
– Summer: Grilled corn or cherry tomatoes enhance color.
– Fall: Roasted squash or Brussels sprouts add hearty flavor.
Using seasonal vegetables keeps your dish vibrant and nutritious.
Sauce Variations
You can spice up your teriyaki sauce. Adding chili paste gives it a kick. Mix in a teaspoon for a fiery touch.
For those avoiding gluten, try tamari instead of soy sauce. It has a similar taste and works well in this recipe.
These simple changes keep your meal interesting and full of flavor.
Storage Info
Best Practices for Refrigeration
To store leftover salmon bowls, let them cool first. Place them in an airtight container. This keeps them fresh and tasty. A good rule is to eat them within three days. The salmon stays good for about two days. The rice and veggies can last up to three days.
Reheating Tips
When you reheat salmon, you want to keep it moist. The stovetop method works best. Heat a small pan over low heat. Add a splash of water and cover. This creates steam and warms the salmon gently. If you use a microwave, heat in short bursts. Cover the bowl to keep moisture in. Check often to avoid drying out.
Freezing Guidelines
Yes, you can freeze teriyaki salmon bowls! However, it is best to freeze components separately. The salmon can last up to three months in the freezer. The rice and veggies also freeze well for about two months. To freeze, wrap each item tightly in plastic wrap. Then, place them in freezer bags. When ready to eat, thaw in the fridge overnight before reheating.
FAQs
What to serve with Teriyaki Salmon Bowls?
You can enhance your Teriyaki Salmon Bowls with tasty side dishes. Here are some ideas:
– Edamame for a protein boost.
– Seaweed salad for a fresh crunch.
– Pickled vegetables for a tangy kick.
– Sliced cucumbers for a cool contrast.
For drinks, try these pairings:
– Green tea for a soothing sip.
– Sparkling water with lemon for a refreshing lift.
– Light beer for a touch of malt.
How to adjust the recipe for more servings?
To make more servings, simply scale up your ingredients. Here’s how:
– Use twice the amount of salmon and rice for four servings.
– Double the vegetables for a colorful mix.
Keep an eye on cooking time. Larger portions may need a few extra minutes. Always check your salmon with a fork to see if it flakes easily.
Can I make this recipe in advance?
Yes, you can prep this recipe ahead of time. Here are some meal prep tips:
– Cook the salmon and veggies, then store them in separate containers.
– Prepare the rice and let it cool before storing.
To store, keep each component in airtight containers. They stay fresh in the fridge for up to three days.
For reheating, use the microwave on low power. You can also reheat on the stovetop. Just add a splash of water to keep things moist.
You now know how to make teriyaki salmon bowls. We covered fresh ingredients, essential sauces, and how to cook everything perfectly. Remember to adjust flavors and use different proteins or veggies if you like. Storing and reheating your meals properly keeps them tasty. This dish is easy to customize and share. Enjoy making and eating i

Savory Teriyaki Salmon Bowls
Ingredients
- 2 fillets fresh salmon
- 1 cup cooked jasmine rice
- 1 cup broccoli florets
- 1 piece red bell pepper, thinly sliced
- 1 medium carrot, peeled and julienned
- 1 tablespoon sesame oil
- 3 tablespoons low-sodium soy sauce
- 2 tablespoons honey
- 1 tablespoon rice vinegar
- 1 teaspoon minced garlic
- 1 teaspoon freshly grated ginger
- 2 green onions finely chopped
- to taste sesame seeds for garnish
Instructions
- Begin by preparing the teriyaki sauce: In a small mixing bowl, whisk together the soy sauce, honey, rice vinegar, minced garlic, and freshly grated ginger until well combined. Set this mixture aside for later use.
- Heat the sesame oil in a non-stick skillet over medium heat. Once the oil is hot, gently place the salmon fillets skin-side down into the pan. Allow them to cook undisturbed for 4-5 minutes, letting the skin crisp up beautifully.
- Carefully turn the salmon fillets over, then pour half of the prepared teriyaki sauce over the top. Continue cooking for an additional 3-4 minutes, occasionally basting the salmon with the sauce, until the fish is cooked through and flakes easily when tested with a fork.
- While the salmon cooks, take a separate pot and steam the broccoli florets along with the sliced red bell pepper and julienned carrot. Steam for about 5 minutes, or until the vegetables are tender yet retain their vibrant colors.
- To assemble the bowls, start by placing ½ cup of cooked jasmine rice into each bowl, forming a warm base for the other ingredients.
- On top of the rice, arrange a portion of the steamed vegetables, ensuring a colorful and appealing presentation.
- Add a salmon fillet atop the vegetables in each bowl, then drizzle with the remaining teriyaki sauce to enhance flavor.
- Finish off by sprinkling each bowl with the chopped green onions and a generous pinch of sesame seeds for an added layer of crunch and flavor.


![For this soup, fresh broccoli is key. Use about 4 cups of broccoli florets, roughly chopped. This gives the soup its vibrant green color and healthy crunch. You also need 1 medium onion, finely chopped, and 2 cloves of garlic, minced. These aromatics build a rich flavor base. Dairy makes this soup creamy and rich. You will need 1 cup of heavy cream. If you prefer a lighter option, substitute with coconut cream. For the broth, use 3 cups of low-sodium vegetable broth. This adds depth without overpowering the other flavors. Seasonings elevate the taste of your soup. Use 1 teaspoon of garlic powder and 1/2 teaspoon of onion powder. Don’t forget to add salt and freshly ground black pepper to taste. If you want a crunchy finish, top your soup with toasted croutons. They add a delightful texture and flavor contrast. This combination of ingredients creates a comforting, flavorful Broccoli Cheddar Soup. For a complete guide, check the Full Recipe. Start by melting the butter in a large pot over medium heat. Add the finely chopped onion. Sauté for about five minutes. You want the onion to be soft and clear. Next, add the minced garlic and cook for one to two minutes. This will make your kitchen smell amazing! Be careful not to burn the garlic. Now it’s time for the broccoli. Add the roughly chopped florets to the pot. Sauté them for about three to four minutes. This helps them soften a bit before the next step. Pour in the vegetable broth and raise the heat to bring it to a boil. Once boiling, reduce the heat to a simmer. Let it cook for about ten to twelve minutes until the broccoli is tender. After the broccoli is tender, it’s blending time! Use an immersion blender right in the pot. If you have a regular blender, transfer the soup in batches. Just be careful with the hot liquid. Blend until smooth. Return the soup to the pot and stir in the heavy cream, keeping the heat low. Slowly add the shredded sharp cheddar cheese. Stir until it melts and mixes well. Finally, add garlic powder and onion powder, and season with salt and pepper. Let it warm for a few more minutes. Serve your soup hot, and add toasted croutons if you like. Enjoy this cheesy broccoli bliss! You can find the full recipe above. To get that creamy feel, blend the soup well. Use an immersion blender for ease. If you want a chunkier soup, blend only half. This keeps some broccoli bits for a nice bite. Make sure to blend until smooth. This step makes all the difference in your final dish. Add more depth to your soup by using fresh herbs. Parsley or thyme brings bright notes. You can also toss in a dash of nutmeg for warmth. Adjust the salt and pepper to your taste. A squeeze of lemon juice can brighten flavors, too. Experiment with these extras until you find your favorite mix. Store leftover soup in an airtight container. It will keep well in the fridge for up to three days. Reheat gently on the stove to avoid curdling the cream. If you freeze it, leave out the cheese. Add it back when you reheat for the best flavor. Store in portions to make it easy to enjoy later. {{image_4}} You can make a vegan version of this soup. Replace the heavy cream with coconut cream. Use nutritional yeast instead of cheddar cheese. This option keeps the cheesy flavor while being dairy-free. Blend the soup until smooth, just like the original. You can still enjoy that creamy texture without any animal products. For a low-carb soup, swap the heavy cream for cauliflower. Cook the cauliflower with the broccoli, then blend it all together. This change cuts carbs while keeping the soup rich and hearty. You can also use a low-carb cheese to enhance the flavor without adding too many carbs. Want to boost the protein? Add cooked chicken or beans. They pair well with the flavors of broccoli and cheese. You can also toss in other veggies like carrots or spinach. This adds color and nutrients to your soup. Just make sure to cook them until tender before blending. For the full recipe, check out the main article. A serving of broccoli cheddar soup contains about 350 calories. The calorie count may vary based on the ingredients you use. For instance, using heavy cream adds more calories than coconut cream. If you add croutons, that will increase the total calories too. This soup packs a punch of nutrients. Here are some key nutrients you get in each serving: - Protein: About 12 grams, mostly from cheese and cream. - Fat: Approximately 25 grams, primarily from cheddar and cream. - Carbohydrates: Around 20 grams, mainly from broccoli and onion. - Fiber: Offers about 4 grams, thanks to the broccoli. Broccoli is more than just tasty. It is a superfood! Here are some reasons to love it: - Rich in Vitamins: It's high in vitamins C and K. - Antioxidants: Broccoli has powerful antioxidants. They help fight free radicals in your body. - Supports Digestion: The fiber helps keep your digestive system healthy. - Boosts Immunity: Eating broccoli may help strengthen your immune system. This nutritional information shows why broccoli cheddar soup is a great choice for a meal. It is not just delicious; it also nourishes your body. To store leftover broccoli cheddar soup, let it cool first. Then, pour it into an airtight container. It keeps well in the fridge for about three to four days. When you want to eat it, just reheat it on the stove or in the microwave. Stir well to mix the flavors again before serving. Yes, you can freeze broccoli cheddar soup. First, let it cool down completely. Then, place it in a freezer-safe container. Make sure to leave some space at the top, as the soup will expand when frozen. It can last for about three months in the freezer. To use, thaw it overnight in the fridge and reheat gently. To make broccoli cheddar soup gluten-free, use gluten-free broth. Most vegetable broths are gluten-free, but always check the label. Also, use cornstarch instead of flour if you want to thicken it. Just mix cornstarch with a little water before adding it to the soup. This way, you will enjoy a creamy soup without gluten. For the full recipe, check out [Full Recipe]. This blog covered how to make a tasty broccoli cheddar soup. We discussed key ingredients, including fresh broccoli and flavor-packed aromatics. I outlined helpful steps for cooking and blending the soup. You learned tips for great texture and flavor as well as how to store leftovers. Try variations like vegan options or low-carb versions to fit your needs. Broccoli brings healthy nutrients, making this soup a smart choice. Enjoy this dish, knowing you can customize it just the way you like!](https://goldendishy.com/wp-content/uploads/2025/06/c21049f2-ac49-4cf8-bdd7-9e479da09cd5-768x768.webp)


. Start by gathering all your ingredients. You will need chicken, garlic, lemon juice, and spices. If you use wooden skewers, soak them in water for at least 30 minutes. This step helps keep them from burning on the grill. In a large bowl, mix the minced garlic, lemon juice, lemon zest, olive oil, smoked paprika, cayenne pepper, ground cumin, salt, and pepper. Whisk these together until they blend well. Then add the chicken cubes. Make sure each piece is coated in the marinade. Cover the bowl and place it in the fridge. Let it marinate for at least 1 hour, or longer if you have time. This will add great flavor to the chicken. Preheat your grill to medium-high heat. If you use a grill pan, heat it over medium on the stove. Once your chicken has marinated, thread the pieces onto the skewers. Leave a small space between each piece. This helps the chicken cook evenly. Grill the skewers for about 10 to 12 minutes. Turn them often to get nice grill marks. Check that the chicken reaches an internal temperature of 165°F (75°C). After grilling, let the skewers rest for a few minutes. This keeps the juices inside. Finally, garnish with fresh parsley before serving. This adds a nice touch to your dish. For the full recipe, check the instructions above. To get the best flavor, use fresh ingredients. Fresh garlic and lemon juice give a bright taste. When mixing the marinade, let the spices blend well. They create a rich flavor. Don't rush the marinating. Allow at least one hour, or better yet, overnight. This soaking time lets the chicken absorb all those tasty flavors. Adjust the cayenne pepper based on your spice level. This way, you can make the dish mild or fiery to fit your taste. One common mistake is not soaking wooden skewers. If you skip this step, they can burn on the grill. Always soak them for at least thirty minutes. Another mistake is overcrowding the skewers. Leave some space between the chicken pieces. This helps them cook evenly. Also, don't rush the resting time after grilling. Letting them rest keeps the juices inside, making the chicken juicy. To make your skewers look great, use a large serving platter. Arrange the skewers neatly. Add fresh lemon wedges around them for color. A sprinkle of chopped parsley on top makes it more inviting. For an extra treat, serve with a yogurt dip or tzatziki. This adds creaminess and coolness to the spicy flavors. These simple steps can elevate your dish and impress your guests. For the complete guide on making these skewers, check the Full Recipe. {{image_4}} You can swap chicken for other proteins. Try shrimp for a quick cook. Beef or pork also works well. Just adjust your cooking time to avoid overcooking. Fish, like salmon, can add a rich flavor. Each protein brings its own taste. For a vegetarian version, use firm tofu. It soaks up flavors well. You can also try mushrooms for a meaty texture. Bell peppers, zucchini, and cherry tomatoes make colorful additions. For a vegan option, skip the chicken and keep the marinade. Mix things up with different marinades. Try adding soy sauce or ginger for an Asian twist. A spicy chili paste can add heat. For a Mediterranean flair, use herbs like oregano and thyme. Experiment with what you like for new tastes. For the full recipe, check out the details above. After enjoying your spicy lemon garlic chicken skewers, let any leftovers cool down. Place them in an airtight container. Store them in the fridge for up to three days. This keeps the chicken fresh and tasty for later meals. To reheat the chicken skewers, preheat your oven to 350°F (175°C). Place the skewers on a baking sheet. Heat for about 10-15 minutes or until they are warm. You can also use a microwave. Heat them on medium power for 1-2 minutes. This way, the chicken stays juicy and delicious. If you want to save the skewers for later, freezing is a great option! Wrap each skewer in plastic wrap or aluminum foil. Place them in a freezer-safe bag. They can last up to three months in the freezer. When you are ready to eat them, thaw them in the fridge overnight. Then, reheat as mentioned above for a tasty meal. For the full recipe, check out the link! You should marinate chicken for at least 1 hour. For the best taste, let it sit overnight. This longer time allows the flavors to soak in well. The garlic and lemon will really shine through. Just remember, the longer the chicken sits in the marinade, the more flavorful it becomes. Yes, you can cook these skewers in the oven. Preheat your oven to 400°F (200°C). Line a baking sheet with foil for easy cleanup. Place the skewers on the sheet and bake for about 15-20 minutes. Make sure to turn them halfway through for even cooking. Check that the chicken reaches 165°F (75°C) inside. These skewers go great with many side dishes. Here are some tasty options: - Grilled vegetables like bell peppers and zucchini - A fresh green salad with lemon vinaigrette - Rice or quinoa to soak up the juices - Garlic bread for a crunchy contrast Each of these sides will add a nice balance to the meal. To change the spice level, simply adjust the cayenne pepper. For less heat, use half a teaspoon or skip it. If you want more spice, add an extra teaspoon. You can also use spicy marinades or hot sauce for extra kick. Always taste as you go, so you can find your perfect level of heat. For the full recipe, check the earlier section. Enjoy cooking! You learned how to make Spicy Lemon Garlic Chicken Skewers. We covered the main ingredients, marinade, and garnishes. I provided step-by-step instructions for grilling. You also got tips for perfect flavor and common mistakes to avoid. There are variations, like using different proteins and marinades. Lastly, I shared storage info and answered key FAQs. Try these skewers for your next cookout. Enjoy the bold flavors and easy prep!](https://goldendishy.com/wp-content/uploads/2025/06/b1f94ef8-81fb-4621-8ae2-1513b5b656e4-768x768.webp)