Sweet Potato Hash with Eggs Tasty Breakfast Treat

Are you ready to wake up to a delicious breakfast that’s both healthy and filling? Sweet potato hash with eggs is your new go-to meal. This vibrant dish combines sweet potatoes, veggies, and eggs for a tasty start to your day. I’ll guide you through easy steps, helpful tips, and fun variations. Let’s dive into making this tasty breakfast treat that will keep you energized all morning!
Why I Love This Recipe
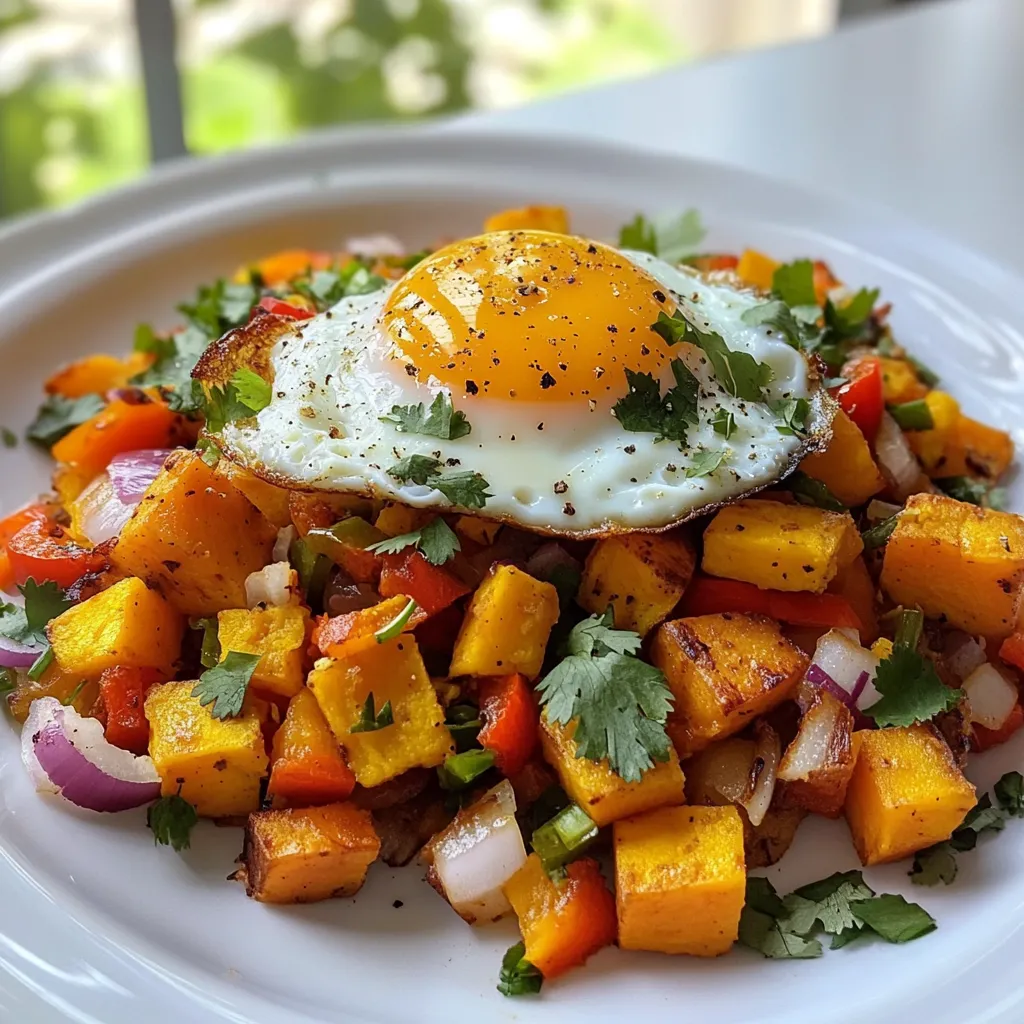
- Healthy and Nutritious: This Sweet Potato Sunrise Hash is packed with vitamins and minerals, making it a wholesome meal option any time of day.
- Easy to Make: With simple ingredients and straightforward instructions, this recipe is perfect for both beginners and seasoned cooks alike.
- Customizable: You can easily modify this dish by adding your favorite vegetables or proteins, making it versatile for any palate.
- Beautiful Presentation: The vibrant colors of the sweet potatoes, peppers, and eggs make for an eye-catching dish that’s sure to impress.
Ingredients
List of Ingredients
– 2 large sweet potatoes, peeled and diced into ¾-inch cubes
– 1 red bell pepper, chopped into bite-sized pieces
– 1 yellow bell pepper, chopped into bite-sized pieces
– 1 small red onion, diced finely
– 2 cloves garlic, minced
– 4 large eggs
– 2 tablespoons extra virgin olive oil
– 1 teaspoon smoked paprika
– Salt and freshly cracked black pepper, to taste
– Fresh cilantro, chopped (for garnish)
– Avocado slices (optional, for serving)
Sweet potatoes are the star of this dish. They bring sweetness and a soft texture. The bell peppers add color and crunch. Red onion gives a nice bite, and garlic adds depth. You’ll need eggs to make this a hearty meal. Olive oil is essential for cooking and adds flavor. Smoked paprika gives warmth and a hint of smoke. Season with salt and pepper to enhance the taste. Fresh cilantro on top adds brightness. If you want, add avocado slices for creaminess. This mix of ingredients makes the hash bright and tasty!

Step-by-Step Instructions
Preparing the Sweet Potatoes
1. Start by heating the olive oil in a large non-stick skillet over medium heat. It takes about 1-2 minutes to warm the oil.
2. Once the oil is hot, add the diced sweet potatoes. Sauté them for 10-15 minutes. Stir occasionally. You want them tender with a nice golden-brown color.
Adding Vegetables
1. Now, add the finely diced red onion, bite-sized red and yellow bell peppers, and minced garlic to the skillet.
2. Cook these veggies for another 5-7 minutes. Stir often until they soften and smell great.
3. Sprinkle in the smoked paprika, salt, and freshly cracked black pepper. Stir well to mix the spices.
Cooking the Eggs
1. Next, create four small wells in the sweet potato mix using the back of a spoon.
2. Carefully crack an egg into each well. Cover the skillet with a lid.
3. Cook the eggs for 5-8 minutes for runny yolks. Cook longer if you prefer fully cooked yolks.
4. Once done, take the skillet off the heat. Sprinkle chopped cilantro on top for a fresh touch.
Tips & Tricks
Enhancing Flavor
To boost the taste of your sweet potato hash, use spices like smoked paprika and fresh herbs. Smoked paprika gives a warm, smoky flavor that pairs well with sweet potatoes. Fresh cilantro adds a bright note. Always taste as you cook. Proper seasoning brings out the best flavors in your dish. You can also try adding cumin or chili powder for a spicy kick.
Achieving Perfectly Cooked Eggs
Cooking eggs perfectly can be tricky. If you want runny yolks, cover the skillet and cook for 5-8 minutes. Check the eggs often to avoid overcooking. For hard yolks, let them cook a few minutes longer. Adjust the cooking time based on your preference. Remember, the eggs will continue to cook a bit after you remove them from heat.
Presentation Ideas
Presentation matters. Serve your sweet potato hash in bowls for a cozy feel. Sprinkle extra cilantro on top for color and flavor. You can also add avocado slices for creaminess. A wedge of lime on the side adds a zesty touch. This enhances the dish’s look and makes it more inviting. Enjoy sharing this colorful breakfast with friends and family!
Pro Tips
- Choose the Right Sweet Potatoes: Select firm, unblemished sweet potatoes for the best texture and flavor. Look for those with smooth skin and avoid any with soft spots or wrinkles.
- Adjust Spice Level: If you enjoy a bit of heat, consider adding a pinch of cayenne pepper or some chopped jalapeños along with the garlic for a spicy kick.
- Egg Cooking Technique: For perfectly runny yolks, cover the skillet with a lid while the eggs cook. This traps steam, helping the tops of the eggs cook without overcooking the whites.
- Make it a Meal Prep: This hash is great for meal prep! You can make a large batch and store portions in the fridge for up to 4 days, reheating them in the microwave or skillet when ready to eat.

Variations
Ingredient Swaps
You can change up the veggies in sweet potato hash. Try adding zucchini or spinach. These options give you different tastes and textures. You can also use different colors of bell peppers. They add more sweetness and crunch.
If you want to switch out eggs, consider tofu or chickpeas. They bring protein and keep the dish filling. You can scramble or sauté them for a hearty alternative.
Dietary Modifications
For a vegetarian twist, keep the eggs and use vegetable broth instead of oil. This adds flavor without meat. You can also go vegan by skipping the eggs and using tofu. Just season the tofu well for a tasty meal.
Make sure to check for hidden animal products in store-bought ingredients. This way, your dish stays vegan or vegetarian.
Flavor Profiles
Spices and herbs can change the flavor of your hash. Add cumin or chili powder for a kick. Fresh herbs like parsley or thyme can brighten the dish. You can also use Italian seasoning for a different vibe.
Don’t forget about garlic! It adds depth to every bite. Experiment with what you love to create your best version of sweet potato hash.
Storage Info
Leftover Storage
To keep your sweet potato hash fresh, store leftovers in an airtight container. Let the dish cool down first. Place it in the fridge within two hours of cooking. This will help prevent bacteria growth. Leftovers can stay good for up to three days. Always label the container with the date. This way, you know when to use it.
Reheating Guidelines
When you’re ready to eat the leftovers, reheat them gently. Use a skillet over medium heat. Add a splash of olive oil to keep it moist. Stir occasionally to heat evenly. If you want to use the microwave, cover the dish with a damp paper towel. This keeps moisture in and helps it reheat well. Aim for a temperature of 165°F to ensure it’s hot enough.
Freezing Recommendations
If you want to freeze sweet potato hash, it’s best to do it before adding the eggs. Cool the hash completely, then transfer it to a freezer-safe bag. Remove as much air as possible before sealing. The hash can last up to three months in the freezer. When you are ready to eat it, thaw it overnight in the fridge. Then, reheat it in a skillet and add fresh eggs as desired.
FAQs
Can I make Sweet Potato Hash with Eggs in advance?
Yes, you can make Sweet Potato Hash with Eggs ahead of time. This dish is great for meal prep. To do this, follow these steps:
– Cook the hash: Prepare the sweet potato and veggie mix as usual.
– Cool it down: Let it cool completely before storing.
– Store in the fridge: Place it in an airtight container for up to 4 days.
– Reheat it: Warm it in a skillet or microwave.
This way, you can enjoy a quick and tasty breakfast on busy mornings. Just crack the eggs fresh when you’re ready to eat.
What can I substitute for sweet potatoes?
If you can’t find sweet potatoes, there are great alternatives:
– Regular potatoes: Use Yukon Gold or red potatoes for a similar texture.
– Butternut squash: This adds a sweet flavor and holds up well.
– Cauliflower: For a lower carb option, use riced cauliflower.
These swaps cater to different diets while keeping the dish tasty.
Are there any other ways to serve this dish?
Absolutely! Here are some fun serving ideas:
– Top with cheese: Add shredded cheese before serving for extra richness.
– Use tortillas: Serve in warm tortillas for a breakfast burrito.
– Add hot sauce: A drizzle of your favorite hot sauce can spice things up.
Feel free to mix and match these ideas for a fun twist!
This article covered making a tasty sweet potato hash with eggs. We explored the key ingredients, from sweet potatoes to spices. I provided easy steps to cook it perfectly, ensuring great taste. You learned tips for flavor and presentation, plus variations for different diets. Finally, I discussed how to store and reheat leftovers.
Remember, this dish is flexible and fun. Enjoy creating your unique versio

Sweet Potato Sunrise Hash with Eggs
Ingredients
- 2 large sweet potatoes, peeled and diced into ¾-inch cubes
- 1 medium red bell pepper, chopped into bite-sized pieces
- 1 medium yellow bell pepper, chopped into bite-sized pieces
- 1 small red onion, diced finely
- 2 cloves garlic, minced
- 4 large eggs
- 2 tablespoons extra virgin olive oil
- 1 teaspoon smoked paprika
- to taste salt and freshly cracked black pepper
- to taste fresh cilantro, chopped (for garnish)
- optional avocado slices (for serving)
Instructions
- Begin by heating the olive oil in a large, non-stick skillet over medium heat. Allow the oil to warm for about 1-2 minutes.
- Once the oil is heated, add the diced sweet potatoes to the skillet. Sauté them for approximately 10-15 minutes, stirring occasionally, until they become tender and develop a nice golden-brown color on the edges.
- Next, add the diced red onion, chopped red and yellow bell peppers, and minced garlic to the skillet. Cook these vegetables together for an additional 5-7 minutes, stirring frequently, until they are softened and fragrant.
- Sprinkle in the smoked paprika and season the mixture with salt and freshly cracked pepper. Stir everything thoroughly to ensure the spices are well distributed and the ingredients are heated through.
- Create four small wells in the sweet potato and vegetable mixture using the back of a spoon. Carefully crack an egg into each well. Cover the skillet with a lid and cook the eggs to your preferred doneness; for runny yolks, cook for about 5-8 minutes, or longer for fully cooked yolks.
- Once the eggs are cooked to your liking, remove the skillet from heat. Generously sprinkle chopped cilantro over the top as a fresh garnish.
- Serve the hash hot, adding avocado slices on top for an extra layer of creaminess if desired.


![- 1 pound fresh shrimp, peeled and deveined - 3 tablespoons unsalted butter, divided - 4 cloves garlic, finely minced - 1 teaspoon smoked paprika - 1 teaspoon ground cumin - Salt and freshly ground black pepper, to taste - 8 small corn tortillas - 1 cup red cabbage, finely shredded - 1 ripe avocado, sliced into thin wedges - Fresh cilantro leaves, roughly chopped, for garnish - Lime wedges, cut into quarters, for serving To make these garlic butter grilled shrimp tacos, you need fresh shrimp. I recommend getting shrimp that are firm and have a nice sheen. Make sure they are peeled and deveined for easy eating. Butter is key for adding richness. Use unsalted butter so you can control the saltiness. Garlic adds a wonderful aroma and flavor. Mince it finely for the best taste. For spices, smoked paprika brings a deep, smoky flavor. Ground cumin adds warmth. Be sure to season with salt and black pepper to taste. Corn tortillas are the perfect wrap. They are soft and add a nice corn flavor. Red cabbage gives a crunchy texture and a pop of color. Sliced avocado adds creaminess. Fresh cilantro gives a burst of freshness. Finally, lime wedges add a zesty kick. To see the full recipe, check out the [Full Recipe]. To start, melt 2 tablespoons of unsalted butter in a large skillet. Use medium heat. Once the butter is melted, add 4 cloves of minced garlic. Sauté the garlic for 1-2 minutes. It should smell great and turn a light golden color. Be careful not to burn the garlic! Next, stir in 1 teaspoon of smoked paprika and 1 teaspoon of ground cumin. Add a pinch of salt and fresh black pepper to taste. Mix well. This creates a tasty marinade for the shrimp. Now, add 1 pound of peeled and deveined shrimp to the skillet. Cook the shrimp for 3-4 minutes. Stir occasionally to make sure they cook evenly. You will know they are done when they turn opaque and pink. This buttery garlic mixture makes them extra delicious! While the shrimp cooks, take another skillet and heat it over medium-high heat. Warm each of the 8 small corn tortillas for about 30 seconds on each side. You want them to be soft and flexible. Look for slight char marks on the tortillas. This adds great flavor! To build your tacos, take a warm tortilla and layer some cooked shrimp in the center. Then, top it with shredded red cabbage and avocado slices. The cabbage adds crunch, while the avocado gives creaminess. Finish off your tacos by adding fresh cilantro on top. Serve them with lime wedges on the side for a zesty touch. For a nice presentation, arrange the tacos on a colorful platter. You can add extra cilantro and lime wedges to make it look even better. Enjoy every bite with a squeeze of lime! When picking shrimp, you have two main choices: fresh or frozen. Fresh shrimp can taste better, but frozen shrimp is often just as good. If you choose frozen shrimp, look for those that are flash-frozen right after harvest. This keeps them fresh and tasty. Size matters too! For tacos, I suggest using medium to large shrimp. They hold up well in the taco and give you a satisfying bite. Aim for shrimp that are about 21 to 30 per pound. To boost the flavor, you can swap the spices. Try adding chili powder or even a pinch of cayenne for heat. If you want a smoky taste, smoked paprika works wonders. You can also mix in some lime zest for a bright kick. To elevate your tacos, think about toppings. Mango salsa adds sweetness, while jalapeños bring heat. A drizzle of sour cream or a splash of hot sauce can make your tacos sing. Do not overcook your shrimp. They cook quickly and should only take 3-4 minutes. When they turn pink and opaque, they are done. Overcooking makes them tough and rubbery. For the tortillas, warmth is key. Heat them in a hot skillet for about 30 seconds on each side. This gives them a nice char and keeps them soft. You can also wrap them in a clean towel to keep them warm while you assemble your tacos. {{image_4}} You can switch the shrimp for other proteins. Chicken is a great option. Use boneless chicken breasts cut into bite-sized pieces. Season them like the shrimp. Cook until golden brown and juicy. Fish also works well. Choose firm fish like mahi-mahi or cod. Grill or pan-fry the fish until flaky. For a vegetarian twist, try veggies or tofu. Grilled bell peppers, onions, and zucchini make a colorful filling. Tofu absorbs flavors well, so marinate it before grilling. Want to spice things up? Add jalapeños or your favorite hot sauce. Slice jalapeños and mix them in with the shrimp. This adds a nice kick. You can change the toppings too. Mango salsa adds sweetness and freshness. Just mix diced mango, red onion, and lime juice. Another tasty option is crema. This creamy sauce balances the spices. Mix sour cream with lime juice and a pinch of salt. Serve your tacos with tasty sides. A fresh salad pairs well. Try a simple cucumber and tomato salad. Rice and beans are classic choices too. Cilantro lime rice adds bright flavor. For drinks, grab a cold beer or a zesty margarita. A light, fruity drink will complement the meal. Explore the full recipe for more ideas. To keep your garlic butter grilled shrimp tacos fresh, store them in an airtight container. Place the shrimp and toppings in separate containers. This helps maintain the flavors and textures. For the tortillas, wrap them in foil or plastic wrap. This keeps them soft and prevents them from drying out. Use them within three days for the best taste. To reheat the shrimp, place them in a skillet over low heat. Add a splash of water or a bit of butter to keep them moist. Heat for about five minutes, stirring gently. For the tortillas, warm them in a dry skillet for about 30 seconds each side. This method helps keep them soft and adds a nice char. Avoid using the microwave, as it may make them chewy. Yes, you can freeze grilled shrimp! Cool the shrimp completely before placing them in a freezer-safe bag. Squeeze out as much air as possible to prevent freezer burn. They can last up to three months in the freezer. When you're ready to use them, thaw overnight in the fridge. For meal prep, consider freezing the shrimp without the seasonings. This way, you can add fresh spices when you cook them later. You can tell when shrimp are cooked by looking for a few signs. First, they change color from grey to bright pink. Second, they curl into a C shape. Finally, perfectly cooked shrimp feel firm to the touch. If they are tough or rubbery, they may be overcooked. The cooking time is usually 3-4 minutes, but this can vary with size. Yes, you can prepare some parts of the tacos in advance. Cook the shrimp and store them in the fridge for up to two days. You can also warm the tortillas just before serving. If you want to save time, chop the cabbage and avocado ahead of time. Just remember to squeeze lime juice on the avocado to keep it fresh and green. Some great sides to serve with shrimp tacos include: - Cilantro lime rice - Black beans - Corn salad - Chips with salsa - Grilled vegetables These sides balance the flavors of the shrimp tacos and make the meal more complete. You can also serve a light salad to add freshness. You learned how to make delicious shrimp tacos from scratch. We covered fresh ingredients, step-by-step cooking, and tasty toppings. Remember, fresh shrimp and warm tortillas make a big difference. You can customize flavors with spices or different proteins. Enjoy serving them with a refreshing drink on the side. Proper storage will keep your leftovers tasty too. Whether you’re cooking for one or many, these tacos are a hit. Enjoy your cooking and get ready for a yummy meal.](https://goldendishy.com/wp-content/uploads/2025/06/f6806160-83d3-4aa8-a207-34a87a11273f-768x768.webp)

