Sweet Potato Chickpea Buddha Bowl Flavorful Delight

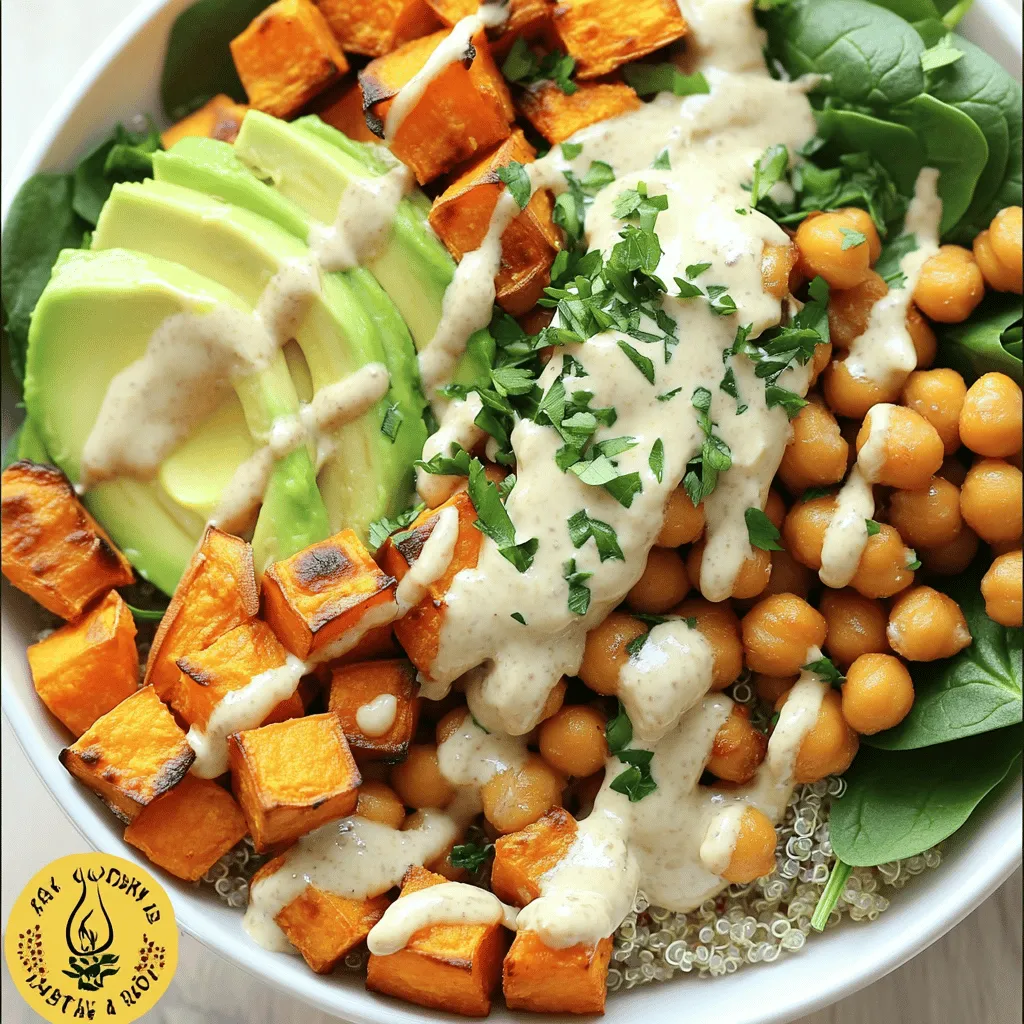
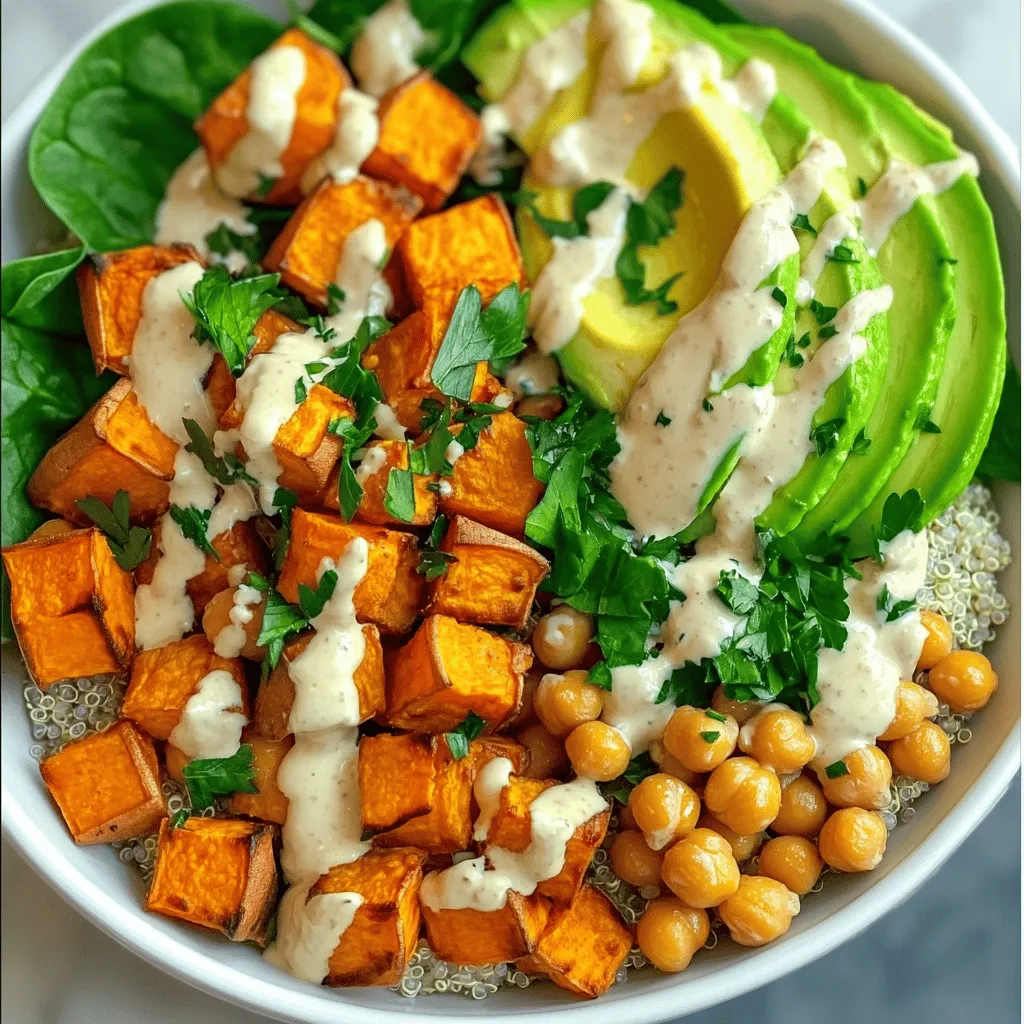
Looking for a meal that’s both tasty and healthy? The Sweet Potato Chickpea Buddha Bowl is your answer! Packed with colorful veggies, wholesome grains, and vibrant flavors, this dish is sure to please. In this article, I’ll guide you through each step, from roasting sweet potatoes to making a creamy tahini dressing. Join me on this culinary journey and discover how to create your own flavorful delight!
Ingredients
Main Ingredients
– 1 large sweet potato, peeled and diced into 1-inch cubes
– 1 can (15 oz) chickpeas, thoroughly drained and rinsed
– 2 cups cooked quinoa (white, red, or a mix for color)
Additional Ingredients
– 1 cup baby spinach, roughly chopped
– 1 ripe avocado, carefully sliced
– 2 tablespoons olive oil, divided
Seasonings and Dressings
– 1 teaspoon smoked paprika for depth of flavor
– 1 teaspoon ground cumin for a warm spice note
– 2 tablespoons tahini, for creaminess
– 1 tablespoon freshly squeezed lemon juice for brightness
– Salt and freshly cracked black pepper to taste
– Chopped fresh parsley for a vibrant garnish
The sweet potato shines in this bowl. Its natural sweetness pairs well with chickpeas. Chickpeas add protein and a nice texture. Quinoa serves as a fluffy base, making the dish filling.
For fresh greens, I like baby spinach. It adds color and a slight crunch. Avocado brings creaminess and healthy fats. Olive oil enhances the dish with richness.
Seasonings matter. Smoked paprika gives depth and warmth. Cumin brings a hint of spice. Tahini and lemon juice create a creamy dressing with bright flavor.
Each ingredient plays a role in this Buddha bowl. Together, they create a colorful and tasty meal. The balance of flavors makes this dish a delight to eat.
Step-by-Step Instructions
Preheat and Prepare
– Preheat your oven to 425°F (220°C).
– Peel and dice the large sweet potato into 1-inch cubes.
Roasting the Sweet Potatoes
– In a bowl, toss the sweet potatoes with 1 tablespoon of olive oil.
– Add smoked paprika, ground cumin, salt, and pepper.
– Spread the sweet potato cubes on a baking sheet.
– Roast for 25-30 minutes, flipping halfway, until golden and tender.
Cooking the Chickpeas
– Heat 1 tablespoon of olive oil in a skillet on medium heat.
– Add the drained and rinsed chickpeas.
– Season with salt and pepper.
– Sauté for 5-7 minutes until slightly crisp and golden.
Making the Tahini Dressing
– In a small bowl, whisk together tahini, lemon juice, and a splash of water.
– Adjust the thickness to your liking.
– Taste and add salt if needed.
Assembling the Buddha Bowl
– Start with an even layer of cooked quinoa at the base of each bowl.
– Neatly arrange the roasted sweet potatoes, sautéed chickpeas, fresh spinach, and avocado slices on top.
– Drizzle the tahini dressing over everything.
– Finish with chopped parsley for a fresh touch.
Tips & Tricks
Perfecting the Sweet Potatoes
– Ensuring even cooking: Cut your sweet potato into evenly sized cubes. This helps them cook at the same rate. Remember to flip them halfway through roasting. This gives them a nice caramel color.
– Flavor enhancements: For a deeper taste, mix in smoked paprika and ground cumin. This adds warmth and a hint of smoke. Don’t forget to season with salt and pepper for balance.
Chickpea Cooking Techniques
– Getting the right crisp: Sauté your chickpeas in a hot pan. Use a little olive oil and let them sit. This creates a crunchy outside that contrasts well with your soft sweet potatoes.
– Alternative preparation methods: You can roast chickpeas for an even crispier texture. Just toss them with olive oil and spices, then bake at 425°F (220°C) for about 20 minutes.
Dressing Variations
– Adjusting consistency and flavors: Whisk tahini with lemon juice and a splash of water. This helps achieve a creamy dressing. If it’s too thick, add more water until you reach your desired consistency.
– Adding spices for a twist: Try adding garlic powder or cayenne pepper to your dressing. This can give it an extra kick. You can also mix in fresh herbs for added flavor.

Variations
Alternative Grains
You can switch up the base of your Buddha bowl with different grains. Brown rice is a great option. It adds a nutty flavor and chewiness. Farro or barley can also work well. They both offer a hearty texture and pair nicely with sweet potatoes and chickpeas.
Seasonal Ingredients
Using seasonal ingredients can make your Buddha bowl even better. Try adding fresh vegetables based on what’s in season. Roasted carrots, zucchini, or bell peppers can add great taste and color. You can also mix in different greens. Kale or arugula can offer a spicy kick and a nutrient boost.
Protein Additions
If you want more protein, consider adding other legumes. Black beans or lentils can be great choices. They add depth and flavor to your bowl. You can also add tempeh or tofu for a heartier meal. Both options take on flavors well and enhance the overall dish.
Storage Info
Storing Leftovers
Store your leftovers in airtight containers. Glass or BPA-free plastic containers work best. Place your Buddha bowl in the fridge within two hours after cooking. This helps keep it fresh. It will stay good for up to three days. Make sure to keep the dressing separate to avoid soggy ingredients.
Reheating Instructions
For quick reheating, the microwave is easy. Place the bowl in the microwave for about 1-2 minutes. Stir halfway through for even heat. If you prefer a crisp texture, use the oven. Preheat it to 350°F (175°C) and warm the bowl for about 10-15 minutes. This helps maintain quality and flavor.
Freezing Tips
Freezing portions makes meals easy. Use freezer-safe containers or bags. Label them with the date for easy tracking. Freeze the Buddha bowl for up to three months. To thaw, place it in the fridge overnight. For reheating, use the microwave or oven, just like before, to enjoy the same great taste.
FAQs
What is a Buddha Bowl?
A Buddha bowl is a colorful, nourishing meal. It combines grains, vegetables, protein, and a tasty dressing. The goal is to create a balanced dish. The name comes from the idea of a bowl that is as full as Buddha’s belly. This dish draws inspiration from many cultures. It celebrates fresh, healthy ingredients in one bowl.
Can I make this recipe vegan?
Yes, this recipe is already vegan! All the ingredients are plant-based. Sweet potatoes, chickpeas, and quinoa are great sources of protein. If you want to add more flavor, try using different seasonings. You can also swap tahini for other vegan dressings. Just make sure any added sauces are vegan-friendly.
How long does the dish last in the fridge?
The Sweet Potato Chickpea Buddha Bowl lasts about 4 days in the fridge. Store it in an airtight container. If the ingredients start to smell off or look slimy, it’s time to toss them. Freshness is key to enjoying this bowl!
Can I add other proteins?
Absolutely! You can add proteins like tofu, tempeh, or even nuts. Just cook them separately and toss them in. Chickpeas are great, but you can mix it up. Adding different proteins can change the flavor and texture. Enjoy experimenting with new combinations!
This blog post shared a tasty Buddha bowl recipe, focusing on key ingredients like sweet potatoes, chickpeas, and quinoa. I provided step-by-step instructions to guide you through roasting, cooking, and assembling. Tips and variations help you customize the dish. Remember to store leftovers properly and enjoy them later. A Buddha bowl is versatile and forgiving. You can add your favorite ingredients or proteins. Enjoy creating your healthy meal, and share your results!


![- Bell peppers: Choose bright colors like red, yellow, or orange. These colors not only look great but also add natural sweetness. Each pepper holds the filling nicely and provides a tasty bite. - Quinoa: Rinse the quinoa well under cold water. This step removes the bitter coating called saponin. Rinsing ensures your quinoa has a clean, nutty flavor that shines in the dish. - Vegetable broth: Use low-sodium broth for better control of the flavor. It enhances the taste of quinoa and adds depth to the dish. You can also try homemade broth for a fresher taste. - Ground spices: Cumin, smoked paprika, and chili powder are key. Cumin gives an earthy flavor, while paprika adds a hint of smokiness. Chili powder can amp up the heat level, making your dish exciting. - Beans and corn: Black beans add protein and fiber, making the meal hearty. Corn brings sweetness and crunch, creating a balanced texture. Both ingredients make the filling more nutritious and filling. - Cheese alternatives: Depending on your diet, choose cheddar for a classic taste or opt for a dairy-free cheese. Both melt well and enhance the flavors, giving a creamy finish to each stuffed pepper. For the full list of ingredients, check the Full Recipe. Start by preheating your oven to 375°F (190°C). This step matters because the right heat cooks the peppers evenly and makes them tender. While the oven warms up, you can prepare the bell peppers. Cut the tops off and scoop out the seeds and membranes inside. Stand the peppers upright in a baking dish. This helps them stay stable while they bake. Next, it’s time to cook the quinoa. In a medium saucepan, add 1 cup of rinsed quinoa and 2 cups of vegetable broth. Bring it to a boil, then lower the heat. Cover and let it simmer for about 15 minutes. You want the quinoa to be fluffy and all the liquid should be gone. While the quinoa cooks, you can mix the filling. In a large bowl, combine the fluffy quinoa, black beans, corn, diced tomatoes, cumin, smoked paprika, and chili powder. Add salt and pepper to taste. Make sure everything is mixed well to ensure a consistent flavor in every bite. Now comes the fun part—stuffing the peppers! Use a spoon to fill each bell pepper with your quinoa mixture. Pack it down gently to fit as much filling as possible. Once filled, sprinkle a good amount of cheese on top of each pepper. Cover the baking dish with aluminum foil and place it in the oven. Bake for 25 minutes. After that, remove the foil and bake for another 10 minutes. This helps the cheese melt and become bubbly. The peppers should be tender but still hold their shape. Once done, take the dish out and let it cool for a few minutes. Right before serving, add fresh cilantro or parsley on top for a nice touch. For the full recipe, check out the details provided earlier. To achieve fluffy quinoa, rinse it well before cooking. Rinsing removes the bitter coating called saponin. Use a fine mesh strainer for this step. Then, cook the quinoa in the right ratio of water to quinoa. I recommend 2 cups of vegetable broth for every 1 cup of quinoa. Bring it to a boil, then simmer for 15 minutes. This way, the quinoa will be light and fluffy. When baking your stuffed peppers, timing is key. Start by covering the dish with foil for the first 25 minutes. This keeps the moisture in, helping the peppers cook evenly. After that, remove the foil and bake for an extra 10 minutes. This will make the cheese melt perfectly and the peppers tender but not mushy. For presentation, serve your stuffed peppers on a large platter. Sprinkle extra herbs like cilantro or parsley around for a fresh look. A drizzle of olive oil or a squeeze of lime juice adds brightness and flavor. As for side dishes, consider a simple green salad or some roasted vegetables. These pair well with the peppers and add color to your meal. A light white wine or sparkling water complements the dish nicely, enhancing your dining experience. For the full recipe, check out [Full Recipe]. {{image_4}} What can I use instead of black beans? You can swap in other legumes like chickpeas or kidney beans. Each offers unique flavors and textures. Chickpeas add a nutty taste, while kidney beans bring a soft bite. Both boost protein and fiber, making your meal heartier. Can I add meat to my stuffed peppers? Yes! Chicken or turkey works great. Use cooked ground meat for easy mixing. This adds a savory depth to your dish. Just remember to season the meat well for the best flavor. How can I change the spices? Explore with different spices to create new flavors. Try adding oregano for a Mediterranean twist or curry powder for a bold kick. Each spice changes the overall taste, making your stuffed peppers exciting. Can I use different veggies? Absolutely! Seasonal vegetables like zucchini, spinach, or mushrooms can enhance your filling. They add more nutrients and variety. Just chop them finely and mix them in with your quinoa and beans. For the full recipe, check out the details above. After enjoying your quinoa stuffed bell peppers, store leftovers in the fridge. Place them in an airtight container. This keeps them fresh for up to four days. If you plan to eat them later, consider freezing them. To freeze, wrap each pepper in plastic wrap. Then place them in a freezer-safe bag or container. Make sure to remove as much air as possible. Properly stored, they can last for up to three months in the freezer. When it’s time to enjoy your stuffed peppers again, you can reheat them in several ways. The oven is my favorite method. Preheat it to 350°F (175°C). Place the peppers in a baking dish and cover with foil. Bake for about 20 minutes, or until heated through. You can also use the microwave for quick reheating. Simply place a pepper on a microwave-safe plate. Cover it with a paper towel to keep moisture in. Heat it for about 2-3 minutes, checking to avoid overheating. If you prefer the stovetop, heat a skillet over medium heat and add a little water. Place the peppers in the skillet and cover. Heat for about 5-7 minutes, turning occasionally. To keep the texture nice, avoid sogginess. When reheating, do not add extra moisture or cover too tightly. This will help maintain that delightful crunch of the peppers. For the full recipe, visit the [Full Recipe]. How long do quinoa stuffed peppers last in the fridge? Quinoa stuffed peppers can last about 3 to 5 days in the fridge. Store them in an airtight container to keep them fresh. If you want to enjoy them later, just heat them up in the oven or microwave. Can I make quinoa stuffed peppers ahead of time? Yes, you can prepare quinoa stuffed peppers ahead of time. Stuff the bell peppers and store them in the fridge. Bake them when you’re ready to eat. This makes meal prep easy and convenient. What can I substitute for quinoa in this recipe? If you want to swap out quinoa, try using brown rice or couscous. Both options provide a nice texture. Just remember to adjust cooking times as needed for these ingredients. Are quinoa stuffed peppers healthy? Yes, quinoa stuffed peppers are healthy. They’re packed with protein, fiber, and vitamins. Quinoa is a complete protein, making this dish a great choice for a balanced meal. Gluten-free options: Ensuring a safe meal for all Quinoa is naturally gluten-free, so this dish is safe for gluten-sensitive people. Just check your labels for any added ingredients that might contain gluten. Vegetarian vs. vegan: Key differences in ingredients Vegetarian quinoa stuffed peppers include cheese, while vegan ones use dairy-free cheese. Both versions are delicious. Choose based on your dietary needs. Quinoa stuffed bell peppers use fresh ingredients and bold flavors for a tasty meal. First, choose colorful bell peppers and rinse the quinoa for the best taste. Use ground spices and beans to boost nutrition. Follow the steps closely for perfect results, and don’t forget to try different flavors and proteins. Store leftovers well to enjoy later. Healthy and easy, this dish fits any dinner. You can impress friends and family while eating well! So, get cooking and enjoy every bite of your delicious creation.](https://goldendishy.com/wp-content/uploads/2025/06/de4f4195-310c-4430-9b68-8374d14e079c-768x768.webp)


![- 12 oz fettuccine or pappardelle pasta - 2 cups butternut squash, peeled and cubed - 1 tablespoon olive oil The base of this dish is fettuccine or pappardelle pasta. I love these shapes as they hold the creamy sauce well. You will also need fresh butternut squash. It gives the dish a warm color and sweet flavor. Using olive oil helps with roasting and adds richness to the pasta. - 1 small onion, diced - 2 cloves garlic, minced - 1 teaspoon freshly grated nutmeg Onions and garlic add depth to the sauce. Dicing the onion makes it cook evenly. Minced garlic gives a punch of flavor. Nutmeg brings warmth and a hint of spice, making the dish cozy and inviting. - 1 cup vegetable broth - 1 cup coconut milk (or heavy cream for a non-vegan option) - ½ cup grated Parmesan cheese (optional) For the sauce, you need vegetable broth for a savory base. Coconut milk adds creaminess and a hint of sweetness. If you prefer, heavy cream works too. Adding Parmesan cheese can enhance the flavor, but it's optional. - Salt and freshly cracked pepper to taste - Fresh sage leaves for garnish Season with salt and cracked pepper to bring everything together. Fresh sage leaves add a lovely touch. They not only look nice but also add an aromatic flavor that complements the dish well. These ingredients create a lovely balance of flavors in the creamy butternut squash pasta. For the full recipe, check out the detailed instructions to make this delicious meal. - Preheat your oven to 400°F (200°C). - Toss the cubed butternut squash in olive oil, salt, and pepper. - Spread the squash on a baking sheet. Roast for 20-25 minutes. The squash should be tender and have a light caramel color. - Bring a large pot of salted water to a boil. - Add the pasta and cook it as per package instructions. - Before draining, reserve 1 cup of the pasta water. This helps adjust your sauce later. - Heat olive oil in a large skillet over medium heat. - Add diced onion and sauté until soft, about 5 minutes. - Stir in minced garlic and cook for about 1 minute. - Blend the roasted squash with the sautéed onion, garlic, vegetable broth, and coconut milk. Use an immersion blender or a regular blender. - Return the blended sauce to the skillet and heat on low. - Add the cooked pasta and gradually mix in the reserved pasta water. - Stir well until the pasta is coated with the sauce. - If you like, stir in the Parmesan cheese. - Taste and adjust seasoning with salt and pepper as needed. - Plate the pasta in shallow bowls for a nice look. - Garnish with fresh sage leaves and drizzle a little olive oil on top. For a detailed guide, check out the Full Recipe. Enjoy your creamy butternut squash pasta! To get a creamy consistency, blend the roasted butternut squash well. You want it smooth. Use an immersion blender for easy mixing. If it’s too thick, add a splash of pasta water. This helps the sauce cling to the noodles. Want to add more flavor? Try spices like cinnamon or a pinch of chili powder. Fresh herbs, such as thyme or rosemary, can boost taste too. You can also add veggies like spinach or kale for added nutrition. They cook quickly and blend well with the sauce. Pair creamy butternut squash pasta with a simple salad. A mix of greens with a light vinaigrette works well. For drinks, a glass of white wine like Sauvignon Blanc complements the dish nicely. If you prefer non-alcoholic options, try sparkling water with a slice of lemon. These sides enhance the meal and make it even more enjoyable. For the full recipe, check out [Full Recipe]. {{image_4}} You can easily adjust creamy butternut squash pasta to fit different diets. For a vegan option, swap heavy cream with coconut milk and skip the cheese. This change still gives you a creamy sauce that tastes great. If you need gluten-free pasta, use rice or corn-based noodles. These options keep the dish light and tasty. Experimenting with different ingredients can make this dish exciting. Instead of butternut squash, try using acorn or delicata squash. Each type has its unique flavor and texture. For cheese, you can use feta for a tangy twist or goat cheese for a creamy finish. These swaps let you create new flavor combinations that keep things fresh. To make this dish more seasonal, add roasted vegetables like Brussels sprouts or carrots. This not only enhances the flavor but also adds color. Making creamy butternut squash pasta in fall is perfect. You can enjoy the warmth of the season with every bite. Try using spices like cinnamon or cloves for a cozy feel. For the full recipe, check out the complete guide and enjoy the rich flavors! To store leftover creamy butternut squash pasta, let it cool first. Then, place it in an airtight container. Glass or BPA-free plastic containers work best. Make sure to seal them tightly to keep the air out. This helps keep the pasta fresh and tasty. Store the container in the fridge for up to four days. Yes, you can freeze this dish! To do this, use a freezer-safe container. Leave some space at the top for expansion. It is best to freeze the pasta without the cheese added. This helps keep the texture right. When you are ready to eat, move the container to the fridge to thaw overnight. To reheat, use a skillet over low heat. Add a splash of vegetable broth or water to help it warm up evenly. In the fridge, creamy butternut squash pasta lasts for about four days. After that, the taste and quality may drop. Always check for signs of spoilage. If the pasta smells sour or has a strange texture, it’s best to throw it away. Enjoy your creamy butternut squash pasta fresh! For the full recipe, visit [Full Recipe]. It takes about 40 minutes to make creamy butternut squash pasta. The prep time is 10 minutes. Cooking the dish takes about 30 minutes. You will spend 20-25 minutes roasting the squash. Boiling the pasta adds another 10-12 minutes. This dish is quick and easy for a weeknight meal! Yes, you can use many types of pasta. Fettuccine and pappardelle work well for this sauce. You can also try penne or rigatoni for a fun twist. Each shape holds the sauce differently, so feel free to experiment! Absolutely! To make it nut-free, use coconut milk instead of cream. If you want a non-vegan option, use heavy cream instead. You can skip any nuts in the garnish. This keeps the dish creamy and delicious without nuts. You can serve this dish with many sides. A crisp green salad pairs well. Try a side of garlic bread for extra comfort. For dessert, pumpkin pie or apple crisp can be great choices. These options enhance the cozy vibe of the meal. To reheat, use a skillet over low heat. Add a splash of water or broth to the pasta. This helps keep the sauce creamy. Stir until heated through. You can also use the microwave, but stir halfway for even heating. Enjoy your leftovers just as much! This creamy butternut squash pasta combines hearty flavors and texture. We roasted the squash and blended it with garlic and onion to create a rich sauce. You learned how to make it creamy, adjust seasoning, and even swap ingredients. In the end, this dish is versatile and perfect for any meal. Enjoy experimenting with flavors and sharing this delightful recipe with friends and family.](https://goldendishy.com/wp-content/uploads/2025/07/000431ad-92db-4f90-88d6-bb841745a08c-768x768.webp)
