Strawberry Shortcake Trifle Fresh and Tasty Delight

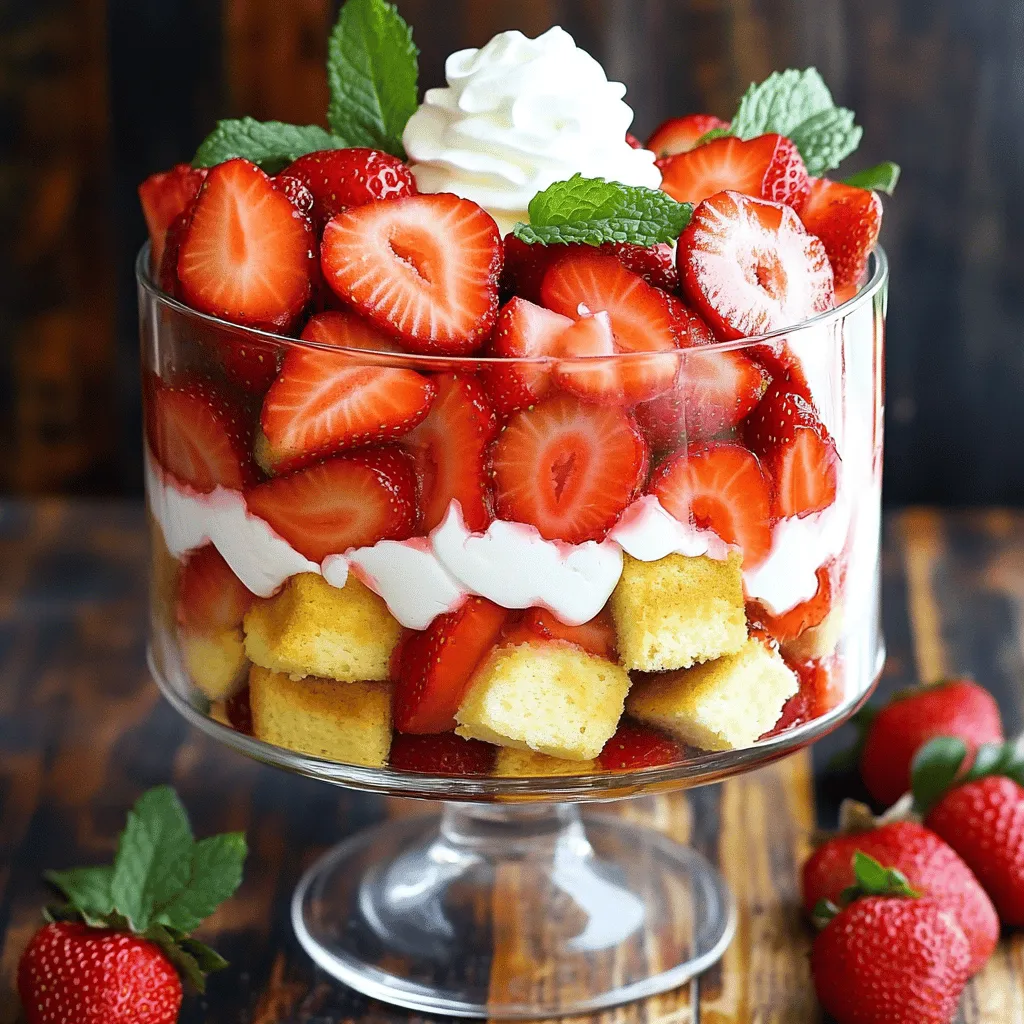
Welcome to a dessert that screams summer: Strawberry Shortcake Trifle! This delightful treat layers juicy strawberries, fluffy cake, and creamy goodness into a stunning dish. Whether you’re hosting a party or simply craving something sweet, this recipe is a perfect choice. Join me as we dive into fresh ingredients, easy steps, and fun tips to make this trifle a showstopper. Get ready to impress your taste buds and loved ones!
Ingredients
Fresh Ingredients
– 2 cups fresh strawberries, hulled and sliced
– 1/4 cup granulated sugar
Cake Components
– 1 box (15 oz) vanilla cake mix or homemade vanilla cake
– 1/2 cup unsalted butter, softened
– 3 large eggs
Creamy Mixtures
– 1 cup heavy cream
– 1/4 cup powdered sugar
– 1 teaspoon vanilla extract
– 1 cup creamy Greek yogurt
– Fresh mint leaves for garnish (optional)
In making a strawberry shortcake trifle, the right ingredients matter greatly. Start with fresh strawberries. They give the dish a burst of flavor. You need two cups of strawberries. Wash, hull, and slice them. Next, mix the strawberries with a quarter cup of granulated sugar. This step helps draw out their natural juices.
For the cake, you can use either a box mix or your favorite homemade vanilla cake. You’ll need one box of vanilla cake mix, half a cup of softened unsalted butter, and three large eggs. If you choose to make it from scratch, ensure your recipe is simple and tasty.
To create that wonderful creamy layer, gather one cup of heavy cream, a quarter cup of powdered sugar, and one teaspoon of vanilla extract. These ingredients will whip up into a light, fluffy cream. Also, add in one cup of creamy Greek yogurt for a tangy twist. If you want to add color, consider fresh mint leaves for garnish. They can elevate the look of your trifle and add a refreshing taste.
Every ingredient plays a role in making this trifle a fresh and tasty delight.
Step-by-Step Instructions
Preparing the Strawberries
– Combine 2 cups of sliced strawberries with 1/4 cup of granulated sugar.
– Mix gently until the sugar coats the strawberries.
– Let the mixture rest for 30 minutes at room temperature. This helps the berries soften and release their tasty juices.
Baking the Cake
– Preheat your oven to 350°F (175°C).
– Grease a 9×13 inch baking dish.
– Prepare the cake mix according to the package instructions, or use your favorite homemade vanilla cake recipe.
– Pour the batter into the prepared dish.
– Bake for 25-30 minutes. Check with a toothpick; it should come out clean when done.
– Once baked, let the cake cool completely in the pan.
Assembling the Trifle
– Cut the cooled cake into small 1-inch cubes.
– In a mixing bowl, whip 1 cup of heavy cream until it thickens.
– Add 1/4 cup of powdered sugar and 1 teaspoon of vanilla extract. Continue whipping until stiff peaks form.
– In another bowl, stir 1 cup of creamy Greek yogurt until smooth. You can fold in some whipped cream for a lighter mix.
– To assemble, start with a layer of cake cubes at the bottom of a trifle dish or individual cups.
– Spoon a layer of the macerated strawberries over the cake.
– Follow with a layer of the Greek yogurt mixture, then top with whipped cream.
– Repeat the layers until all ingredients are used. Finish with a dollop of whipped cream.
– Chill in the fridge for at least 1 hour before serving. This helps the flavors blend nicely.
Tips & Tricks
Perfecting the Layers
To make your trifle shine, let your strawberries macerate. Mix the sliced strawberries with sugar and let them sit for 30 minutes. This step brings out their sweet juices. You can also play with the order of your layers. Try starting with cake, then yogurt, and finish with cream. This can add fun visuals.
Making Whipped Cream
For the best whipped cream, use cold heavy cream. Whip it until you see stiff peaks form. This means it holds its shape well. You can also use alternative sweeteners like honey or maple syrup. This adds a unique twist to your cream.
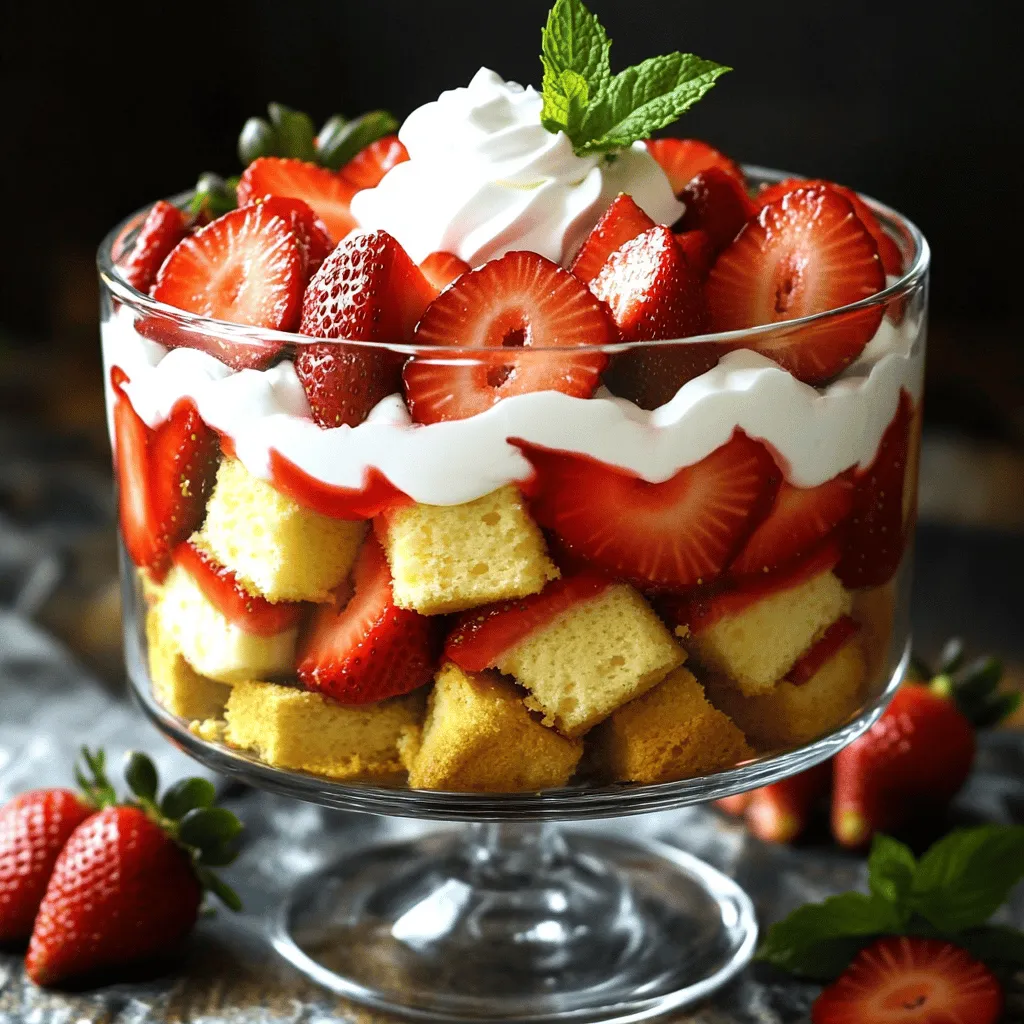
Serving Suggestions
Serve your trifle in individual cups for a personal touch. This makes it easy for guests. For a fancy finish, garnish with mint leaves and extra strawberry slices. This not only looks great but adds fresh flavor. Use clear glass dishes to show off those beautiful layers!

Variations
Seasonal Fruit Substitutes
You can swap strawberries for other fruits. Blueberries, raspberries, and peaches work great. Each fruit adds its own unique flavor. For example, blueberries bring a sweet-tart taste. Raspberries offer a delightful zing, while peaches add a juicy sweetness. Mix and match fruits to create your perfect trifle.
Gluten-Free Options
If you need a gluten-free trifle, use gluten-free cake mix. You can also make a homemade gluten-free cake. Look for recipes that use almond flour or coconut flour. These flours will keep your dessert light and fluffy. Always check labels to ensure no gluten sneaks in.
Healthier Alternatives
You can make this trifle a bit healthier. Swap whipped cream for creamy Greek yogurt. Greek yogurt adds protein and a tangy flavor. You can also cut back on sugar. Use less granulated sugar for the strawberries. This way, you enjoy a lighter dessert without losing taste.
Storage Information
Refrigeration Tips
To keep your strawberry shortcake trifle fresh, store it in the fridge. Use a tight lid to cover it. This helps keep the trifle moist and tasty. You can store it for up to three days before serving. The flavors will blend nicely during this time.
Freezing Guidelines
You can freeze your trifle, but it takes some care. The best way is to freeze each part separately. Freeze the cake cubes in an airtight bag. You can also freeze the whipped cream and yogurt mixtures in separate containers. Avoid freezing the strawberries, as they can get mushy.
Reheating Tips
If you have leftover trifle, reassemble it for serving. Start by layering the cake cubes at the bottom again. Then, add the strawberries and yogurt mixture as before. Finally, top with whipped cream. This way, you keep the layers looking nice and fresh.
FAQs
What is a trifle?
A trifle is a layered dessert. It usually has cake, fruit, and cream. You can see each layer through a clear dish. This makes trifles look very pretty. Traditional trifles use sponge cake. However, you can use any cake you like. The mix of textures and flavors makes trifles fun to eat.
Can I make strawberry shortcake trifle ahead of time?
Yes, you can make this trifle ahead of time. Prepare the trifle a few hours before serving. You can even make it a day in advance. Just keep it covered in the fridge. This helps the flavors blend well. Just remember to add any fresh toppings right before serving. This keeps them looking fresh and bright.
What other cakes can I use in a trifle?
You can use many different cakes in a trifle. Here are some great options:
– Pound cake
– Angel food cake
– Chocolate cake
– Lemon cake
– Spice cake
These cakes will work well with fruits and cream. Each type adds its own flavor and texture. Enjoy experimenting with different cakes in your trifles!
This blog post showcased how to create a delicious strawberry shortcake trifle. We discussed fresh ingredients, step-by-step baking, and assembly tips. You learned about variations, storage information, and FAQs. This dessert is great for any season and can be tailored to your taste. Remember, the right layers and flavors make all the difference. Enjoy crafting this easy, delightful treat for family and friends. Dive in and create a trifle that impresses everyone!


![- 1 ½ cups graham cracker crumbs - ½ cup unsalted butter, melted - 2 tablespoons granulated sugar - 16 oz cream cheese, softened to room temperature - 1 cup granulated sugar - 3 large eggs, at room temperature - 1 teaspoon pure vanilla extract - 2 tablespoons fresh lemon zest - ½ cup freshly squeezed lemon juice - 1 cup fresh blueberries - Powdered sugar for dusting (optional) The key to great Lemon Blueberry Cheesecake Bars lies in using fresh, high-quality ingredients. The combination of cream cheese and lemon creates a creamy texture with a bright flavor. The blueberries add bursts of sweetness and color. - If you need a gluten-free option, try almond flour or gluten-free cookies for the crust. - For a vegan version, you can use plant-based cream cheese. Look for brands that offer a similar taste. - If you want to cut sugar, use coconut sugar or a sugar substitute like stevia. These substitutions help you customize the recipe to fit your needs while keeping it delicious. For the full recipe, check the detailed instructions above. 1. First, preheat your oven to 350°F (175°C). This step is key for even baking. 2. Next, prepare an 8x8 inch baking pan. Line it with parchment paper. Let the paper hang over the sides. This helps when lifting the bars out later. 3. In a medium mixing bowl, combine 1 ½ cups of graham cracker crumbs, ½ cup melted unsalted butter, and 2 tablespoons of granulated sugar. Mix until it looks like damp sand. 4. Press this mixture firmly into the bottom of the pan. This forms your crust. Bake it for 8-10 minutes until it turns lightly golden. Remove it from the oven and let it cool slightly. 1. In a large bowl, use an electric mixer to beat 16 oz of softened cream cheese with 1 cup of granulated sugar. Mix until it is smooth and creamy. This should take about 2-3 minutes. 2. Add 3 large eggs, one at a time. Mix on low speed after each egg. Avoid overmixing to keep air bubbles out. 3. Now, stir in 1 teaspoon of vanilla extract, 2 tablespoons of fresh lemon zest, and ½ cup of freshly squeezed lemon juice. Make sure everything blends well. 4. Gently fold in 1 cup of fresh blueberries with a spatula. Be careful not to crush them; you want them whole in the bars. 1. Pour the cheesecake mixture over the cooled crust in the pan. Spread it evenly using a spatula. 2. Bake the mixture in the preheated oven for 25-30 minutes. The center should look set but still jiggle slightly. It will firm up more as it cools. 3. Once baked, take the pan out and let it cool to room temperature. After it cools, refrigerate for at least 4 hours. For best results, leave it overnight. 4. When you’re ready to serve, lift the cheesecake out of the pan using the parchment paper. Cut into squares and enjoy! You can dust the tops with powdered sugar for a nice touch. For the full recipe and more details, check out the [Full Recipe]. Avoiding cracks in the cheesecake To prevent cracks, do not overmix the batter. Overmixing adds air, which can create bubbles. Also, use room temperature ingredients. Cold cream cheese can make lumps. Bake the bars at a lower temperature for a longer time. A water bath can help keep the heat even. Achieving the perfect texture For a creamy texture, blend the cream cheese until smooth. Mix in the eggs one at a time. This keeps the batter light and fluffy. Do not rush this step. After baking, let the bars cool slowly to room temp. Chill them in the fridge for at least four hours. Creative ways to present the bars Cut the bars into squares and place them on a nice plate. You can garnish with fresh blueberries and lemon slices for color. A drizzle of lemon glaze adds shine and flavor. Serve them with a dollop of whipped cream for extra flair. Complementary toppings and sides Top each bar with a sprinkle of powdered sugar for sweetness. A scoop of vanilla ice cream pairs well, too. You can also serve with a side of lemon curd for a zesty punch. Fresh mint leaves add a pop of color and freshness. Fixing undercooked bars If the bars are too soft, return them to the oven. Bake for an additional 5-10 minutes. The center should have a slight jiggle but not be runny. Make sure to let them cool before checking the texture. Preventing overbaking Keep an eye on your bars as they bake. If the edges start to brown too much, cover them with foil. Use a toothpick to check doneness. It should come out mostly clean but with a bit of moist filling clinging to it. {{image_4}} You can mix up the flavors in your cheesecake bars easily. Swap blueberries for other berries like raspberries or strawberries. You can even use a mix of berries for a fun twist. If you love chocolate, add some chocolate chips. This makes the bars sweeter and richer. If you need gluten-free options, use gluten-free graham crackers for the crust. They work just as well and taste great. For those on a dairy-free diet, try using vegan cream cheese. It gives you a similar creamy texture without the dairy. Change the fruits based on what’s in season. In summer, use fresh peaches or cherries for a juicy taste. In the fall, think about adding pumpkin or apple flavors. You can also dress up the bars for holidays. Try adding whipped cream or holiday-themed sprinkles for fun. These variations let you enjoy lemon blueberry cheesecake bars in new ways. Don't forget to check out the Full Recipe for more details! To store leftover Lemon Blueberry Cheesecake Bars, place them in an airtight container. This keeps them fresh and tasty. You can also cover them with plastic wrap. Store them in the fridge for up to five days. For the best flavor, eat them within the first two days. You can freeze these cheesecake bars for longer storage. First, cut them into squares. Wrap each square in plastic wrap, then place them in a freezer-safe bag. They will last about three months in the freezer. When you're ready to enjoy them, take out the bars and place them in the fridge overnight to thaw. You can also let them sit at room temperature for about 30 minutes before serving. If you plan to serve these bars at a gathering, make them a day ahead. This allows the flavors to blend nicely. To keep the bars fresh, store them in the fridge until you're ready to serve. For a beautiful touch, dust the tops with powdered sugar just before serving. This keeps the bars looking fresh and inviting even a day later. For the full recipe, check out the Lemon Blueberry Cheesecake Bars section. Lemon Blueberry Cheesecake Bars are a creamy and tangy dessert. They combine smooth cheesecake with fresh blueberries and zesty lemon. The base is a crispy graham cracker crust that adds crunch. These bars are easy to slice and serve, making them perfect for gatherings. You can enjoy them chilled, which enhances the flavors. Each bite is a delightful mix of sweet and tart. Yes, you can make these bars ahead of time. They taste even better when chilled overnight. Prepare the bars and let them cool to room temperature. Place them in the fridge for at least four hours. If you want to make them days in advance, store them in an airtight container. Just remember to cut them into squares before serving. This way, you save time on the day of your event. You can tell when cheesecake bars are done by looking for a few signs. The edges should be set, while the center may jiggle slightly. This jiggle means they will firm up as they cool. Another sign is a light golden color around the edges. If you see cracks forming, they may be overbaked. Keep an eye on them during the last few minutes of baking. Yes, there are several substitutes for eggs in this recipe. You can use unsweetened applesauce; a quarter cup replaces one egg. Another option is silken tofu, blended until smooth. Use about one quarter cup for each egg needed. You can also try using flaxseed meal mixed with water. One tablespoon of flaxseed meal mixed with three tablespoons of water equals one egg. These alternatives keep your cheesecake rich and creamy. In this blog post, we covered how to create delicious lemon blueberry cheesecake bars. We started with the ingredients, explored substitutions, and shared step-by-step instructions. Tips for serving, variations, and storage were also discussed. These tips help ensure your cheesecake turns out perfectly every time. Remember, baking is fun, and experimenting with flavors leads to great treats. Enjoy your baking journey and share your creations with friends and family!](https://goldendishy.com/wp-content/uploads/2025/07/2e10f80d-a440-4f9c-b53b-c6e4b2946195-768x768.webp)


