Strawberry Pretzel Salad Cups Delightful Dessert Treat

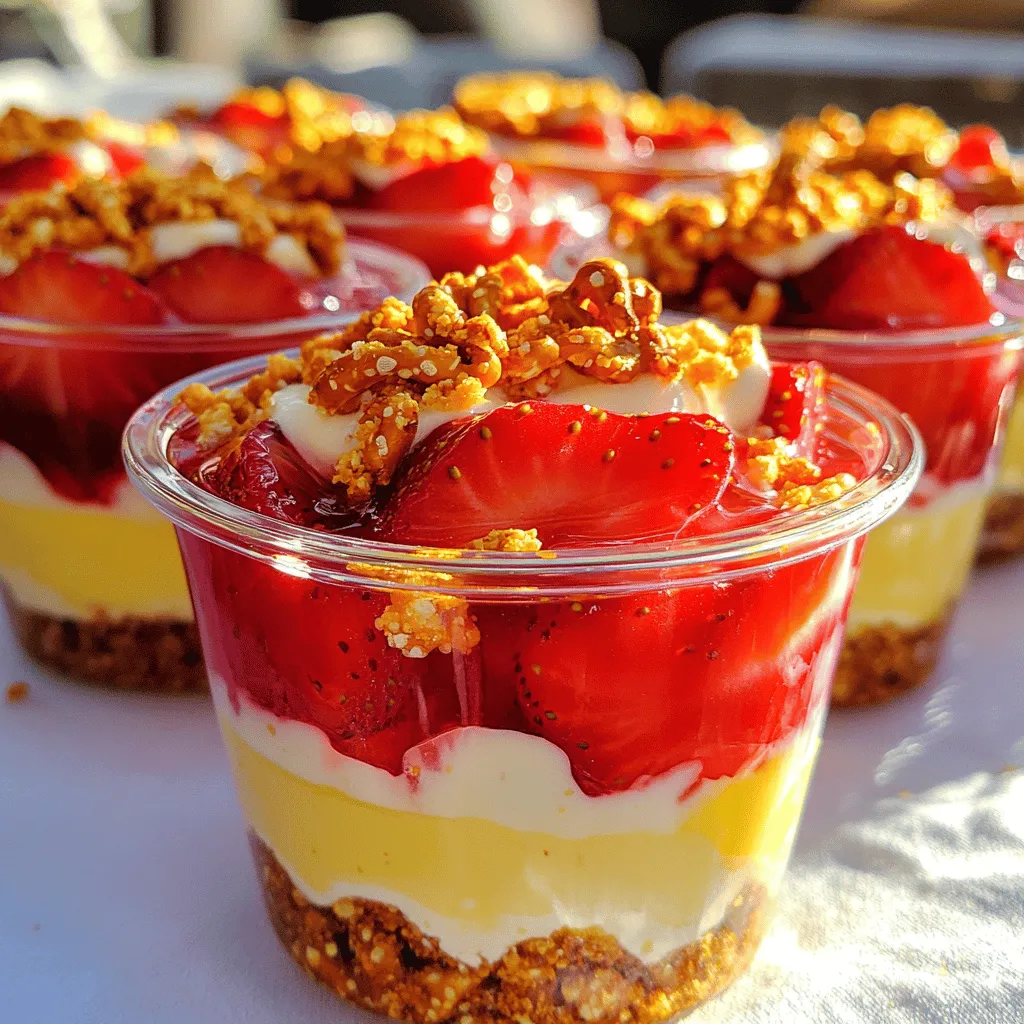
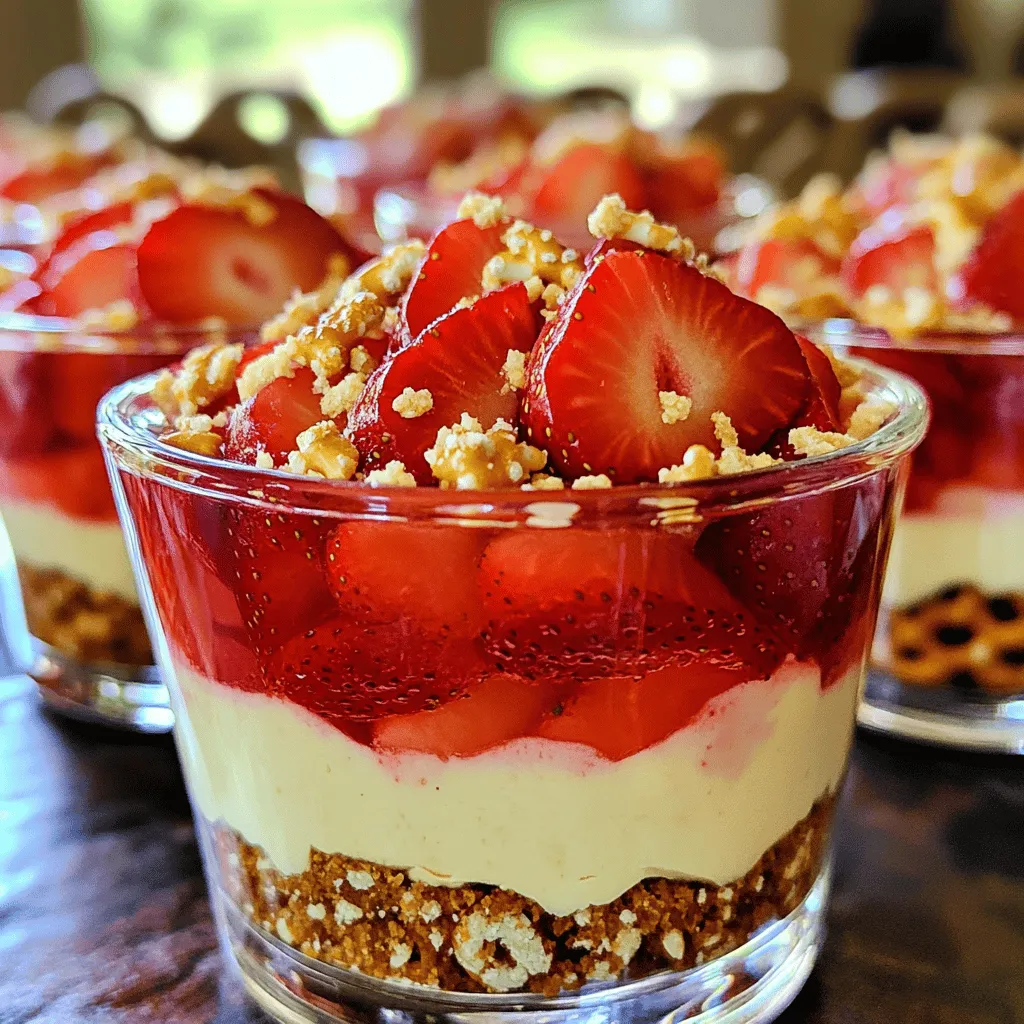
If you’re looking for a crowd-pleasing dessert, Strawberry Pretzel Salad Cups are a must-try. These delightful treats combine a crunchy pretzel crust with a creamy layer and fresh strawberries. You’ll impress your friends and family with this fun twist on a classic dish. Not only are they easy to make, but they’re also perfect for any occasion. Let’s dive into the recipe and create some sweet memories!They have a crunchy pretzel crust, a creamy cheese layer, and a fresh strawberry top. This dish is easy to make and a hit with everyone.
Detailed Ingredients List
– Crust ingredients:
– 1 cup crushed pretzels
– 2 tablespoons granulated sugar
– 1/2 cup unsalted butter, melted
– Cream cheese layer ingredients:
– 8 oz cream cheese, softened to room temperature
– 1 cup powdered sugar
– 1 cup whipped topping (such as Cool Whip)
– Strawberry layer ingredients:
– 2 cups fresh strawberries, hulled and sliced
– 1 cup strawberry gelatin mix (powdered)
– 2 cups boiling water
– 2 cups cold water
These ingredients come together to create a delightful treat. The salty pretzels balance the sweet cream and strawberries. You will love how they blend perfectly!
Step-by-Step Instructions
Preparation of the Pretzel Crust
1. Preheat oven and combine ingredients: Start by preheating your oven to 350°F (175°C). In a bowl, mix 1 cup of crushed pretzels, 2 tablespoons of granulated sugar, and 1/2 cup of melted unsalted butter. Stir until everything combines well.
2. Press and bake the crust: Next, press the pretzel mixture into the bottom of a baking dish or cups. Bake for about 10 minutes. You want it golden but not too hard.
3. Cooling time requirements: After baking, remove the dish from the oven and let it cool completely at room temperature. This step is key for a good texture.
Making the Cream Cheese Layer
1. Mixing cream cheese and powdered sugar: In a separate bowl, beat 8 oz of softened cream cheese with an electric mixer. Add 1 cup of powdered sugar slowly until smooth and creamy.
2. Incorporating whipped topping: Now, gently fold in 1 cup of whipped topping. This adds lightness to the cream cheese layer.
Preparing the Strawberry Layer
1. Dissolving gelatin and cooling: In another bowl, mix 1 cup of strawberry gelatin powder with 2 cups of boiling water. Stir well until the gelatin dissolves. Then, add 2 cups of cold water.
2. Mixing in strawberries: Add 2 cups of hulled and sliced fresh strawberries into the gelatin mixture. Stir gently to mix.
Assembling the Cups
1. Layer construction process: Once the pretzel crust has cooled, spread the cream cheese layer evenly over it. Then, carefully pour the strawberry gelatin mixture on top. Make sure to cover it well without mixing the layers.
2. Chilling instructions before serving: Finally, place the dish in the fridge. Chill for at least 3-4 hours, or until the gelatin is firm. This waiting time helps all the flavors meld together.
Tips & Tricks
Perfecting the Pretzel Crust
To make the perfect pretzel crust, avoid sogginess by letting it cool completely after baking. This step is key. If you skip it, the cream cheese layer can make the crust mushy.
For a better texture, use finely crushed pretzels. You can even mix in some crushed nuts for an extra crunch. It adds flavor and makes your crust unique.
Cream Cheese Layer Enhancements
Want to try something new? Swap granulated sugar with honey or agave. These sweeteners bring a nice twist. You can also add a dash of vanilla extract or almond extract for more flavor.
Think about toppings too! Fresh fruit, chocolate shavings, or a drizzle of caramel can make this layer pop.
Serving Suggestions
Presentation is key with Strawberry Pretzel Salad Cups. Serve them on a bright platter to make them stand out. Top each cup with fresh strawberry slices for a burst of color.
Pair these cups with a refreshing drink like lemonade or iced tea. They also go great with brunch items like waffles or pancakes. Your guests will love the mix!

Variations
Fruit Substitutions
You can switch out strawberries for other fruits. Try peaches, blueberries, or raspberries. Each fruit brings its own taste and charm. For a mixed berry version, just combine berries. This lets you enjoy many flavors in one cup. Each fruit pairs well with the creamy layer.
Gluten-Free Options
If you need gluten-free, look for gluten-free pretzels. Many brands offer great choices. You can also make your own by crushing gluten-free crackers. For the rest of the recipe, just stick to gluten-free ingredients. This way, everyone can enjoy this treat.
Low-Sugar and Vegan Alternatives
For a lower sugar version, use less sugar in the cream cheese mix. You can also find low-sugar gelatin options. If you want to make it vegan, use a plant-based cream cheese. Look for brands that taste good and whip well. Top with fresh fruit or a nut-based cream for a tasty finish.
Storage Info
Storing Leftovers
To keep your Strawberry Pretzel Salad Cups fresh, store them in the fridge. Use an airtight container to avoid any strong odors mixing in. You can also cover them tightly with plastic wrap. For best taste, enjoy them within 3 days. After that, they may lose some quality.
Freezing Tips
You can freeze Strawberry Pretzel Salad Cups if you need to store them longer. First, let them chill completely. Then, place them in a freezer-safe container. Make sure to seal it well to prevent freezer burn. When you’re ready to enjoy, thaw them in the fridge overnight. Avoid thawing at room temperature to keep the texture nice.
FAQs
Can I make Strawberry Pretzel Salad Cups ahead of time?
Yes, you can make Strawberry Pretzel Salad Cups ahead of time. I recommend chilling them for at least 3-4 hours. This time allows the layers to set properly. You can store them in the fridge for up to three days. Just cover them with plastic wrap or a lid to keep them fresh.
Can I use frozen strawberries instead of fresh?
Using frozen strawberries is possible, but it changes the taste and texture. Frozen strawberries may be softer when thawed. This can make your dessert a bit mushy. Fresh strawberries give a nice crunch and bright flavor. For the best results, I suggest using fresh strawberries.
What is the best way to serve Strawberry Pretzel Salad Cups?
Serve your Strawberry Pretzel Salad Cups in clear cups for a pretty look. You can garnish with extra strawberry slices or a sprinkle of crushed pretzels on top. This adds a nice touch and crunch. You can also serve them on a colorful platter for a fun presentation.
How long does the gelatin take to set?
The gelatin takes about 3-4 hours to set completely. For best results, chill the dessert overnight if you can. This ensures the layers hold their shape when you serve them. Just be patient and let the fridge do its work!
This blog post covers how to make delicious Strawberry Pretzel Salad Cups. We explored the key ingredients, including crust, cream cheese, and strawberry layers. I shared step-by-step instructions to help you assemble these treats easily.
Remember, you can tweak the recipe to fit your needs. Try different fruits or make it gluten-free if you like. Whether you share these with friends or enjoy them alone, they are sure to please. Enjoy your cooking and have fun!


. To keep your scones fresh, let them cool completely. Place them in an airtight container. You can store them at room temperature for up to three days. If you live in a humid area, refrigerate them to prevent spoilage. Use parchment paper between layers to keep them from sticking. Reheat your scones for the best taste. Preheat your oven to 350°F (175°C). Place the scones on a baking sheet. Heat them for about 5 to 10 minutes, or until warm. You can also use a microwave. Heat them for 15 to 20 seconds. This warms them quickly but may make them soft. To freeze scones, wrap each one in plastic wrap. Place them in a freezer bag or airtight container. Label with the date for easy tracking. They can last up to three months in the freezer. When ready to eat, thaw them in the fridge overnight. Reheat as mentioned above for a fresh taste. Check the Full Recipe for more tips on making these treats! To make cinnamon roll scones, follow this simple process. First, mix the dry ingredients in a bowl. This includes flour, sugar, baking powder, salt, and cinnamon. Next, cut in cold butter until the mix looks crumbly. Then, whisk buttermilk, melted butter, and vanilla in another bowl. Combine the wet and dry mixes gently. Pat the dough into a rectangle, brush melted butter, and sprinkle brown sugar for the swirl. Roll it up, slice it, and bake. For the full recipe, check the details above. Yes, you can use milk instead of buttermilk. If you do, add a splash of lemon juice or vinegar. This helps the milk mimic buttermilk's tangy flavor. It also makes the scones soft and fluffy. However, buttermilk adds a richer taste. Serve cinnamon roll scones warm for the best taste. Drizzle the icing over the top just before serving. You can also sprinkle a little cinnamon on top for added flavor. Pair them with coffee or tea for a relaxing treat. They look great on a nice platter. Cinnamon roll scones last for about two days at room temperature. To keep them fresh longer, store them in an airtight container. You can also refrigerate them for up to a week. Just warm them in the oven before serving to regain that fresh-baked taste. Yes, you can make cinnamon roll scones ahead of time. Prepare the dough, and cut the scones. Then, place them on a baking sheet and freeze until firm. After that, transfer them to a bag or container. When you’re ready, bake them straight from the freezer, adding a few extra minutes to the baking time. This way, you enjoy fresh scones anytime! Making scones is simple and fun. You learned about ingredients, tools, and baking steps. I shared tips to help you avoid mistakes and find the best flavors. You also discovered flavor variations and storage methods. Scones can be your tasty treat for any occasion. With a few easy steps, you can impress your friends. Enjoy baking, and don’t forget to share your tasty results!](https://goldendishy.com/wp-content/uploads/2025/07/878de396-77ac-4fc1-b8cf-b56551936fe1-768x768.webp)


![To make the Easy Lemon Raspberry Loaf, you need a few simple ingredients. Here’s the list you will use: - 1 ¾ cups all-purpose flour - 1 cup granulated sugar - ½ cup unsalted butter - 2 large eggs - 1 teaspoon pure vanilla extract - 1 tablespoon fresh lemon zest - ½ cup freshly squeezed lemon juice - 1 teaspoon baking powder - ½ teaspoon baking soda - ¼ teaspoon fine sea salt - 1 cup fresh raspberries - Powdered sugar for dusting (optional) These ingredients help create a moist and zesty loaf. The lemon zest and juice add bright flavor. Fresh raspberries give you sweet bursts in every bite. Use unsalted butter to control the saltiness. It’s best to use fresh raspberries, but frozen will work too. Make sure to measure everything carefully. Baking is all about balance. Each ingredient plays a role in the final taste and texture. If you want to learn more about the steps to make this treat, check out the Full Recipe. - Setting the Temperature First, set your oven to 350°F (175°C). This step is crucial for even baking. - Preparing the Loaf Pan Grease a 9x5-inch loaf pan. You can also line it with parchment paper. This helps the loaf come out easily after baking. - Method of Mixing In a large bowl, combine softened butter and granulated sugar. Use a hand mixer or stand mixer to beat them together. - Desired Consistency Mix until the blend is light and fluffy. This should take about 3-4 minutes. The mixture should look pale and creamy. - Adding Eggs One at a Time Add the eggs one by one. Mix well after each egg to ensure they are fully blended. - Mixing Techniques After adding the eggs, stir in the vanilla extract and lemon zest. Mix gently but thoroughly to keep the batter smooth. - Combining Flour and Leavening Agents In another bowl, whisk together flour, baking powder, baking soda, and salt. This ensures even distribution of leavening agents. - Proper Mixing Technique Gradually add the dry mix to the wet mixture, alternating with lemon juice. Start and end with the dry ingredients. Mix gently, and don’t overmix. - Techniques to Preserve Raspberry Shape Carefully fold in the raspberries. Use a spatula to gently mix. This keeps the raspberries intact. - Ensuring Even Distribution Make sure the raspberries are evenly spread throughout the batter. This enhances the flavor in every slice. - Baking Time and Techniques for Doneness Pour the batter into the loaf pan. Bake for 55-60 minutes. To check doneness, insert a toothpick into the center of the loaf. It should come out clean. - Cooling Tips for Best Texture Once done, let the loaf cool in the pan for 10-15 minutes. Then, transfer it to a wire rack to cool completely. This helps achieve a perfect texture. Feel free to check the Full Recipe for more details! To make the best lemon raspberry loaf, avoid overmixing. Mixing too much can make the loaf dense. When you combine wet and dry ingredients, mix just until you see no flour. To check for doneness, insert a toothpick into the center. If it comes out clean or with a few crumbs, your loaf is ready. If not, bake a little longer. If the top is browning too fast, cover it with foil halfway through. Measuring ingredients incorrectly can lead to issues. Always use dry measuring cups for flour and sugar. Spoon the flour into the cup, then level it off with a knife. This keeps the correct ratio. Adjust baking time if you use a dark pan. Dark pans can cook faster, so start checking for doneness a few minutes early. Fresh lemon juice makes a big difference. Squeeze the lemons right before you use them. This keeps the juice bright and zesty. You can also add extras like nuts or spices. Chopped walnuts or a touch of cinnamon can add great depth. For a sweet twist, consider a lemon glaze on top for extra shine. {{image_4}} You can switch out raspberries for other fruits. Blueberries make a great choice. They add a sweet touch and look pretty too. Strawberries can also work well. Just chop them into smaller pieces. If you like seasonal fruits, use what is fresh. In summer, try peaches or cherries. In fall, apples or pears can add a nice twist. Each fruit brings its own flavor and charm to the loaf. If you need a gluten-free loaf, don’t worry. You can use almond flour or coconut flour. Both work great as substitutes. Just remember, the texture may change a bit. You might need to adjust the liquid too. Gluten-free flours absorb more moisture. Adding an extra egg or some yogurt can help keep it moist and fluffy. Want to jazz up your loaf? Adding nuts can give it a nice crunch. Chopped walnuts or pecans are perfect. Just fold them in gently with the raspberries. You can also add spices for warmth. Cinnamon or nutmeg can enhance the flavor. For a sweet finish, create a lemon glaze. Mix powdered sugar with lemon juice. Drizzle this over the cooled loaf for a zesty touch. These variations keep your lemon raspberry loaf exciting and fun! For the full recipe, check out the details provided earlier. Room Temperature Storage Store your lemon raspberry loaf at room temperature. Use an airtight container to keep it fresh. This will help it stay moist and tasty. It can last for up to three days this way. Refrigeration Guidelines If you want to keep it longer, put the loaf in the fridge. Wrap it tightly in plastic wrap or foil. This will keep it from drying out. It can last up to one week in the fridge. How to Freeze the Loaf Freezing the lemon raspberry loaf is easy. Wait until it cools completely. Then, wrap it in plastic wrap and foil. This protects it from freezer burn. You can freeze it for up to three months. Thawing Tips To thaw, take it out of the freezer. Leave it in the fridge overnight. If you want it warm, slice and heat it in the microwave for a few seconds. Freshness Indicators Check for signs of spoilage. Look for mold or a change in smell. If the loaf feels dry or hard, it’s time to toss it. Maximum Storage Duration In total, the loaf can last up to one week in the fridge or three months in the freezer. Proper storage helps maintain its delicious flavor and texture. To keep the loaf moist, use a few key ingredients. Butter adds fat and moisture. Eggs also help with texture. Additionally, use fresh lemon juice for tang and juiciness. Baking techniques matter too. Do not overmix the batter. This keeps air in the loaf. Bake at the right temperature and check for doneness with a toothpick. A little moist crumb is perfect! Yes, you can use frozen raspberries! Just make sure to thaw them first. Drain any extra juice to avoid a soggy loaf. Using frozen fruit may change the texture. Fresh raspberries give a firmer bite. However, frozen raspberries still add great flavor and color. You can substitute lemon juice with lime or orange juice. Lime juice adds a tart zing. Orange juice gives a sweeter flavor. Keep in mind that this changes the flavor profile. The loaf will taste different but still delicious! This loaf pairs well with tea or coffee. The bright lemon flavor complements hot drinks nicely. For a fun twist, serve it with whipped cream. Fresh berries on the side add a lovely touch too. For the full recipe, feel free to check the [Full Recipe]. You now know how to make a delicious Lemon Raspberry Loaf. We covered key ingredients, step-by-step instructions, and helpful tips for success. Remember, watch your mixing and baking time to avoid mistakes. Try different fruits or flavors to put your spin on it. Store it properly to keep it fresh. Whether for breakfast or dessert, this loaf will please everyone. Enjoy your baking adventure and the tasty treats you create!](https://goldendishy.com/wp-content/uploads/2025/07/5ff44623-bcfe-47fa-965b-01d738fc2f08-768x768.webp)

