Strawberry Lemonade Cake Fresh and Flavorful Delight

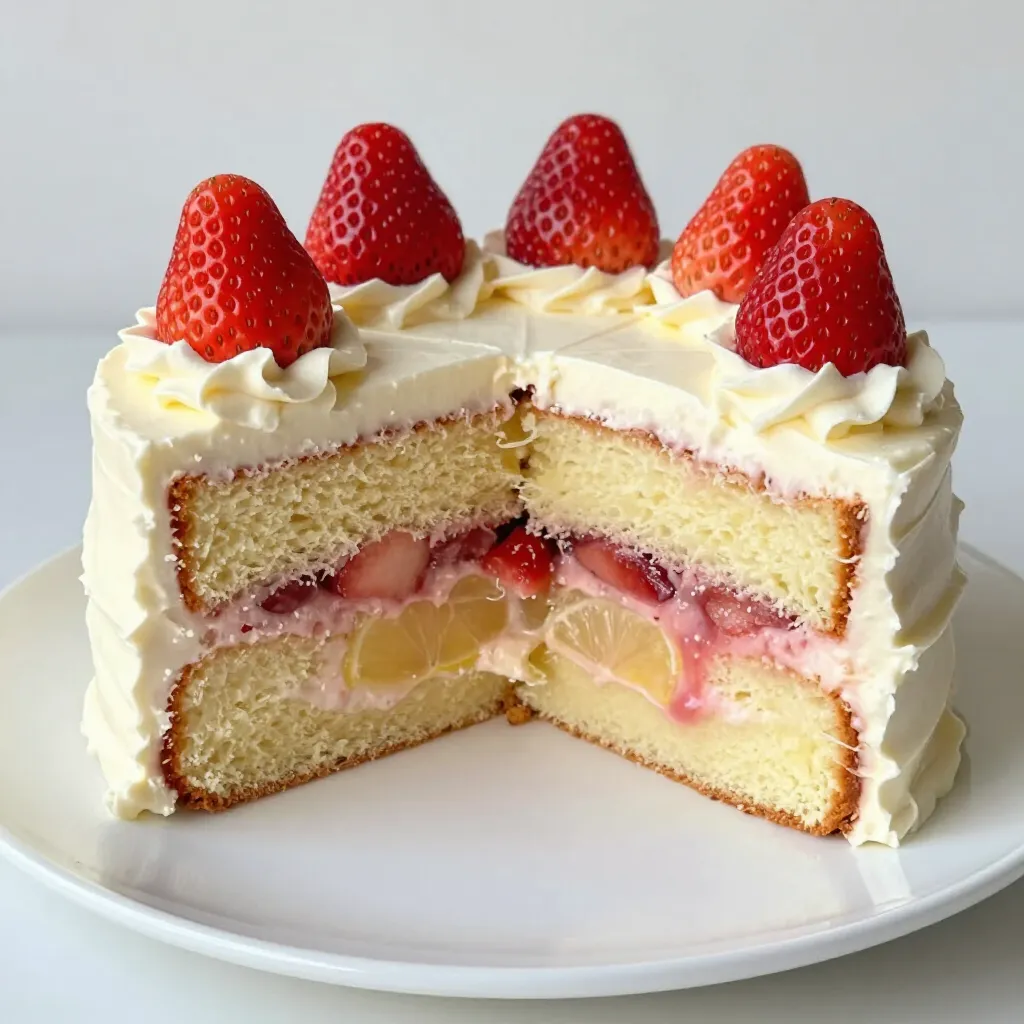
Are you ready to enjoy a burst of flavor? My Strawberry Lemonade Cake is the perfect summer treat! It brings together the sweet taste of fresh strawberries and the tangy zing of lemonade. This cake is sure to impress your friends and family. In this post, I’ll guide you through the easy steps to make this delightful dessert, covering ingredients, tips, and storage. Let’s dive into the deliciousness!
Why I Love This Recipe
- Fresh and Fruity Flavor: This cake combines the sweet taste of strawberries with the tangy zest of lemons, creating a refreshing dessert that’s perfect for any occasion.
- Bright and Beautiful Presentation: The vibrant colors of the strawberries and lemon frosting make this cake not only delicious but also a stunning centerpiece for your table.
- Perfect for Celebrations: This Strawberry Lemonade Cake is ideal for birthdays, picnics, or summer gatherings, bringing joy and deliciousness to your celebrations.
- Easy to Make: With straightforward steps and simple ingredients, this recipe is accessible for bakers of all skill levels, ensuring everyone can enjoy a slice.
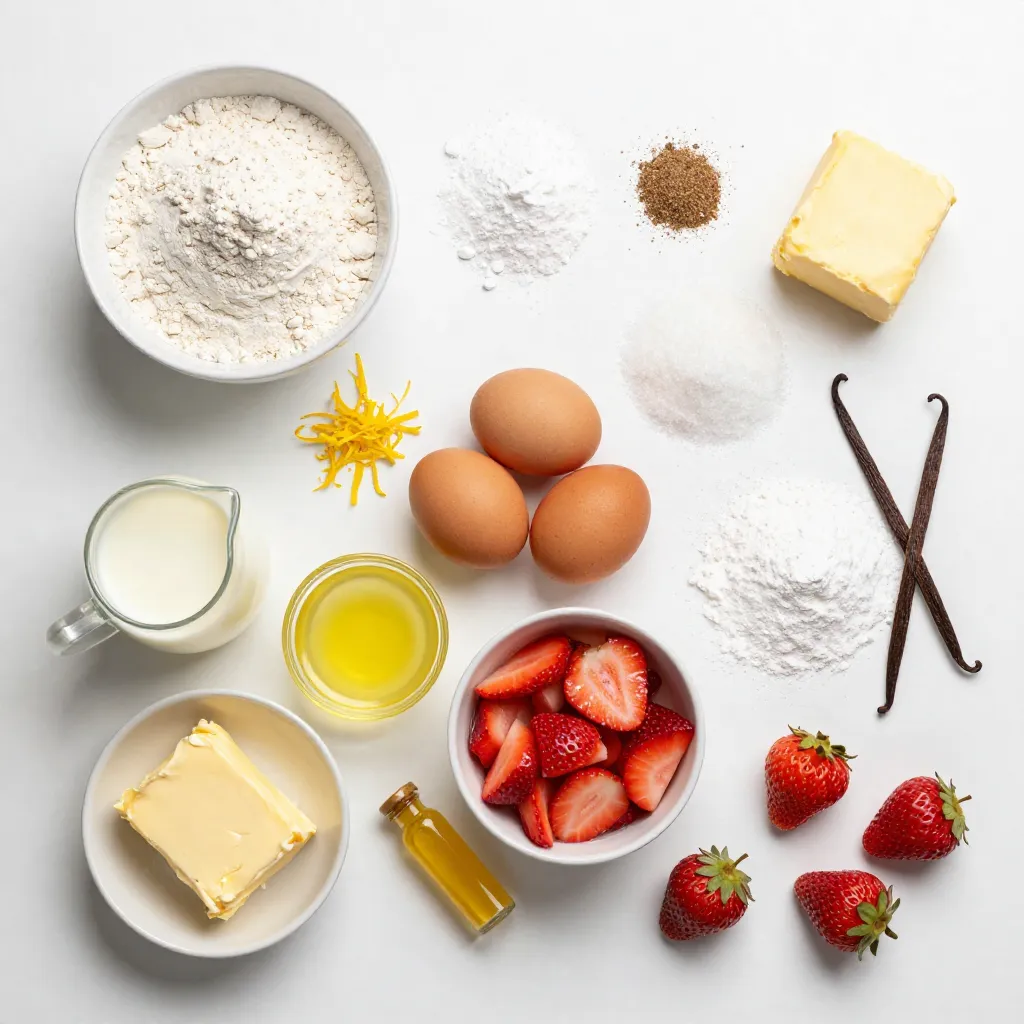
Ingredients
List of Ingredients for Cake
– 2 ½ cups all-purpose flour
– 2 teaspoons baking powder
– ½ teaspoon baking soda
– 1 teaspoon salt
– 1 cup unsalted butter, softened
– 2 cups granulated sugar
– 4 large eggs
– 1 tablespoon fresh lemon zest
– 1 cup buttermilk, at room temperature
– 1 tablespoon fresh lemon juice
– 1 cup fresh strawberries, pureed
– 1 teaspoon vanilla extract
List of Ingredients for Frosting
– 1 cup unsalted butter, softened
– 4 cups powdered sugar
– 4 tablespoons fresh lemon juice
– 1 teaspoon vanilla extract
– Fresh strawberries, trimmed and halved
Key Substitutions
You can use yogurt or milk if you don’t have buttermilk. For a dairy-free option, try almond milk mixed with lemon juice as a substitute. If you want a lighter cake, use egg whites instead of whole eggs.

Step-by-Step Instructions
Prepping the Oven and Pans
First, you need to preheat your oven to 350°F (175°C). This step is key for even baking. Next, take two 9-inch round cake pans. Grease them well with butter or oil, then dust them with flour. This will help your cakes come out easily after baking.
Mixing Dry Ingredients
In a medium bowl, whisk together the dry ingredients. Combine 2 ½ cups of all-purpose flour, 2 teaspoons of baking powder, ½ teaspoon of baking soda, and 1 teaspoon of salt. Make sure it’s well mixed. Set this bowl aside for now.
Creaming Butter and Sugar
Now, grab a large bowl and an electric mixer. Beat 1 cup of softened unsalted butter with 2 cups of granulated sugar. Mix them on medium-high speed until the mixture is light and fluffy. This should take about 4 to 5 minutes. This step adds air, which helps the cake rise.
Adding Eggs and Flavoring
Next, add 4 large eggs, one at a time, to the butter-sugar mix. Make sure to beat well after each egg. After that, mix in 1 tablespoon of fresh lemon zest and 1 teaspoon of vanilla extract. This adds a bright flavor to your cake.
Combining Wet and Dry Ingredients
Now it’s time to combine everything. Slowly add the dry mixture to the butter mixture. Alternate this with 1 cup of buttermilk and 1 tablespoon of fresh lemon juice. Start and end with the flour mixture. Mix gently until it’s just combined. This keeps your cake light and fluffy.
Baking and Cooling the Cakes
Pour the batter evenly into the prepared pans. Smooth the tops with a spatula. Bake for 25 to 30 minutes. To test if they’re done, insert a toothpick in the center. If it comes out clean, they’re ready! Allow the cakes to cool in the pans for 10 minutes. Then, transfer them to wire racks to cool completely.
Preparing the Frosting
In a mixing bowl, beat 1 cup of softened unsalted butter. Mix on medium speed until creamy. Then, slowly add 4 cups of powdered sugar. Mix on low until it’s all combined. Finally, add 4 tablespoons of fresh lemon juice and 1 teaspoon of vanilla extract. Beat until your frosting is light and fluffy.
Assembly and Decoration
Once the cakes are fully cool, place one layer on a serving plate. Spread a generous layer of frosting on top. Carefully add the second layer on top. Frost the top and sides evenly. For decoration, use fresh strawberries, trimming and halving them. Place them on top for a bright look. For the best taste, slice and serve your cake chilled.
Tips & Tricks
Ensuring a Moist Cake
To keep your cake moist, start with room-temperature butter and buttermilk. This helps the batter mix well. Another tip is to avoid overmixing after adding the flour. Mix just until combined; this keeps the cake tender. Adding the strawberry puree also adds moisture and flavor.
Flavor Enhancement Suggestions
For a burst of extra flavor, try adding more lemon zest. You can also use lemon extract for a stronger lemon taste. Fresh herbs like mint can add a unique twist. If you like a bit of spice, a dash of cardamom or ginger can brighten the cake.
Preventing Cake from Sticking to the Pan
To prevent sticking, grease the pans well with butter or spray. After greasing, dust them lightly with flour. You can also line the bottom with parchment paper for easy removal. Allow the cakes to cool for a few minutes before flipping them out. This way, they won’t stick or break.
Pro Tips
- Fresh Strawberries: Use ripe, fresh strawberries for the puree to enhance the flavor of your cake. If strawberries are not in season, frozen strawberries can also work, but ensure they are thawed and drained well before pureeing.
- Room Temperature Ingredients: Make sure all your ingredients, especially eggs and buttermilk, are at room temperature. This helps create a smoother batter and ensures even baking.
- Don’t Overmix: When combining the wet and dry ingredients, mix just until combined. Overmixing can lead to a denser cake, so be gentle when folding in the strawberry puree as well.
- Chill Before Serving: For the best flavor and texture, refrigerate the cake for at least 1 hour before slicing. This allows the frosting to set and the flavors to meld beautifully.
Variations
Using Different Fruits (e.g., raspberries, blueberries)
You can easily swap strawberries for other fruits. Raspberries and blueberries work well. They add a nice tartness and color. Just replace the strawberry puree with an equal amount of your chosen fruit. If you use raspberries, you may want to strain the puree. This keeps the seeds out and gives a smooth texture.
Gluten-Free Option
Making this cake gluten-free is simple. Use a gluten-free all-purpose flour blend instead of regular flour. Make sure it contains xanthan gum for structure. This tweak keeps the cake light and fluffy. The taste remains just as good!
Lemonade Flavor Variations
You can play with the lemonade flavor too. Try adding extra lemon juice for a bolder taste. You can also mix in some grapefruit juice for a unique twist. For a sweeter version, consider lemon-lime soda in the cake mix. Each change brings a new layer of flavor and fun!
Storage Info
Best Storage Practices
To store your Strawberry Lemonade Cake, keep it in an airtight container. This helps to trap moisture and flavor. If you do not have a container, wrap the cake in plastic wrap. Store it at room temperature for up to 2 days. If you need to keep it longer, refrigerate it for up to a week.
How to Keep the Cake Fresh
For the best taste, eat your cake within the first few days. If you notice it drying out, add a slice of bread to the container. The bread helps keep the cake moist. Just make sure it does not touch the cake. You can also cover the cake with a damp paper towel before sealing it. This simple tip helps retain moisture.
Freezing Instructions
Freezing the Strawberry Lemonade Cake is a great option if you want to save some for later. First, let the cake cool completely. Then, wrap each layer tightly in plastic wrap. After that, place them in a freezer-safe bag or container. This way, they can last for up to 3 months. When you are ready to eat, thaw the cake in the fridge overnight. You can frost it once it is fully defrosted. Enjoy the fresh flavor even when frozen!
FAQs
Can I make Strawberry Lemonade Cake ahead of time?
Yes, you can make this cake ahead of time. Bake the cake layers and let them cool completely. Wrap them tightly in plastic wrap. Store them at room temperature for up to two days. If you want to keep it longer, freeze the layers for up to three months. Frost the cake on the day you plan to serve it. This helps keep the frosting fresh.
How do I fix a dry cake?
If your cake turns out dry, there are a few tricks you can use. First, brush the layers with simple syrup. This is a mixture of equal parts sugar and water. Heat it until the sugar dissolves, then cool it. You can also add whipped cream or fresh fruit to serve with the cake. This adds moisture and flavor.
Can I use frozen strawberries for the puree?
Yes, you can use frozen strawberries for the puree. Thaw them first, then blend until smooth. This works well when fresh strawberries are not available. Just remember that frozen strawberries may have a slightly different taste than fresh ones. They can still add great flavor to your cake.
What can I serve with Strawberry Lemonade Cake?
Strawberry Lemonade Cake pairs well with many treats. You can serve it with whipped cream, fresh strawberries, or even a scoop of vanilla ice cream. A light fruit salad also complements the cake nicely. These options enhance the refreshing flavors of the cake.
How long does the cake last in the fridge?
The cake lasts about five days in the fridge. Store it in an airtight container to keep it fresh. If you have leftover cake, make sure to slice it before storing. This way, you can enjoy a slice whenever you want.
This blog post showed you how to make a tasty Strawberry Lemonade Cake. We covered the ingredients, step-by-step instructions, and some helpful tips. You learned how to store your cake and even explored fun variations.
In the end, baking can bring joy and delicious treats. With this guide, you can create a cake that everyone will love. Enjoy your baking journe

Strawberry Lemonade Cake
Ingredients
- 2.5 cups all-purpose flour
- 2 teaspoons baking powder
- 0.5 teaspoon baking soda
- 1 teaspoon salt
- 1 cup unsalted butter, softened to room temperature
- 2 cups granulated sugar
- 4 large eggs
- 1 tablespoon fresh lemon zest
- 1 cup buttermilk, at room temperature
- 1 tablespoon fresh lemon juice
- 1 cup fresh strawberries, pureed
- 1 teaspoon vanilla extract
- 1 cup unsalted butter, softened to room temperature (for frosting)
- 4 cups powdered sugar
- 4 tablespoons fresh lemon juice (for frosting)
- 1 teaspoon vanilla extract (for frosting)
- to taste fresh strawberries, trimmed and halved for decoration
Instructions
- Preheat the Oven: Begin by preheating your oven to 350°F (175°C). Generously grease and flour two 9-inch round cake pans to ensure easy removal after baking.
- Mix Dry Ingredients: In a medium bowl, whisk together the all-purpose flour, baking powder, baking soda, and salt until well combined. Set this mixture aside for later use.
- Cream Butter and Sugar: In a large mixing bowl, use an electric mixer to beat the softened butter with the granulated sugar on medium-high speed until the mixture is light and fluffy, approximately 4-5 minutes in duration.
- Add Eggs and Flavors: Incorporate the eggs into the butter-sugar mixture one at a time, ensuring to beat well after each addition. Next, mix in the lemon zest and vanilla extract until fully blended.
- Combine Ingredients: Gradually introduce the flour mixture to the butter mixture, alternating with the buttermilk and lemon juice. Begin and end the process with the flour mixture. Mix gently until just combined to maintain a light texture.
- Incorporate Strawberry Puree: Carefully fold in the strawberry puree using a spatula, ensuring it is evenly distributed without overmixing the batter.
- Bake the Cakes: Evenly pour the cake batter into the prepared pans and use a spatula to smooth the tops. Bake in the preheated oven for 25-30 minutes, or until a toothpick inserted in the center comes out clean.
- Cool the Cakes: Allow the cakes to cool in the pans for 10 minutes before carefully transferring them to wire racks to cool completely.
- Prepare the Frosting: In a mixing bowl, beat the softened butter on medium speed until creamy. Gradually add the powdered sugar, mixing on low until fully incorporated. Finally, add fresh lemon juice and vanilla extract, beating until the frosting is light and fluffy.
- Assembly: Once the cakes are completely cooled, place one layer on a serving plate. Spread a generous layer of frosting on top before carefully adding the second layer. Frost the top and sides of the cake evenly for a smooth finish.
- Decorate: Adorn the top of the cake with fresh strawberry halves for a vibrant and appealing presentation. For best flavor, slice and serve chilled.


![To make Peach Cobbler French Toast, gather these items: - 4 slices of thick bread (brioche or challah is best) - 2 ripe peaches, sliced (canned peaches work too; drain them) - 2 large eggs - 1 cup milk (whole or almond milk is great) - 1 tablespoon pure vanilla extract - 1 teaspoon ground cinnamon - 1 tablespoon brown sugar - 1 tablespoon unsalted butter (for cooking) - ½ cup granola (optional, for crunch) - Whipped cream (optional, for serving) If you have dietary needs, consider these swaps: - For gluten-free, use gluten-free bread. - Vegan? Swap eggs with flaxseed meal and use plant-based milk. - For low-sugar diets, try a sugar substitute in place of brown sugar. Picking peaches is easy with these tips: - Look for peaches that are firm but slightly soft when squeezed. - Choose fruit with a sweet smell; this indicates ripeness. - Avoid peaches with bruises or dark spots, as these can affect flavor and texture. By following these tips and using the right ingredients, you’ll make a delightful Peach Cobbler French Toast that everyone will love! Check out the Full Recipe for more details. Making Peach Cobbler French Toast is a fun and simple process. I’ll walk you through each step to ensure your dish turns out perfectly. 1. Mixing the egg custard: In a medium bowl, whisk together 2 large eggs, 1 cup of milk, 1 tablespoon of pure vanilla extract, and 1 teaspoon of ground cinnamon. Mix well until it is smooth and creamy. This egg custard gives the French toast its rich flavor. 2. Soaking the bread slices: Pour the egg mixture into a shallow dish. Take 4 slices of thick bread, like brioche or challah. Place each slice in the dish, soaking for about 2-3 minutes on each side. Make sure they absorb the custard well. 3. Preparing the peach topping: While the bread soaks, slice 2 ripe peaches. If you use canned peaches, ensure they are drained. In a small saucepan, combine the sliced peaches with 1 tablespoon of brown sugar. Cook over medium heat for about 5-7 minutes, stirring often. When the peaches are soft and syrupy, take them off the heat. 4. Cooking the French toast: Heat a skillet over medium heat and add 1 tablespoon of unsalted butter. Let the butter melt completely. Place the soaked bread slices in the skillet. Cook each side for 3-4 minutes until golden brown. The butter helps give the toast a nice, crisp texture. Once cooked, arrange the French toast on plates and spoon the warm peach topping over each slice. For a delightful crunch, you can sprinkle granola on top. If you want to indulge, add a dollop of whipped cream. For detailed steps, refer to the Full Recipe. - Achieving the perfect golden crust: To get that nice, golden crust, use thick bread. Brioche or challah works best. Soak each slice well, but don't leave it too long. This ensures the center stays soft while the outside crisps up. - Temperature control for even cooking: Keep your skillet or griddle at medium heat. If it’s too hot, the bread will burn before cooking through. If it’s too cool, you won’t get the lovely crust. Adjust as needed while cooking each slice. - How to avoid soggy bread: Soak the bread just enough to absorb the flavors. If the bread is too soggy, it won’t cook well. A quick 2-3 minute soak on each side is perfect for keeping it fluffy yet not falling apart. - Pairing with syrup or whipped cream: Drizzle with maple syrup for sweetness. A dollop of whipped cream adds a creamy touch. Both make your Peach Cobbler French Toast even more delightful. - Presentation ideas for special occasions: Stack the slices on a platter. Add warm peach syrup on top. Garnish with fresh peach slices. A sprinkle of cinnamon creates an eye-catching centerpiece for brunch. - Best sides to complement Peach Cobbler French Toast: Serve with crispy bacon or sausages for a savory balance. Fresh fruit adds color and freshness, making your meal more appealing. You can also add a light salad for a refreshing touch. For the full recipe, check out [Full Recipe]. {{image_4}} You can make Peach Cobbler French Toast to fit your diet. If you need gluten-free options, choose gluten-free bread. Many brands offer tasty alternatives. For dairy-free choices, almond or oat milk works well. Both give a nice flavor. You can also swap out spices. Try nutmeg or allspice for a twist. Extracts like almond or maple add a fun taste. To make this dish even better, think about adding nuts or seeds. Chopped pecans or walnuts give a nice crunch. You can also mix in berries. Blueberries or raspberries pair well with peaches. They add color and flavor. If you want new fruit choices, try apples or mango. Both fruits bring a fresh taste and keep it exciting. With these tips, you can create your own unique version. Check out the Full Recipe for more details! To keep your Peach Cobbler French Toast fresh, follow these tips: - Refrigerate promptly: Place leftover French toast in an airtight container within two hours of cooking. - Layer wisely: If you have multiple pieces, insert parchment paper between them to prevent sticking. - Use within three days: For the best taste and texture, enjoy your leftovers within this time. When it comes to reheating, use a skillet or microwave: - Skillet method: Heat on low for about 3-4 minutes on each side. This keeps the toast crispy. - Microwave method: Heat on medium for 30-second intervals until warm. This method may soften the toast. You can freeze Peach Cobbler French Toast for later enjoyment! Here’s how: - Cool completely: Let the French toast cool to room temperature before freezing. - Wrap well: Use freezer-safe bags or wrap each slice in plastic wrap, then aluminum foil. - Label and date: Write the date on the bag for easy tracking. To thaw and reheat: - Thaw overnight: Place in the fridge for several hours or overnight. - Reheat: Use the skillet method mentioned above or microwave for 1-2 minutes until hot. Now you can enjoy this delicious treat anytime! Check out the Full Recipe for all the details. Choosing the right bread makes a big difference. I recommend using thick slices of brioche or challah. These breads soak up the egg mixture well and become nice and fluffy. Look for bread that is fresh but not too soft. You want a sturdy texture that holds up during cooking. Yes, you can prepare some parts ahead of time. You can soak the bread slices in the egg mixture and store them in the fridge for a few hours. Just be sure to cook them right before serving. You can also prepare the peach topping in advance and warm it up when you are ready to eat. If you don’t have peaches, you can try other fruits. Fresh or canned sliced pears work well. You can also use berries like blueberries or strawberries. Just keep in mind that cooking times may vary slightly. The cooked Peach Cobbler French Toast lasts about three days in the fridge. Store it in an airtight container to keep it fresh. When you reheat it, warm it in a skillet or microwave until hot. This helps keep the texture nice. For the full recipe, check the one provided above. Peach Cobbler French Toast is a delightful dish that brings joy to breakfast. We covered ingredients, preparation steps, and useful tips for cooking. I offered ideas for variations, storage, and answers to common questions. Embrace your creativity with this recipe. Try different fruits or spices for unique flavors. Enjoy the process and make it your own! Happy cooking!](https://goldendishy.com/wp-content/uploads/2025/06/19b86d0b-72ea-4091-b6de-feef30e599d4-768x768.webp)
