Sriracha Lime Grilled Shrimp Flavorful Dinner Delight

Are you ready to spice up your dinner routine? This Sriracha Lime Grilled Shrimp will bring bold flavors to your table! With a zesty kick and quick prep time, it’s perfect for busy nights or casual gatherings. I’ll guide you through easy steps and tips, from selecting fresh shrimp to grilling techniques. Let’s dive into this flavorful dinner delight that will have everyone asking for seconds!
Why I Love This Recipe
- Bold Flavors: The combination of Sriracha and lime creates a perfect balance of heat and acidity that elevates the shrimp.
- Quick and Easy: With minimal prep time and a short marinating period, this recipe is perfect for busy weeknights or last-minute gatherings.
- Healthy Option: Shrimp is a lean protein that is low in calories, making this dish a nutritious choice without sacrificing flavor.
- Versatile Serving: These grilled shrimp can be served as an appetizer or main dish, and they pair wonderfully with various sides.
Ingredients
List of Ingredients
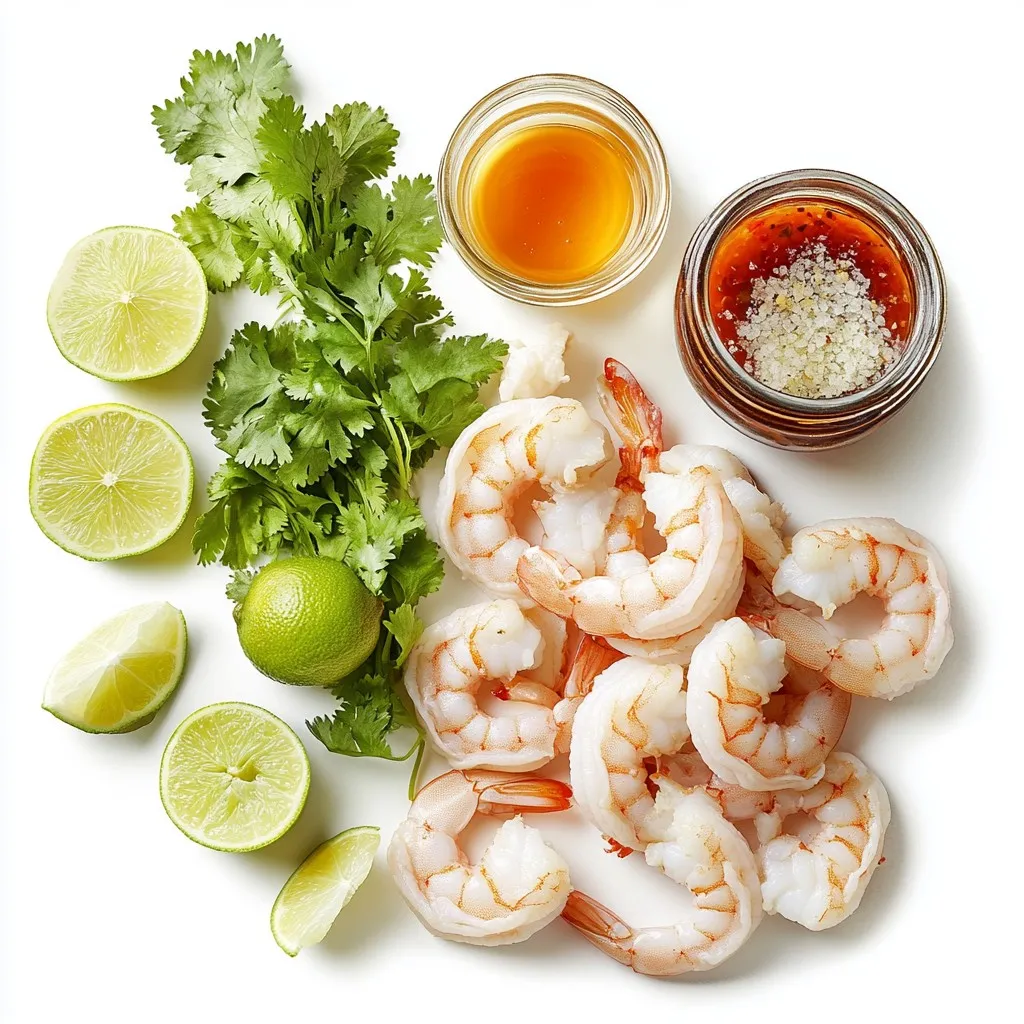
To make Sriracha lime grilled shrimp, gather these simple ingredients:
– 1 lb large shrimp, peeled and deveined
– 3 tablespoons Sriracha sauce
– 2 tablespoons freshly squeezed lime juice
– 1 tablespoon lime zest
– 2 tablespoons olive oil
– 2 cloves garlic, finely minced
– 1 teaspoon honey
– Sea salt and freshly ground black pepper to taste
– Fresh cilantro leaves, for garnish
– Lime wedges, for serving
Ingredient Substitutions
You can swap some ingredients if needed. For the shrimp, any large shrimp will work. Use a different hot sauce if you want less spice. Lime juice can be replaced with lemon juice for a new twist. If you don’t have honey, maple syrup is a good choice. For the olive oil, any light oil will do.
Tips for Selecting Fresh Shrimp
When buying shrimp, look for these signs of freshness:
– They should smell like the ocean, not fishy.
– The shells should be firm and not slimy.
– The shrimp should have a nice, shiny color.
– If possible, buy shrimp that are wild-caught. They often taste better than farmed shrimp. Always check the sell-by date.
These tips will help you choose the best shrimp for your delicious dish.

Step-by-Step Instructions
Detailed Preparation Steps
First, gather your ingredients. You will need one pound of large shrimp, Sriracha sauce, lime juice, lime zest, olive oil, garlic, honey, sea salt, and black pepper. In a medium mixing bowl, combine three tablespoons of Sriracha sauce, two tablespoons of lime juice, one tablespoon of lime zest, and two tablespoons of olive oil. Add two minced garlic cloves and one teaspoon of honey. Sprinkle in sea salt and black pepper to taste. Whisk this mixture until it blends well.
Next, add the shrimp to the bowl. Make sure each shrimp is coated fully in the marinade. Cover the bowl with plastic wrap, then refrigerate it for at least 30 minutes. For deeper flavor, let the shrimp soak for up to two hours.
Grilling Tips
Preheat your grill to medium-high heat. If you use wooden skewers, soak them in water for about 30 minutes. This step keeps the skewers from burning on the grill. Once the grill is hot, thread the marinated shrimp onto the soaked skewers. Leave a small gap between each shrimp. This gap helps them cook evenly.
Cooking Time and Techniques
Place the skewers on the grill. Cook the shrimp for about 2-3 minutes on each side. Watch for the shrimp to change color. They should turn a bright pink and become opaque. This change shows they are fully cooked. After grilling, remove the skewers and let them rest for one minute. This resting time helps keep the juices inside.
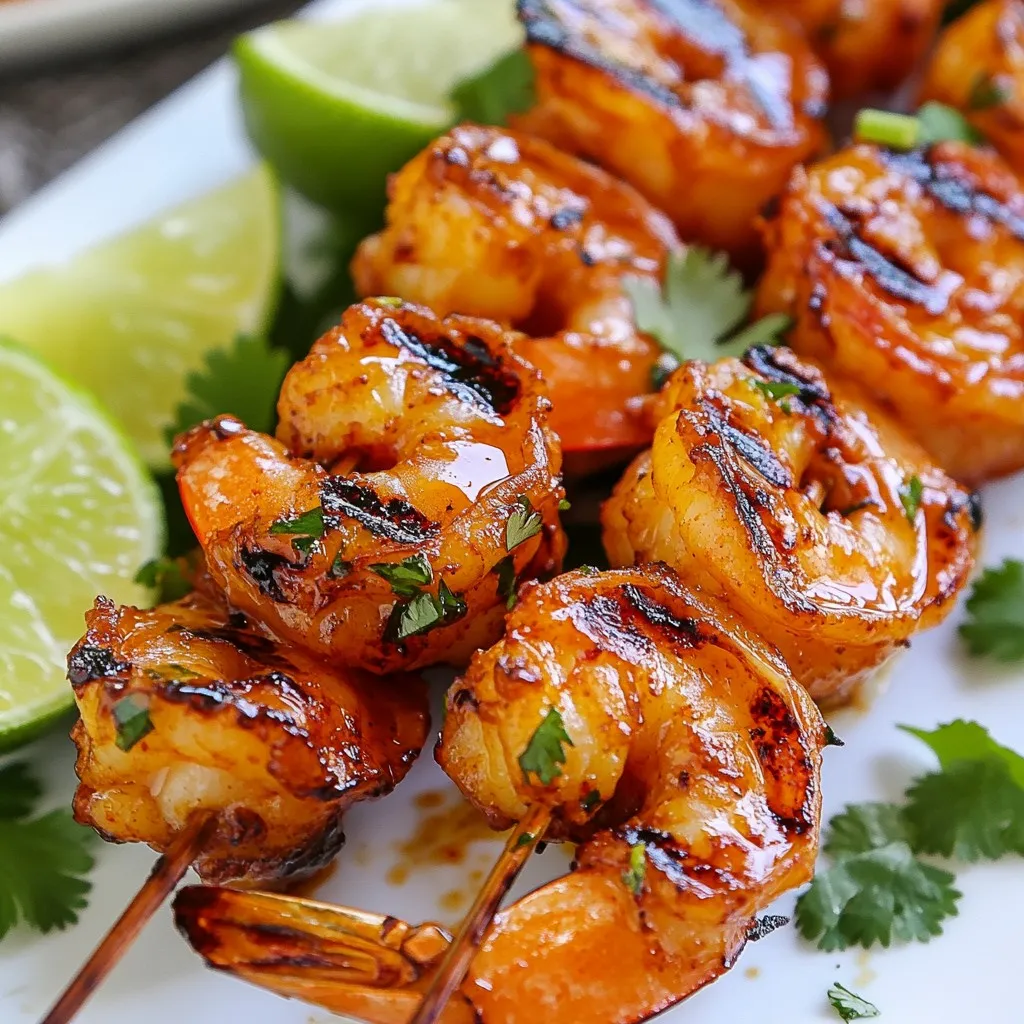
Now, your Sriracha lime grilled shrimp is ready to serve. Garnish with fresh cilantro and add lime wedges for a zesty touch. Enjoy your flavorful dinner delight!
Tips & Tricks
Marinade Best Practices
For the best flavor, let your shrimp soak in the marinade. I suggest 30 minutes at least. If you have time, marinate for up to 2 hours. Use a medium bowl to mix your Sriracha sauce, lime juice, lime zest, olive oil, minced garlic, honey, and some sea salt and pepper. Whisk well until smooth. Make sure each shrimp is fully coated. This ensures every bite bursts with flavor.
Achieving Perfectly Grilled Shrimp
Grilling shrimp is easy if you follow some simple steps. First, preheat your grill to medium-high heat. If using wooden skewers, soak them for about 30 minutes. This keeps them from burning. Thread your marinated shrimp onto the skewers, but leave a small gap between each piece. This helps them cook evenly. Grill shrimp for 2-3 minutes on each side. Look for a vibrant pink color and opaque texture to know they’re done.
Serving Suggestions and Pairings
Once your shrimp are ready, let them rest for a minute. This keeps them juicy. Serve the skewers on a bright platter. I love adding fresh cilantro leaves on top for a pop of color. Lime wedges on the side add a zesty kick. Pair your shrimp with rice, a fresh salad, or even tacos for a full meal. Enjoy the delicious burst of flavors!
Pro Tips
- Perfectly Cooked Shrimp: Keep an eye on the shrimp while grilling; they cook quickly and should only take 2-3 minutes per side. Overcooking can lead to rubbery shrimp.
- Marination Time: For the best flavor, marinate the shrimp for at least 30 minutes, but up to 2 hours is ideal. This allows the spices and lime to penetrate the shrimp fully.
- Grill Temperature: Make sure the grill is preheated to medium-high heat. This ensures a nice sear on the shrimp and prevents them from sticking to the grill.
- Serving Suggestion: Serve the shrimp skewers with additional lime wedges and a side of dipping sauce, such as a tangy yogurt sauce, to enhance the flavors further.

Variations
Sriracha Lime Shrimp Tacos
You can turn Sriracha lime grilled shrimp into tasty tacos. Use warm corn tortillas. Add your grilled shrimp, some crunchy cabbage, and avocado slices. A squeeze of lime brings it all together. You can also add a drizzle of extra Sriracha for more heat. This meal is fun and easy to make.
Alternative Marinades
You can change the flavor by using different marinades. Try a garlic and herb mix with olive oil, lemon juice, and parsley. You can also mix soy sauce, ginger, and sesame oil for an Asian twist. Each marinade gives the shrimp a unique taste. Feel free to experiment and find your favorite!
Using Other Proteins
If shrimp isn’t your thing, you can use other proteins. Chicken or fish works well with the same marinade. Just adjust the cooking time based on the protein you choose. For chicken, grill until it reaches a safe internal temperature. For fish, cook until it flakes easily with a fork. Each choice offers a new flavor experience!
Storage Info
How to Store Leftovers
After enjoying your Sriracha Lime Grilled Shrimp, you might have some leftovers. Place the shrimp in an airtight container. Store it in the fridge for up to three days. Make sure it cools down before sealing. This keeps the shrimp fresh and tasty.
Reheating Tips
When reheating, avoid using a microwave. It can make shrimp rubbery. Instead, use a skillet on low heat. Add a tiny bit of oil to the pan. Heat the shrimp for a few minutes, turning often. This keeps the shrimp juicy and flavorful.
Freezing Grilled Shrimp
If you want to save the shrimp for later, freezing is a great option. First, let the shrimp cool completely. Then, place them in a freezer-safe bag. Remove as much air as possible before sealing. You can freeze them for up to three months. When ready to eat, thaw in the fridge overnight.
FAQs
Can I use frozen shrimp?
Yes, you can use frozen shrimp. Just thaw them before cooking. Place them in cold water for about 15-20 minutes. This makes them safe to eat and easier to cook. Always check for a firm texture. Avoid shrimp that feel mushy.
How do I know when shrimp are cooked?
Shrimp cook quickly. They turn bright pink and become opaque. Look for a slight curl as they cook. Use a timer for 2-3 minutes on each side. When done, they should feel firm to the touch. Overcooked shrimp can become tough, so watch carefully.
What can I serve with Sriracha Lime Grilled Shrimp?
Sriracha Lime Grilled Shrimp pairs well with many sides. Here are some ideas:
– Rice: Jasmine or basmati rice adds a nice touch.
– Salad: A fresh green salad with citrus dressing brightens the meal.
– Tacos: Serve the shrimp in soft tortillas with toppings.
– Vegetables: Grilled veggies or a corn salad complement the shrimp well.
– Dips: Prepare a creamy avocado dip for a fun twist.
These options make your meal colorful and tasty!
We covered how to make Sriracha Lime Grilled Shrimp with fresh ingredients, step-by-step tips, and tricks. Choosing the right shrimp and knowing how to grill them perfectly is key. Remember to try different marinades for fun flavors. Store leftovers properly to enjoy later. Serving ideas enhance your meal even more. Use the FAQs to clarify any doubts. With these tips, you can create a tasty dish that satisfies. Get ready to impress your friends and famil

Sriracha Lime Grilled Shrimp
Ingredients
- 1 lb large shrimp, peeled and deveined
- 3 tablespoons Sriracha sauce
- 2 tablespoons freshly squeezed lime juice
- 1 tablespoon lime zest
- 2 tablespoons olive oil
- 2 cloves garlic, finely minced
- 1 teaspoon honey
- to taste sea salt and freshly ground black pepper
- for garnish fresh cilantro leaves
- for serving lime wedges
Instructions
- In a medium mixing bowl, combine the Sriracha sauce, freshly squeezed lime juice, lime zest, olive oil, finely minced garlic, honey, and a sprinkle of sea salt and black pepper. Whisk these ingredients together until the marinade is well blended and smooth.
- Add the peeled and deveined shrimp to the marinade, making sure each piece is thoroughly coated. Cover the bowl with plastic wrap or a lid and refrigerate for at least 30 minutes to allow the flavors to absorb (for a richer flavor, marinate for up to 2 hours).
- Preheat your grill to medium-high heat. If you are using wooden skewers, soak them in water for about 30 minutes prior to grilling to prevent them from burning.
- Carefully thread the marinated shrimp onto the soaked skewers, ensuring to leave a small gap between each shrimp to promote even cooking.
- Place the skewers on the preheated grill and cook for approximately 2-3 minutes on each side. Grill the shrimp until they turn a vibrant pink color and are opaque, signaling they are fully cooked.
- Once cooked, remove the skewers from the grill and allow them to rest for about a minute to retain their juices.
- To serve, garnish the grilled shrimp with freshly picked cilantro leaves and present with lime wedges on the side for an extra burst of citrusy flavor.


![- 1 can (15 oz) chickpeas, drained and rinsed - 1 can (5 oz) tuna in water, drained - 1/4 cup Greek yogurt or vegan mayonnaise (optional) - 1 tablespoon Dijon mustard - 1/2 red bell pepper, finely chopped - 1/4 red onion, finely chopped - 1/4 cup fresh parsley, chopped - 1 tablespoon fresh lemon juice - Seasoning: Salt and pepper to taste - Optional: 1 ripe avocado, diced To make this salad, gather all the ingredients listed above. The chickpeas and tuna serve as the base. Chickpeas give a nice texture, while tuna adds protein. The Greek yogurt or vegan mayo brings creaminess. Dijon mustard gives it a tangy kick. Chop the red bell pepper and red onion finely for a nice crunch. Fresh parsley adds color and flavor. A squeeze of lemon juice brightens up the dish. You can also add diced avocado for extra creaminess. This Easy Chickpea Tuna Salad is perfect for lunch or a light dinner. You can follow the [Full Recipe] for step-by-step guidance. - Lightly mash the chickpeas in a large mixing bowl. - Combine the drained tuna with the chickpeas. - Whisk together Greek yogurt, Dijon mustard, and lemon juice in a small bowl. - Pour the yogurt mixture over the chickpeas and tuna. - Fold in the chopped red bell pepper, red onion, parsley, and optional avocado. - Season with salt and pepper to taste. - Serve immediately or chill before serving. This Easy Chickpea Tuna Salad is simple and quick. You can find the Full Recipe for more details. Enjoy it as a meal or snack! - Use freshly squeezed lemon juice for a brighter flavor. This adds freshness. - Adjust seasoning to taste. Start with a little and add more if needed. - Pair the salad with whole grain crackers. This adds crunch and fullness. - Serve as a filling for lettuce wraps. It makes a great low-carb meal. - Garnish with extra parsley and lemon wedges. This makes your dish look bright and inviting. - Use a colorful bowl to showcase the vibrant ingredients. This enhances the overall experience. For the full recipe, check the detailed steps to create this delicious dish! {{image_4}} You can easily change up the recipe to suit your taste. If you want a plant-based option, swap Greek yogurt for vegan mayonnaise. This keeps the salad creamy and tasty. You can also switch the chickpeas for different beans. Black beans or white beans both work well. These swaps give you a fun twist on the classic recipe. Want to add some crunch? Diced celery is a great choice. It brings a nice texture to the salad. If you like salty flavors, try adding olives. They give a briny kick that pairs well with the other ingredients. Feel free to get creative with your flavor choices! If you need to make it gluten-free, check the ingredients you use. Most of the items in the salad should be gluten-free. Just make sure that any sauces or extras are also gluten-free. This way, you can enjoy the salad without worry. For the Full Recipe, check out the complete guide for making this delicious dish! Store your chickpea tuna salad in an airtight container. This keeps it fresh. Make sure the lid is on tight. For the best taste, eat it within 3-4 days. After this time, it may lose flavor. This salad is best served cold or at room temperature. Avoid reheating to keep the texture and taste just right. Enjoy it straight from the fridge for a quick meal! Yes, you can make it a few hours in advance. This gives the flavors time to meld together. I often make this salad in the morning for lunch later. Itβs easy and saves time! Absolutely! This salad holds up well for meal prep. You can store it in the fridge for a few days. It remains tasty and fresh, making it a great option for busy weeks. This salad is high in protein, fiber, and healthy fats. Chickpeas provide protein and fiber, while tuna adds more protein. Greek yogurt gives creaminess and healthy fats. Overall, it's a nutritious choice for any meal. In this article, we explored how to make a tasty and simple Chickpea Tuna Salad. You learned the key ingredients and followed easy steps to prepare it. We discussed tips for adding flavor and how to store any leftovers. Finally, the saladβs health benefits make it a smart choice for meals. This salad is quick, nutritious, and great for any occasion. Enjoy making it in your own kitchen!](https://goldendishy.com/wp-content/uploads/2025/07/30687038-eca4-4cc3-b428-c7157439eb59-768x768.webp)
![- 1 pound fresh green beans, trimmed - 4 tablespoons unsalted butter - 4 cloves garlic, minced - 1/2 teaspoon red pepper flakes (optional) - Salt and freshly ground black pepper - Juice of 1/2 lemon - 1/4 cup toasted pine nuts - Fresh parsley, finely chopped Garlic butter green beans shine with fresh flavors. The fresh green beans add crunch, while garlic brings warmth. I love using unsalted butter for its rich taste. The red pepper flakes are optional. They give a nice kick if you want some heat. Salt and pepper elevate the dish, enhancing its natural flavors. The lemon juice adds brightness to the beans. It balances the richness of the butter. Finally, toasted pine nuts bring a nutty crunch that you will enjoy. Garnishing with fresh parsley makes the dish pop with color. All these ingredients work together to create a simple, tasty side. For the full recipe, check out the details above. Start by boiling a large pot of salted water. The water should bubble hard. Add 1 pound of fresh green beans to the pot. Cook them for 3 to 4 minutes. You want them bright green and tender-crisp. This step keeps the beans fresh and crunchy. Once the beans are done, drain them quickly. Move them to a large bowl filled with ice water. This ice bath stops the cooking right away. It also helps keep their color. Leave them in the ice water for a few minutes. Then, drain the beans well and set them aside. In a large skillet, melt 4 tablespoons of unsalted butter over medium heat. When the butter is melted, add 4 cloves of minced garlic. If you want a kick, add 1/2 teaspoon of red pepper flakes. Stir this mix for 1 to 2 minutes. You want it fragrant, but not brown. Brown garlic can taste bitter. Add the blanched green beans to the skillet. Gently toss them in the garlic butter. Make sure they are well-coated. Cook for another 2 to 3 minutes. This lets the green beans soak up those tasty flavors. Squeeze the juice of half a lemon over the green beans. Season them with salt and freshly ground black pepper. Toss everything together again. You want the flavors to blend nicely. Transfer the garlic butter green beans to a serving dish. Top them with 1/4 cup of toasted pine nuts and some finely chopped fresh parsley. This adds a nice crunch and a pop of color. Enjoy your tangy and flavorful side! For the complete recipe, check the Full Recipe section. To get the best green beans, start with fresh ones. Trim the ends for a clean look. Bring a large pot of salted water to a rolling boil. Once boiling, add the beans. Blanch them for 3-4 minutes. You want them bright green and tender-crisp. After blanching, quickly drain the beans. Transfer them to a bowl of ice water. This stops the cooking process and keeps their color. Leave them in the ice bath for a few minutes. Then, drain them well before using. Garlic adds great taste, but it can burn fast. To sautΓ© garlic, melt unsalted butter in a skillet over medium heat. Once melted, add minced garlic. Stir it for 1-2 minutes. Watch closely; you want it fragrant, not brown. If it turns brown, it will taste bitter. For an extra kick, add red pepper flakes during this step. This will bring a nice warmth to the dish. Feel free to get creative with your garlic butter green beans! Try adding toasted almonds or sesame seeds for extra crunch. You can also sprinkle some grated Parmesan cheese for a cheesy flavor. If you love herbs, toss in some thyme or dill. These add fresh notes to the dish. For a touch of sweetness, consider adding a drizzle of honey or maple syrup. Each of these options can make the dish your own. For the full recipe, check out the [Full Recipe]. {{image_4}} You can jazz up garlic butter green beans in many ways. Here are a few ideas: - Toasted almonds add a nice crunch and nutty taste. - Sesame seeds bring an Asian flair and a bit of texture. - Bacon bits offer a savory, smoky flavor that pairs well. - Parmesan cheese adds richness and depth to the dish. These simple tweaks can really boost your green beans. Feel free to mix and match! If you want a vegan version, you can swap out the butter. Here are some great options: - Olive oil works well and adds healthy fats. - Vegan butter is a direct substitute that keeps the flavor. - Coconut oil gives a unique twist with a slight sweetness. Using these substitutes lets everyone enjoy this side dish. You can prepare garlic butter green beans in various ways. Each method offers a different taste: - Grilling gives a smoky flavor and nice char marks. - Oven-roasting caramelizes the beans, making them sweet and tender. - Steaming keeps them crisp and vibrant in color. No matter how you cook them, the garlic butter flavor shines through. This flexibility makes it easy to fit your style! To store leftover garlic butter green beans, first let them cool. Place the beans in an airtight container. Make sure to cover them tightly. They will stay fresh in the fridge for up to three days. If you want to keep them longer, consider freezing. To reheat, you can use a skillet or microwave. For the skillet, heat a bit of butter over medium heat. Add the green beans and stir until warmed through. If using a microwave, place them in a bowl and cover it with a lid. Heat in short bursts of 30 seconds, stirring in between, until hot. If you want to freeze garlic butter green beans, cool them completely first. Pack the beans into freezer bags, removing as much air as possible. Label the bags with the date. You can freeze them for up to three months. To use, thaw in the fridge overnight before reheating. Enjoy the fresh taste even after freezing! Garlic butter green beans last about 3 to 4 days in the fridge. Store them in an airtight container. This keeps them fresh and tasty for your next meal. Yes, you can use frozen green beans. Just cook them according to the package instructions before adding them to the garlic butter. They may not have the same crispness as fresh beans, but they still taste great. Green beans are low in calories and high in nutrients. They are a good source of vitamins A, C, and K. Eating green beans can help support a healthy heart and improve digestion. They also provide fiber, which is important for gut health. Yes, you can prepare garlic butter green beans ahead of time. Cook them, then store them in the fridge. When you are ready to eat, just reheat them in a skillet for a few minutes. This keeps them tasty and quick to serve. Garlic butter green beans pair well with many dishes. They go great with roasted chicken, grilled fish, or steak. You can also serve them with pasta or rice for a complete meal. Consider them a versatile side that complements many flavors. Garlic butter green beans brighten any meal with their vibrant flavor. They are easy to make and add a touch of elegance. Garlic butter green beans are a side dish made with fresh green beans, garlic, and butter. The dish is quick to prepare and is perfect for any occasion. Blanching gives the green beans a bright color and crisp texture. This process makes them tender yet still crunchy. It also helps to lock in their nutrients. To create garlic butter, melt unsalted butter in a skillet. Then, add minced garlic and optional red pepper flakes. This mix brings rich flavor and a gentle heat to the dish. After tossing the green beans in the garlic butter, squeeze half a lemon over them. This adds a fresh, tangy taste. Then, season with salt and pepper to enhance the flavors. To finish, add toasted pine nuts for a nutty crunch. Sprinkle chopped fresh parsley on top for color and added freshness. You can find the full recipe above to try this tasty dish at home! In this post, we covered a simple and tasty recipe for garlic butter green beans. You learned about key ingredients, steps to prepare, and how to store the dish. I shared tips for cooking and adding your favorite flavors. Green beans are not only delicious but also healthy. You can enjoy them fresh or frozen. Now, you can make this dish with confidence and impress your family or friends. Try it out and have fun!](https://goldendishy.com/wp-content/uploads/2025/06/25c5d3d6-959d-413a-b3ac-306353b9d5bf-768x768.webp)


. 1. Heat olive oil in a large skillet over medium heat. 2. Add finely chopped red onion to the skillet. 3. SautΓ© the onion for 2-3 minutes until it becomes soft. 4. Now, add diced red and green bell peppers to the skillet. 5. Cook for 3-4 minutes until the peppers soften. 6. Stir in corn kernels and black beans. 7. Season with ground cumin, smoked paprika, garlic powder, salt, and pepper. 8. Mix well and cook for 5 more minutes until hot. 1. Heat another skillet over medium heat. 2. Place a tortilla in the skillet and sprinkle ΒΌ cup of cheese on it. 3. Layer Β½ cup of the veggie mixture over the cheese. 4. Top with another ΒΌ cup of cheese for extra flavor. 5. Fold the tortilla in half, covering the filling. 6. Cook for 3-4 minutes until golden brown on one side. 7. Flip the quesadilla gently using a spatula. 8. Cook for another 3-4 minutes until crispy and cheese melts. - Keep the heat at medium for a crispy texture. - Use a spatula to flip the quesadilla easily. - Check for doneness by ensuring both sides are golden brown. These simple steps make it easy to create loaded veggie quesadillas at home. For the full recipe, refer to the recipe section above. Enjoy the process! Choosing the right cheese is key. I love a mix of cheddar and mozzarella. This mix melts well and adds great flavor. You want the cheese to stretch and pull when you take a bite. Balancing spices and seasonings is also important. Start with the basics like salt and pepper. Then, add spices like cumin and smoked paprika. Adjust them to fit your taste. A little heat can come from red pepper flakes if you like it spicy. Day-to-day storage tips help keep your quesadillas fresh. Place leftovers in an airtight container. Keep them in the fridge for up to three days. You can also wrap them tightly in foil or plastic wrap. Reheating suggestions for best flavor include using the oven or skillet. For the oven, preheat to 350Β°F. Heat the quesadillas for about 10 minutes. In a skillet, cook them over medium heat. This method keeps them crispy and delicious. Plating ideas can make your meal pop. Arrange the quesadillas in a fan shape on a colorful plate. This makes them look fun and inviting. Adding colorful garnishes like fresh cilantro adds a nice touch. You can also sprinkle some diced tomatoes or avocado on top. These small changes make your meal look gourmet. Enjoy your loaded veggie quesadillas! For the full recipe, check out the Loaded Veggie Quesadillas π₯ section. {{image_4}} You can make loaded veggie quesadillas even more fun. Here are some easy ideas. Want some extra protein? You can add grilled chicken or tofu. Just cook them first, then slice and add to your quesadilla mix. If you like seafood, try shrimp. Cook them quickly and toss them in for a tasty twist. Spices can change the game. Try different spices like chili powder or oregano. They add depth and warmth. You can also add sauces or marinades. A dash of hot sauce or a sprinkle of lime juice can elevate your quesadillas. Need gluten-free options? Use gluten-free tortillas. They work great and taste just as good. If you're vegan, swap out the cheese for a plant-based version. There are many tasty dairy-free cheeses out there that melt well. You can find the full recipe for loaded veggie quesadillas to get started on these variations. To keep your uncooked quesadillas fresh, wrap them tightly in plastic wrap. This keeps out moisture and air. You can also place them in an airtight container. If you want to freeze them, stack the quesadillas with parchment paper in between. This prevents them from sticking together. Uncooked quesadillas can stay in the freezer for up to three months. After cooking, let the quesadillas cool completely. Then, wrap them in foil or place them in a container. Store them in the fridge for up to four days. I find they taste best within the first two days. If you notice any odd smell or mold, itβs best to toss them. To reheat, use an oven or a skillet. For the oven, preheat to 350Β°F (175Β°C). Place the quesadilla on a baking sheet and heat for about 10 minutes. If using a skillet, add a little oil and heat over medium heat for about 3-4 minutes on each side. Leftover quesadillas can also become a fun breakfast. Chop them up and add them to scrambled eggs for a tasty twist. For more ideas, check out the Full Recipe. Making loaded veggie quesadillas is quick and easy. It takes about 10 minutes to prep. Cooking them takes around 15 minutes. In total, you can make them in about 25 minutes. This makes them a great choice for busy days or quick meals. Yes, you can prep loaded veggie quesadillas in advance. To do this, cook the veggie mixture and let it cool. Then, assemble the quesadillas but do not cook them. Store them in an airtight container in the fridge for up to two days. You can also freeze them for a month. When ready to eat, just cook them straight from the fridge or freezer. This makes meal prepping super easy! You can mix and match many veggies in quesadillas. Some great options include: - Spinach or kale for a green boost - Mushrooms for a savory taste - Zucchini or squash for extra texture - JalapeΓ±os for a spicy kick - Tomatoes for freshness Feel free to get creative! Each veggie adds its own flavor and texture. You can make quesadillas that fit your taste perfectly. For more ideas, check out the Full Recipe. These loaded veggie quesadillas are fun and easy to make. We explored essential ingredients like black beans, bell peppers, and corn. Iβve shared tips for perfect texture, storing leftovers, and creative garnishes. Remember, you can customize them with protein or spices to suit your taste. In the end, these quesadillas are more than just food; they bring flavor and joy. Enjoy making them your own!](https://goldendishy.com/wp-content/uploads/2025/06/a7c52493-2108-4a2f-8f90-ee80e7df7b2a-768x768.webp)