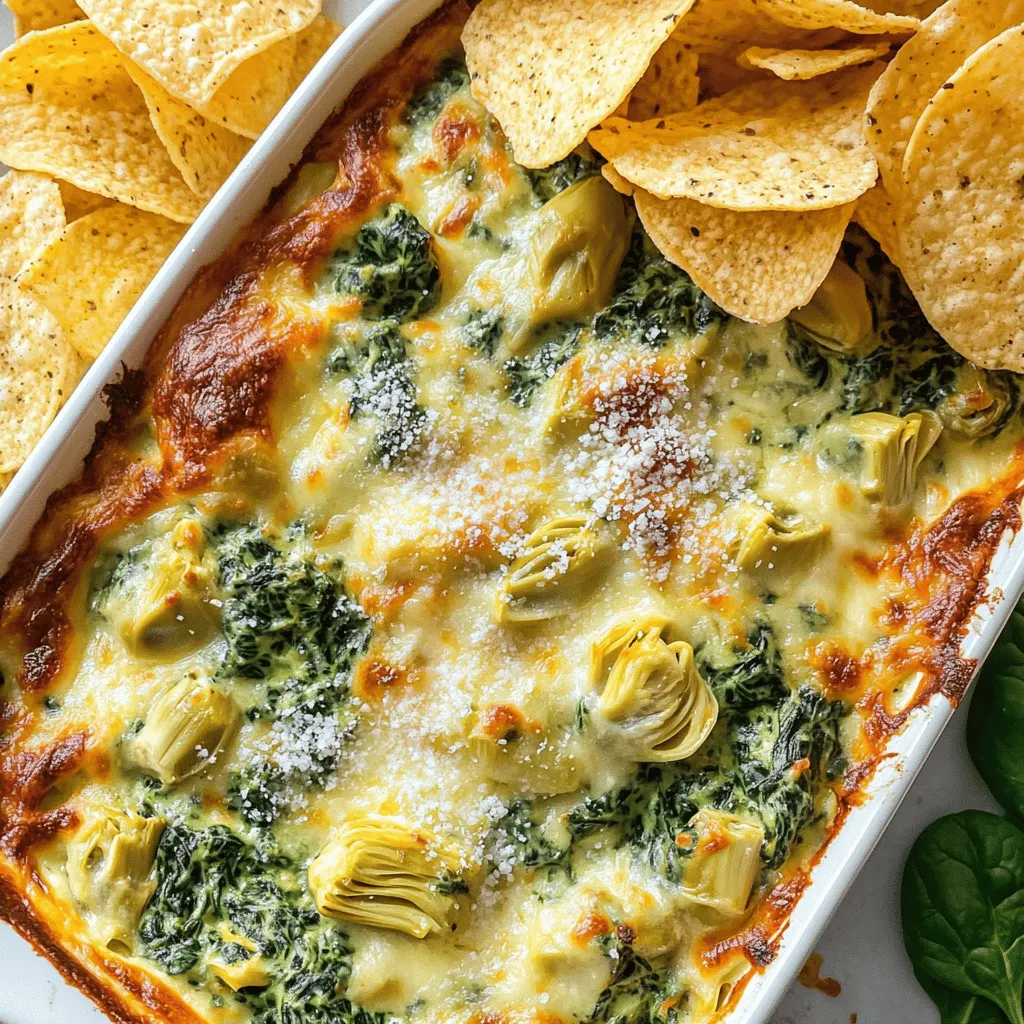
Spinach Artichoke Dip Flavorful Party Delight

Spinach artichoke dip is a crowd-pleaser and a must-have for your next party. It’s creamy, rich, and packed with flavor everyone loves. Whether you’re serving it with chips, veggies, or bread, this dip is sure to impress. In this guide, I’ll share the best tips, ingredient swaps, and even fun variations. Let’s dive into this flavorful delight that brings joy to every gathering!
Ingredients
List of Ingredients for Spinach Artichoke Dip
To make this tasty dip, gather these ingredients:
– 1 cup fresh spinach, finely chopped
– 1 cup canned artichoke hearts, drained and roughly chopped
– 1 cup cream cheese, softened to room temperature
– ½ cup sour cream
– ½ cup mayonnaise
– 1 cup shredded mozzarella cheese
– ½ cup grated Parmesan cheese
– 2 cloves garlic, minced
– Salt and freshly ground black pepper to taste
– ½ teaspoon red pepper flakes (optional, for added heat)
– Tortilla chips or slices of a freshly baked baguette for serving
Ingredient Substitutions for Dietary Needs
You can easily swap some ingredients to fit your diet. Here are some options:
– Use Greek yogurt instead of sour cream for a lighter dip.
– Replace cream cheese with a dairy-free version for a vegan option.
– If you’re gluten-free, make sure your chips or bread are certified gluten-free.
– For a lower-fat option, use reduced-fat cream cheese and mayonnaise.
Fresh vs. Canned: Which Ingredients to Choose?
Choosing between fresh and canned ingredients can affect the dip’s taste and texture.
– Fresh spinach gives a vibrant flavor and bright color. It wilts down well when mixed.
– Canned artichoke hearts are convenient and still packed with flavor. Just make sure to drain them well.
– For cheeses, fresh mozzarella creates a beautiful melt, but shredded works just fine too.
– Using fresh garlic gives a stronger taste, while jarred minced garlic is a quick alternative.
This mix of fresh and canned ingredients leads to a creamy and delicious Spinach Artichoke Dip.
Step-by-Step Instructions
Overview of Preparation Process
Making spinach artichoke dip is simple and fun. You mix creamy cheeses with tasty veggies. Start by prepping your oven and ingredients. Then, blend your mix and bake until bubbly. This dip is perfect for any gathering and always a hit!
Detailed Baking Instructions
1. Preheat your oven to 350°F (175°C). This step is key for a nice bake.
2. In a medium bowl, mix cream cheese, sour cream, and mayonnaise. Use an electric mixer or spatula for a smooth blend.
3. Add spinach, artichokes, and garlic to the bowl. Stir well to combine everything.
4. Fold in mozzarella and Parmesan cheese. Make sure it’s evenly mixed.
5. Season the mix with salt, pepper, and red pepper flakes if you want heat.
6. Transfer the creamy mix into a baking dish. Spread it out evenly.
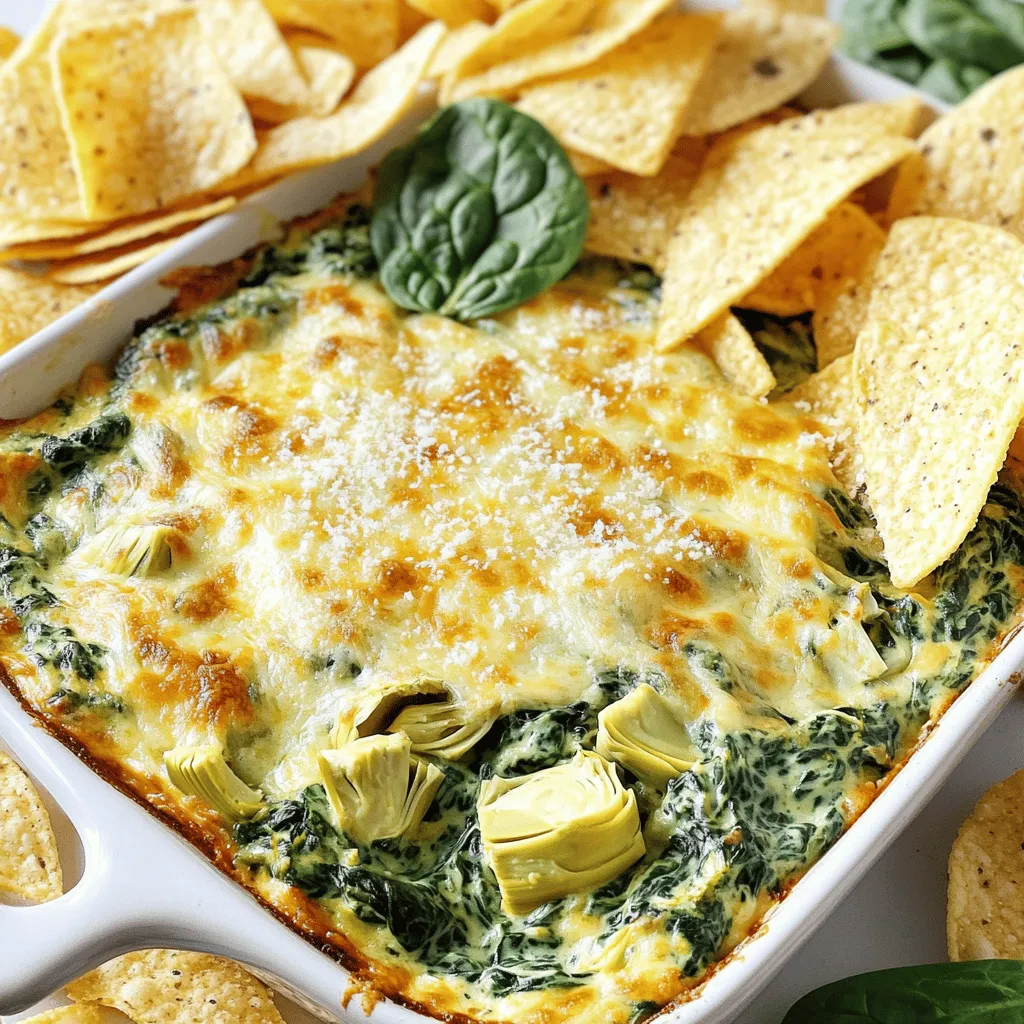
7. Bake for 25-30 minutes. Look for a golden top and bubbly edges.
8. Let it cool slightly before serving. This helps the flavors come together.
Tips for Achieving the Perfect Dip Consistency
To get that perfect dip texture, use softened cream cheese. This makes mixing easier. Don’t skip the baking time. It allows the cheese to melt and flavors to blend. If it’s too thick, add a splash of cream or milk. For a lighter dip, try using Greek yogurt instead of sour cream. These tips will help you create a dip that’s creamy and delicious.
Tips & Tricks
Best Practices for Mixing and Baking
To create the best spinach artichoke dip, start with room-temperature cream cheese. This makes it easier to blend. Use a mixer or spatula to ensure smoothness. Mix the cream cheese, sour cream, and mayonnaise until creamy. Then, gently fold in the spinach and artichokes. This keeps the dip light and fluffy.
When baking, spread the mixture evenly in the dish. This helps it cook evenly. Watch it closely as it bakes. You want a golden brown top, which shows it’s ready. Let it cool for a few minutes before serving to help the flavors meld.
Serving Suggestions for Spinach Artichoke Dip
Serve the dip warm for the best taste. It pairs well with tortilla chips or slices of a freshly baked baguette. For a colorful touch, sprinkle some extra Parmesan cheese on top. Add a few fresh spinach leaves for a pop of color. This not only looks great but also adds freshness.
You can also serve it with veggie sticks. Carrots, celery, and bell peppers make excellent dippers. They add crunch and a healthy twist to your party platter.
Pairing Options with Drinks and Other Food
Spinach artichoke dip goes well with many drinks. A crisp white wine like Sauvignon Blanc complements its creamy texture. If you prefer beer, a light lager or pale ale works nicely, too.
For food pairings, consider serving some light appetizers. Shrimp cocktails or bruschetta can balance the dip’s richness. If you’re feeling adventurous, try serving it alongside a charcuterie board. The flavors of cured meats and cheeses can enhance your experience.Enjoy your culinary adventure!
Variations
Vegan Spinach Artichoke Dip Recipe
To make a vegan version, replace cream cheese with cashew cream. Soak cashews in water for a few hours. Blend them until smooth. Use a dairy-free sour cream and mayonnaise too. This way, you’ll keep the creaminess while being plant-based. The flavor stays rich and satisfying without any animal products.
Gluten-Free Version of Spinach Artichoke Dip
For a gluten-free dip, just focus on your dippers. Use fresh veggies or gluten-free chips. The dip itself is naturally gluten-free. All the ingredients, like cheese and artichokes, are safe to enjoy. Just check labels for any hidden gluten in processed items.
Spicy Spinach Artichoke Dip Modifications
Want some heat? Add in more red pepper flakes or diced jalapeños. You can also mix in diced green chiles for a different spice level. If you enjoy smokiness, try smoked paprika. These changes add depth and excitement to your dip. Customize it to suit your taste buds!
Storage Info
How to Store Leftovers Properly
To keep leftover spinach artichoke dip fresh, let it cool first. Then, transfer it to an airtight container. Make sure the lid seals tightly. Store it in the fridge for up to three days. Label your container with the date. This way, you know when to eat it by.
Reheating Instructions for Optimal Flavor
When you’re ready to enjoy your dip again, reheat it gently. Preheat your oven to 350°F (175°C). Place the dip in an oven-safe dish. Cover it with foil to keep it moist. Bake for about 15-20 minutes until hot. You can also use the microwave for quick reheating. Heat it in short bursts, stirring in between. This ensures it warms evenly without drying out.
Freezing Spinach Artichoke Dip: Is it Possible?
Yes, you can freeze spinach artichoke dip! First, let it cool completely. Then, place it in a freezer-safe container, leaving some space for expansion. Seal it tightly and label it with the date. It can last in the freezer for up to three months. To thaw, move it to the fridge overnight. Reheat it as mentioned before to restore its deliciousness. Enjoy every creamy bite!
FAQs
How long does Spinach Artichoke Dip last?
Spinach Artichoke Dip lasts about 3 to 5 days in the fridge. Store it in an airtight container. This helps keep it fresh and tasty. If you see any mold or bad smell, throw it away.
Can I make Spinach Artichoke Dip in advance?
Yes, you can make Spinach Artichoke Dip ahead of time. Prepare it a day or two before your event. Just keep it covered in the fridge. When you’re ready, bake it before serving. This saves time and lets the flavors blend well.
What can I use as a dipper apart from tortilla chips?
You can use many things as dippers for Spinach Artichoke Dip. Here are some ideas:
– Slices of fresh baguette
– Pita chips
– Veggie sticks like carrots or celery
– Crackers
– Pretzels
All these options add fun and flavor to your dip experience.
Is Spinach Artichoke Dip healthy?
Spinach Artichoke Dip can be part of a healthy diet. It has spinach, which is full of vitamins. Artichokes have fiber, too. However, it also has cream and cheese, which are high in fat. Enjoy it in moderation to keep it balanced.You’ll find all the ingredients and steps you need to create this tasty dish.
In this post, I covered homemade spinach artichoke dip, from ingredients to serving. You learned about ingredient swaps and how to choose fresh or canned options. I shared easy steps for perfect consistency and useful tips for mixing and baking. You also discovered fun variations, storage methods, and answers to common questions.
Spinach artichoke dip is versatile and easy to make. Whether you serve it at a party or enjoy it at home, it’s sure to please everyone.

![- 1 lb Brussels sprouts, cleaned and halved - 3 tablespoons extra virgin olive oil - 4 cloves garlic, finely minced - 1/2 cup freshly grated Parmesan cheese - Zest of 1 lemon - 1/2 teaspoon red pepper flakes (optional for heat) - Fresh parsley for garnish - Sea salt and freshly cracked black pepper When I make Garlic Parmesan Brussels sprouts, I always start with the basics. Fresh Brussels sprouts are key. I buy about a pound and clean them well. Halving them helps them cook evenly and adds texture. Next, I add extra virgin olive oil. It coats the sprouts and gives them a rich flavor. I use about three tablespoons. Garlic is a must. Four cloves of finely minced garlic bring a great kick to the dish. Parmesan cheese is what makes these sprouts shine. I use half a cup of freshly grated cheese. The cheese melts and creates a tasty crust when roasted. For extra brightness, I often add zest from one lemon. It lifts the flavors and adds a fresh note. If you like heat, a half teaspoon of red pepper flakes gives the dish a spicy kick. Lastly, I season with sea salt and freshly cracked black pepper. These simple seasonings enhance the flavor without overpowering it. Don't forget to garnish with fresh parsley for a pop of color. This combination of ingredients makes a flavorful side dish that everyone will love. For the full recipe, check out the details above. - Preheat oven to 400°F (200°C). - Prepare a baking sheet with parchment paper. First, you want to make your oven hot. This helps cook the Brussels sprouts fast. The parchment paper makes cleanup simple and helps them roast better. - Mix Brussels sprouts with olive oil, garlic, and seasonings. Take your cleaned and halved Brussels sprouts and put them in a big bowl. Add the olive oil, minced garlic, sea salt, and black pepper. Toss everything together. Make sure each sprout gets coated nicely. This mix gives them great flavor. - Spread Brussels sprouts on the baking sheet. - Roast for 20 minutes, stirring halfway through. Now, spread the Brussels sprouts out on the baking sheet. Keep them in a single layer to roast evenly. Set the timer for 20 minutes, but remember to stir them halfway. This helps them get golden and crispy all over. - Add Parmesan cheese and return to oven for additional 5-7 minutes. - Garnish with parsley before serving. After roasting, take them out and sprinkle the grated Parmesan cheese on top. You can also add lemon zest and red pepper flakes if you like some heat. Put them back in the oven for 5-7 minutes. This melts the cheese and makes it bubbly. Once done, take them out and garnish with parsley. Serve them warm for the best taste. For the full details, check the Full Recipe. To get great Brussels sprouts, keep them in a single layer. This helps them cook evenly. If you crowd them, they will steam instead of roast. Stir them halfway through cooking. This ensures every side gets that nice, crispy brown. Want to brighten the dish? Add lemon zest before serving. It gives a fresh taste that pairs well with the savory flavors. You can also try different cheeses. Parmesan is great, but Pecorino Romano adds a nice twist. One common mistake is overcrowding the baking sheet. This leads to uneven cooking. Also, watch your cooking time. Undercooking makes them tough, while overcooking turns them mushy. Follow the recipe closely for the best results. For the full recipe, check out the details above. {{image_4}} To switch up the taste, try using different cheeses. Pecorino Romano adds a salty, sharp flavor. It brings a new twist to the dish. If you want a vegan option, use nutritional yeast. It gives a cheesy flavor without dairy. Plus, it's packed with nutrients! Adding protein can make your dish heartier. Toss in crispy bacon or pancetta for a savory touch. Their rich flavor pairs well with the sprouts. You can also add cooked chicken pieces. This makes the dish more filling and satisfying. For a vegetarian option, substitute the cheese with vegan alternatives. There are many great cheese substitutes that melt well. Use plant-based oil for roasting instead of olive oil. This keeps the dish fully vegan while still being delicious. For the full recipe, check out Garlic Parmesan Brussels Sprouts Delight! Store your Garlic Parmesan Brussels Sprouts in an airtight container. Refrigerating them helps keep their flavor fresh. They are best eaten within 3-5 days for optimal taste and texture. To restore crispiness, reheat the sprouts in the oven. Set your oven to 350°F (175°C) and bake for about 10-15 minutes. If you're in a hurry, you can use the microwave. However, be aware that the texture may suffer a bit. You can freeze Brussels sprouts before roasting for long-term storage. This way, they maintain their flavor. To reheat, simply thaw them first, then roast as per the [Full Recipe]. This will help you enjoy them fresh and tasty! To make your Brussels sprouts crispy, follow these tips: - Use high heat: Roasting at 400°F (200°C) gives the best results. - Spread them out: Place Brussels sprouts in a single layer on your baking sheet. - Don’t overcrowd: Give them room to breathe, which helps them roast better. - Toss halfway: Stir them at the halfway point of roasting for even browning. - Add cheese last: Sprinkle Parmesan cheese towards the end of the cooking time so it melts but does not burn. Yes, you can prepare Brussels sprouts in advance. Here’s how: - Clean and cut: Clean and halve the Brussels sprouts the day before. - Store properly: Keep them in an airtight container in the fridge. - Roast fresh: When ready to eat, toss them with oil and seasonings, and roast right before serving. Garlic Parmesan Brussels sprouts go well with many dishes. Here are a few: - Roasted chicken: The savory flavors complement crispy chicken well. - Grilled steak: The rich flavors of steak pair nicely with the sprouts. - Pasta dishes: They add a fresh, crunchy element to creamy pastas. Yes, Brussels sprouts are very healthy! They are: - Low in calories: Great for weight management. - High in fiber: Good for digestion. - Rich in vitamins: They provide vitamin C, vitamin K, and folate. Plus, they have antioxidants that help your body fight disease. Yes, you can use frozen Brussels sprouts. Here are some tips: - Thaw first: Thaw them completely before cooking for even roasting. - Pat dry: Remove moisture with a paper towel to help them crisp up. - Adjust cooking time: You may need to roast them a bit longer to achieve the same crispiness. For the full recipe, check out Garlic Parmesan Brussels Sprouts Delight. Garlic Parmesan Brussels sprouts are simple to make and full of flavor. We covered essential ingredients like fresh Brussels sprouts, olive oil, and cheese. You learned step-by-step how to prepare, toss, and roast them. Plus, I shared tips for perfecting your dish and variations to keep it exciting. Remember, the key to great Brussels sprouts is even cooking and the right flavors. Take your time to enjoy this healthy side dish. You’ll love the taste and how easy it is to make!](https://goldendishy.com/wp-content/uploads/2025/05/a403e98b-d04b-46c1-bd99-9a315ef16e11-768x768.webp)


![- 2 ripe peaches, diced - 2 ripe avocados, diced - 1 cup fresh arugula or a mix of your favorite greens - Fresh mint leaves, for garnish - 1/2 cup tangy feta cheese, crumbled - 1/4 cup pecans, coarsely chopped - 2 tablespoons creamy honey - 2 tablespoons freshly squeezed lemon juice - Salt and freshly cracked pepper, to taste To make this Peach and Avocado Salad, you need fresh, quality ingredients. Ripe peaches bring a sweet taste. Ripe avocados add creamy texture. Fresh arugula or mixed greens offer a nice crunch. Don't forget the fresh mint leaves for a pop of color and flavor. For additional flavor, add tangy feta cheese. It enhances the salad's taste. Pecans add a lovely crunch and nuttiness. Honey gives a hint of sweetness. Fresh lemon juice adds a zesty touch. Finally, season with salt and pepper to balance everything. This mix of flavors and textures creates a fresh and flavorful delight. For the complete recipe, you can check the [Full Recipe]. - First, dice the peaches and avocados. Aim for small, even pieces. This helps them blend well in the salad. - Next, layer the diced peaches and avocados in a large salad bowl. This forms a colorful base for the dish. - Now, gently fold in your choice of greens, like arugula or mixed greens. This adds a nice crunch and freshness. - Sprinkle the crumbled feta cheese and chopped pecans on top. They give a lovely salty flavor and texture contrast. - In a small bowl, whisk together the honey and fresh lemon juice. This dressing is simple but very tasty. - Drizzle the dressing over the salad. Toss gently to combine without smashing the avocado. - Finally, taste and season with salt and freshly cracked pepper. Adjust to make the flavors pop. You can find the complete instructions in the [Full Recipe]. To make the best peach and avocado salad, cut your fruits into similar sizes. This helps create a nice balance. When you toss the salad, do it gently. You want to mix it well but avoid mashing the ripe avocado. This keeps the salad light and fresh. Taste is key. Adjust the seasoning to fit your palate. You can also add a touch of honey for sweetness or fresh mint leaves for a burst of flavor. These small tweaks can take your salad to the next level. Serving matters. You can place the salad in individual bowls for a nice touch. Another idea is to arrange everything on a platter. A colorful display makes the salad look even more inviting. A drizzle of honey or a sprinkle of mint can add a lovely finish. For the full recipe, check out the detailed steps provided. {{image_4}} You can switch up the cheese and nuts in this salad for new flavors. Instead of feta, try goat cheese or blue cheese. Both add a rich taste that pairs well with peaches. For nuts, swap pecans for walnuts or almonds. Each nut gives its unique crunch and flavor. You can also change the greens. If you want a different taste, use spinach or kale. Both greens add a nice twist. Spinach brings a soft texture, while kale adds a bit of bite. Each option makes the salad fresh and fun to eat. The dressing plays a big role in this salad. If you want to try something different, use balsamic vinegar or olive oil instead of honey and lemon juice. Balsamic adds a sweet and tangy flavor, while olive oil brings a smooth, rich taste. You can also experiment with flavored vinegars. Try raspberry or apple cider vinegar for a new twist. These flavors will enhance the sweetness of the peaches. To make this salad a complete meal, add grilled chicken or shrimp. Both proteins add heartiness and pair well with the fruits. Grilled chicken offers a mild flavor, while shrimp brings a sweet touch. You can also mix in extra fruits like berries. Strawberries or blueberries add a burst of color and flavor. They make the salad even more vibrant and exciting. For the full recipe, check out the Peachy Avocado Delight 🥭🥗 section. To store leftovers, place the salad in an airtight container. This helps keep the salad fresh. Make sure to seal it well. Keep it in the refrigerator. It will stay good for about one day. The avocado may brown a bit, but it remains tasty. To help maintain freshness, you can add a squeeze of lemon. This slows down browning and keeps flavors bright. You cannot freeze this salad. Freezing will change the texture of the peaches and avocados. They may become mushy when thawed. Enjoy the salad fresh for the best taste and experience. You can enjoy leftovers cold straight from the fridge. The cool salad is refreshing on warm days. If you prefer it warm, gently reheat it. Use a pan over low heat. Heat just until warm, but avoid cooking it. This keeps the flavors intact and the ingredients from getting mushy. Enjoy every bite of your Peach and Avocado Salad! For the full recipe, check out the detailed instructions above. Yes, you can make this salad ahead of time. To keep it fresh, follow these steps: - Prep ingredients separately: Dice your peaches and avocados. Store them in separate containers. - Mix greens and toppings: Combine arugula, feta, and pecans in another bowl. - Make the dressing: Whisk together honey and lemon juice. Store in a small jar. When ready to serve, mix everything together for a fresh taste. This method helps prevent browning. This salad is both tasty and healthy. Here’s a quick look at its nutrition: - Calories: About 250 per serving - Protein: 5 grams - Fat: 18 grams - Carbohydrates: 22 grams - Fiber: 6 grams It offers a good mix of healthy fats from avocados and protein from feta. You can easily make this salad vegan. Here are some swaps: - Cheese: Replace feta with vegan cheese or omit it. - Honey: Use maple syrup or agave nectar instead of honey. These changes keep the salad creamy and sweet without dairy. This salad pairs well with many dishes. Here are a few ideas: - Grilled chicken or fish: Adds protein and complements the fruit. - Quinoa or rice: Serve as a side dish for a fuller meal. - Bruschetta: Offers a crunchy contrast to the salad's softness. These options create a balanced and satisfying meal. For the full recipe, check out Peachy Avocado Delight. This blog post detailed how to make a refreshing Peach and Avocado Salad. You learned about the best fresh ingredients, like ripe peaches and avocados, and useful tips for preparation and mixing. I shared ways to enhance flavor and present your salad beautifully, along with easy swaps and storage tips. In conclusion, this salad brightens any meal. Experiment with ingredients and enjoy fresh flavors. Make it your own!](https://goldendishy.com/wp-content/uploads/2025/06/36e1ff7f-d317-490a-9c34-18da7fd6bdcc-768x768.webp)