Spicy Roasted Red Pepper Pasta Simple Flavor Boost

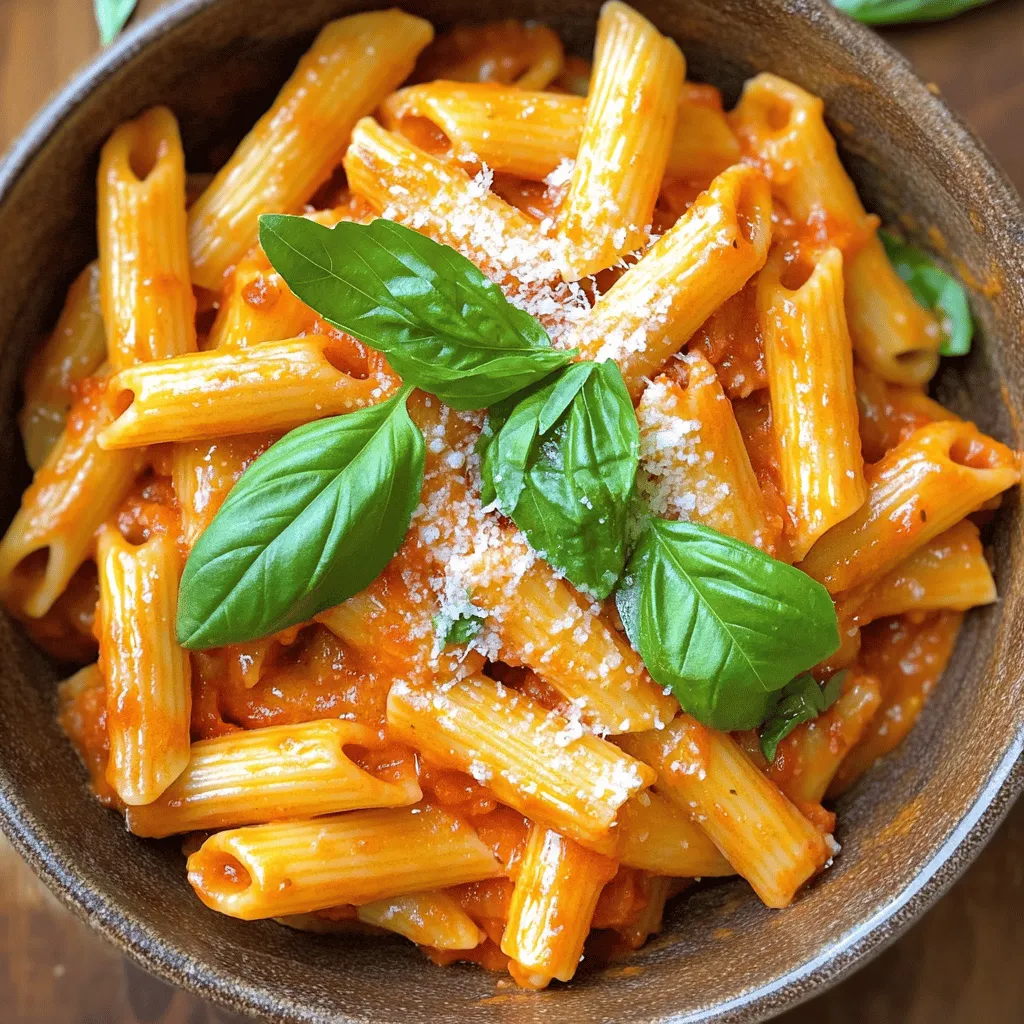
If you’re looking to add a kick to your dinner, this Spicy Roasted Red Pepper Pasta recipe is what you need. With simple ingredients like roasted red bell peppers and creamy sauce, you can whip up a tasty meal in no time. Whether you prefer penne or spaghetti, this easy dish will satisfy your cravings for bold flavors. Let’s dive into the details and elevate your pasta game!
Ingredients
Main Ingredients for Spicy Roasted Red Pepper Pasta
– 12 oz pasta (penne or spaghetti)
– 2 large red bell peppers, roasted and peeled
– 3 tablespoons olive oil
– 3 cloves garlic, minced
– 1 cup vegetable broth
– 1/2 cup heavy cream (or coconut cream for a dairy-free option)
I love using penne or spaghetti for this dish. Both types of pasta soak up the sauce well. Roasted red bell peppers give a sweet and smoky flavor. The olive oil adds a nice richness, while garlic brings a sharp zest. Heavy cream creates a creamy texture that makes the sauce feel luxurious.
Optional Ingredients
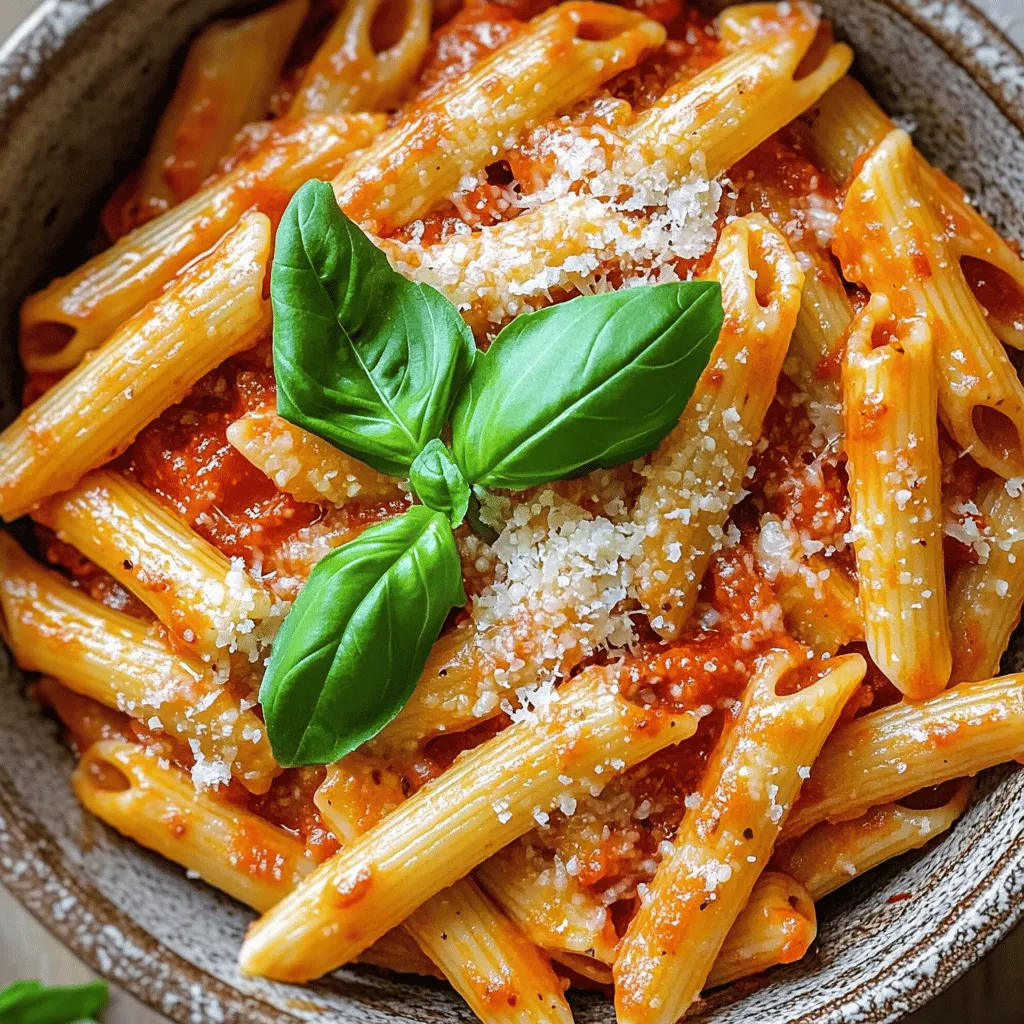
– 1/4 cup grated Parmesan cheese (optional)
– Fresh basil leaves, for garnish
Adding Parmesan cheese boosts the umami flavor. Fresh basil leaves provide a pop of color and freshness. They make the dish look pretty, too!
Seasoning and Substitutes
– 1 teaspoon red pepper flakes (adjust to taste)
– Salt and black pepper to taste
I like to add red pepper flakes for a kick. You can adjust the amount based on your spice level. If you want a lighter option, use vegetable broth as the base. If you’re dairy-free, coconut cream works well instead of heavy cream.
This combination of ingredients creates a rich and flavorful dish.Enjoy crafting your spicy roasted red pepper pasta!
Step-by-Step Instructions
Preparing the Roasted Red Peppers
To roast red peppers, you have two good choices: the broiler or the grill. If you use the broiler, set it to high and place the peppers on a baking sheet. Turn them often until the skin is blackened. For the grill, place the peppers directly on the grates. Keep turning until they get charred all over.
After roasting, put the peppers in a bowl and cover it with plastic wrap. This steaming process helps loosen the skin. Let them steam for about 10 minutes. Once cooled, peel off the skin, remove the seeds, and chop the peppers into small pieces.
Cooking the Pasta
Fill a large pot with water and add a generous amount of salt. Bring the water to a full boil. Add your choice of pasta, either penne or spaghetti. Cook according to the package instructions until the pasta is al dente. This usually takes about 8 to 10 minutes. Once cooked, drain the pasta but save a cup of the pasta water for later.
Making the Sauce
In a high-speed blender, combine the roasted red peppers, olive oil, minced garlic, red pepper flakes, vegetable broth, and heavy cream. Blend these ingredients until smooth and creamy. After blending, taste the sauce. Add salt and pepper to adjust the flavor to your liking.
Combining Pasta and Sauce
Pour the blended sauce into a large skillet over medium heat. Let it simmer for about 5 minutes, stirring occasionally. If the sauce is too thick, add a bit of the reserved pasta water until it reaches your desired consistency. Next, add the cooked pasta to the skillet. Toss gently to ensure that every piece of pasta gets a good coating of sauce. If you want, sprinkle in grated Parmesan cheese at this stage and mix well.
Serving Suggestions
Serve the pasta hot and garnish with fresh basil leaves. This adds a nice aroma and color to the dish. For plating, you can use a large bowl or individual plates. Twirl the pasta into a nest shape for a nice presentation. Enjoy your flavorful dish!
Tips & Tricks
Perfecting the Pasta Dish
To make the best Spicy Roasted Red Pepper Pasta, cook the pasta until it’s al dente. This means it should be firm but not hard. Usually, this takes about 8-10 minutes, but check the package for exact times. For spice lovers, add more red pepper flakes. If you want it milder, use less or skip them.
Time-Saving Tips
Prep your ingredients ahead of time. Chop garlic and roast red peppers in advance. You can roast peppers quickly on a grill or under a broiler. Just turn them until they are charred. This method takes about 10-15 minutes. After roasting, cover them to steam. This makes peeling easy.
Enhancing Flavor
To boost flavor, add herbs like thyme or oregano. You can also try spices like smoked paprika for a unique twist. When serving, pair the dish with a crisp white wine, like Sauvignon Blanc. This wine pairs perfectly with the creamy sauce. You can also serve it with a side salad to balance the meal.

Variations
Vegetarian and Vegan Options
You can easily make this dish vegetarian or vegan. To switch to vegan, replace the heavy cream with coconut cream. It gives a rich taste without dairy. You can also use plant-based cheese if you want. Adding more veggies boosts nutrition and flavor. Try tossing in spinach, zucchini, or mushrooms. They add color and taste to the dish.
Alternative Pasta Choices
For gluten-free options, use rice or chickpea pasta. These types cook well and taste great too. Whole grain pasta is a healthy choice. It adds more fiber and nutrients. You can find whole grain versions of penne or spaghetti. These options keep the dish wholesome and filling.
Different Flavor Profiles
To change the flavor, think about adding sun-dried tomatoes or olives. They bring a unique taste and depth to the sauce. You can also use nuts or seeds for a crunchy texture. Pine nuts or sunflower seeds work nicely. These additions make the dish exciting and different.
Storage Info
Storing Leftovers
To keep your spicy roasted red pepper pasta fresh, store it right. Let it cool down first. Then, place it in an airtight container. This helps to seal in the flavors. A glass container works best. It won’t stain and keeps the pasta safe. If you have extra sauce, store that in a separate container. This keeps the pasta from getting soggy.
Reheating Tips
When it’s time to enjoy your leftovers, reheat them carefully. The best way is to use a skillet. Add a bit of olive oil or water to the pan. Heat it over low to medium heat. Stir often to keep the pasta from sticking. If your sauce is thick, add a splash of reserved pasta water. This brings back that creamy texture.
Freezing the Dish
You can freeze this pasta for later meals. First, let it cool completely. Then, place it in a freezer-safe container. Make sure to leave some space at the top. The pasta will expand as it freezes. It’s best to use it within three months for the best taste. When ready to eat, thaw it overnight in the fridge. Reheat as mentioned above for a delicious meal.
FAQs
What pasta works best for Spicy Roasted Red Pepper Pasta?
I recommend using penne or spaghetti for this dish. Penne holds the sauce well in its tubes. Spaghetti gives you long, twirly bites that make each forkful fun. Both types cook quickly and pair nicely with the creamy sauce.
Can I make Spicy Roasted Red Pepper Pasta ahead of time?
Yes, you can! Prepare the sauce and cook the pasta in advance. Store the sauce in an airtight container in the fridge for up to three days. Keep the pasta separate to avoid sogginess. When you’re ready to eat, just reheat the sauce and toss it with the pasta.
How can I adjust the spice level?
To make it milder, use less red pepper flakes. You can also swap in sweet bell peppers for some of the red peppers. Adding more cream can tone down the heat as well. Taste as you go to get it just right for your liking.
What can I serve with this dish?
This pasta goes great with a simple green salad. A side of garlic bread also adds a nice touch. If you want a protein, grilled chicken or shrimp are excellent choices. They will enhance the meal and balance the flavors nicely.
In this blog post, we explored how to make Spicy Roasted Red Pepper Pasta. You learned about key ingredients like roasted red peppers and cream. I shared tips for cooking pasta and making a creamy sauce. We discussed variations, storage tips, and answered frequently asked questions.
Now, you have all the tools to create a tasty dish. Enjoy experimenting with flavors and making it your own. This pasta is easy, quick, and packed with flavor!


![- 1 can (15 oz) black beans, drained and rinsed - 1/2 cup cooked quinoa, cooled - 1/2 cup breadcrumbs (gluten-free option available) - 1 small red onion, finely diced - 2 cloves garlic, minced - 1 small jalapeño, minced (seeds removed for less heat) - 1 tablespoon chili powder - 1 teaspoon ground cumin - 1/2 teaspoon smoked paprika - Sea salt and black pepper, to taste - 2 tablespoons fresh cilantro, finely chopped - 1 large egg (or for a vegan option, mix 1 tablespoon ground flaxseed with 2.5 tablespoons water) - Olive oil for frying To make these spicy black bean burgers, choose fresh ingredients when you can. Fresh veggies add great flavor and crunch. However, pantry staples like canned black beans and quinoa work well too. When picking black beans, look for those with a firm texture. Check the can for any damage. Good beans should have a clean label with no added preservatives. For a gluten-free option, look for gluten-free breadcrumbs at your store. They are easy to find and useful in many dishes. You can also use oats or crushed corn chips if needed. This recipe is not just tasty but also easy to prepare. It allows you to explore new flavors while making a healthy meal. For the full recipe, check the instructions provided above. 1. Mashing black beans for ideal texture: Start with a large bowl. Use a fork or potato masher to mash the black beans. Aim for a mix of smooth and chunky. This gives your burger a great texture. 2. Mixing all ingredients thoroughly: After mashing, add the cooked quinoa, breadcrumbs, diced onion, minced garlic, chopped jalapeño, chili powder, cumin, smoked paprika, salt, pepper, and cilantro. Mix everything well. You want each bite to have a burst of flavor. 3. Tips for shaping patties consistently: To shape patties, wet your hands slightly. This helps the mixture stick less. Form about four to six patties, depending on your size preference. Make them even in thickness for even cooking. 1. Heating the skillet correctly: Pour a good drizzle of olive oil into a non-stick skillet. Heat it on medium. Wait until the oil shimmers before adding patties. This step is key for crispiness. 2. Cooking times for achieving crispy patties: Cook each patty for 5 to 6 minutes. Check for a golden brown color before flipping. This ensures a nice crust forms. 3. How to avoid breakage while flipping: Use a spatula to gently lift each patty. Flip them carefully to keep them intact. If they feel too soft, let them cook a bit longer. To get the right texture, add ingredients in the right order. Start with the black beans. Mash them well, but leave some chunks. This gives your burger a nice bite. Next, mix in the quinoa and breadcrumbs. These help bind your burger. If you want a firmer burger, add more breadcrumbs. For a softer burger, reduce them. Use olive oil for frying. It adds great flavor and helps the patties crisp up nicely. Spice up your burgers with extra spices. Consider adding cayenne for heat or oregano for earthiness. You can make a homemade spicy mayo. Mix mayo with hot sauce and lime juice. This makes a great dip too! Pair your burgers with tasty sides. Sweet potato fries or a fresh salad work well. These add color and flavor to your meal. For the full recipe, check out [Full Recipe]. {{image_4}} You can easily change this recipe to suit your taste. Here are a few ideas: - Different Beans or Grains: If you want a twist, try using kidney beans or chickpeas. You can also swap quinoa for brown rice or oats. Each option brings a unique flavor and texture. - Adding Cheese: For a creamy touch, mix in some cheese. Cheddar or pepper jack adds great flavor. If you prefer a vegan option, use vegan cheese or nutritional yeast. Both will give a cheesy taste without dairy. - Adjusting Spice Levels: Want it milder? Skip the jalapeño or use less chili powder. If you love heat, double the spices or add hot sauce. Make it just right for you. Take your spicy black bean burgers to the next level with these fun ideas: - Unique Toppings: Try avocado slices, pickled onions, or spicy slaw. Fresh herbs like cilantro or basil add a bright touch too. Experiment and find your favorite combo! - Suggested Sides: Pair your burgers with sweet potato fries, a crisp salad, or coleslaw. These sides add crunch and flavor to your meal. - Creative Presentation: Stack your burger high with colorful veggies. Serve it on a wooden board for a rustic look. Use fun plates to make your dish pop. Your guests will love it! For the full recipe, check out the [Full Recipe]. After enjoying your spicy black bean burgers, store leftovers in the fridge. Place cooked patties in an airtight container. They stay fresh for about three to four days. For uncooked patties, wrap them tightly in plastic wrap or place them in a freezer-safe bag. This way, you can freeze them for up to three months. To reheat, heat a skillet over medium heat. Add a little olive oil and cook the patties for about five minutes on each side. This will keep them crispy. You can also use an oven. Preheat it to 350°F (175°C) and bake for about 10-15 minutes. Cooked spicy black bean burgers last for up to four days in the fridge. If you freeze them, they can last for about three months. Look for signs of spoilage, like an off smell or a change in color. If the burgers feel slimy or dry, it's best to throw them away. Always trust your senses to keep your food safe! Can I make these burgers ahead of time? Yes, you can make these spicy black bean burgers ahead of time. Shape the patties and store them in the fridge for up to a day. This saves time on busy nights. You can also freeze them for up to three months. Just make sure to separate them with parchment paper. Are spicy black bean burgers gluten-free? Yes, they can be gluten-free! Use gluten-free breadcrumbs instead of regular ones. Many brands offer tasty options that work well in this recipe. Always check the label for hidden gluten. What can I use as a binder if I can’t use eggs? If you can’t use eggs, try a flax egg. Mix 1 tablespoon of ground flaxseed with 2.5 tablespoons of water. Let it sit for about five minutes until it thickens. This works great to hold the burger together. How can I make these burgers spicier? To add more heat, include extra jalapeños or use a spicier pepper like serrano. You can also add hot sauce or cayenne pepper to the mixture. Experiment to find your perfect spice level! Can I cook these on a grill instead? Absolutely! Grilling adds a nice smoky flavor. Preheat your grill and lightly oil the grates. Cook the patties for about 5-6 minutes on each side, just like in a skillet. What are the best buns to use for black bean burgers? I recommend whole wheat or brioche buns for great flavor. Lettuce wraps are an option too for a low-carb meal. Choose what fits your taste and diet best! Tips for meal prepping these burgers for the week. Make a large batch of patties and store them in the fridge or freezer. You can reheat them quickly for lunch or dinner. Pair with fresh toppings for a nice meal. Having these ready to go makes weeknight cooking easier! You learned how to make delicious black bean burgers. We covered key ingredients, step-by-step instructions, and great tips. Remember to choose fresh ingredients for the best flavor. Mix your beans well to get the right texture. Don’t forget to try different variations and toppings to suit your taste. Proper storage will help you enjoy leftovers later. With these tips, you can impress anyone at your next meal. Enjoy creating your perfect black bean burger!](https://goldendishy.com/wp-content/uploads/2025/06/68a5a06a-1097-44cf-8076-380ecc54e2d9-768x768.webp)
![To make your Fajita Veggie Sheet Pan, gather these simple and fresh ingredients: - Bell peppers (red, yellow, or green) - Zucchini - Red onion - Cherry tomatoes - Black beans - Olive oil - Spices and seasonings (chili powder, cumin, garlic powder, salt, pepper) - Fresh cilantro for garnish - Lime wedges for serving - Tortillas (corn or flour) These ingredients create a colorful and tasty dish. Using fresh veggies adds great flavor and texture. The spices make everything pop! You can adjust the veggies based on what you have or prefer. For example, you might try adding corn or mushrooms. Each change can lead to a new twist on this tasty recipe. This Fajita Veggie Sheet Pan really shows how simple ingredients can shine together. When you gather these items, you set the stage for a fun cooking adventure. Check out the Full Recipe for complete details on how to bring this delicious dish to life. 1. First, preheat your oven to 425°F (220°C). This helps the veggies cook just right. 2. Next, line a large sheet pan with parchment paper. This makes cleanup easy. 3. In a big mixing bowl, combine the sliced bell pepper, zucchini rounds, red onion wedges, halved cherry tomatoes, and rinsed black beans. 4. Drizzle 3 tablespoons of olive oil over the mixture. It helps the flavors blend. 5. Now, add 2 teaspoons of chili powder, 1 teaspoon of ground cumin, and 1 teaspoon of garlic powder. Don't forget a pinch of salt and black pepper. 6. Toss everything gently until each piece is well-coated with oil and spices. 1. Spread the veggie and bean mixture evenly on the prepared sheet pan. Make sure they are not crowded. 2. Place the pan in the preheated oven and roast for 20-25 minutes. Stir halfway through for even cooking. 3. The veggies should be tender and have slightly caramelized edges when done. 1. To warm the tortillas, you can use a skillet or microwave. Just a minute or two will do. 2. Fill each warm tortilla with the roasted fajita veggies. 3. Top with fresh cilantro and a drizzle of lime juice for extra flavor. 4. Serve the filled tortillas on a platter, garnished with lime wedges and extra cilantro for a beautiful display. For the complete recipe, check out the [Full Recipe]. To get the best from your fajita veggies, even cooking is key. Spread the veggies in a single layer on the sheet pan. This helps them roast well. Stir them halfway through cooking. This way, they brown nicely on all sides. Each oven runs a bit differently. You may need to adjust the cooking time. Keep an eye on the veggies. They should be tender and slightly charred. Want to kick up the flavor? Add more spices! A pinch of smoked paprika or cayenne pepper can work wonders. Fresh herbs like oregano or thyme also add depth. Don’t forget lime juice! A squeeze right before serving makes the dish pop. It gives a fresh, zesty flavor that brightens everything up. When serving, arrange the filled tortillas on a pretty platter. It makes the meal more inviting. Garnish with lime wedges and extra cilantro for color. You can also sprinkle some crumbled cheese on top. This adds a nice touch and looks great. A vibrant display makes your Fajita Veggie Sheet Pan Delight even more appetizing. {{image_4}} You can swap out veggies to suit your taste. Try adding mushrooms or sweet potatoes. Seasonal choices like asparagus or butternut squash work well, too. Think of what’s fresh at your local market. Broccoli and cauliflower also add great texture. Mix and match for a colorful plate. Want to make this dish heartier? Tofu or tempeh are great choices. Cube them and toss with your veggies. You can also add chickpeas for extra protein. They blend well with the spices. If you eat meat, grilled chicken or shrimp can elevate this dish. Just season them like your veggies for a tasty mix. Experimenting with spices can change your dish. For a mild flavor, stick with cumin and garlic. If you like heat, add cayenne or smoked paprika. Try a taco seasoning mix for a new twist. You could even toss in fresh herbs like cilantro or oregano. This will keep your fajita veggie sheet pan exciting each time! To keep your fajita veggies fresh, store them in an airtight container. Place the container in the fridge. This way, your flavors stay bright. Use leftover veggies within three to four days for best taste. For reheating, the oven is your best friend. Preheat it to 350°F (175°C). Spread the veggies on a baking sheet and heat for about 10 minutes. This restores texture and taste. You can also use the microwave, but the oven keeps them crisp. If you have extras, try adding them to a salad or a quesadilla for a tasty twist. To freeze the fajita veggie mix, let it cool first. Then, transfer it to a freezer-safe bag. Remove as much air as you can before sealing. This helps prevent freezer burn. When ready to use, move it to the fridge overnight to thaw. Reheat as mentioned above, and enjoy! It takes about 10 minutes to prep. Roasting in the oven takes 20-25 minutes. Altogether, you can enjoy this dish in about 30-35 minutes. Yes, you can easily swap veggies. Try adding mushrooms, asparagus, or even corn. Just make sure they cut evenly for even cooking. Absolutely! This dish is great for meal prep. You can store it in the fridge for up to four days. Just reheat portions as needed. Corn or flour tortillas are both great options. Corn tortillas give a nice crunch, while flour tortillas are soft and chewy. To spice things up, add more chili powder. You can also include fresh jalapeños or a splash of hot sauce. Experiment with heat to find your perfect level. You can prepare the veggies and seasoning ahead. Just store them in the fridge. When ready, roast them for a quick, fresh meal. For the full recipe, check out the details in the main article! This blog post covered how to make delicious fajita veggies on a sheet pan. We talked about the ingredients, preparation steps, and tips for perfect roasting. You learned about storing leftovers and customizing the recipe to fit your taste. In summary, this dish is both fun and easy to prepare. You can explore different veggies and spices, making it your own. Enjoy this tasty meal with friends or family, and remember, cooking should always bring joy!](https://goldendishy.com/wp-content/uploads/2025/07/261fee1c-f0d4-4ba8-a84d-53625610978f-768x768.webp)
![For this soup, fresh broccoli is key. Use about 4 cups of broccoli florets, roughly chopped. This gives the soup its vibrant green color and healthy crunch. You also need 1 medium onion, finely chopped, and 2 cloves of garlic, minced. These aromatics build a rich flavor base. Dairy makes this soup creamy and rich. You will need 1 cup of heavy cream. If you prefer a lighter option, substitute with coconut cream. For the broth, use 3 cups of low-sodium vegetable broth. This adds depth without overpowering the other flavors. Seasonings elevate the taste of your soup. Use 1 teaspoon of garlic powder and 1/2 teaspoon of onion powder. Don’t forget to add salt and freshly ground black pepper to taste. If you want a crunchy finish, top your soup with toasted croutons. They add a delightful texture and flavor contrast. This combination of ingredients creates a comforting, flavorful Broccoli Cheddar Soup. For a complete guide, check the Full Recipe. Start by melting the butter in a large pot over medium heat. Add the finely chopped onion. Sauté for about five minutes. You want the onion to be soft and clear. Next, add the minced garlic and cook for one to two minutes. This will make your kitchen smell amazing! Be careful not to burn the garlic. Now it’s time for the broccoli. Add the roughly chopped florets to the pot. Sauté them for about three to four minutes. This helps them soften a bit before the next step. Pour in the vegetable broth and raise the heat to bring it to a boil. Once boiling, reduce the heat to a simmer. Let it cook for about ten to twelve minutes until the broccoli is tender. After the broccoli is tender, it’s blending time! Use an immersion blender right in the pot. If you have a regular blender, transfer the soup in batches. Just be careful with the hot liquid. Blend until smooth. Return the soup to the pot and stir in the heavy cream, keeping the heat low. Slowly add the shredded sharp cheddar cheese. Stir until it melts and mixes well. Finally, add garlic powder and onion powder, and season with salt and pepper. Let it warm for a few more minutes. Serve your soup hot, and add toasted croutons if you like. Enjoy this cheesy broccoli bliss! You can find the full recipe above. To get that creamy feel, blend the soup well. Use an immersion blender for ease. If you want a chunkier soup, blend only half. This keeps some broccoli bits for a nice bite. Make sure to blend until smooth. This step makes all the difference in your final dish. Add more depth to your soup by using fresh herbs. Parsley or thyme brings bright notes. You can also toss in a dash of nutmeg for warmth. Adjust the salt and pepper to your taste. A squeeze of lemon juice can brighten flavors, too. Experiment with these extras until you find your favorite mix. Store leftover soup in an airtight container. It will keep well in the fridge for up to three days. Reheat gently on the stove to avoid curdling the cream. If you freeze it, leave out the cheese. Add it back when you reheat for the best flavor. Store in portions to make it easy to enjoy later. {{image_4}} You can make a vegan version of this soup. Replace the heavy cream with coconut cream. Use nutritional yeast instead of cheddar cheese. This option keeps the cheesy flavor while being dairy-free. Blend the soup until smooth, just like the original. You can still enjoy that creamy texture without any animal products. For a low-carb soup, swap the heavy cream for cauliflower. Cook the cauliflower with the broccoli, then blend it all together. This change cuts carbs while keeping the soup rich and hearty. You can also use a low-carb cheese to enhance the flavor without adding too many carbs. Want to boost the protein? Add cooked chicken or beans. They pair well with the flavors of broccoli and cheese. You can also toss in other veggies like carrots or spinach. This adds color and nutrients to your soup. Just make sure to cook them until tender before blending. For the full recipe, check out the main article. A serving of broccoli cheddar soup contains about 350 calories. The calorie count may vary based on the ingredients you use. For instance, using heavy cream adds more calories than coconut cream. If you add croutons, that will increase the total calories too. This soup packs a punch of nutrients. Here are some key nutrients you get in each serving: - Protein: About 12 grams, mostly from cheese and cream. - Fat: Approximately 25 grams, primarily from cheddar and cream. - Carbohydrates: Around 20 grams, mainly from broccoli and onion. - Fiber: Offers about 4 grams, thanks to the broccoli. Broccoli is more than just tasty. It is a superfood! Here are some reasons to love it: - Rich in Vitamins: It's high in vitamins C and K. - Antioxidants: Broccoli has powerful antioxidants. They help fight free radicals in your body. - Supports Digestion: The fiber helps keep your digestive system healthy. - Boosts Immunity: Eating broccoli may help strengthen your immune system. This nutritional information shows why broccoli cheddar soup is a great choice for a meal. It is not just delicious; it also nourishes your body. To store leftover broccoli cheddar soup, let it cool first. Then, pour it into an airtight container. It keeps well in the fridge for about three to four days. When you want to eat it, just reheat it on the stove or in the microwave. Stir well to mix the flavors again before serving. Yes, you can freeze broccoli cheddar soup. First, let it cool down completely. Then, place it in a freezer-safe container. Make sure to leave some space at the top, as the soup will expand when frozen. It can last for about three months in the freezer. To use, thaw it overnight in the fridge and reheat gently. To make broccoli cheddar soup gluten-free, use gluten-free broth. Most vegetable broths are gluten-free, but always check the label. Also, use cornstarch instead of flour if you want to thicken it. Just mix cornstarch with a little water before adding it to the soup. This way, you will enjoy a creamy soup without gluten. For the full recipe, check out [Full Recipe]. This blog covered how to make a tasty broccoli cheddar soup. We discussed key ingredients, including fresh broccoli and flavor-packed aromatics. I outlined helpful steps for cooking and blending the soup. You learned tips for great texture and flavor as well as how to store leftovers. Try variations like vegan options or low-carb versions to fit your needs. Broccoli brings healthy nutrients, making this soup a smart choice. Enjoy this dish, knowing you can customize it just the way you like!](https://goldendishy.com/wp-content/uploads/2025/06/c21049f2-ac49-4cf8-bdd7-9e479da09cd5-768x768.webp)


