Spicy Honey Garlic Shrimp Flavorful and Simple Recipe
![To make the spicy honey garlic shrimp, gather these items: - 1 pound large shrimp, peeled and deveined - 3 tablespoons honey - 3 tablespoons low-sodium soy sauce - 4 cloves garlic, finely minced - 1 tablespoon extra virgin olive oil - 1 teaspoon red pepper flakes (adjust according to your spice tolerance) - 1 teaspoon freshly grated ginger - 2 green onions, finely chopped (for garnish) - Toasted sesame seeds (for garnish) - Salt and freshly ground black pepper to taste You can swap some ingredients if needed: - Instead of honey, try maple syrup for a different sweetness. - Use tamari if you need a gluten-free option for soy sauce. - For garlic, garlic powder can work in a pinch. - You can replace shrimp with chicken or tofu if you prefer. A serving of spicy honey garlic shrimp has about: - Calories: 220 - Protein: 25g - Fat: 8g - Carbohydrates: 10g - Fiber: 0g - Sodium: 600mg This dish offers a good amount of protein while keeping the carbs low. The honey adds sweetness, and the shrimp provide healthy nutrients. For the full recipe, check the link provided. To start, gather your ingredients. This makes cooking easier and faster. You need: - 1 pound large shrimp, peeled and deveined - 3 tablespoons honey - 3 tablespoons low-sodium soy sauce - 4 cloves garlic, finely minced - 1 tablespoon extra virgin olive oil - 1 teaspoon red pepper flakes - 1 teaspoon freshly grated ginger - 2 green onions, finely chopped (for garnish) - Toasted sesame seeds (for garnish) - Salt and freshly ground black pepper to taste In a medium bowl, mix the honey, soy sauce, minced garlic, red pepper flakes, and ginger. Whisk it well. Set this aside to let the flavors blend. Heat the olive oil in a large skillet over medium-high heat. Wait until it shimmers. While it heats, season the shrimp with salt and black pepper. Add the shrimp in a single layer in the skillet. Cook for about 2-3 minutes without stirring. This helps them turn pink and golden on one side. Use tongs to flip the shrimp over. Pour the honey garlic sauce over them. Sauté for another 1-2 minutes. The shrimp should be fully cooked and glossy with sauce. Remove the skillet from heat. Sprinkle the green onions and sesame seeds over the shrimp. This adds flavor and crunch. If you use smaller shrimp, reduce the cooking time. Cook them for 1-2 minutes on each side. For jumbo shrimp, increase cooking time to about 3-4 minutes per side. Always check if they turn pink and are opaque. This means they are fully cooked. Enjoy this spicy honey garlic shrimp dish, and don’t forget to check the Full Recipe for more details! To get the best shrimp, look for large, firm shrimp. They should feel smooth and have a fresh smell. Avoid shrimp that smell like ammonia or are slimy. Fresh shrimp have a slight sheen and a pink color. If buying frozen shrimp, check for ice crystals. This means they may have thawed and refrozen. Cook shrimp quickly using high heat. This keeps them juicy and tender. Start with a hot pan and add oil. Add shrimp in a single layer; avoid crowding. Cook for just 2-3 minutes on one side until pink. Flip and then add your sauce. Cook for another 1-2 minutes until cooked through. To boost flavor, add fresh herbs like cilantro or parsley. You can also use lime juice for a zesty kick. For extra heat, toss in more red pepper flakes. Want more depth? Try adding a splash of rice vinegar or a bit of sesame oil. These small changes can make your shrimp pop with flavor. For the full recipe, check out the [Full Recipe]. {{image_4}} You can easily add veggies to this dish. Bell peppers, snap peas, or broccoli work great. Start by sautéing the vegetables in the skillet before adding the shrimp. This way, they cook together perfectly. Toss them in with the shrimp and sauce for a balanced meal. The veggies soak up the sweet and spicy sauce, making each bite even better. Grilling is a fantastic way to enjoy this shrimp. Marinate the shrimp in the honey garlic sauce for about 30 minutes. Preheat your grill to medium heat. Skewer the shrimp and grill for 2-3 minutes on each side. You’ll get a nice char and smoky flavor. This method is perfect for summer cookouts or outdoor gatherings. Turn this dish into tacos for a fun twist. Use corn tortillas or flour ones, whichever you prefer. Cook the shrimp as usual, then fill each taco with them. Top with cabbage, avocado, and a squeeze of lime. The crunch from the cabbage and creaminess from the avocado balance the heat. Enjoy these tacos with your friends for a tasty meal. For the full recipe, check the section above. To keep your spicy honey garlic shrimp fresh, let it cool first. Place the shrimp in an airtight container. Store it in the fridge for up to three days. This way, you can enjoy it again later. When you're ready to eat the leftovers, reheat them gently. Use a skillet over medium heat. Add a splash of water or broth to keep the shrimp moist. Stir it often so it heats evenly. This will help maintain its flavor and texture. If you want to store shrimp longer, freezing is a great option. First, cool the shrimp completely. Then, place it in a freezer-safe bag. Squeeze out any air before sealing it. You can keep it in the freezer for up to three months. When you're ready to eat, thaw it overnight in the fridge. Reheat as mentioned above for the best taste. For the full recipe, check out the details to make this tasty dish! The best way to peel shrimp is to start at the head. Hold the body and gently pull off the shell. You can also pinch the tail to detach it. To devein, make a shallow cut along the back. Use a small knife or toothpick to pull out the dark vein. Rinse the shrimp under cold water after. This step helps clean them well. Yes, you can make Spicy Honey Garlic Shrimp in advance. Cook the shrimp and sauce, then let them cool. Store them in an airtight container in the fridge. They will stay fresh for up to two days. When ready to serve, reheat them in a skillet. This helps keep their flavor bright and tasty. You can serve Spicy Honey Garlic Shrimp with several delicious sides. Steamed jasmine rice is a classic choice. It soaks up the sauce well. You can also try it with quinoa for a healthier option. Fresh veggies or a crisp salad add color and crunch. For more details on the full recipe, check out the Full Recipe section. In this blog post, we explored the complete guide to making Spicy Honey Garlic Shrimp. We covered the ingredients, including substitutions and nutritional info. You learned step-by-step instructions for prep and cooking, adjusted for shrimp sizes. The tips shared help you choose the best shrimp and achieve perfect flavor. We also discussed tasty variations and storage tips for leftovers. Remember, you can find the full recipe for Spicy Honey Garlic Shrimp linked in this post. Enjoy cooking and sharing your delicious dish!](https://goldendishy.com/wp-content/uploads/2025/06/cf05c4bf-72ca-4483-afe2-f2d6fc570350.webp)
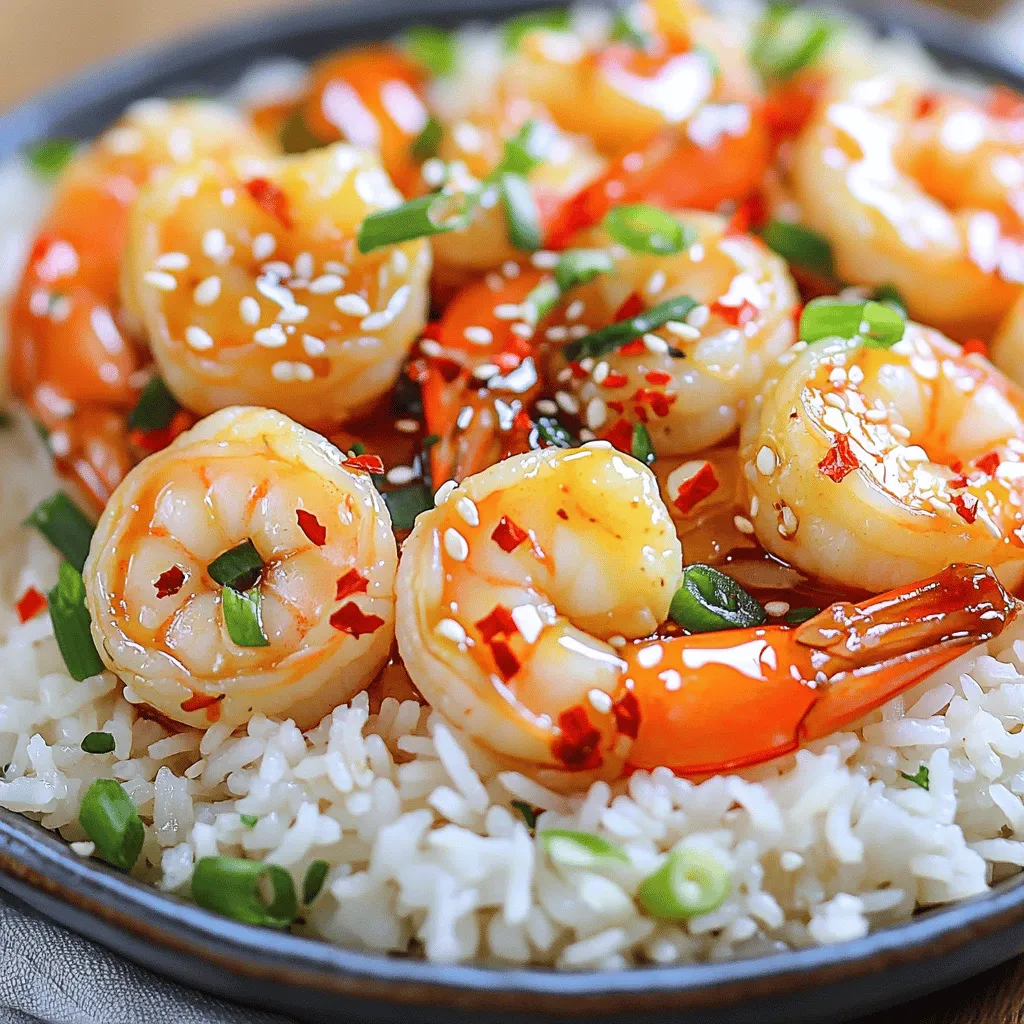
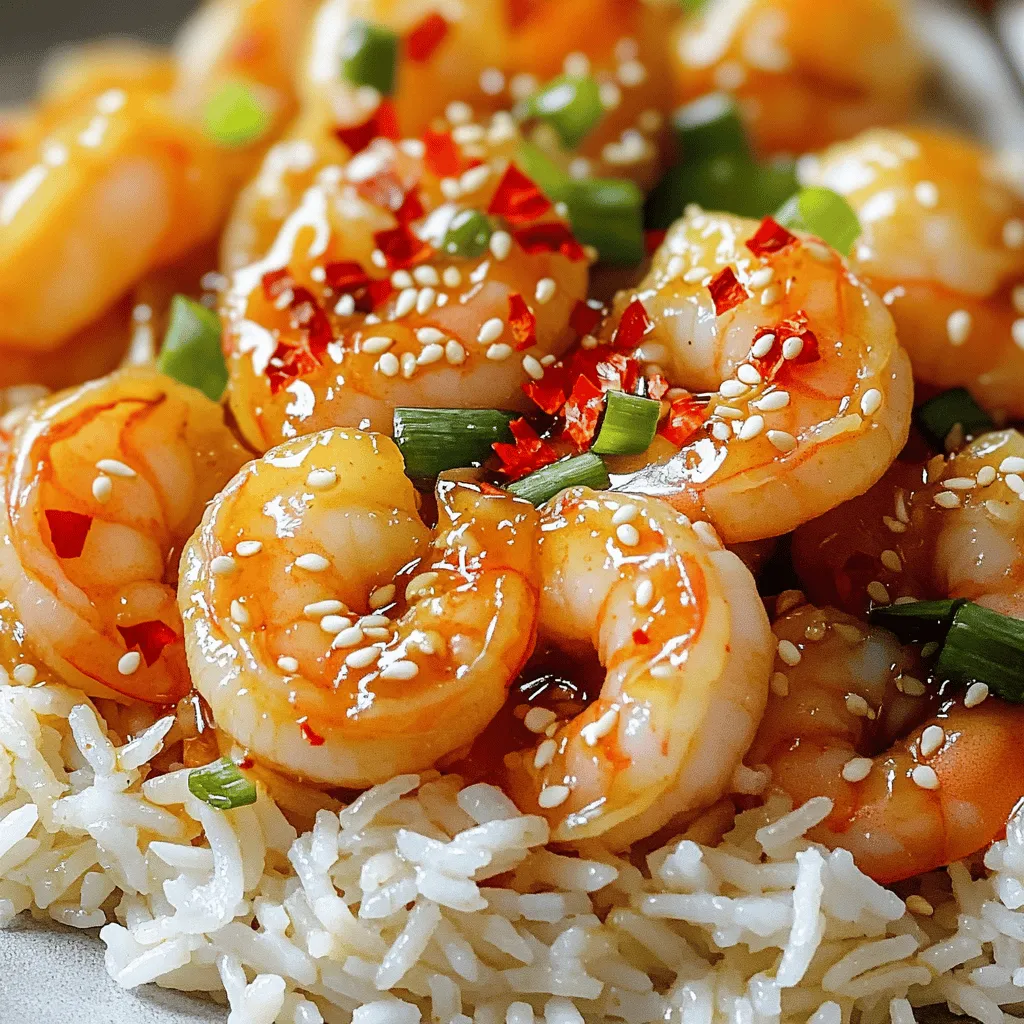
Craving a fun and tasty dish that’s quick to whip up? Look no further! My Spicy Honey Garlic Shrimp recipe brings together sweet, spicy, and savory flavors in just a few simple steps. Whether you’re cooking for a family dinner or a cozy night in, this dish guarantees satisfaction. Join me as we dive into the ingredients and easy-to-follow steps that will make your dinner unforgettable!
Ingredients
Complete List of Ingredients
To make the spicy honey garlic shrimp, gather these items:
– 1 pound large shrimp, peeled and deveined
– 3 tablespoons honey
– 3 tablespoons low-sodium soy sauce
– 4 cloves garlic, finely minced
– 1 tablespoon extra virgin olive oil
– 1 teaspoon red pepper flakes (adjust according to your spice tolerance)
– 1 teaspoon freshly grated ginger
– 2 green onions, finely chopped (for garnish)
– Toasted sesame seeds (for garnish)
– Salt and freshly ground black pepper to taste
Substitutions and Alternatives
You can swap some ingredients if needed:
– Instead of honey, try maple syrup for a different sweetness.
– Use tamari if you need a gluten-free option for soy sauce.
– For garlic, garlic powder can work in a pinch.
– You can replace shrimp with chicken or tofu if you prefer.
Nutritional Information
A serving of spicy honey garlic shrimp has about:
– Calories: 220
– Protein: 25g
– Fat: 8g
– Carbohydrates: 10g
– Fiber: 0g
– Sodium: 600mg
This dish offers a good amount of protein while keeping the carbs low. The honey adds sweetness, and the shrimp provide healthy nutrients.
Step-by-Step Instructions
Preparation Steps
To start, gather your ingredients. This makes cooking easier and faster. You need:
– 1 pound large shrimp, peeled and deveined
– 3 tablespoons honey
– 3 tablespoons low-sodium soy sauce
– 4 cloves garlic, finely minced
– 1 tablespoon extra virgin olive oil
– 1 teaspoon red pepper flakes
– 1 teaspoon freshly grated ginger
– 2 green onions, finely chopped (for garnish)
– Toasted sesame seeds (for garnish)
– Salt and freshly ground black pepper to taste
In a medium bowl, mix the honey, soy sauce, minced garlic, red pepper flakes, and ginger. Whisk it well. Set this aside to let the flavors blend.
Cooking Process
Heat the olive oil in a large skillet over medium-high heat. Wait until it shimmers. While it heats, season the shrimp with salt and black pepper.
Add the shrimp in a single layer in the skillet. Cook for about 2-3 minutes without stirring. This helps them turn pink and golden on one side. Use tongs to flip the shrimp over. Pour the honey garlic sauce over them. Sauté for another 1-2 minutes. The shrimp should be fully cooked and glossy with sauce.
Remove the skillet from heat. Sprinkle the green onions and sesame seeds over the shrimp. This adds flavor and crunch.
Adjusting Cooking Time for Different Shrimp Sizes
If you use smaller shrimp, reduce the cooking time. Cook them for 1-2 minutes on each side. For jumbo shrimp, increase cooking time to about 3-4 minutes per side. Always check if they turn pink and are opaque. This means they are fully cooked.
Tips & Tricks
How to Choose the Best Shrimp
To get the best shrimp, look for large, firm shrimp. They should feel smooth and have a fresh smell. Avoid shrimp that smell like ammonia or are slimy. Fresh shrimp have a slight sheen and a pink color. If buying frozen shrimp, check for ice crystals. This means they may have thawed and refrozen.
Cooking Tips for Perfectly Juicy Shrimp
Cook shrimp quickly using high heat. This keeps them juicy and tender. Start with a hot pan and add oil. Add shrimp in a single layer; avoid crowding. Cook for just 2-3 minutes on one side until pink. Flip and then add your sauce. Cook for another 1-2 minutes until cooked through.
Flavor Enhancements and Additions
To boost flavor, add fresh herbs like cilantro or parsley. You can also use lime juice for a zesty kick. For extra heat, toss in more red pepper flakes. Want more depth? Try adding a splash of rice vinegar or a bit of sesame oil. These small changes can make your shrimp pop with flavor.

Variations
Spicy Honey Garlic Shrimp with Vegetables
You can easily add veggies to this dish. Bell peppers, snap peas, or broccoli work great. Start by sautéing the vegetables in the skillet before adding the shrimp. This way, they cook together perfectly. Toss them in with the shrimp and sauce for a balanced meal. The veggies soak up the sweet and spicy sauce, making each bite even better.
Grilled Spicy Honey Garlic Shrimp
Grilling is a fantastic way to enjoy this shrimp. Marinate the shrimp in the honey garlic sauce for about 30 minutes. Preheat your grill to medium heat. Skewer the shrimp and grill for 2-3 minutes on each side. You’ll get a nice char and smoky flavor. This method is perfect for summer cookouts or outdoor gatherings.
Sweet & Spicy Honey Garlic Shrimp Tacos
Turn this dish into tacos for a fun twist. Use corn tortillas or flour ones, whichever you prefer. Cook the shrimp as usual, then fill each taco with them. Top with cabbage, avocado, and a squeeze of lime. The crunch from the cabbage and creaminess from the avocado balance the heat. Enjoy these tacos with your friends for a tasty meal.
Storage Info
How to Store Leftovers
To keep your spicy honey garlic shrimp fresh, let it cool first. Place the shrimp in an airtight container. Store it in the fridge for up to three days. This way, you can enjoy it again later.
Reheating Instructions for Best Results
When you’re ready to eat the leftovers, reheat them gently. Use a skillet over medium heat. Add a splash of water or broth to keep the shrimp moist. Stir it often so it heats evenly. This will help maintain its flavor and texture.
Freezing Tips for Longer Storage
If you want to store shrimp longer, freezing is a great option. First, cool the shrimp completely. Then, place it in a freezer-safe bag. Squeeze out any air before sealing it. You can keep it in the freezer for up to three months. When you’re ready to eat, thaw it overnight in the fridge. Reheat as mentioned above for the best taste.
FAQs
What is the best way to peel and devein shrimp?
The best way to peel shrimp is to start at the head. Hold the body and gently pull off the shell. You can also pinch the tail to detach it. To devein, make a shallow cut along the back. Use a small knife or toothpick to pull out the dark vein. Rinse the shrimp under cold water after. This step helps clean them well.
Can I make Spicy Honey Garlic Shrimp in advance?
Yes, you can make Spicy Honey Garlic Shrimp in advance. Cook the shrimp and sauce, then let them cool. Store them in an airtight container in the fridge. They will stay fresh for up to two days. When ready to serve, reheat them in a skillet. This helps keep their flavor bright and tasty.
What can I serve with Spicy Honey Garlic Shrimp?
You can serve Spicy Honey Garlic Shrimp with several delicious sides. Steamed jasmine rice is a classic choice. It soaks up the sauce well. You can also try it with quinoa for a healthier option. Fresh veggies or a crisp salad add color and crunch.
In this blog post, we explored the complete guide to making Spicy Honey Garlic Shrimp. We covered the ingredients, including substitutions and nutritional info. You learned step-by-step instructions for prep and cooking, adjusted for shrimp sizes. The tips shared help you choose the best shrimp and achieve perfect flavor. We also discussed tasty variations and storage tips for leftovers.Enjoy cooking and sharing your delicious dish!
![To make the spicy honey garlic shrimp, gather these items: - 1 pound large shrimp, peeled and deveined - 3 tablespoons honey - 3 tablespoons low-sodium soy sauce - 4 cloves garlic, finely minced - 1 tablespoon extra virgin olive oil - 1 teaspoon red pepper flakes (adjust according to your spice tolerance) - 1 teaspoon freshly grated ginger - 2 green onions, finely chopped (for garnish) - Toasted sesame seeds (for garnish) - Salt and freshly ground black pepper to taste You can swap some ingredients if needed: - Instead of honey, try maple syrup for a different sweetness. - Use tamari if you need a gluten-free option for soy sauce. - For garlic, garlic powder can work in a pinch. - You can replace shrimp with chicken or tofu if you prefer. A serving of spicy honey garlic shrimp has about: - Calories: 220 - Protein: 25g - Fat: 8g - Carbohydrates: 10g - Fiber: 0g - Sodium: 600mg This dish offers a good amount of protein while keeping the carbs low. The honey adds sweetness, and the shrimp provide healthy nutrients. For the full recipe, check the link provided. To start, gather your ingredients. This makes cooking easier and faster. You need: - 1 pound large shrimp, peeled and deveined - 3 tablespoons honey - 3 tablespoons low-sodium soy sauce - 4 cloves garlic, finely minced - 1 tablespoon extra virgin olive oil - 1 teaspoon red pepper flakes - 1 teaspoon freshly grated ginger - 2 green onions, finely chopped (for garnish) - Toasted sesame seeds (for garnish) - Salt and freshly ground black pepper to taste In a medium bowl, mix the honey, soy sauce, minced garlic, red pepper flakes, and ginger. Whisk it well. Set this aside to let the flavors blend. Heat the olive oil in a large skillet over medium-high heat. Wait until it shimmers. While it heats, season the shrimp with salt and black pepper. Add the shrimp in a single layer in the skillet. Cook for about 2-3 minutes without stirring. This helps them turn pink and golden on one side. Use tongs to flip the shrimp over. Pour the honey garlic sauce over them. Sauté for another 1-2 minutes. The shrimp should be fully cooked and glossy with sauce. Remove the skillet from heat. Sprinkle the green onions and sesame seeds over the shrimp. This adds flavor and crunch. If you use smaller shrimp, reduce the cooking time. Cook them for 1-2 minutes on each side. For jumbo shrimp, increase cooking time to about 3-4 minutes per side. Always check if they turn pink and are opaque. This means they are fully cooked. Enjoy this spicy honey garlic shrimp dish, and don’t forget to check the Full Recipe for more details! To get the best shrimp, look for large, firm shrimp. They should feel smooth and have a fresh smell. Avoid shrimp that smell like ammonia or are slimy. Fresh shrimp have a slight sheen and a pink color. If buying frozen shrimp, check for ice crystals. This means they may have thawed and refrozen. Cook shrimp quickly using high heat. This keeps them juicy and tender. Start with a hot pan and add oil. Add shrimp in a single layer; avoid crowding. Cook for just 2-3 minutes on one side until pink. Flip and then add your sauce. Cook for another 1-2 minutes until cooked through. To boost flavor, add fresh herbs like cilantro or parsley. You can also use lime juice for a zesty kick. For extra heat, toss in more red pepper flakes. Want more depth? Try adding a splash of rice vinegar or a bit of sesame oil. These small changes can make your shrimp pop with flavor. For the full recipe, check out the [Full Recipe]. {{image_4}} You can easily add veggies to this dish. Bell peppers, snap peas, or broccoli work great. Start by sautéing the vegetables in the skillet before adding the shrimp. This way, they cook together perfectly. Toss them in with the shrimp and sauce for a balanced meal. The veggies soak up the sweet and spicy sauce, making each bite even better. Grilling is a fantastic way to enjoy this shrimp. Marinate the shrimp in the honey garlic sauce for about 30 minutes. Preheat your grill to medium heat. Skewer the shrimp and grill for 2-3 minutes on each side. You’ll get a nice char and smoky flavor. This method is perfect for summer cookouts or outdoor gatherings. Turn this dish into tacos for a fun twist. Use corn tortillas or flour ones, whichever you prefer. Cook the shrimp as usual, then fill each taco with them. Top with cabbage, avocado, and a squeeze of lime. The crunch from the cabbage and creaminess from the avocado balance the heat. Enjoy these tacos with your friends for a tasty meal. For the full recipe, check the section above. To keep your spicy honey garlic shrimp fresh, let it cool first. Place the shrimp in an airtight container. Store it in the fridge for up to three days. This way, you can enjoy it again later. When you're ready to eat the leftovers, reheat them gently. Use a skillet over medium heat. Add a splash of water or broth to keep the shrimp moist. Stir it often so it heats evenly. This will help maintain its flavor and texture. If you want to store shrimp longer, freezing is a great option. First, cool the shrimp completely. Then, place it in a freezer-safe bag. Squeeze out any air before sealing it. You can keep it in the freezer for up to three months. When you're ready to eat, thaw it overnight in the fridge. Reheat as mentioned above for the best taste. For the full recipe, check out the details to make this tasty dish! The best way to peel shrimp is to start at the head. Hold the body and gently pull off the shell. You can also pinch the tail to detach it. To devein, make a shallow cut along the back. Use a small knife or toothpick to pull out the dark vein. Rinse the shrimp under cold water after. This step helps clean them well. Yes, you can make Spicy Honey Garlic Shrimp in advance. Cook the shrimp and sauce, then let them cool. Store them in an airtight container in the fridge. They will stay fresh for up to two days. When ready to serve, reheat them in a skillet. This helps keep their flavor bright and tasty. You can serve Spicy Honey Garlic Shrimp with several delicious sides. Steamed jasmine rice is a classic choice. It soaks up the sauce well. You can also try it with quinoa for a healthier option. Fresh veggies or a crisp salad add color and crunch. For more details on the full recipe, check out the Full Recipe section. In this blog post, we explored the complete guide to making Spicy Honey Garlic Shrimp. We covered the ingredients, including substitutions and nutritional info. You learned step-by-step instructions for prep and cooking, adjusted for shrimp sizes. The tips shared help you choose the best shrimp and achieve perfect flavor. We also discussed tasty variations and storage tips for leftovers. Remember, you can find the full recipe for Spicy Honey Garlic Shrimp linked in this post. Enjoy cooking and sharing your delicious dish!](https://goldendishy.com/wp-content/uploads/2025/06/cf05c4bf-72ca-4483-afe2-f2d6fc570350-300x300.webp)

![- 1 lb boneless, skinless chicken breast - Soy sauce, honey, rice vinegar, sesame oil - Fresh garlic and ginger The main stars of this dish are the chicken and the sauce. Start with 1 pound of boneless, skinless chicken breast. Cut it into 1-inch cubes for even cooking. You’ll also need soy sauce for that salty umami flavor. Honey adds sweetness, while rice vinegar gives a nice tang. Don't forget the sesame oil, which adds a rich, nutty taste. Fresh garlic and ginger bring a wonderful aroma and flavor to the mix. - Red and green bell peppers - Zucchini - Scallions and sesame seeds for garnish Adding vegetables makes your skewers colorful and tasty. Use red and green bell peppers cut into 1-inch squares. They add crunch and sweetness. Sliced zucchini rounds are great for texture and taste. For garnish, sprinkle chopped scallions and sesame seeds on top. They add a nice pop of flavor and look pretty, too. - Wooden skewers or metal skewers - Cornstarch for sauce thickening You will need skewers to hold all the goodness together. If you choose wooden skewers, soak them in water for about 30 minutes. This helps prevent burning on the grill. Metal skewers are a great option too. For the teriyaki sauce, you will use cornstarch mixed with water to make it thick and glossy. This will give your chicken a beautiful glaze. For the full recipe, check the section above on how to bring these ingredients together into a delightful dish. To start, gather your marinade ingredients. In a bowl, mix the soy sauce, honey, rice vinegar, sesame oil, minced garlic, and grated ginger. Whisk until everything blends well. Add the chicken breast cubes, making sure they are well coated. Cover the bowl with plastic wrap. Place it in the fridge for at least 30 minutes. For a stronger flavor, marinate for up to 2 hours. This step is key to juicy, flavorful chicken. If you use wooden skewers, soak them in water for at least 30 minutes. This helps stop them from burning. While the skewers soak, preheat your grill or grill pan to medium-high heat. A hot grill will give your skewers those perfect grill marks and lock in the flavors. After marinating, take the chicken out of the fridge. Start threading the marinated chicken onto the skewers. Alternate with pieces of red and green bell peppers and zucchini slices. Leave small gaps between each piece for even cooking. Now, place the skewers on the hot grill. Grill them for about 10 to 12 minutes. Turn them occasionally to ensure even cooking. The chicken should reach an internal temperature of 165°F. You’ll know they are done when they have beautiful grill marks and smell amazing. For the best flavor, marinate the chicken for at least 30 minutes. If you have time, let it soak for up to 2 hours. This longer marinating time helps the chicken absorb all the tasty flavors. To boost the flavor even more, add a splash of orange juice or sprinkle some chili flakes into the marinade. These small changes can make a big difference. To get those nice grill marks, preheat your grill to medium-high heat. Once you place the skewers on, resist the urge to move them around too much. Let them cook for about 10-12 minutes. Flip them only when they lift easily from the grill. To know if the chicken is done, use a meat thermometer. The safe internal temperature for chicken is 165°F. This ensures your skewers are juicy and safe to eat. When serving your Chicken Teriyaki Skewers, make it look nice! Arrange them on a platter, maybe on a bed of fresh lettuce. You can also serve them with a small bowl of extra teriyaki sauce for dipping. For sides, consider steamed rice or a fresh salad. The colors of the skewers and the sides will create a beautiful meal. This makes it more fun to eat and share! {{image_4}} You can switch up the protein in your skewers. Shrimp works great, too. Just remember to cook shrimp for only 4-6 minutes. Tofu is another good choice. Use firm tofu and press it first to remove extra water. Then, cut it into cubes. Tofu takes about the same time as chicken to cook. For a plant-based twist, try a marinade with soy sauce, maple syrup, and garlic. It will give you great flavor without meat. You can make vegetable-only skewers with bell peppers, zucchini, mushrooms, and cherry tomatoes. These cook quickly and taste amazing on the grill. You can make your skewers even better with spices. Adding chili flakes or smoked paprika gives a nice kick. You can also try different sauces like peanut or hoisin sauce. Mix in veggies like onions or asparagus for more color and taste. These small changes can make your Chicken Teriyaki Skewers unique and fun. For the full recipe, check out the detailed instructions above. When you have leftover chicken teriyaki skewers, store them properly. Place the skewers in an airtight container. This helps keep them fresh. Refrigerate them within two hours of cooking. It’s best to eat them within three days. Use glass or plastic containers with tight lids. These containers prevent air from getting in. You can also wrap them in aluminum foil. Just make sure they are sealed well. This keeps your skewers moist and tasty. To reheat your skewers, use an oven or a stovetop. Both methods keep the chicken juicy. If using an oven, set it to 350°F. Place the skewers on a baking sheet. Heat for about 10 minutes. For stovetop reheating, use a non-stick pan. Add a splash of water to the pan. Cover it with a lid. This helps steam the skewers and keeps them moist. Avoid reheating them in the microwave. Microwaves can make the chicken dry. Instead, always check the internal temperature. It should reach 165°F for safe eating. If you want to freeze the chicken skewers, do it right after cooking. Let them cool completely first. Wrap each skewer in plastic wrap. Then place them in a freezer bag. This helps prevent freezer burn. To thaw, move the skewers to the fridge a day before you want to eat them. This keeps them safe and tasty. If you need to thaw them faster, use the microwave on the defrost setting. But make sure to cook them right away after. For the best results, enjoy your chicken teriyaki skewers fresh. But if you follow these steps, leftovers can still taste great! For the full recipe, check it out [Full Recipe]. To check if your Chicken Teriyaki Skewers are done, use a meat thermometer. The chicken should reach an internal temperature of 165°F (75°C). This step is key for food safety. If you don't have a thermometer, make sure the juice runs clear when you cut the chicken. No pink should show. Yes, you can make the teriyaki sauce ahead of time. Mix the ingredients and store it in the fridge. This makes your meal prep easier. You can also make a larger batch and freeze it. Just thaw it before use. This way, your meal cooks faster. Chicken Teriyaki Skewers pair well with many side dishes. You might try steamed rice or quinoa for a filling option. A fresh salad adds a nice crunch. You can also serve them with grilled vegetables for a colorful plate. These sides will enhance the flavors and balance the meal. Chicken Teriyaki skewers are easy and fun to make. You learned about key ingredients like chicken, vegetables, and sauce. I shared step-by-step instructions for marinating, preparing, and grilling. You also saw tips for perfecting your dish and some tasty variations. In the end, you can enjoy these skewers any way you like. With proper storage and reheating, leftovers can be just as delicious. I hope this guide helps you create a tasty meal that you will love!](https://goldendishy.com/wp-content/uploads/2025/07/34476f9e-f69f-487d-af01-da0dcfe0a0e7-768x768.webp)


![- 1 pound fresh shrimp, peeled and deveined - 3 tablespoons unsalted butter, divided - 4 cloves garlic, finely minced - 1 teaspoon smoked paprika - 1 teaspoon ground cumin - Salt and freshly ground black pepper, to taste - 8 small corn tortillas - 1 cup red cabbage, finely shredded - 1 ripe avocado, sliced into thin wedges - Fresh cilantro leaves, roughly chopped, for garnish - Lime wedges, cut into quarters, for serving To make these garlic butter grilled shrimp tacos, you need fresh shrimp. I recommend getting shrimp that are firm and have a nice sheen. Make sure they are peeled and deveined for easy eating. Butter is key for adding richness. Use unsalted butter so you can control the saltiness. Garlic adds a wonderful aroma and flavor. Mince it finely for the best taste. For spices, smoked paprika brings a deep, smoky flavor. Ground cumin adds warmth. Be sure to season with salt and black pepper to taste. Corn tortillas are the perfect wrap. They are soft and add a nice corn flavor. Red cabbage gives a crunchy texture and a pop of color. Sliced avocado adds creaminess. Fresh cilantro gives a burst of freshness. Finally, lime wedges add a zesty kick. To see the full recipe, check out the [Full Recipe]. To start, melt 2 tablespoons of unsalted butter in a large skillet. Use medium heat. Once the butter is melted, add 4 cloves of minced garlic. Sauté the garlic for 1-2 minutes. It should smell great and turn a light golden color. Be careful not to burn the garlic! Next, stir in 1 teaspoon of smoked paprika and 1 teaspoon of ground cumin. Add a pinch of salt and fresh black pepper to taste. Mix well. This creates a tasty marinade for the shrimp. Now, add 1 pound of peeled and deveined shrimp to the skillet. Cook the shrimp for 3-4 minutes. Stir occasionally to make sure they cook evenly. You will know they are done when they turn opaque and pink. This buttery garlic mixture makes them extra delicious! While the shrimp cooks, take another skillet and heat it over medium-high heat. Warm each of the 8 small corn tortillas for about 30 seconds on each side. You want them to be soft and flexible. Look for slight char marks on the tortillas. This adds great flavor! To build your tacos, take a warm tortilla and layer some cooked shrimp in the center. Then, top it with shredded red cabbage and avocado slices. The cabbage adds crunch, while the avocado gives creaminess. Finish off your tacos by adding fresh cilantro on top. Serve them with lime wedges on the side for a zesty touch. For a nice presentation, arrange the tacos on a colorful platter. You can add extra cilantro and lime wedges to make it look even better. Enjoy every bite with a squeeze of lime! When picking shrimp, you have two main choices: fresh or frozen. Fresh shrimp can taste better, but frozen shrimp is often just as good. If you choose frozen shrimp, look for those that are flash-frozen right after harvest. This keeps them fresh and tasty. Size matters too! For tacos, I suggest using medium to large shrimp. They hold up well in the taco and give you a satisfying bite. Aim for shrimp that are about 21 to 30 per pound. To boost the flavor, you can swap the spices. Try adding chili powder or even a pinch of cayenne for heat. If you want a smoky taste, smoked paprika works wonders. You can also mix in some lime zest for a bright kick. To elevate your tacos, think about toppings. Mango salsa adds sweetness, while jalapeños bring heat. A drizzle of sour cream or a splash of hot sauce can make your tacos sing. Do not overcook your shrimp. They cook quickly and should only take 3-4 minutes. When they turn pink and opaque, they are done. Overcooking makes them tough and rubbery. For the tortillas, warmth is key. Heat them in a hot skillet for about 30 seconds on each side. This gives them a nice char and keeps them soft. You can also wrap them in a clean towel to keep them warm while you assemble your tacos. {{image_4}} You can switch the shrimp for other proteins. Chicken is a great option. Use boneless chicken breasts cut into bite-sized pieces. Season them like the shrimp. Cook until golden brown and juicy. Fish also works well. Choose firm fish like mahi-mahi or cod. Grill or pan-fry the fish until flaky. For a vegetarian twist, try veggies or tofu. Grilled bell peppers, onions, and zucchini make a colorful filling. Tofu absorbs flavors well, so marinate it before grilling. Want to spice things up? Add jalapeños or your favorite hot sauce. Slice jalapeños and mix them in with the shrimp. This adds a nice kick. You can change the toppings too. Mango salsa adds sweetness and freshness. Just mix diced mango, red onion, and lime juice. Another tasty option is crema. This creamy sauce balances the spices. Mix sour cream with lime juice and a pinch of salt. Serve your tacos with tasty sides. A fresh salad pairs well. Try a simple cucumber and tomato salad. Rice and beans are classic choices too. Cilantro lime rice adds bright flavor. For drinks, grab a cold beer or a zesty margarita. A light, fruity drink will complement the meal. Explore the full recipe for more ideas. To keep your garlic butter grilled shrimp tacos fresh, store them in an airtight container. Place the shrimp and toppings in separate containers. This helps maintain the flavors and textures. For the tortillas, wrap them in foil or plastic wrap. This keeps them soft and prevents them from drying out. Use them within three days for the best taste. To reheat the shrimp, place them in a skillet over low heat. Add a splash of water or a bit of butter to keep them moist. Heat for about five minutes, stirring gently. For the tortillas, warm them in a dry skillet for about 30 seconds each side. This method helps keep them soft and adds a nice char. Avoid using the microwave, as it may make them chewy. Yes, you can freeze grilled shrimp! Cool the shrimp completely before placing them in a freezer-safe bag. Squeeze out as much air as possible to prevent freezer burn. They can last up to three months in the freezer. When you're ready to use them, thaw overnight in the fridge. For meal prep, consider freezing the shrimp without the seasonings. This way, you can add fresh spices when you cook them later. You can tell when shrimp are cooked by looking for a few signs. First, they change color from grey to bright pink. Second, they curl into a C shape. Finally, perfectly cooked shrimp feel firm to the touch. If they are tough or rubbery, they may be overcooked. The cooking time is usually 3-4 minutes, but this can vary with size. Yes, you can prepare some parts of the tacos in advance. Cook the shrimp and store them in the fridge for up to two days. You can also warm the tortillas just before serving. If you want to save time, chop the cabbage and avocado ahead of time. Just remember to squeeze lime juice on the avocado to keep it fresh and green. Some great sides to serve with shrimp tacos include: - Cilantro lime rice - Black beans - Corn salad - Chips with salsa - Grilled vegetables These sides balance the flavors of the shrimp tacos and make the meal more complete. You can also serve a light salad to add freshness. You learned how to make delicious shrimp tacos from scratch. We covered fresh ingredients, step-by-step cooking, and tasty toppings. Remember, fresh shrimp and warm tortillas make a big difference. You can customize flavors with spices or different proteins. Enjoy serving them with a refreshing drink on the side. Proper storage will keep your leftovers tasty too. Whether you’re cooking for one or many, these tacos are a hit. Enjoy your cooking and get ready for a yummy meal.](https://goldendishy.com/wp-content/uploads/2025/06/f6806160-83d3-4aa8-a207-34a87a11273f-768x768.webp)