Spicy Chipotle Chicken Burritos Flavorful Meal Idea

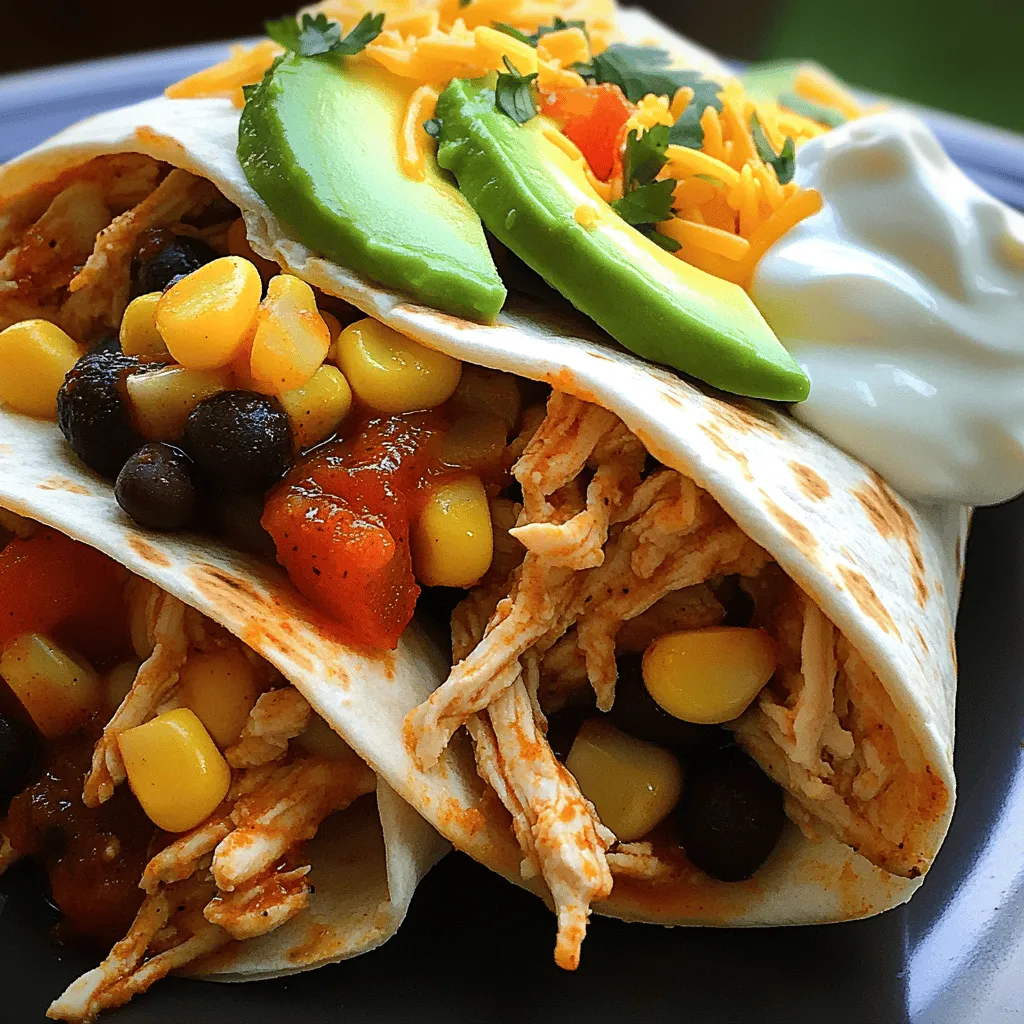
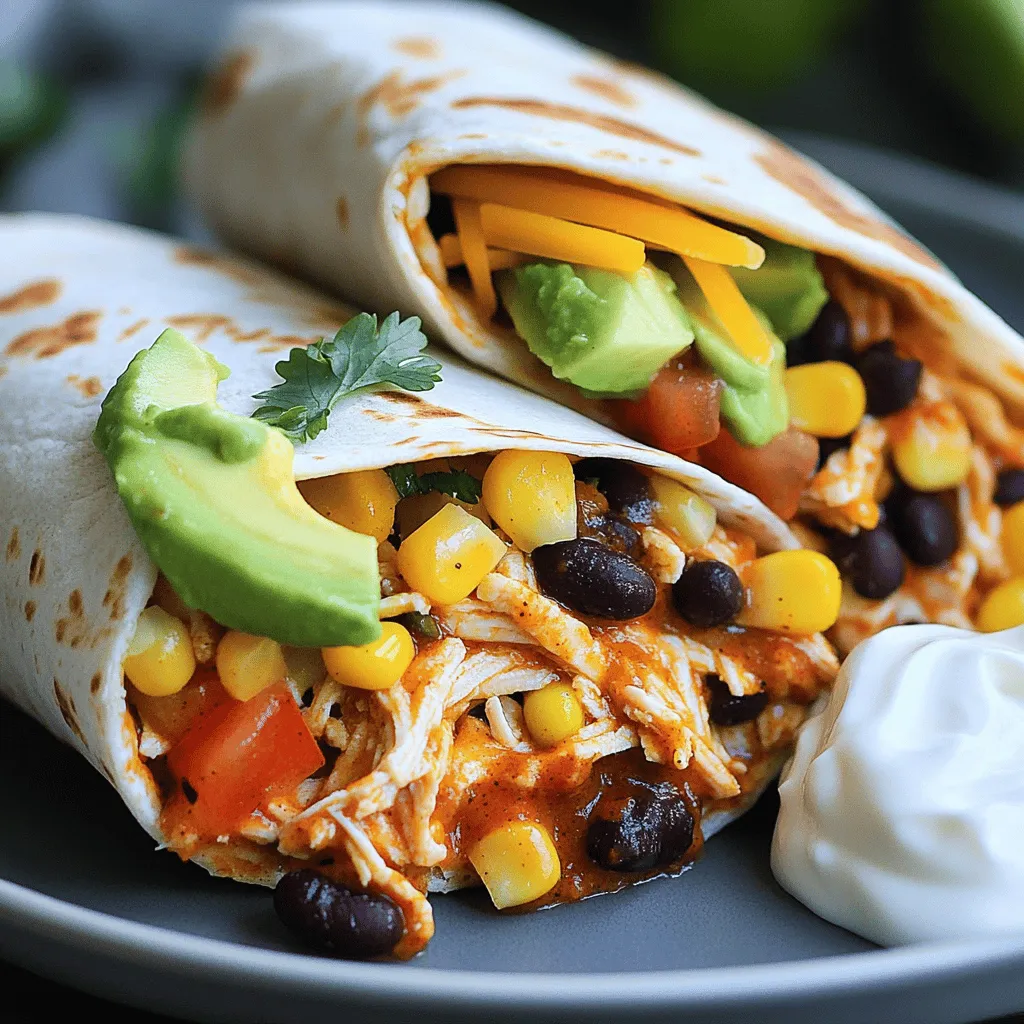
Are you ready to spice up your mealtime? In this post, I’ll guide you through making mouth-watering Spicy Chipotle Chicken Burritos! Packed with bold flavors and fresh ingredients, these burritos are easy to make and perfect for any occasion. Plus, I’ll share helpful tips to customize your meal to suit your taste. Let’s dive in and create a delicious burrito experience that will wow your family and friends!
Ingredients
Complete List of Ingredients
– Chicken and Tortilla Components
– 2 cups cooked and shredded chicken breast
– 4 large flour tortillas
– Vegetables and Spices
– 1 tablespoon chipotle peppers in adobo sauce, finely chopped
– 1 tablespoon olive oil
– 1 teaspoon ground cumin
– 1 teaspoon smoked paprika
– 1 cup black beans, drained and rinsed
– 1 cup corn kernels (can be fresh, canned, or frozen)
– 1 cup diced tomatoes
– 1/2 cup fresh cilantro, chopped
– Salt and freshly cracked pepper, to taste
– Optional Toppings
– 1 cup shredded cheddar cheese
– 1 avocado, sliced
– Sour cream or Greek yogurt for serving
These ingredients make the perfect balance of flavor and texture. The chipotle peppers add heat and depth, while the chicken offers protein. You can use fresh items like tomatoes and cilantro for a burst of freshness. The optional toppings add a creamy element that makes every bite special. I love how versatile this recipe is; you can mix and match to suit your taste.
Step-by-Step Instructions
Preparation of Chicken Filling
– Heat 1 tablespoon of olive oil in a large skillet over medium heat.
– Add 2 cups of cooked and shredded chicken, 1 tablespoon of finely chopped chipotle peppers, 1 teaspoon of ground cumin, 1 teaspoon of smoked paprika, salt, and freshly cracked pepper.
– Stir well to coat the chicken with the spices.
– Sauté for about 5-7 minutes until heated through and fragrant.
Creating the Bean and Corn Mixture
– In a large bowl, add 1 cup of drained and rinsed black beans, 1 cup of corn, and 1 cup of diced tomatoes.
– Toss in 1/2 cup of chopped fresh cilantro.
– Gently mix everything together to ensure a good blend of flavors.
Assembling the Burritos
– Take a large flour tortilla and lay it flat.
– Spoon a generous portion of the spicy chicken mixture into the center.
– Add a scoop of the bean and corn mixture, a sprinkle of shredded cheddar cheese, and a few slices of avocado.
– Fold the sides of the tortilla in, then roll from the bottom up, keeping the filling secure.
Optional Crisping Technique
– For a crispy finish, place the rolled burritos seam-side down in a lightly oiled skillet.
– Cook over medium heat for 2-3 minutes until golden brown.
– Carefully flip the burritos and cook for another 2-3 minutes until crispy.
– Cut each burrito in half diagonally for a nice presentation.
Tips & Tricks
Best Practices for Rolling Burritos
– Securing the Filling
Start with a generous scoop of filling. Place it in the center of the tortilla. This makes it easy to fold. Be careful not to overfill, as this can lead to spills. Make sure the filling is even along the center.
– Avoiding Spills
Fold the sides of the tortilla in first. This keeps the filling inside. Then, roll from the bottom. Tuck the filling as you roll. A snug roll helps keep everything together. If you find it hard to roll, try warming the tortilla for a few seconds. This makes it more pliable.
Flavor Enhancement Suggestions
– Adding More Spices
If you love heat, add more chipotle peppers. A pinch of cayenne or chili powder can also boost flavor. Experiment with spices like garlic powder or onion powder for depth. Don’t shy away from fresh herbs, either. They brighten the taste.
– Using Fresh Ingredients
Fresh vegetables improve the taste. Use ripe tomatoes for a juicy burst. Fresh cilantro adds brightness. Choose firm avocados for creaminess. Fresh ingredients make a big difference in flavor and texture.
Serving Suggestions
– Ideal Pairings
Serve these burritos with a side of Mexican rice or a light salad. A fresh pico de gallo adds a nice crunch. You can also serve it with guacamole for extra creaminess. A squeeze of lime on top can elevate the dish.
– Creative Presentation Ideas
Cut the burritos in half for a colorful display. Place them on a vibrant plate. Add a small bowl of sour cream or Greek yogurt in the center. Garnish with extra cilantro or lime wedges for flair. This not only looks good but enhances the dining experience.

Variations
Alternative Proteins
You can switch the chicken for other proteins. Ground beef works well. The flavors blend nicely with the spices. For a lighter option, use tofu. It absorbs flavors and gives a great texture. If you want a vegetarian burrito, simply skip the meat. You can add more beans or veggies to fill it up.
Different Flavor Profiles
Want more heat? Try adding jalapeños. Slice them thin and mix them in. They add a nice crunch and spice. If you like a sweet twist, add fresh pineapple. It balances the heat and adds a tropical touch. Just chop it up and mix it with the other fillings.
Gluten-Free and Low-Carb Substitutes
If you need a gluten-free option, use corn tortillas. They hold up well and taste great. For a low-carb meal, try lettuce wraps. They keep the flavors but cut down on carbs. Another idea is using cauliflower rice instead of tortillas. This adds bulk without the extra carbs.
Storage Info
Refrigerator Storage
– How Long They Last: Spicy Chipotle Chicken Burritos stay fresh in the fridge for up to 3 days. After that, they may lose flavor and texture.
– Best Practices for Keeping Fresh: Wrap each burrito tightly in plastic wrap or foil. Place them in an airtight container. This method keeps the burritos moist and tasty.
Freezing Instructions
– Tips for Freezing Burritos: For longer storage, freeze burritos. Wrap each one in plastic wrap, then place them in a freezer-safe bag. Remove as much air as possible to prevent freezer burn.
– Reheating Methods: To reheat, remove the wrap and place a burrito on a plate. Microwave for 1-2 minutes, or until hot. For a crispy finish, bake in an oven at 350°F for about 15-20 minutes.
Meal Prep Ideas
– Make-Ahead Tips: You can prepare the chicken filling and bean mixture a day in advance. Store them separately in the fridge. This makes assembly quick and easy.
– Safe Serving Techniques: When serving leftovers, ensure they are heated thoroughly. Use a food thermometer to check that the center reaches 165°F. This way, you keep everyone safe and enjoy the great flavors again.
FAQs
How to make Spicy Chipotle Chicken Burritos from scratch?
To make Spicy Chipotle Chicken Burritos from scratch, follow these key steps:
1. Heat olive oil in a skillet.
2. Add shredded chicken and spices.
3. Sauté until hot and fragrant.
4. Mix black beans, corn, tomatoes, and cilantro in a bowl.
5. Layer the chicken, bean mixture, cheese, and avocado in tortillas.
6. Roll and optionally crisp them in a skillet.
Key ingredients to focus on:
– Cooked and shredded chicken breast
– Chipotle peppers in adobo sauce
– Black beans
– Corn kernels
– Fresh cilantro
These ingredients bring flavor and texture to your burritos. Don’t forget the tortillas and cheese for a complete meal!
What sides go well with burritos?
Recommended sides include:
– Spanish rice
– Refried beans
– Grilled vegetables
– Fresh salad
Complementary dips can enhance the meal:
– Guacamole
– Salsa
– Queso dip
These sides make your meal more fun and tasty!
Can I use leftover chicken for this recipe?
Yes, you can use leftover chicken for this recipe. Best practices for using leftovers:
– Shred the chicken if it’s in larger pieces.
– Ensure it is fully cooked and safe to eat.
Safety guidelines for reheating:
– Heat leftovers to at least 165°F.
– Use a microwave or skillet for even heating.
Using leftovers saves time and reduces waste, making this meal efficient and tasty!
You now know how to make tasty burritos from start to finish. From choosing the right ingredients to optional crisping techniques, you have many ways to enjoy them. Remember, you can switch up proteins or adjust spices to make them your own. Store leftovers safely for future meals. Burritos are fun and versatile. They are great for weeknight dinners, parties, or quick lunches. Get creative and share your unique twists with friends and family. Enjoy your cooking adventure!


![- 2 medium sweet potatoes, peeled and cut into ½-inch cubes - 1 can (15 oz) black beans, drained and thoroughly rinsed - 1 can (14 oz) diced tomatoes, including their juices - 1 medium onion, finely chopped - 2 cloves garlic, minced - 1 red bell pepper, diced - 2 tablespoons olive oil - 2 tablespoons chili powder - 1 teaspoon ground cumin - ½ teaspoon smoked paprika - 1 cup vegetable broth - Salt and pepper, to taste To make my sweet potato and black bean chili pop with flavor, I focus on fresh ingredients. The sweet potatoes provide a creamy texture and a hint of sweetness. I use black beans for protein and fiber, which makes this dish filling. The diced tomatoes add acidity and moisture, balancing the flavors. Aromatics like onion, garlic, and red bell pepper create a fragrant base. Olive oil helps to sauté these ingredients, unlocking their full taste. I season the chili with chili powder, cumin, and smoked paprika. These spices bring warmth and depth to the dish. Vegetable broth adds richness, making the chili hearty and satisfying. Don’t forget to season with salt and pepper to taste; this step enhances every bite. - Fresh cilantro - Avocado slices For extra flavor, I love to add fresh cilantro on top. It gives the chili a fresh kick. Avocado slices add a creamy touch, making each bowl even more delicious. The chili is packed with nutrients. One serving has about 300 calories. It offers a good mix of proteins, carbs, and healthy fats. Each ingredient brings its own health benefits: - Sweet Potatoes: High in vitamins A and C, they support your immune system. - Black Beans: Rich in fiber, they aid digestion and keep you full. - Diced Tomatoes: Loaded with antioxidants, they help fight inflammation. - Aromatics: Onions and garlic have heart health benefits. - Olive Oil: Contains healthy fats that support brain health. Enjoying this chili not only warms your belly but also fuels your body with great nutrition. For the full recipe, you can check out my Sweet Potato and Black Bean Chili. How to Prepare and Cut Sweet Potatoes To start, grab two medium sweet potatoes. Use a peeler to remove the skin. Cut them into ½-inch cubes. This size helps them cook evenly. Place the cubes in a bowl of water to prevent browning. Tips for Cooking Aromatics For the aromatics, chop one medium onion finely. Mince two cloves of garlic. Dice one red bell pepper. These add flavor and depth. Heat two tablespoons of olive oil in a large pot over medium heat. Once hot, add the onion. Sauté for about 3-4 minutes until soft. Detailed Instructions for Sautéing and Simmering Next, stir in the minced garlic and diced bell pepper. Cook for an additional two minutes until fragrant. Now, add the sweet potato cubes. Stir well and cook for about five minutes. This helps to soften them before the chili cooks. Sprinkle in two tablespoons of chili powder, one teaspoon of ground cumin, and ½ teaspoon of smoked paprika. Season with salt and pepper. Stir until the sweet potatoes are coated with the spices. Then, pour in a can of diced tomatoes and one cup of vegetable broth. Timing for Each Step Bring the mixture to a gentle boil. Then, lower the heat and cover the pot. Let it simmer for 25-30 minutes, or until the sweet potatoes are fork-tender. After this, add one can of drained and rinsed black beans. Simmer for another 5-10 minutes to warm them through. Adjusting Seasoning Before Serving Taste the chili and adjust seasoning as needed. Add more salt or pepper if you like. This helps enhance the flavors. Presentation Recommendations Ladle the hot chili into deep bowls. Drizzle a little olive oil over the top for richness. Garnish with freshly chopped cilantro. If you love creaminess, add slices of avocado on top. For the full recipe, check out the details above. To make the best sweet potato chili, start with the sweet potatoes. Cut them into small, even cubes. This helps them cook faster and evenly. I always peel them for a smoother taste. Cook them until they are soft but not mushy. This gives your chili the right texture. When cooking aromatics like onion and garlic, avoid burning them. Use medium heat and stir often. If they start to brown too fast, lower the heat. This way, you keep their sweet flavor. A little patience goes a long way. To make your chili even better, try adding more spices. A pinch of cayenne or a splash of hot sauce can add a kick. You can also add smoked paprika for a deeper flavor. Each spice brings something unique to the table. Experiment and find what you like best! If you want heat, add jalapeños or other fresh peppers. Dice them small to mix in well. Start with a small amount, then taste and adjust. You can always add more, but it’s hard to take it out! For a complete meal, serve your chili with bread or rice. I love cornbread with mine for a classic touch. It adds a nice crunch and sweetness. You can also serve it over rice for a filling option. Want to add a fresh touch? Serve with lime wedges and sour cream. They brighten the dish and cool the heat. If you want a healthy twist, add avocado slices on top. They give a creamy finish and pair well with the chili. For the full recipe, visit the link provided. Enjoy your cooking adventure! {{image_4}} You can easily switch up the beans in this chili. Try using pinto beans or kidney beans for a new twist. They offer a different taste but still pair well with sweet potatoes. If you prefer a meat option, ground turkey or beef can be added. Just brown the meat before adding other ingredients. For vegan or vegetarian choices, this recipe is perfect as is. It uses no animal products. You can add tofu or tempeh for extra protein if desired. Both options blend well with the flavors of the chili. You can make this chili in a slow cooker. Just add all your ingredients into the cooker. Set it on low and let it cook for 6-8 hours. If you want a quicker option, use an Instant Pot. Cook on high pressure for 10 minutes, then let it release naturally. Both methods create a rich flavor. Feel free to add seasonal vegetables to your chili. Zucchini, corn, or bell peppers can enhance the dish. They bring freshness and crunch to each bite. When the weather changes, you can adapt the chili. In colder months, add warming spices like cinnamon or nutmeg. On hot days, serve it chilled or over a salad for a refreshing twist. For the full recipe, click here: [Full Recipe]. To keep your chili fresh, store it in an airtight container. Place it in the fridge as soon as it cools down. This helps keep flavors strong. Sweet potato and black bean chili lasts about 3 to 5 days in the fridge. If you want to save some for later, freezing is a great option. Portion out your chili into smaller containers. Make sure to leave some space at the top, as it will expand when frozen. Sweet potato and black bean chili can last up to 3 months in the freezer. When you're ready to eat it, thaw it in the fridge overnight. For reheating, you can use the stove or microwave. If using the stove, heat on low until warm. Stir occasionally to prevent sticking. In the microwave, heat in short bursts, stirring in between. Always check the temperature. It should be hot all the way through. Chili is perfect for meal prep. You can make a big batch for the week. Serve it with rice or quinoa for a complete meal. You can also use the chili in other dishes. Try it in burritos, tacos, or even over a baked potato. This adds variety to your meal plan without much extra work. Check out the Full Recipe for more details on making this delicious dish! What can I serve with Sweet Potato and Black Bean Chili? You can enjoy this chili with warm cornbread, rice, or tortilla chips. A fresh salad also pairs well. For a complete meal, add avocado slices on top for creaminess. How spicy is this chili? This chili has a mild spice level. The chili powder adds flavor without too much heat. If you like it spicy, add some chopped jalapeños or hot sauce. Can I use fresh tomatoes instead of canned? Yes, you can use fresh tomatoes. Dice about four medium tomatoes. Just remember to adjust the liquid since fresh tomatoes have less juice than canned ones. How can I make this chili gluten-free? The ingredients in this chili are naturally gluten-free. Just check your chili powder and broth labels to ensure they are gluten-free. Is Sweet Potato and Black Bean Chili healthy? Yes, this chili is very healthy! Sweet potatoes are full of vitamins and fiber. Black beans offer protein and iron. Together, they make a nutritious meal. Can I eat it on a plant-based diet? Absolutely! This chili is plant-based and vegan-friendly. It’s a great choice for anyone looking to eat more plant-based meals. Enjoy it with confidence! This blog covered making a delicious Sweet Potato and Black Bean Chili. We discussed essential ingredients, health benefits, and cooking steps. You learned about tips for perfecting your chili and suggested variations to keep it fresh. Proper storage and meal prep ideas ensure you enjoy it later. Remember, this chili is flexible and healthy. Experiment with flavors and ingredients for your taste. Enjoy your cooking journey!](https://goldendishy.com/wp-content/uploads/2025/06/98b7eb11-b0dd-4c6d-9f71-53ea28c64add-768x768.webp)
![- 2 chicken breasts, sliced into thin strips - 1 ripe, juicy mango, diced into small cubes - 1 red bell pepper, sliced into thin strips - 1 yellow bell pepper, sliced into thin strips - 1 cup snap peas, trimmed - 2 cloves garlic, finely minced - 1 tablespoon fresh ginger, grated - 3 tablespoons soy sauce (low sodium recommended) - 1 tablespoon honey (or maple syrup for a vegan option) - 1 tablespoon olive oil or sesame oil - Fresh cilantro leaves for garnish - Cooked jasmine rice or your choice of rice (for serving) The magic of Mango Chicken Stir Fry comes from simple, fresh ingredients. Chicken breasts form the base, bringing protein to your meal. The ripe mango adds sweetness. Bell peppers bring color and crunch. Snap peas give that crisp bite. Aromatics like garlic and ginger add depth. Soy sauce gives a savory touch, while honey balances it out with sweetness. For extra richness, use olive or sesame oil. Fresh cilantro adds a burst of flavor. Jasmine rice makes the perfect bed for this dish. Check out the Full Recipe to gather everything you need! To start, take your chicken breasts and slice them into thin strips. Aim for even cuts so they cook uniformly. Once sliced, season the chicken with salt and pepper. This simple step adds great flavor to the dish. Now, let’s heat the oil. In a large skillet or wok, pour in your olive oil. Set the heat to medium-high and wait until the oil shimmers. This means it’s ready for cooking. Next, add the sliced chicken to the hot pan. Cook the chicken for about 5-7 minutes. Stir frequently to ensure it browns nicely and cooks all the way through. After cooking, remove the chicken from the pan and set it aside on a plate. In the same pan, it’s time for aromatics. Add minced garlic and grated ginger. Sauté these for about 30 seconds. The smell will be amazing, but be careful not to burn them! Now, let’s add the vibrant vegetables. Toss in your sliced red and yellow bell peppers along with the snap peas. Stir-fry them for about 3-4 minutes. You want them tender but still crisp. Return the cooked chicken to the pan. Gently fold in the diced mango to mix everything together. The sweet mango will balance the savory chicken perfectly. Next, let’s make the sauce. In a small bowl, whisk together soy sauce and honey. Pour this mixture over your chicken and veggies. Stir well to coat everything evenly. Let it cook together for an additional 2 minutes. This allows all the flavors to meld. Once done, remove the stir-fry from the heat. It’s now ready to serve. Enjoy your Mango Chicken Stir Fry over cooked jasmine rice. Don’t forget to garnish with fresh cilantro for that extra pop of flavor! For the full recipe, check out the details above. To get the best results, pay close attention to your heat. Use high heat to sear the chicken and veggies. This helps keep the food juicy and full of flavor. If your pan isn't hot enough, the chicken will steam instead of sear. Avoid overcooking your vegetables. Cook them just until they are bright and crisp. This usually takes about 3-4 minutes. If you let them cook too long, they will lose their crunch and color. To add more depth, try spices like cumin or paprika. These can give your dish a unique twist. You can also add a pinch of red pepper flakes for heat. If you want a different sauce, consider teriyaki or sweet chili sauce. These can add a different layer of flavor that pairs well with mango. When serving, place your stir-fry over a bed of fluffy jasmine rice. This adds a nice base and absorbs the sauce. For garnishing, sprinkle fresh cilantro on top. You can also add lime wedges on the side. This adds color and a zesty kick. For the complete experience, check out the Full Recipe. Enjoy your cooking! {{image_4}} You can easily make this dish vegetarian. Use tofu instead of chicken. Firm tofu works best. Press it to remove excess water. Cut it into cubes and sauté until golden. For sauce, you can swap honey with maple syrup. This keeps it vegan-friendly. You might also try tamari instead of soy sauce. It’s gluten-free and tastes great. If you want more protein, shrimp or beef are great choices. For shrimp, cook them for about 3-4 minutes. The shrimp turn pink when done. If you use beef, slice it thinly. Cook it for about 5-7 minutes. Always check it’s fully cooked. You can use flank steak or sirloin for the best flavor. You can switch out fruits and veggies based on the season. In summer, try peaches or pineapple for a juicy twist. Winter calls for hearty vegetables like carrots or broccoli. Adding seasonal greens like kale or spinach boosts nutrition too. Get creative with what you have. This keeps your Mango Chicken Stir Fry fresh and exciting. For the full recipe, check above! To keep your Mango Chicken Stir Fry fresh, store leftovers in an airtight container. Let the stir-fry cool before sealing. It stays good for up to three days in the fridge. Always label your container with the date. This helps you keep track of freshness. When you want to enjoy your stir-fry again, reheat it carefully. You can use a microwave or a skillet. If using a microwave, heat in short bursts. Stir between heating to ensure even warmth. If using a skillet, add a splash of water to keep it moist. Always make sure it reaches a safe temperature of 165°F (74°C) before eating. You can freeze Mango Chicken Stir Fry if you want to store it longer. Place it in a freezer-safe container and leave some space for expansion. It can last up to three months in the freezer. To thaw, move it to the fridge overnight. For reheating, use a skillet or microwave, just like before. This method helps maintain the flavors and textures well. Check the [Full Recipe] for more details on making this dish. Mango Chicken Stir Fry lasts about 3 to 4 days in the fridge. Store it in an airtight container to keep it fresh. Make sure to cool it down before putting it in the fridge. This helps keep the texture and flavor. Yes, you can use frozen mango in this recipe. Frozen mango works well when fresh mango is not available. Just thaw the mango before adding it to the stir-fry. This will help it blend well with the other ingredients. Fresh mango offers a firmer texture and brighter flavor, but frozen is a great alternative. You can serve this dish with jasmine rice, quinoa, or even noodles. These sides soak up all the tasty sauce. You can also add a simple salad on the side. A cucumber salad or a green bean salad pairs nicely with the stir-fry. Yes, the recipe can be made gluten-free. Use tamari or coconut aminos instead of soy sauce. These options give a similar taste without gluten. Always check the labels to ensure there are no hidden gluten ingredients. This blog post covered everything you need to make a tasty Mango Chicken Stir Fry. We explored key ingredients like chicken, mango, and veggies. I provided step-by-step instructions to help you cook with confidence. You learned tips for perfecting the dish, plus variations to keep things fresh. In short, this recipe is fun and easy to customize. Get creative in the kitchen and enjoy your stir-fry!](https://goldendishy.com/wp-content/uploads/2025/06/67704695-6c72-4914-a503-47315e3cdcd3-768x768.webp)
