Slow Cooker Creamy Tortellini Soup Rich and Easy Meal

If you’re craving a quick and tasty meal, look no further! My Slow Cooker Creamy Tortellini Soup is rich, comforting, and super easy to make. With just a few fresh ingredients and a handy slow cooker, you’ll have a warm bowl of goodness ready for dinner. This soup offers a creamy texture, packed with delicious flavors that will make your taste buds dance. Ready to dive into this delightful dish? Let’s get cooking!
Ingredients
Main Components
– 1 package (9-12 oz) refrigerated or frozen cheese tortellini
– 4 cups vegetable broth
– 1 can (14.5 oz) diced tomatoes, including the liquid
Creaminess and Nutritional Boost
– 1 cup heavy cream or coconut cream
– 1 cup fresh spinach, roughly chopped
Flavor Enhancers
– 1 medium onion, finely diced
– 3 cloves garlic, minced
– 1 teaspoon dried Italian seasoning
– 1/2 teaspoon red pepper flakes (adjust for desired spice level)
– Salt and freshly ground black pepper, to taste
– 1/2 cup grated Parmesan cheese (optional, for a finishing touch)
In this recipe, I use cheese tortellini as the star. You can use fresh or frozen tortellini, and both work well. The next hero is vegetable broth, which gives the soup a nice base. Diced tomatoes add sweetness and color.
To make the soup creamy, I add heavy cream or coconut cream. Coconut cream gives it a fresh twist. Fresh spinach adds a pop of color and nutrition.
For flavor, I use diced onion and minced garlic as my base. Italian seasoning adds a classic taste, while red pepper flakes bring in some heat. Finally, salt, pepper, and Parmesan cheese round out the flavors.
This mix creates a rich and easy meal that everyone will love!
Step-by-Step Instructions
Preparing the Base
Start by placing the diced onion and minced garlic into your slow cooker. This mix gives the soup a solid flavor. Next, pour in the vegetable broth. Stir everything well. Then, add the drained diced tomatoes. The juice adds a nice touch. Sprinkle in the dried Italian seasoning and red pepper flakes if you like spice. Finally, add a little salt and pepper to taste. Stir again to blend all the flavors.
Cooking the Soup
Now, secure the lid on your slow cooker. Set it to cook on low for 6-8 hours or on high for 3-4 hours. The longer you cook it, the better the flavors blend. Check it occasionally if you can. It’s a great time to enjoy the lovely aroma.
Final Touches
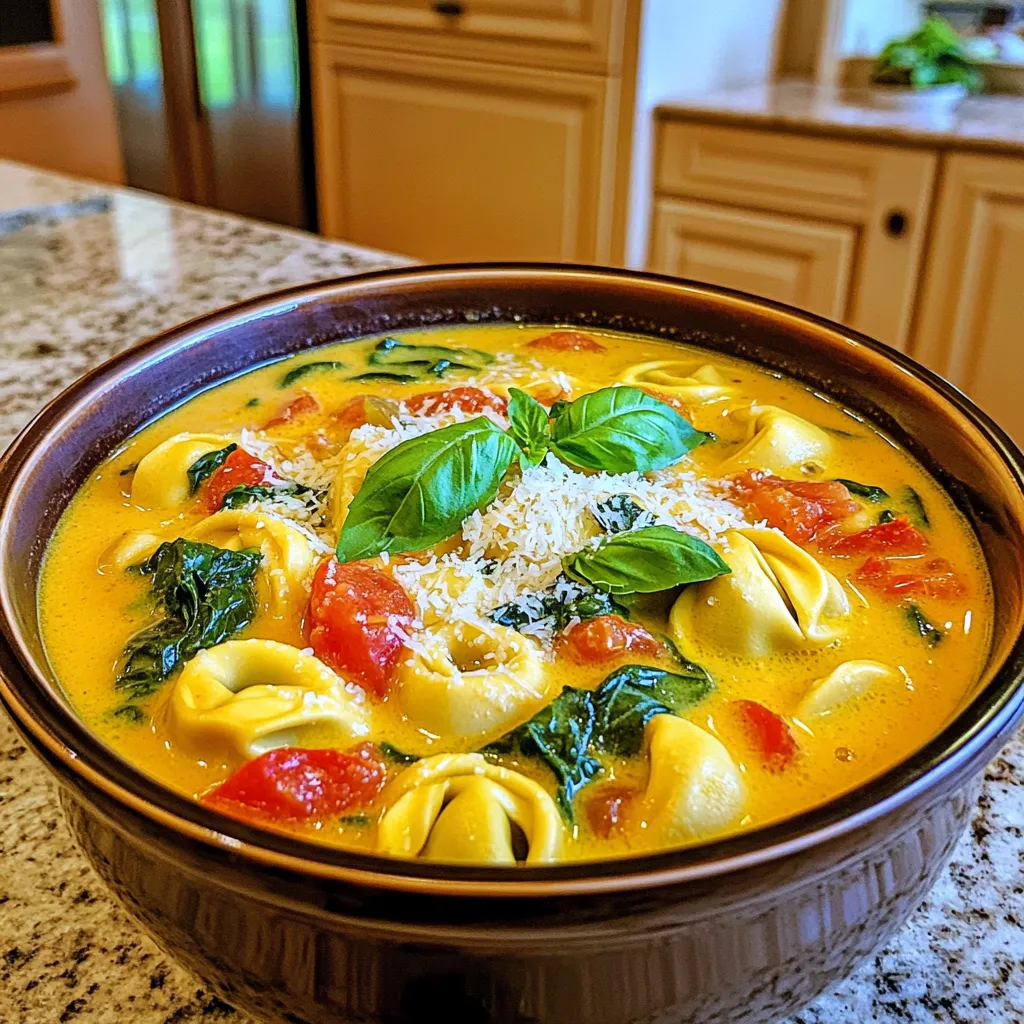
About 30 minutes before serving, gently stir in the cheese tortellini and heavy cream. If you prefer a lighter dish, use coconut cream. Mix carefully to avoid breaking the tortellini. Right before serving, add the chopped spinach. This will make the soup look vibrant and add nutrients. Taste the soup and adjust the seasonings as needed. Serve hot, and don’t forget to add some grated Parmesan cheese and fresh basil leaves for a beautiful finish!
Tips & Tricks
Enhancing Flavor
– Adjust seasonings: Add more Italian seasoning for a stronger taste. Consider adding fresh herbs like thyme or rosemary for extra depth.
– Substitutions: Swap heavy cream for coconut cream for a lighter option. Use vegetable broth instead of chicken broth for a vegan version.
Perfecting Texture
– Preventing broken tortellini: Stir gently when adding tortellini to avoid breaking them. Wait until the last 30 minutes of cooking to add them.
– Achieving creaminess: To maintain a creamy texture, add cream slowly while stirring. This helps emulsify the ingredients.
Presentation Tips
– Serving suggestions: Use deep bowls to serve the soup. This makes it easy to enjoy every last drop.
– Garnishing ideas: Sprinkle grated Parmesan cheese on top. Add fresh basil leaves for a pop of color and flavor.

Variations
Ingredient Swaps
You can easily change the soup by swapping the tortellini. Try using ravioli or gnocchi instead. If you want more protein, add cooked chicken or turkey. For added veggies, toss in some carrots or bell peppers. You can also use vegetable broth or chicken broth for a different flavor.
Dietary Modifications
To make this soup vegan, choose plant-based options. Use vegan tortellini and substitute heavy cream with coconut cream. This keeps it creamy while being dairy-free. For gluten-free options, look for gluten-free tortellini made from rice or corn. These options make it easy for everyone to enjoy.
Spice Level Adjustments
You can adjust the spice level to fit your taste. If you prefer a mild soup, skip the red pepper flakes. For more heat, add extra flakes or a dash of hot sauce. You can also try adding diced jalapeños for a fresh kick. Just remember to taste as you go!
Storage Info
Refrigeration Tips
You can keep this soup in the fridge for about three to four days. To store it, let the soup cool to room temperature first. Then, place it in an airtight container. This helps keep it fresh and tasty.
Freezing Guidelines
To freeze your tortellini soup, pour it into a freezer-safe container. Leave space at the top for expansion. It can last up to three months in the freezer. When you’re ready to eat, take it out and thaw it in the fridge overnight. For quick thawing, you can use the microwave.
Reheating Techniques
To reheat, you have a few good options. You can warm it on the stove over low heat. Stir often to keep it from sticking. Another option is to use the microwave. Heat it in short bursts, stirring in between, to keep the flavor and texture nice.
FAQs
Common Questions
Can I use frozen tortellini in this recipe?
Yes, you can use frozen tortellini. Just add it during the last 30 minutes of cooking. This keeps the pasta from getting too soft. I find frozen tortellini works great and saves time.
How can I make this soup richer in flavor?
To boost flavor, add more garlic or herbs. You can also use chicken broth instead of vegetable broth. A splash of white wine before cooking adds a nice depth. Lastly, stirring in some grated Parmesan right before serving enhances richness.
Dietary Questions
Is this soup suitable for a gluten-free diet?
Yes, you can make this soup gluten-free. Look for gluten-free tortellini brands. You can also use a gluten-free broth. This way, you can enjoy the soup without worry.
Can I make the soup dairy-free?
To make this soup dairy-free, swap heavy cream with coconut cream. It keeps the creamy texture and adds a hint of sweetness. You can also skip the cheese or use a dairy-free alternative.
Cooking Time Queries
How do cooking times vary between high and low settings?
On low, the soup takes 6-8 hours. On high, it cooks in 3-4 hours. The low setting allows flavors to meld better. If you’re in a hurry, the high setting works too.
What do I do if my soup is too thick?
If your soup is too thick, add more broth or water. Stir it in slowly until you reach your desired consistency. This keeps the soup creamy without losing flavor.
This soup recipe combines cheesy tortellini, hearty broth, and fresh veggies. You learned how to build flavor with herbs and spices, and I shared helpful tips for texture and presentation. Remember, you can adjust ingredients for dietary needs. Whether you want it vegan or gluten-free, the options are endless. Store leftovers correctly to enjoy every last bite. I hope you feel inspired to create a warm bowl of soup that delights. Enjoy each step as you make this delicious meal in your kitchen!


. - Heat your skillet over medium heat. - Add the unsalted butter and let it melt. - Once melted, watch for it to bubble gently. - Next, add the minced garlic. - Sauté the garlic for about one minute. - Stir often until it smells great and turns lightly golden. - Now, add the peeled and deveined shrimp to the skillet. - Season the shrimp with salt and pepper. - If you like spice, sprinkle in some red pepper flakes. - Cook the shrimp for 2-3 minutes on one side. - Flip the shrimp to cook the other side evenly. - Add the lemon zest and juice as they cook. - Keep cooking until the shrimp are opaque. - Remove the skillet from the heat. - Stir in the chopped parsley for a fresh taste. - Serve the shrimp over warm pasta or fluffy rice. - Drizzle the leftover lemon-garlic butter sauce on top for extra flavor. - For a lovely presentation, you can garnish with lemon wedges. For more details, check the Full Recipe. - Achieving the perfect shrimp texture: To get tender shrimp, avoid overcooking. Cook them just until they turn pink. This usually takes about 2-3 minutes per side. - Best practices for sautéing garlic: Start with a hot skillet and melted butter. Add minced garlic and stir for about 1 minute. Keep an eye on it so it doesn’t burn; burnt garlic tastes bitter. - Presentation ideas for a beautiful dish: Serve the shrimp in shallow bowls to make it look elegant. Add a sprinkle of parsley on top for color. Include lemon wedges on the side for a fresh touch. - Pairing options with side dishes: Lemon garlic butter shrimp goes well with cooked pasta or fluffy rice. You can also serve it with a side salad for a light meal. - Additional herbs or spices to try: Consider adding fresh basil or thyme for extra flavor. These herbs pair well with lemon and shrimp. - Adjusting spice levels with red pepper flakes: If you like heat, add more red pepper flakes. Start with a teaspoon and adjust to your taste. This will make your dish more exciting! For more details, check the Full Recipe. {{image_4}} You can change the seafood in this recipe. Try scallops or even crab. These swaps add new tastes while keeping the dish simple. If you want a healthier fat, swap butter for olive oil. Olive oil works well and gives a light, fresh flavor. To mix things up, add other citrus flavors. Lime or orange juice can brighten the dish. You can also infuse the recipe with herbs. Try basil or thyme for a different twist. These herbs can make the dish feel more seasonal. If you need a gluten-free option, serve the shrimp over quinoa or zucchini noodles. Both are great gluten-free choices. For a low-calorie meal, cut back on the butter. You can use less or replace it with vegetable broth. This keeps the dish tasty but lighter. After enjoying your lemon garlic butter shrimp, store any leftovers in the fridge. Use an airtight container to keep them fresh. These shrimp will stay good for about 2-3 days. Always check for freshness before eating. To freeze lemon garlic butter shrimp, let them cool completely first. Place them in a freezer-safe bag, removing as much air as possible. They can last for about 2 months in the freezer. When you're ready to eat, thaw the shrimp in the fridge overnight. Reheat them gently in a skillet over low heat. This keeps them tender and tasty. Always ensure your shrimp is safe to eat after storage. Check for any off smells or changes in color. If the shrimp look slimy or smell bad, it’s best to discard them. Trust your senses to keep your meals safe and enjoyable. Cook shrimp for 4-6 minutes. They cook quickly. In a hot skillet, shrimp turn pink when done. Avoid overcooking; it makes them tough. Yes, you can use frozen shrimp. Thaw them first for best results. Place them in cold water for about 15 minutes. This way, they cook evenly and taste fresh. I love serving lemon garlic butter shrimp with: - Cooked pasta - Fluffy rice - Fresh salad - Garlic bread These sides balance the rich flavors well. Check for color and texture. Cooked shrimp turn pink and opaque. They should feel firm but not hard. When in doubt, cut one open. It should be white inside, not translucent. You’ve learned how to make lemon garlic butter shrimp. We covered essential ingredients, easy steps, tips for cooking, and variations to try. Remember to adjust flavors to your taste and pair with your favorite sides. Store leftovers safely for later enjoyment. Cooking shrimp can be simple and satisfying. Enjoy every bite, and don't hesitate to experiment. Whether for a cozy night in or impressing guests, this dish shines every time. Let your kitchen be a place of fun and flavor!](https://goldendishy.com/wp-content/uploads/2025/06/8ad1771e-7d26-4dd4-879b-9e464bbb0647-768x768.webp)
![- 1 can (15 oz) black beans, drained and rinsed - 1/2 cup cooked quinoa, cooled - 1/2 cup breadcrumbs (gluten-free option available) - 1 small red onion, finely diced - 2 cloves garlic, minced - 1 small jalapeño, minced (seeds removed for less heat) - 1 tablespoon chili powder - 1 teaspoon ground cumin - 1/2 teaspoon smoked paprika - Sea salt and black pepper, to taste - 2 tablespoons fresh cilantro, finely chopped - 1 large egg (or for a vegan option, mix 1 tablespoon ground flaxseed with 2.5 tablespoons water) - Olive oil for frying To make these spicy black bean burgers, choose fresh ingredients when you can. Fresh veggies add great flavor and crunch. However, pantry staples like canned black beans and quinoa work well too. When picking black beans, look for those with a firm texture. Check the can for any damage. Good beans should have a clean label with no added preservatives. For a gluten-free option, look for gluten-free breadcrumbs at your store. They are easy to find and useful in many dishes. You can also use oats or crushed corn chips if needed. This recipe is not just tasty but also easy to prepare. It allows you to explore new flavors while making a healthy meal. For the full recipe, check the instructions provided above. 1. Mashing black beans for ideal texture: Start with a large bowl. Use a fork or potato masher to mash the black beans. Aim for a mix of smooth and chunky. This gives your burger a great texture. 2. Mixing all ingredients thoroughly: After mashing, add the cooked quinoa, breadcrumbs, diced onion, minced garlic, chopped jalapeño, chili powder, cumin, smoked paprika, salt, pepper, and cilantro. Mix everything well. You want each bite to have a burst of flavor. 3. Tips for shaping patties consistently: To shape patties, wet your hands slightly. This helps the mixture stick less. Form about four to six patties, depending on your size preference. Make them even in thickness for even cooking. 1. Heating the skillet correctly: Pour a good drizzle of olive oil into a non-stick skillet. Heat it on medium. Wait until the oil shimmers before adding patties. This step is key for crispiness. 2. Cooking times for achieving crispy patties: Cook each patty for 5 to 6 minutes. Check for a golden brown color before flipping. This ensures a nice crust forms. 3. How to avoid breakage while flipping: Use a spatula to gently lift each patty. Flip them carefully to keep them intact. If they feel too soft, let them cook a bit longer. To get the right texture, add ingredients in the right order. Start with the black beans. Mash them well, but leave some chunks. This gives your burger a nice bite. Next, mix in the quinoa and breadcrumbs. These help bind your burger. If you want a firmer burger, add more breadcrumbs. For a softer burger, reduce them. Use olive oil for frying. It adds great flavor and helps the patties crisp up nicely. Spice up your burgers with extra spices. Consider adding cayenne for heat or oregano for earthiness. You can make a homemade spicy mayo. Mix mayo with hot sauce and lime juice. This makes a great dip too! Pair your burgers with tasty sides. Sweet potato fries or a fresh salad work well. These add color and flavor to your meal. For the full recipe, check out [Full Recipe]. {{image_4}} You can easily change this recipe to suit your taste. Here are a few ideas: - Different Beans or Grains: If you want a twist, try using kidney beans or chickpeas. You can also swap quinoa for brown rice or oats. Each option brings a unique flavor and texture. - Adding Cheese: For a creamy touch, mix in some cheese. Cheddar or pepper jack adds great flavor. If you prefer a vegan option, use vegan cheese or nutritional yeast. Both will give a cheesy taste without dairy. - Adjusting Spice Levels: Want it milder? Skip the jalapeño or use less chili powder. If you love heat, double the spices or add hot sauce. Make it just right for you. Take your spicy black bean burgers to the next level with these fun ideas: - Unique Toppings: Try avocado slices, pickled onions, or spicy slaw. Fresh herbs like cilantro or basil add a bright touch too. Experiment and find your favorite combo! - Suggested Sides: Pair your burgers with sweet potato fries, a crisp salad, or coleslaw. These sides add crunch and flavor to your meal. - Creative Presentation: Stack your burger high with colorful veggies. Serve it on a wooden board for a rustic look. Use fun plates to make your dish pop. Your guests will love it! For the full recipe, check out the [Full Recipe]. After enjoying your spicy black bean burgers, store leftovers in the fridge. Place cooked patties in an airtight container. They stay fresh for about three to four days. For uncooked patties, wrap them tightly in plastic wrap or place them in a freezer-safe bag. This way, you can freeze them for up to three months. To reheat, heat a skillet over medium heat. Add a little olive oil and cook the patties for about five minutes on each side. This will keep them crispy. You can also use an oven. Preheat it to 350°F (175°C) and bake for about 10-15 minutes. Cooked spicy black bean burgers last for up to four days in the fridge. If you freeze them, they can last for about three months. Look for signs of spoilage, like an off smell or a change in color. If the burgers feel slimy or dry, it's best to throw them away. Always trust your senses to keep your food safe! Can I make these burgers ahead of time? Yes, you can make these spicy black bean burgers ahead of time. Shape the patties and store them in the fridge for up to a day. This saves time on busy nights. You can also freeze them for up to three months. Just make sure to separate them with parchment paper. Are spicy black bean burgers gluten-free? Yes, they can be gluten-free! Use gluten-free breadcrumbs instead of regular ones. Many brands offer tasty options that work well in this recipe. Always check the label for hidden gluten. What can I use as a binder if I can’t use eggs? If you can’t use eggs, try a flax egg. Mix 1 tablespoon of ground flaxseed with 2.5 tablespoons of water. Let it sit for about five minutes until it thickens. This works great to hold the burger together. How can I make these burgers spicier? To add more heat, include extra jalapeños or use a spicier pepper like serrano. You can also add hot sauce or cayenne pepper to the mixture. Experiment to find your perfect spice level! Can I cook these on a grill instead? Absolutely! Grilling adds a nice smoky flavor. Preheat your grill and lightly oil the grates. Cook the patties for about 5-6 minutes on each side, just like in a skillet. What are the best buns to use for black bean burgers? I recommend whole wheat or brioche buns for great flavor. Lettuce wraps are an option too for a low-carb meal. Choose what fits your taste and diet best! Tips for meal prepping these burgers for the week. Make a large batch of patties and store them in the fridge or freezer. You can reheat them quickly for lunch or dinner. Pair with fresh toppings for a nice meal. Having these ready to go makes weeknight cooking easier! You learned how to make delicious black bean burgers. We covered key ingredients, step-by-step instructions, and great tips. Remember to choose fresh ingredients for the best flavor. Mix your beans well to get the right texture. Don’t forget to try different variations and toppings to suit your taste. Proper storage will help you enjoy leftovers later. With these tips, you can impress anyone at your next meal. Enjoy creating your perfect black bean burger!](https://goldendishy.com/wp-content/uploads/2025/06/68a5a06a-1097-44cf-8076-380ecc54e2d9-768x768.webp)


