Slow Cooker Butter Chicken Easy Flavorful Recipe

If you’re searching for an easy, flavorful recipe to bring warmth to your dinner table, you’ve found it! Slow Cooker Butter Chicken is the perfect dish for busy days. With tender chicken thighs simmered in a rich sauce made from spices, tomatoes, and creamy coconut milk, this recipe offers comfort and convenience. Ready to impress your family and friends? Let’s dive into making this delightful meal!
Why I Love This Recipe
- Rich and Flavorful: This butter chicken recipe is packed with spices and creamy coconut milk, creating a rich sauce that envelops the chicken perfectly.
- Easy Preparation: With just a few minutes of prep and the rest done by the slow cooker, this dish is perfect for busy weeknights.
- Customizable Heat: You can easily adjust the chili powder to suit your spice preference, making it a dish for everyone!
- Delicious Leftovers: This butter chicken tastes even better the next day, making it a fantastic option for meal prep or leftovers.
Ingredients
List of Main Ingredients
– 2 lbs boneless, skinless chicken thighs, cut into bite-sized pieces
– 1 large onion, finely chopped
– 4 cloves garlic, minced
– 1-inch piece of ginger, grated
– 1 can crushed tomatoes (15 oz)
– 1 cup coconut milk
– 6 tablespoons unsalted butter, cubed
Spices and Seasonings
– 2 tablespoons garam masala
– 1 tablespoon ground cumin
– 1 tablespoon ground coriander
– 1 teaspoon turmeric
– 1 teaspoon chili powder (adjust to taste)
– Salt and pepper to taste
Suggested Garnishes and Sides
– Fresh cilantro, chopped, for garnish
– Cooked basmati rice or naan for serving
Gathering these ingredients makes the slow cooker butter chicken easy and fun. The chicken thighs give a juicy bite, while the onion, garlic, and ginger add depth to the dish. The crushed tomatoes and coconut milk create a rich and creamy base.
The spices are key! Garam masala brings warmth, while cumin and coriander add earthiness. Turmeric gives a lovely golden color, and chili powder adds a hint of heat. Adjust the chili to your taste.
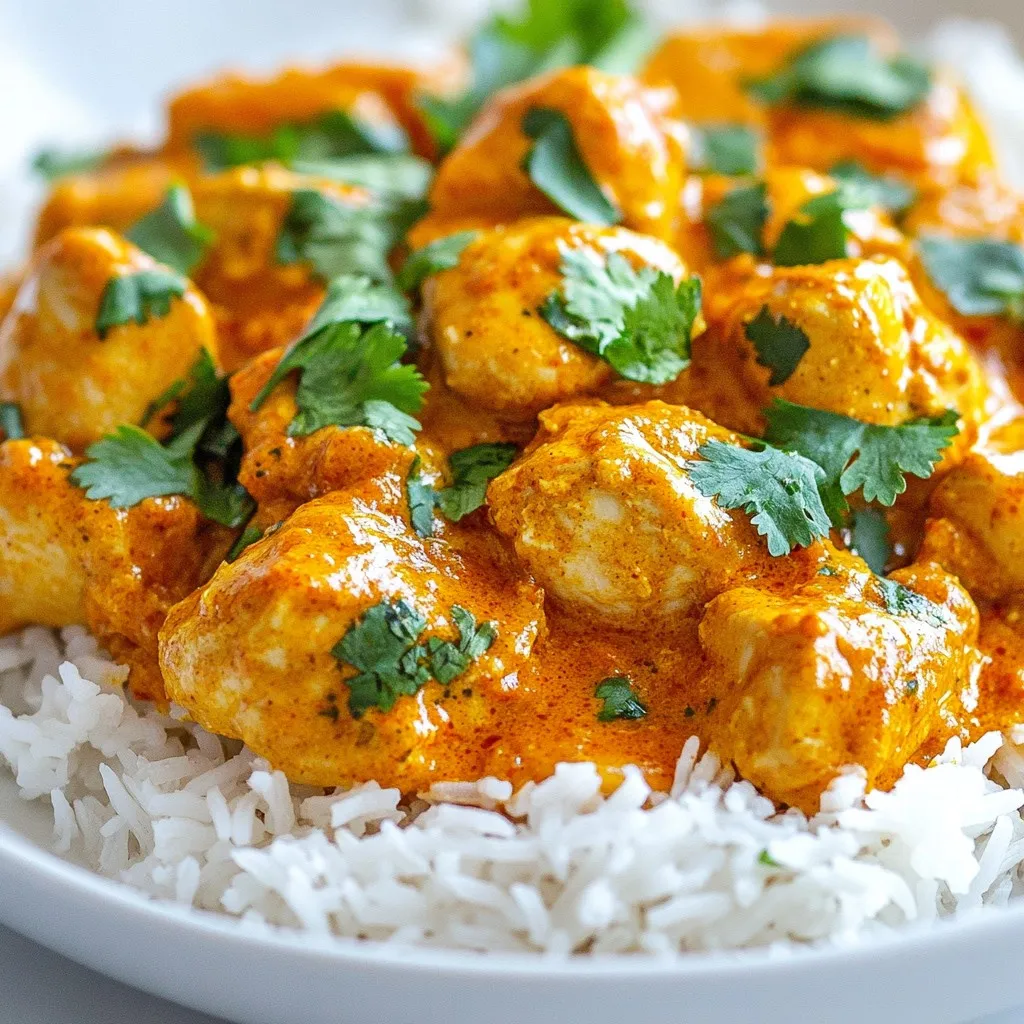
For a beautiful finish, top your dish with fresh cilantro. Serve it over fluffy basmati rice or with warm naan to soak up that tasty sauce. This meal shines with these simple yet flavorful ingredients.

Step-by-Step Instructions
Preparing the Slow Cooker
1. Start by chopping one large onion. Add the onion to the bottom of your slow cooker.
2. Next, mince four cloves of garlic and grate one inch of ginger. Mix these in with the onion.
3. Stir the onion, garlic, and ginger until combined. This mix brings great flavor to the dish.
4. Now, cut two pounds of boneless, skinless chicken thighs into small pieces. Layer the chicken on top of the onion mix.
5. Sprinkle some salt and pepper over the chicken to enhance the taste.
Creating the Sauce
1. In a mixing bowl, add one can of crushed tomatoes and one cup of coconut milk.
2. Add six tablespoons of cubed butter to the bowl. Then, add two tablespoons of garam masala, one tablespoon of ground cumin, and one tablespoon of ground coriander.
3. Don’t forget one teaspoon of turmeric and one teaspoon of chili powder. Adjust the chili powder to your taste.
4. Whisk all these ingredients together until fully combined. This sauce is rich and full of flavor.
5. Carefully pour the sauce over the chicken in the slow cooker. Make sure the chicken is well covered.
Cooking in the Slow Cooker
1. Cover your slow cooker. Set it to low heat for six to eight hours. You can also set it to high heat for four to five hours.
2. Check the chicken after the time is up. It should be fork-tender and fully cooked.
3. If you want a thicker sauce, blend a portion of it and mix it back in. This step will make the sauce creamier.
4. Before serving, stir in one extra tablespoon of butter for more richness.
5. Serve the butter chicken hot over fluffy basmati rice or warm naan. Garnish with chopped cilantro for a pop of color.
Tips & Tricks
Enhancing Flavor
To make your butter chicken sing with flavor, adjust the spices to your taste. The recipe calls for chili powder. If you like it spicy, add a bit more. If you prefer mild, use less. The spice level is in your hands!
Right before serving, consider adding an extra tablespoon of butter. This makes the sauce richer and adds smoothness. It’s a simple trick to elevate the dish.
Cooking Tips
Getting the chicken texture just right is key. Use boneless, skinless chicken thighs for the best results. They stay juicy and tender during cooking. Cook on low for 6-8 hours or high for 4-5 hours. Check for fork-tender chicken to know it’s done.
If you want a thicker sauce, there are options. You can blend part of the sauce in a blender and mix it back in. This method adds body without losing flavor. It’s a quick fix for a saucier dish.
Serving Suggestions
Butter chicken is best served with basmati rice or warm naan. The rice absorbs the sauce well, while naan is perfect for dipping. You can’t go wrong with either!
For garnishing, use freshly chopped cilantro. Sprinkle it on top for color and taste. It adds a fresh note that brightens the dish. Serve it hot for the best experience!
Pro Tips
- Marinate for Extra Flavor: For an even richer taste, marinate the chicken in yogurt and spices for a few hours before cooking. This not only enhances the flavor but also tenderizes the meat.
- Adjust Spice Levels: If you prefer a milder dish, reduce the chili powder or opt for a mild garam masala. Conversely, for a spicier kick, feel free to add more chili powder or fresh chilies.
- Use Fresh Ingredients: Whenever possible, use fresh garlic and ginger instead of pre-minced or jarred versions. Fresh ingredients significantly elevate the flavor profile of the dish.
- Leftover Magic: This butter chicken tastes even better the next day! Store leftovers in an airtight container and enjoy the enhanced flavors for lunch or dinner the following day.

Variations
Ingredient Swaps
You can easily swap out the protein in this dish. If you prefer meat, try chicken breasts. For a lighter option, use turkey thighs. If you want a meat-free meal, chickpeas or tofu work great too. They soak up the flavors well.
If you need a dairy-free or vegan version, replace the butter with vegan butter or coconut oil. Use almond or soy milk in place of coconut milk. Make sure your crushed tomatoes are also free from dairy.
Flavor Variations
Adding vegetables can boost the flavor and nutrition. Try adding chopped spinach, bell peppers, or peas. These veggies add color and taste. You can add them in the last hour of cooking.
Experiment with spices to create unique flavors. Try adding cinnamon for warmth or cardamom for depth. You can also mix in some fresh chili for extra heat. Adjust spices based on your taste.
Cooking Method Alternatives
If you don’t have a slow cooker, you can use an Instant Pot. Cook the chicken on high pressure for about 10 minutes. Let it naturally release for 10 minutes before serving. This method saves time and still gives great flavor.
You can also make butter chicken in the oven. Use an oven-safe pot and set your oven to 350°F (175°C). Cook for about 1.5 hours, stirring halfway through. This method yields tender chicken and a rich sauce.
Storage Info
Storing Leftovers
After you enjoy your slow cooker butter chicken, store any leftovers right away. Let the dish cool first. Then, place it in an airtight container. This helps keep it fresh. Store it in the fridge for up to four days. If you want to save it longer, freeze it. Use freezer-safe bags or containers. Make sure to label them with the date. You can freeze leftovers for up to three months.
Reheating Instructions
When you are ready to eat again, reheating is easy. The best way is to use the stove. Heat the butter chicken in a pan over medium heat. Stir often to warm it evenly. If the sauce is too thick, add a splash of water or coconut milk. You can also use the microwave. Place it in a microwave-safe dish. Cover it with a lid or plastic wrap, leaving a small gap for steam. Heat in short bursts, stirring in between.
Always check that your leftovers are hot all the way through. This helps keep you safe from foodborne illness. If you have any doubts, reheat it longer. Enjoy your delicious butter chicken again!
FAQs
How long does it take to cook slow cooker butter chicken?
The prep time for slow cooker butter chicken is just 15 minutes. After that, the cooking time varies. You can set the slow cooker on low heat for 6 to 8 hours. If you’re short on time, use high heat for 4 to 5 hours. You want the chicken to be tender and fully cooked.
Can I use chicken breasts instead of thighs?
Yes, you can use chicken breasts instead of thighs. Chicken breasts are leaner and can work well in this dish. However, they might not be as juicy. Thighs have more fat, which adds flavor and moisture. Choose what you like best, but thighs will give you that rich taste.
Is butter chicken spicy?
Butter chicken typically has a mild spice level. It uses spices like garam masala and chili powder. You can adjust the heat by adding more chili powder. If you want it less spicy, cut back on the chili powder. Always taste and adjust to match your preference.
This blog post detailed making a tasty slow cooker butter chicken. We discussed key ingredients, like chicken thighs and spices, and how to create a flavorful sauce. I shared tips to enhance flavor and variations to suit your taste. Properly storing leftovers ensures you enjoy your meal later. Remember, cooking can be fun and creative. Don’t hesitate to adjust spices or try new ingredients. Enjoy your buttery, spicy masterpiece and make it your ow

Slow Cooker Butter Chicken
Ingredients
- 2 lbs boneless, skinless chicken thighs, cut into bite-sized pieces
- 1 large onion, finely chopped
- 4 cloves garlic, minced
- 1 inch piece of ginger, grated
- 1 can (15 oz) crushed tomatoes
- 1 cup (240ml) coconut milk
- 6 tablespoons unsalted butter, cubed
- 2 tablespoons garam masala
- 1 tablespoon ground cumin
- 1 tablespoon ground coriander
- 1 teaspoon turmeric
- 1 teaspoon chili powder (adjust to taste)
- to taste salt and pepper
- for garnish fresh cilantro, chopped
- for serving cooked basmati rice or naan
Instructions
- In the base of your slow cooker, combine the finely chopped onion, minced garlic, and grated ginger. Stir together until evenly mixed.
- Layer the diced chicken thighs over the onion mixture, sprinkling with salt and pepper to enhance flavor.
- In a separate mixing bowl, whisk together the crushed tomatoes, coconut milk, cubed butter, garam masala, ground cumin, ground coriander, turmeric, and chili powder. Ensure all ingredients are thoroughly combined, then pour the sauce over the chicken in the slow cooker.
- Cover and set your slow cooker to low heat for 6-8 hours or high heat for 4-5 hours, until the chicken is fork-tender and completely cooked through.
- Once cooking is complete, taste the dish and adjust with more salt, pepper, or spices if desired. For a thicker sauce, you may blend a portion of it in a blender and return it to the slow cooker, stirring well to combine.
- Prior to serving, you can stir in an additional tablespoon of butter for an extra layer of richness to the sauce.
- Serve the butter chicken piping hot over a bed of fluffy basmati rice or alongside warm naan bread. Garnish each plate with freshly chopped cilantro for a burst of color and flavor.


. Start by gathering all your ingredients. You will need chicken, garlic, lemon juice, and spices. If you use wooden skewers, soak them in water for at least 30 minutes. This step helps keep them from burning on the grill. In a large bowl, mix the minced garlic, lemon juice, lemon zest, olive oil, smoked paprika, cayenne pepper, ground cumin, salt, and pepper. Whisk these together until they blend well. Then add the chicken cubes. Make sure each piece is coated in the marinade. Cover the bowl and place it in the fridge. Let it marinate for at least 1 hour, or longer if you have time. This will add great flavor to the chicken. Preheat your grill to medium-high heat. If you use a grill pan, heat it over medium on the stove. Once your chicken has marinated, thread the pieces onto the skewers. Leave a small space between each piece. This helps the chicken cook evenly. Grill the skewers for about 10 to 12 minutes. Turn them often to get nice grill marks. Check that the chicken reaches an internal temperature of 165°F (75°C). After grilling, let the skewers rest for a few minutes. This keeps the juices inside. Finally, garnish with fresh parsley before serving. This adds a nice touch to your dish. For the full recipe, check the instructions above. To get the best flavor, use fresh ingredients. Fresh garlic and lemon juice give a bright taste. When mixing the marinade, let the spices blend well. They create a rich flavor. Don't rush the marinating. Allow at least one hour, or better yet, overnight. This soaking time lets the chicken absorb all those tasty flavors. Adjust the cayenne pepper based on your spice level. This way, you can make the dish mild or fiery to fit your taste. One common mistake is not soaking wooden skewers. If you skip this step, they can burn on the grill. Always soak them for at least thirty minutes. Another mistake is overcrowding the skewers. Leave some space between the chicken pieces. This helps them cook evenly. Also, don't rush the resting time after grilling. Letting them rest keeps the juices inside, making the chicken juicy. To make your skewers look great, use a large serving platter. Arrange the skewers neatly. Add fresh lemon wedges around them for color. A sprinkle of chopped parsley on top makes it more inviting. For an extra treat, serve with a yogurt dip or tzatziki. This adds creaminess and coolness to the spicy flavors. These simple steps can elevate your dish and impress your guests. For the complete guide on making these skewers, check the Full Recipe. {{image_4}} You can swap chicken for other proteins. Try shrimp for a quick cook. Beef or pork also works well. Just adjust your cooking time to avoid overcooking. Fish, like salmon, can add a rich flavor. Each protein brings its own taste. For a vegetarian version, use firm tofu. It soaks up flavors well. You can also try mushrooms for a meaty texture. Bell peppers, zucchini, and cherry tomatoes make colorful additions. For a vegan option, skip the chicken and keep the marinade. Mix things up with different marinades. Try adding soy sauce or ginger for an Asian twist. A spicy chili paste can add heat. For a Mediterranean flair, use herbs like oregano and thyme. Experiment with what you like for new tastes. For the full recipe, check out the details above. After enjoying your spicy lemon garlic chicken skewers, let any leftovers cool down. Place them in an airtight container. Store them in the fridge for up to three days. This keeps the chicken fresh and tasty for later meals. To reheat the chicken skewers, preheat your oven to 350°F (175°C). Place the skewers on a baking sheet. Heat for about 10-15 minutes or until they are warm. You can also use a microwave. Heat them on medium power for 1-2 minutes. This way, the chicken stays juicy and delicious. If you want to save the skewers for later, freezing is a great option! Wrap each skewer in plastic wrap or aluminum foil. Place them in a freezer-safe bag. They can last up to three months in the freezer. When you are ready to eat them, thaw them in the fridge overnight. Then, reheat as mentioned above for a tasty meal. For the full recipe, check out the link! You should marinate chicken for at least 1 hour. For the best taste, let it sit overnight. This longer time allows the flavors to soak in well. The garlic and lemon will really shine through. Just remember, the longer the chicken sits in the marinade, the more flavorful it becomes. Yes, you can cook these skewers in the oven. Preheat your oven to 400°F (200°C). Line a baking sheet with foil for easy cleanup. Place the skewers on the sheet and bake for about 15-20 minutes. Make sure to turn them halfway through for even cooking. Check that the chicken reaches 165°F (75°C) inside. These skewers go great with many side dishes. Here are some tasty options: - Grilled vegetables like bell peppers and zucchini - A fresh green salad with lemon vinaigrette - Rice or quinoa to soak up the juices - Garlic bread for a crunchy contrast Each of these sides will add a nice balance to the meal. To change the spice level, simply adjust the cayenne pepper. For less heat, use half a teaspoon or skip it. If you want more spice, add an extra teaspoon. You can also use spicy marinades or hot sauce for extra kick. Always taste as you go, so you can find your perfect level of heat. For the full recipe, check the earlier section. Enjoy cooking! You learned how to make Spicy Lemon Garlic Chicken Skewers. We covered the main ingredients, marinade, and garnishes. I provided step-by-step instructions for grilling. You also got tips for perfect flavor and common mistakes to avoid. There are variations, like using different proteins and marinades. Lastly, I shared storage info and answered key FAQs. Try these skewers for your next cookout. Enjoy the bold flavors and easy prep!](https://goldendishy.com/wp-content/uploads/2025/06/b1f94ef8-81fb-4621-8ae2-1513b5b656e4-768x768.webp)

![- 1 lb baby carrots (or regular carrots, peeled and sliced into sticks) - 2 tablespoons olive oil - 3 tablespoons pure maple syrup - 2 tablespoons Dijon mustard - 1 tablespoon fresh thyme leaves (or 1 teaspoon dried thyme) These key items create the sweet and tangy glaze that makes the carrots shine. Baby carrots are sweet and tender, while regular carrots add a heartier texture. The olive oil helps the glaze stick and adds a rich flavor. Pure maple syrup brings sweetness, and Dijon mustard adds a kick. Fresh thyme gives an earthy note that ties it all together. - Salt and pepper to taste - Zest of 1 lemon (for garnish) - Additional herbs (like parsley or chives) These optional items can elevate your dish. Salt and pepper enhance all flavors. Lemon zest adds a bright note that contrasts beautifully with the sweet glaze. Extra herbs can give a pop of color and flavor. Feel free to mix and match these garnishes to make your dish unique. For the full recipe, check out [Full Recipe]. First, you need to preheat your oven to 425°F (220°C). This step helps the carrots roast perfectly. If you’re using regular carrots, peel them first. Then, slice them into sticks about 1/2 inch thick. Cutting them evenly ensures they cook at the same rate. Baby carrots can go straight into the oven without any slicing. Next, grab a small mixing bowl. In it, whisk together the following ingredients: - 2 tablespoons olive oil - 3 tablespoons pure maple syrup - 2 tablespoons Dijon mustard - 1 tablespoon fresh thyme leaves (or 1 teaspoon dried thyme) - A pinch of salt and pepper Whisk until all the ingredients blend into a smooth glaze. This glaze gives the carrots a sweet and tangy flavor that really shines. Now, transfer the carrots to a large mixing bowl. Pour the glaze over the carrots. Toss them gently to coat each piece evenly. You want every carrot stick to be covered in that tasty mixture. Spread the glazed carrots in a single layer on a baking sheet lined with parchment paper. Make sure there's space between each piece; this helps them roast evenly. Place the baking sheet in the oven and roast for 20-25 minutes. Remember to toss the carrots halfway through. This ensures they brown nicely on all sides. When they finish roasting, the carrots should be tender and caramelized, looking delicious. You can find the full recipe for these amazing Maple Dijon Glazed Carrots to make them at home! To make your Maple Dijon glazed carrots pop, think about adding spices or herbs. Try a pinch of cayenne for heat or a dash of garlic powder for depth. Fresh herbs like parsley or dill can also brighten the dish. These small changes can bring a new twist to the recipe. Adjusting sweetness levels is another way to suit your taste. If you love sweet, add more maple syrup. If you prefer less sweetness, cut back slightly. Balancing the sweet and tangy flavors makes each bite exciting. Even cooking is key for great roasted carrots. Cut your carrots into uniform pieces. This ensures they cook at the same rate. For baby carrots, you can roast them whole. If using regular carrots, aim for 1/2 inch thick sticks. If you want to try alternatives to oven roasting, consider steaming or sautéing. Steaming keeps the carrots tender and bright. Sautéing in a pan with the glaze gives a nice caramelization as well. Both methods can work well, but roasting brings out the best flavors. Find the full recipe for Maple Dijon glazed carrots to explore even more cooking tips! {{image_4}} You can easily swap out some ingredients in this recipe. If you're out of maple syrup, try honey or agave syrup. Both add a nice sweetness but change the flavor a bit. You can also use brown sugar, but it will change the glaze's texture. For the mustard, Dijon is great, but you can use yellow mustard for a milder taste. Spicy brown mustard adds a kick. You can even try whole grain mustard for a rustic feel. Each option brings a new twist to the dish. You can make these glazed carrots on the stovetop if you prefer. Simply steam the carrots until tender. Then, toss them in the glaze in a pan over low heat. This method gives you a softer texture. If you're hosting a big dinner, you can serve these carrots in many ways. For a casual meal, serve them right from the baking dish. For a fancy dinner, arrange them on a platter and drizzle extra glaze on top. You can even add some nuts for crunch. For the full recipe, check the link provided. Enjoy exploring these variations! To keep your maple Dijon glazed carrots fresh, use airtight containers. Glass or plastic containers work well. Make sure the carrots cool down before sealing them. This helps prevent moisture build-up. Store the leftovers in the fridge. They stay good for about three to five days. When reheating glazed carrots, the oven is best. Preheat it to 350°F (175°C). Spread the carrots on a baking sheet and heat for about 10 minutes. This keeps them crispy and tasty. You can also use the microwave. Heat them in short bursts of 30 seconds. Stir between each burst to keep flavors intact. How long do roasted carrots last in the fridge? Roasted carrots can last about 3 to 5 days in the fridge. Store them in an airtight container. This helps keep them fresh and tasty. Can I make this recipe ahead of time? Yes, you can make this recipe ahead of time. Roast the carrots and let them cool. Then, store them in the fridge. Reheat them before serving for the best flavor. Is this recipe suitable for vegan diets? Yes, this recipe is vegan-friendly. It uses maple syrup and mustard, which are both plant-based. You can enjoy this dish without any animal products. How can I make this gluten-free? This recipe is already gluten-free. Dijon mustard is often gluten-free, but always check the label. This way, you ensure it fits your diet. What meals pair well with glazed carrots? Glazed carrots pair well with roasted chicken, grilled fish, or a hearty grain dish. Their sweet and tangy flavor adds balance to savory meals. Can I use other vegetables in this recipe? Yes! You can use other veggies like parsnips or sweet potatoes. Just adjust the cooking time for different vegetables. Enjoy the variety! For the full recipe, check out the Maple Dijon Glazed Carrots recipe to explore all the tasty details. Maple Dijon glazed carrots are both tasty and easy to make. We covered essential ingredients like carrots, olive oil, and Dijon mustard. Each step, from roasting to optional flavor tweaks, helps you create the best dish. Remember to store leftovers properly and reheat them for full flavor. Feel free to experiment with variations to match your taste. With this recipe, you can impress at any meal. Now, gather your ingredients and enjoy making these delicious carrots!](https://goldendishy.com/wp-content/uploads/2025/07/c1b9af90-3a4b-46ea-8cf2-4dca4008c015-768x768.webp)
