Savory Chicken and Broccoli Pasta Creamy Recipe

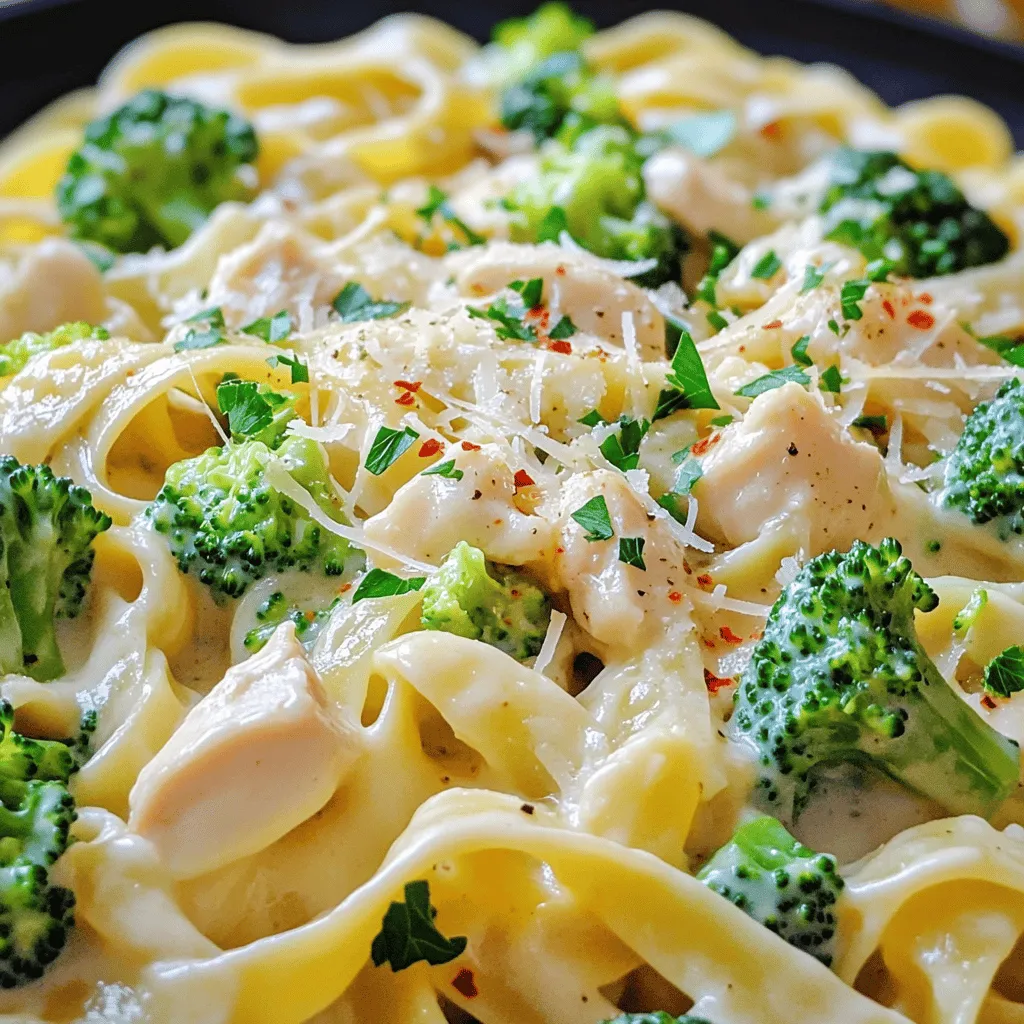
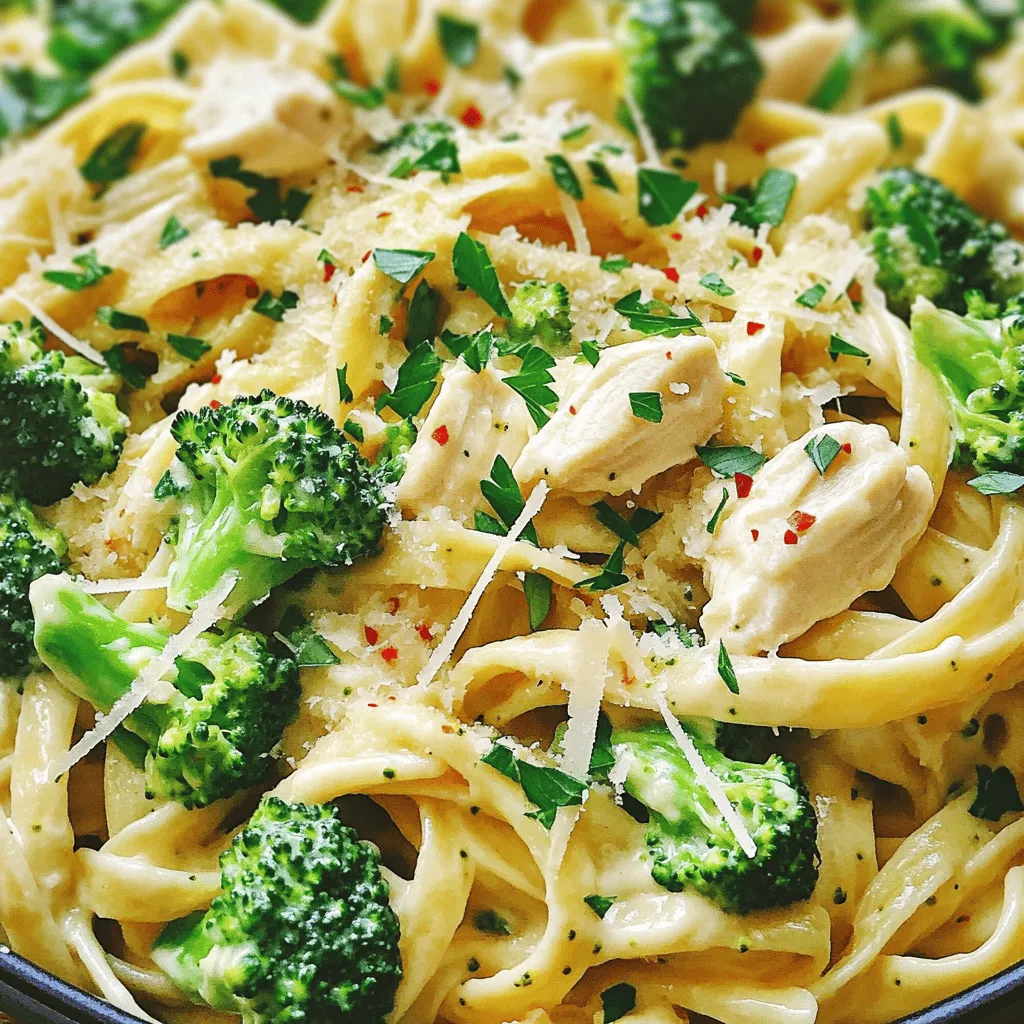
Are you ready for a dish that combines tender chicken, crisp broccoli, and creamy pasta in one fantastic recipe? This Savory Chicken and Broccoli Pasta Creamy Recipe is the perfect weeknight meal that will impress your family. It’s quick, delicious, and easy to make! Join me as we dive into the ingredients and step-by-step instructions that will make your dinner a hit. Let’s cook together!
Ingredients
Main Ingredients
– 8 oz fettuccine or penne pasta
– 1 lb boneless, skinless chicken breasts, diced
– 2 cups fresh broccoli florets
– 1 cup heavy cream
Seasonings and Toppings
– 2 tablespoons extra virgin olive oil
– 3 garlic cloves, finely minced
– 1 cup freshly grated Parmesan cheese
– Sea salt and freshly cracked black pepper to taste
– Optional: 1/4 teaspoon red pepper flakes
– Fresh parsley for garnish
When I cook chicken and broccoli pasta, I focus on fresh ingredients. The pasta base is the heart of the dish. You can use fettuccine or penne, whichever you prefer. I often choose penne for its fun shape that holds the sauce well.
For the protein, I rely on boneless, skinless chicken breasts. I dice them into bite-sized pieces. This helps them cook evenly and makes each bite perfect. Fresh broccoli florets add color and nutrition. They also bring a nice crunch to the meal.
The heavy cream gives the sauce its rich texture. It makes the dish feel indulgent yet comforting. I always have some on hand for recipes like this.
Next, I turn to seasonings. Extra virgin olive oil brings a fruity flavor. I use minced garlic for a punch of taste. Freshly grated Parmesan cheese adds depth and creaminess. I sprinkle in sea salt and black pepper to enhance all the flavors. If you like heat, add red pepper flakes for a spicy kick. Finally, fresh parsley gives a lovely pop of green when I serve the dish.
That’s the lineup for my savory chicken and broccoli pasta.
Step-by-Step Instructions
Cooking the Pasta and Broccoli
– Boil salted water in a large pot.
– Add 8 oz of fettuccine or penne pasta.
– Cook according to the package instructions until al dente.
– During the last 3-4 minutes, add 2 cups of fresh broccoli florets.
– Drain the pasta and broccoli and set aside.
Sautéing the Chicken
– Heat 2 tablespoons of extra virgin olive oil in a skillet.
– Add 1 lb of diced boneless, skinless chicken breasts.
– Season with sea salt and freshly cracked black pepper.
– Cook for 5-7 minutes until the chicken turns golden.
Making the Creamy Alfredo Sauce
– Lower the heat to medium.
– Sauté 3 minced garlic cloves until fragrant.
– Pour in 1 cup of heavy cream and stir gently.
– Let it simmer for 2-3 minutes to thicken.
– Gradually mix in 1 cup of grated Parmesan cheese until melted.
Combining All Ingredients
– Toss the drained pasta and broccoli into the skillet.
– Use tongs to mix until well-coated with the sauce.
– Warm everything through for an additional minute.Enjoy your cooking!
Tips & Tricks
Perfecting the Sauce
To make your sauce smooth, start with heavy cream. Heat it gently, stirring often. If it looks too thick, add a splash of pasta water. This helps loosen things up. For a creamy texture, stir in cheese slowly. Avoid clumps by grating cheese fresh. Pre-packaged cheese has anti-caking agents that can cause clumps.
Enhancing Flavor
Spices can change everything. Try adding a pinch of nutmeg. It adds warmth and depth. Fresh herbs also brighten the dish. Basil or thyme work well. When choosing Parmesan, go for the real deal. Freshly grated cheese has more flavor than pre-shredded. Look for a block of cheese and grate it yourself for the best taste.
Cooking Tips
Cooking chicken well is key. Cut it into small pieces for even cooking. Sear it until golden brown. This adds flavor and texture. For pasta, use a large pot of water and plenty of salt. This keeps the pasta from sticking. Cook it al dente, so it has a slight bite. Remember, the pasta will cook a bit more when mixed with the sauce.

Variations
Protein Alternatives
You can swap chicken for shrimp or tofu in this dish. Shrimp cooks quickly and adds a nice touch. If you choose tofu, use firm tofu for the best texture. Just like chicken, you should season them well. Combining shrimp and chicken gives you a hearty meal. Mix flavors and textures for a fun twist.
Vegetable Additions
Adding vegetables like bell peppers, peas, or spinach boosts nutrition. Bell peppers bring a sweet crunch. Peas add a pop of color and sweetness. Spinach adds a lovely green touch. You can also try seasonal veggies like asparagus in spring or squash in fall. Each choice adds excitement and flavor.
Sauce Variations
To lighten the dish, use low-fat cream instead of heavy cream. This keeps the creamy texture while reducing calories. For a dairy-free option, try using coconut milk or almond milk. These alternatives still give a rich flavor without the dairy. Both options let you enjoy the dish in different ways.
Storage Info
Refrigeration Guidelines
To keep your Chicken and Broccoli Pasta fresh, store leftovers in an airtight container. This method prevents moisture loss and keeps flavors intact. You should place the pasta in the fridge within two hours of cooking. Properly stored, the dish will stay good for about three to four days. When you’re ready to eat, just reheat it in a pan or microwave until hot.
Freezing Instructions
If you want to save some for later, freezing is a great option. First, let the pasta cool to room temperature. Then, portion it into freezer-safe containers. Make sure to leave some space at the top, as the pasta will expand when frozen. You can freeze it for up to three months.
To reheat, transfer the pasta from the freezer to the fridge the night before. This allows it to thaw slowly. When you’re ready to enjoy, heat it in a saucepan over low heat. Adding a splash of cream or milk helps maintain the creamy texture. Stir gently until it’s warmed through.
FAQs
How can I make Chicken and Broccoli Pasta without cream?
You can use various ingredients instead of heavy cream. Here are a few options:
– Milk and Flour: Mix 1 cup of milk with 2 tablespoons of flour. This gives a creamy texture.
– Greek Yogurt: Use 1 cup of Greek yogurt for a tangy flavor and creamy feel.
– Coconut Milk: For a dairy-free option, coconut milk is great. It adds a unique taste.
– Nut Milk: Almond or cashew milk can work too. Just add some flour to thicken it.
These alternatives help you keep the dish creamy without heavy cream.
Can I prepare the recipe ahead of time?
Yes, you can make Chicken and Broccoli Pasta ahead of time. Here are some tips:
– Cook the Pasta and Chicken: You can cook the pasta and chicken a day before. Store them separately.
– Prepare the Sauce: Make the creamy sauce and store it in the fridge. Keep it in an airtight container.
– Combine Before Serving: When you’re ready to eat, reheat the chicken and pasta. Add the sauce and broccoli at the last moment to keep it fresh.
This way, you save time while enjoying a delicious meal.
What’s a quick way to reheat leftovers?
Reheating leftovers can be easy. Here are the best methods:
– Stovetop: Heat a skillet over medium heat. Add a splash of water or broth with the pasta. Stir until warm.
– Microwave: Place the pasta in a microwave-safe dish. Cover it with a damp paper towel to keep moisture. Heat in short bursts until warm.
– Oven: Preheat the oven to 350°F (175°C). Place the pasta in an oven-safe dish, cover with foil, and heat for about 15 minutes.
These methods keep the dish tasty and prevent it from drying out. Enjoy your creamy chicken and broccoli pasta!
This blog post showed you how to make a delicious Chicken and Broccoli Pasta dish. You learned about the main ingredients, step-by-step cooking instructions, and helpful tips for perfecting the meal. You also discovered fun variations and how to store leftovers well.
Keep experimenting with flavors and ingredients. Cooking allows creativity. I hope you enjoy making this dish as much as I do!


![To make these crispy fish tacos, gather these key items: - 1 lb white fish fillets (cod or tilapia work great) - 1 cup all-purpose flour - 1 cup cornmeal - 1 teaspoon paprika - 1/2 teaspoon cayenne pepper - 1/2 teaspoon garlic powder - 1/2 teaspoon salt - 1/4 teaspoon black pepper - 2 large eggs, beaten - Vegetable oil, for frying - 8 small corn tortillas The toppings add flavor and texture to your tacos. Here are my favorites: - 1/2 cup red cabbage, thinly sliced - 1 avocado, sliced - Fresh cilantro leaves, for garnish - Lime wedges, for serving To round out your meal, consider these sides: - Fresh salsa for a zesty kick - A drizzle of spicy crema for creaminess - Mexican rice for a hearty addition These ingredients make crispy fish tacos a fun and tasty weeknight meal. For the full recipe, be sure to check out the details above! Start by drying the fish fillets with paper towels. This step helps the coating stick better. Cut the fish into strips that are about 1 inch wide. This size cooks evenly and fits nicely in the tacos. In a medium bowl, mix the flour, cornmeal, paprika, cayenne pepper, garlic powder, salt, and black pepper. Stir until well combined. In another bowl, beat the eggs until smooth. This egg wash will help the coating stick. Heat about 1 inch of vegetable oil in a large skillet over medium-high heat. Check if the oil is hot by dropping in a pinch of the flour mix; if it sizzles, it's ready. Dip each fish strip into the egg wash, letting excess drip off. Then coat it in the flour mixture, pressing lightly to ensure it sticks. Place the coated fish in the hot oil, frying in batches to prevent overcrowding. Cook for 3-4 minutes on each side until golden brown. Transfer the fried fish to a plate lined with paper towels to absorb extra oil. Warm each corn tortilla in a dry skillet for about 30 seconds on each side. This makes them soft and easy to fold. For each tortilla, place 2-3 pieces of crispy fish. Top with sliced red cabbage, avocado, and fresh cilantro. Don’t forget to serve the tacos with lime wedges. A squeeze of lime adds a bright, fresh flavor. For the full recipe, you can check the complete details above. To get that perfect crunch, follow these steps: - Dry the Fish: Start by patting the fish fillets with paper towels. This removes moisture and helps them get crispy. - Use Cornmeal: Mixing cornmeal with flour gives extra texture and crunch. It makes the coating thicker and crispier. - Hot Oil: Make sure the oil is hot enough before frying. If it’s too cool, the fish will absorb oil and turn soggy. - Don’t Overcrowd: Fry the fish in batches. Too many pieces at once cools the oil and affects crispiness. Here are some common mistakes you should steer clear of: - Skipping the Egg Wash: The egg wash helps the coating stick. Don’t skip this step! - Not Heating the Oil Properly: Always test the oil. If it’s not hot, you’ll end up with greasy fish. - Using Wet Fish: Wet fish won’t fry well. Always dry them before coating. - Flipping Too Soon: Let the fish cook fully on one side before flipping. This helps it stay intact and crispy. Enhance your tacos with these tasty garnishes: - Fresh Cilantro: Adds a burst of freshness and color. - Avocado: Creamy avocado pairs well with crispy fish. - Lime Wedges: A squeeze of lime brightens up the flavors. - Salsa or Crema: A drizzle of spicy crema or your favorite salsa adds flavor and moisture. For the full recipe, check out [Full Recipe]. {{image_4}} If you want to try a different protein, shrimp works great. Just peel and devein before cooking. You can also use chicken strips. They need a bit more time to cook, so adjust frying time. Another option is tofu for a different texture. Press it to remove water and cut into strips. For a vegetarian twist, use cauliflower. Cut it into small florets, coat, and fry. It gets nice and crispy. If you want a vegan option, tempeh is fantastic. Slice it thin and marinate for flavor before frying. Just make sure to use a plant-based egg wash or a mixture of flour and water. To boost flavor, add lime zest to the coating mix. It brightens each bite. For spice, increase the cayenne pepper in the coating. You can also create a spicy sauce for drizzling on top. Mix yogurt or mayo with hot sauce for a creamy kick. Fresh herbs like cilantro or parsley can add freshness too. These variations keep the dish exciting, ensuring you can enjoy crispy fish tacos in many ways! Try out the full recipe to explore these options. To keep your crispy fish tacos fresh, store leftovers in an airtight container. Place the fish in one container and the toppings in another. This keeps the fish crispy and the toppings fresh. You can also wrap the tortillas in foil for better storage. To reheat, use the oven or an air fryer for best results. Preheat your oven to 350°F (175°C). Place the fish on a baking sheet and bake for about 10 minutes. If using an air fryer, heat it to 350°F (175°C) and fry for 5 minutes. This way, the fish stays crispy. Cooked fish lasts about 2-3 days in the fridge. Fresh toppings, like cabbage and avocado, can last 1-2 days. Store each item separately. If you have leftover tortillas, they can stay fresh in a sealed bag for up to a week. Always check for signs of spoilage before using any of the ingredients. For the full recipe, check the complete list of ingredients. I recommend using white fish like cod or tilapia. These fish have a mild flavor and cook well. They stay tender inside while getting crispy on the outside. Other good options include haddock or snapper. Yes, you can prepare the fish ahead of time. Cut the fish into strips and coat them. Keep the coated fish in the fridge for up to an hour. This helps the coating stick better when you fry them. If you can't find corn tortillas, flour tortillas are a good choice. You can also use lettuce leaves for a low-carb option. They add a nice crunch and freshness to your tacos. Crispy fish tacos can be gluten-free if you use gluten-free flour. Make sure to check the labels on your ingredients. Corn tortillas are naturally gluten-free, so they work well for this dish. For the best results, use gluten-free breadcrumbs or a gluten-free flour blend for coating the fish. Crispy fish tacos are a fun dish to make at home. We discussed key ingredients, topped it with tasty options, and paired it with sides. The steps from preparing the fish to frying it were simple and clear. Use my tips for crispy results and avoid common mistakes. You can also explore variations for flavors and dietary choices. Proper storage will keep your tacos fresh. Now, enjoy making and sharing your crispy fish tacos! They’re sure to impress.](https://goldendishy.com/wp-content/uploads/2025/06/e15c4a6f-d152-43b4-ae39-d2f9004115b6-768x768.webp)

![For this soup, fresh broccoli is key. Use about 4 cups of broccoli florets, roughly chopped. This gives the soup its vibrant green color and healthy crunch. You also need 1 medium onion, finely chopped, and 2 cloves of garlic, minced. These aromatics build a rich flavor base. Dairy makes this soup creamy and rich. You will need 1 cup of heavy cream. If you prefer a lighter option, substitute with coconut cream. For the broth, use 3 cups of low-sodium vegetable broth. This adds depth without overpowering the other flavors. Seasonings elevate the taste of your soup. Use 1 teaspoon of garlic powder and 1/2 teaspoon of onion powder. Don’t forget to add salt and freshly ground black pepper to taste. If you want a crunchy finish, top your soup with toasted croutons. They add a delightful texture and flavor contrast. This combination of ingredients creates a comforting, flavorful Broccoli Cheddar Soup. For a complete guide, check the Full Recipe. Start by melting the butter in a large pot over medium heat. Add the finely chopped onion. Sauté for about five minutes. You want the onion to be soft and clear. Next, add the minced garlic and cook for one to two minutes. This will make your kitchen smell amazing! Be careful not to burn the garlic. Now it’s time for the broccoli. Add the roughly chopped florets to the pot. Sauté them for about three to four minutes. This helps them soften a bit before the next step. Pour in the vegetable broth and raise the heat to bring it to a boil. Once boiling, reduce the heat to a simmer. Let it cook for about ten to twelve minutes until the broccoli is tender. After the broccoli is tender, it’s blending time! Use an immersion blender right in the pot. If you have a regular blender, transfer the soup in batches. Just be careful with the hot liquid. Blend until smooth. Return the soup to the pot and stir in the heavy cream, keeping the heat low. Slowly add the shredded sharp cheddar cheese. Stir until it melts and mixes well. Finally, add garlic powder and onion powder, and season with salt and pepper. Let it warm for a few more minutes. Serve your soup hot, and add toasted croutons if you like. Enjoy this cheesy broccoli bliss! You can find the full recipe above. To get that creamy feel, blend the soup well. Use an immersion blender for ease. If you want a chunkier soup, blend only half. This keeps some broccoli bits for a nice bite. Make sure to blend until smooth. This step makes all the difference in your final dish. Add more depth to your soup by using fresh herbs. Parsley or thyme brings bright notes. You can also toss in a dash of nutmeg for warmth. Adjust the salt and pepper to your taste. A squeeze of lemon juice can brighten flavors, too. Experiment with these extras until you find your favorite mix. Store leftover soup in an airtight container. It will keep well in the fridge for up to three days. Reheat gently on the stove to avoid curdling the cream. If you freeze it, leave out the cheese. Add it back when you reheat for the best flavor. Store in portions to make it easy to enjoy later. {{image_4}} You can make a vegan version of this soup. Replace the heavy cream with coconut cream. Use nutritional yeast instead of cheddar cheese. This option keeps the cheesy flavor while being dairy-free. Blend the soup until smooth, just like the original. You can still enjoy that creamy texture without any animal products. For a low-carb soup, swap the heavy cream for cauliflower. Cook the cauliflower with the broccoli, then blend it all together. This change cuts carbs while keeping the soup rich and hearty. You can also use a low-carb cheese to enhance the flavor without adding too many carbs. Want to boost the protein? Add cooked chicken or beans. They pair well with the flavors of broccoli and cheese. You can also toss in other veggies like carrots or spinach. This adds color and nutrients to your soup. Just make sure to cook them until tender before blending. For the full recipe, check out the main article. A serving of broccoli cheddar soup contains about 350 calories. The calorie count may vary based on the ingredients you use. For instance, using heavy cream adds more calories than coconut cream. If you add croutons, that will increase the total calories too. This soup packs a punch of nutrients. Here are some key nutrients you get in each serving: - Protein: About 12 grams, mostly from cheese and cream. - Fat: Approximately 25 grams, primarily from cheddar and cream. - Carbohydrates: Around 20 grams, mainly from broccoli and onion. - Fiber: Offers about 4 grams, thanks to the broccoli. Broccoli is more than just tasty. It is a superfood! Here are some reasons to love it: - Rich in Vitamins: It's high in vitamins C and K. - Antioxidants: Broccoli has powerful antioxidants. They help fight free radicals in your body. - Supports Digestion: The fiber helps keep your digestive system healthy. - Boosts Immunity: Eating broccoli may help strengthen your immune system. This nutritional information shows why broccoli cheddar soup is a great choice for a meal. It is not just delicious; it also nourishes your body. To store leftover broccoli cheddar soup, let it cool first. Then, pour it into an airtight container. It keeps well in the fridge for about three to four days. When you want to eat it, just reheat it on the stove or in the microwave. Stir well to mix the flavors again before serving. Yes, you can freeze broccoli cheddar soup. First, let it cool down completely. Then, place it in a freezer-safe container. Make sure to leave some space at the top, as the soup will expand when frozen. It can last for about three months in the freezer. To use, thaw it overnight in the fridge and reheat gently. To make broccoli cheddar soup gluten-free, use gluten-free broth. Most vegetable broths are gluten-free, but always check the label. Also, use cornstarch instead of flour if you want to thicken it. Just mix cornstarch with a little water before adding it to the soup. This way, you will enjoy a creamy soup without gluten. For the full recipe, check out [Full Recipe]. This blog covered how to make a tasty broccoli cheddar soup. We discussed key ingredients, including fresh broccoli and flavor-packed aromatics. I outlined helpful steps for cooking and blending the soup. You learned tips for great texture and flavor as well as how to store leftovers. Try variations like vegan options or low-carb versions to fit your needs. Broccoli brings healthy nutrients, making this soup a smart choice. Enjoy this dish, knowing you can customize it just the way you like!](https://goldendishy.com/wp-content/uploads/2025/06/c21049f2-ac49-4cf8-bdd7-9e479da09cd5-768x768.webp)

![To make this tasty dish, gather these main items: - 1 large head of cauliflower, cut into bite-sized florets - 5 cloves of garlic, skins left on - 3 tablespoons extra virgin olive oil, divided - 1/4 cup unsweetened almond milk (or your preferred milk) - 2 tablespoons butter (or a vegan alternative) - Salt and freshly ground black pepper, to taste These ingredients form the base of the mash. The cauliflower gives the dish its creamy texture. Roasting the garlic adds a rich flavor. You can change the recipe to suit your taste. Here are some ideas: - Swap almond milk for regular milk or cream for a richer flavor. - Use ghee instead of butter for a unique twist. - Add a pinch of nutmeg for warmth. - Incorporate herbs like thyme or rosemary for added depth. These options let you make the dish your own. Feel free to get creative! Garnishing makes the dish look appealing. Here are some great choices: - Fresh chives, finely chopped, for a pop of color - A drizzle of extra virgin olive oil for richness - A sprinkle of smoked paprika for a touch of spice These garnishes enhance the flavor and presentation. They make your Roasted Garlic Cauliflower Mash shine on the table. For the full recipe, check the earlier section. To start, I preheat my oven to 400°F (200°C). This temperature works best for roasting. Next, I take one large head of cauliflower and cut it into bite-sized florets. I love using fresh cauliflower for the best flavor. On a baking sheet, I place the florets and five unpeeled cloves of garlic. Then, I drizzle two tablespoons of extra virgin olive oil over them. I sprinkle salt and black pepper generously, then toss everything together. It helps the veggies get well-coated. I spread the cauliflower and garlic in a single layer. Now, I roast them for 25 to 30 minutes. Halfway through, I gently toss them to ensure they cook evenly. I look for a nice golden brown color and tender texture when they are done. Once roasted, I let the garlic cool for a few minutes before handling it. After cooling, I squeeze the softened garlic out of its skin. I put it into a large mixing bowl with the roasted cauliflower. Then, I add a quarter cup of unsweetened almond milk, two tablespoons of butter, and the last tablespoon of olive oil. I grab a hand mixer or an immersion blender to blend the mix. I blend until it turns smooth and creamy. If I want a chunkier mash, I blend just until combined. I make sure not to overmix, as it can change the texture. Once blended, I taste the mash. If it needs more flavor, I adjust with extra salt and pepper. I love a well-seasoned mash! Now, I transfer the cauliflower mash to a serving bowl. For a fun finishing touch, I sprinkle freshly chopped chives on top. This adds color and a nice flavor. To make it look fancy, I might drizzle a bit of olive oil on top. This mash is now ready to impress! Enjoy this easy and tasty dish from the [Full Recipe]. To make the best roasted garlic cauliflower mash, follow these tips. First, use a large head of cauliflower. This gives you enough to work with. Cut the florets into even sizes. This helps them cook at the same rate. Roasting adds flavor, so don’t rush it. Allow the cauliflower to become tender and golden. When blending, don’t overmix. A few pulses will give you a nice texture. If you want it creamier, add a splash more milk. Always taste as you go. Adjust salt and pepper to your liking for the best flavor. Having the right tools makes cooking easier. Here’s what I recommend: - Baking sheet for roasting - Large mixing bowl for combining ingredients - Immersion blender or hand mixer for smoothness - Measuring cups and spoons for precise amounts - Knife and cutting board for prep These tools help you work efficiently and make the process enjoyable. Watch out for these common mistakes. First, don’t skip the roasting step. Raw cauliflower will not have the same rich taste. Second, avoid using too much liquid. It can make your mash watery. If you prefer a thicker mash, add less almond milk. Finally, remember to season well. Under-seasoning can leave your mash bland. Always taste your dish before serving. This way, you ensure it is full of flavor. For the full recipe, check the details above. Enjoy making your roasted garlic cauliflower mash! {{image_4}} You can easily make this dish dairy-free. Use almond milk or coconut milk instead of regular milk. For a buttery flavor, swap butter for vegan butter or olive oil. This keeps the mash creamy and rich without dairy. Adding flavors can elevate your mash. Fresh herbs like thyme or rosemary add a lovely touch. You can also sprinkle in garlic powder for extra garlic flavor. If you enjoy cheese, mix in some grated Parmesan for a savory kick. Get creative with how you serve this mash! Use it as a base for grilled chicken or fish. You can also serve it as a side dish with roasted vegetables. Try topping it with sautéed mushrooms or crispy bacon bits for added flavor and texture. After enjoying your roasted garlic cauliflower mash, let it cool. Place it in an airtight container. Store it in the fridge for up to 4 days. This keeps the flavor fresh and the texture nice. If you have more leftovers, freezing is a great option. Put the mash in a freezer-safe bag or container. Make sure to remove excess air. It will last for about 3 months. Label the container with the date so you can keep track. When you're ready to enjoy the mash again, reheat it gently. You can use the microwave or a stovetop. If it seems dry, add a splash of almond milk or butter. Stir it well as you heat it. This keeps it creamy and delicious. Yes, you can make Roasted Garlic Cauliflower Mash ahead of time. Prepare the mash, then let it cool. Store it in an airtight container in the fridge for up to three days. When you’re ready to eat, simply reheat it on the stove or in the microwave. You may need to add a splash of milk to bring back the creamy texture. Yes, cauliflower mash is a low-carb alternative to mashed potatoes. A cup of cooked cauliflower has about 5 grams of carbs, while a cup of mashed potatoes has around 35 grams. This makes cauliflower mash a great choice if you want to cut carbs but still enjoy a creamy side dish. Roasted Garlic Cauliflower Mash pairs well with many dishes. You can serve it with roasted chicken, grilled steak, or pan-seared fish. It also complements sautéed vegetables or a fresh salad. For a hearty meal, try it with a rich mushroom gravy or a savory sauce. The mash's creamy texture and garlic flavor enhance any main dish beautifully. Roasted Garlic Cauliflower Mash is simple and tasty. We covered its key ingredients, from cauliflower to garlic. You can customize it with optional ingredients and garnishes for more flavor. The step-by-step instructions ensure a smooth texture every time. You now have tips to avoid common mistakes. Variations allow for dairy-free or unique flavors. Storing is easy, and leftovers can even be frozen. This mash is a great low-carb option. Try it with your favorite dishes for a perfect side.](https://goldendishy.com/wp-content/uploads/2025/07/e8f9d6da-9905-472e-90b5-76f2ba9b0789-768x768.webp)
