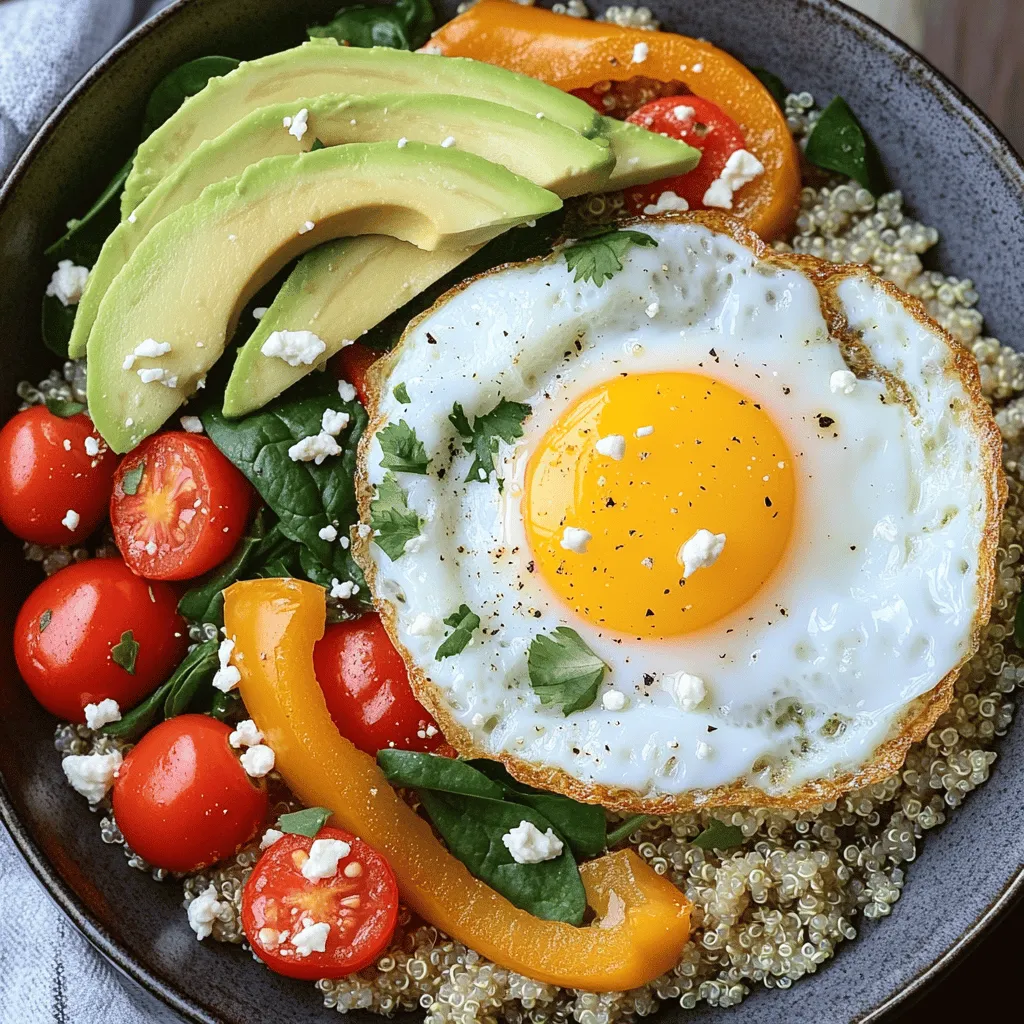
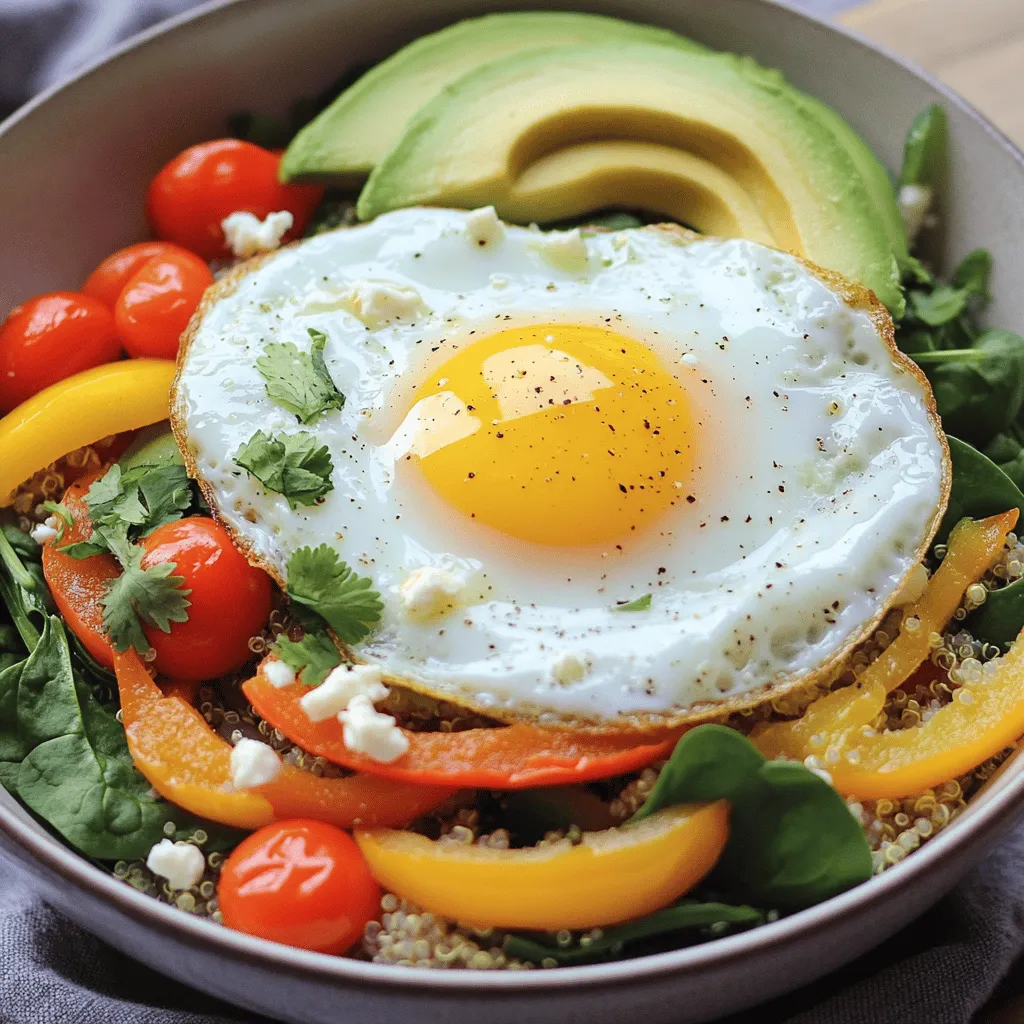
Start your day with a delicious Savory Breakfast Bowl packed with flavor and nutrition! This dish combines hearty quinoa, fresh veggies, and perfectly cooked eggs into one satisfying meal. Whether you’re short on time or need a healthy breakfast option, this bowl is easy to make and customize. Join me as I share the ingredients, cooking tips, and variations to brighten up your mornings with a nutritious twist!
Ingredients
Key Ingredients for Savory Breakfast Bowl
– 1 cup quinoa
– 2 cups vegetable broth
– 1 tablespoon olive oil
– 1 small onion, finely diced
– 1 bell pepper, diced
– 1 cup cherry tomatoes, halved
– 1 cup fresh spinach, chopped
– 4 large eggs
– Salt and pepper, to taste
– 1 ripe avocado, sliced
– 1 tablespoon fresh cilantro, chopped
– 1 tablespoon crumbled feta cheese (optional)
The main star of this savory breakfast bowl is quinoa. It is packed with protein and fiber. Quinoa cooks quickly and gives a nice texture to your dish. I love using vegetable broth instead of water. It adds depth and flavor.
Next, we have eggs. They are rich in protein and bring a creamy taste. You can cook them as you like. Sunny side up is my favorite, but scrambled works too!
Fresh vegetables add color and nutrients. I enjoy using onions, bell peppers, cherry tomatoes, and spinach. These veggies are easy to find and full of vitamins. Sautéing them creates a warm, inviting smell.
For toppings, I recommend avocado, cilantro, and feta cheese. Avocado gives a creamy texture. Cilantro adds freshness. Feta cheese gives a salty kick. You can skip the cheese if you want.
Recommended Cooking Supplies
– Medium saucepan
– Large skillet
– Non-stick skillet
– Mixing bowl
You will need a medium saucepan for cooking the quinoa. A large skillet is great for sautéing the veggies. A non-stick skillet helps with frying the eggs without sticking. A mixing bowl is handy for combining ingredients.
Now you are ready to gather your ingredients and start cooking!
Step-by-Step Instructions
Cooking the Quinoa
First, rinse the quinoa. This step removes any bitterness. Next, combine the rinsed quinoa with vegetable broth in a medium saucepan. Bring this mix to a boil over medium-high heat. Once boiling, reduce the heat to low, cover, and let it simmer. Cook for about 15 minutes. The quinoa should be tender, and the broth will be absorbed. Remove the pot from heat and let it sit, covered, for another 5 minutes. Finally, fluff the quinoa with a fork.
Sautéing the Vegetables
Now, heat olive oil in a large skillet over medium heat. Add the finely diced onion and sauté for about 3 to 4 minutes. You want the onion to turn translucent and fragrant. After that, add the diced bell pepper into the skillet. Cook for another 3 minutes. Next, toss in the halved cherry tomatoes. Let them soften for an additional 2 to 3 minutes. Now, stir in the chopped spinach. Cook it for 1 to 2 minutes until it wilts. Season this mix with salt and pepper to taste.
Cooking the Eggs
For the eggs, you have options. You can cook them sunny side up, over easy, or scrambled. Use a non-stick skillet for easy cooking. Cook them to your desired doneness.
Assembling Your Bowl
Now it’s time to assemble your bowl. First, scoop a generous portion of the cooked quinoa into each bowl. Next, top it with the sautéed vegetable mix. Finally, place one fried egg on top of each bowl. This layering creates a beautiful dish. For a finishing touch, add slices of fresh avocado and sprinkle chopped cilantro on top. If you like, you can also add crumbled feta cheese. Enjoy your savory breakfast bowl full of flavor and nutrition!
Tips & Tricks
Cooking Tips for Perfect Quinoa
To cook quinoa well, you should first rinse it. Rinsing takes away the bitter taste. Use a fine mesh sieve to rinse it under cold water for about 30 seconds.
To avoid mushiness, use the right water ratio. For every cup of quinoa, use two cups of liquid. This gives it the right texture. When it cooks, keep an eye on it. If you see bubbles, reduce the heat to low and cover it.
Once the quinoa is done, let it sit covered for 5 minutes. This helps it to absorb any leftover moisture. Fluff it gently with a fork. This makes it light and airy.
Flavor Enhancement Techniques
Spices add depth to your bowl. You can try cumin, paprika, or chili powder. These flavors work well with quinoa and vegetables. Start with a pinch and taste as you go.
Fresh herbs also brighten up the dish. Add chopped cilantro or parsley for a fresh touch. You can mix them in with the cooked vegetables. This gives a nice, vibrant flavor.
Egg Cooking Preferences
Cooking eggs can be fun! You can choose how you like them. For sunny side up, cook them in a non-stick skillet. Let them sit without flipping until the whites are set but the yolks are still runny.
If you prefer over easy, gently flip the eggs after the whites set. Cook for one more minute. Scrambled eggs are simple too. Just whisk them in a bowl and cook, stirring often, until they’re fluffy and just set.
For the best breakfast bowl, make sure your eggs match your taste. Each style brings its own flavor to the dish. Enjoy experimenting!
Variations
Vegetarian Options
For a tasty vegetarian breakfast bowl, you can swap out the eggs. Here are some easy substitutes:
– Silken tofu: Blend it to a creamy texture.
– Chickpea scramble: Mash chickpeas with spices for a hearty mix.
You can also add plant-based proteins to boost nutrition. Consider these options:
– Black beans: They add fiber and protein.
– Lentils: These are rich in protein and flavor.
Gluten-Free Options
If you need a gluten-free breakfast bowl, you can skip traditional grains. Instead, try these alternatives:
– Quinoa: This is already gluten-free and packs a nice crunch.
– Brown rice: Another great option that gives you a chewy texture.
Low-Carb Choices
For low-carb lovers, consider using cauliflower rice instead of quinoa. Here’s how it works:
– Grate cauliflower: Use a box grater or food processor.
– Sauté lightly: Cook it in a pan for just a few minutes.
This swap keeps your breakfast bowl filling while reducing carbs. Each variation gives you a new way to enjoy the Savory Breakfast Bowl. Be creative and mix flavors to your liking!
Storage Info
Storing Leftovers
To keep your Savory Breakfast Bowl fresh, use airtight containers. Store in the fridge. This helps maintain taste and texture. Enjoy leftovers within three days for best quality. Keep the egg separate if possible to avoid sogginess.
Reheating Instructions
Reheat your breakfast bowl in the microwave. Use a microwave-safe dish. Heat for 30 seconds, stir, and check. If it needs more time, heat in 15-second bursts. This keeps the quinoa fluffy and the vegetables tender. Avoid overheating to keep the eggs intact.
Meal Prep Options
Batch cooking saves time. Prepare quinoa and veggies ahead. Store each in separate containers. You can cook eggs fresh each morning. Or, scramble them and store. This makes for quick, easy breakfasts all week. Enjoy a tasty meal with very little effort.
FAQs
Can I make a Savory Breakfast Bowl ahead of time?
Yes, you can make a Savory Breakfast Bowl ahead of time. I suggest cooking the quinoa and sautéing the veggies in advance. Store them separately in airtight containers. When you are ready to eat, just reheat them. You can fry the eggs fresh or warm up pre-cooked eggs in the microwave. This way, your meal stays fresh and tasty.
What can I add for more protein?
To add more protein, consider beans or sausage. Black beans or chickpeas mix well with the quinoa and veggies. You could also use turkey or chicken sausage for a heartier option. Eggs are great, but these additions boost the protein content. Try mixing and matching to find your favorite combo.
How long can I store leftovers in the fridge?
You can store leftovers in the fridge for up to four days. Make sure to place them in airtight containers. Keep the eggs separate if possible, to maintain their texture. When you’re ready to eat, just reheat everything. It’s a quick and easy way to enjoy your meal again.
Can I customize this recipe?
Absolutely! You can personalize this recipe easily. Swap out vegetables based on what you like or have on hand. Try adding mushrooms, zucchini, or kale for different flavors. You can also change the toppings. Use salsa, hot sauce, or even different cheeses to mix things up. Make it yours!
Is it possible to freeze a Savory Breakfast Bowl?
Yes, you can freeze a Savory Breakfast Bowl. Just cook all components and allow them to cool. Place them in freezer-safe containers. When you are ready to eat, thaw in the fridge overnight. Reheat in the microwave or on the stove. This way, you have a quick meal ready when you need it.
In this blog post, we explored how to make a savory breakfast bowl. We covered key ingredients like quinoa, eggs, and vegetables, along with cooking supplies you’ll need. I provided step-by-step instructions for cooking the quinoa, sautéing vegetables, and assembling your bowl. You also learned tips for perfecting flavors, along with variations for different diets.
Remember, this dish is versatile and easy to customize. Enjoy your delicious breakfast bowl, and don’t hesitate to get creative!


