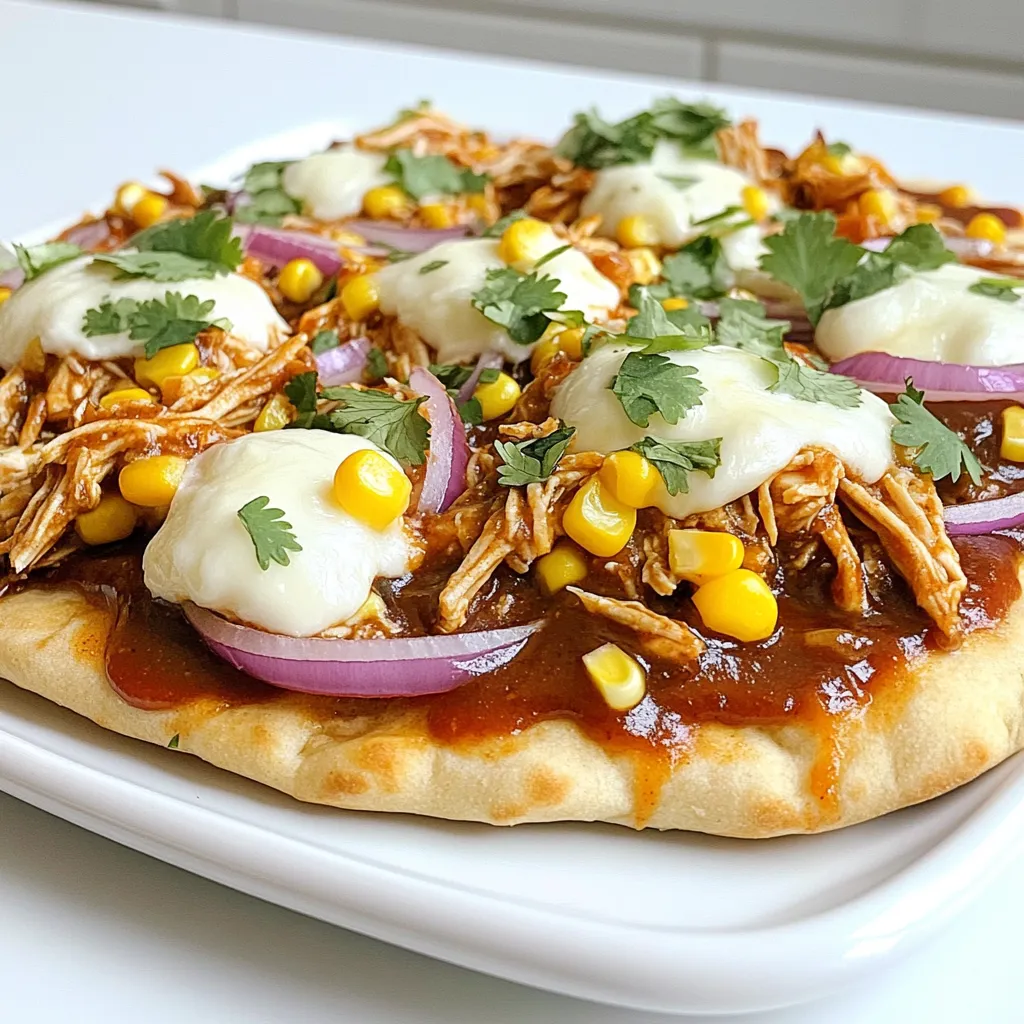
Are you ready to impress your family and friends with a meal that’s easy and delicious? This Savory BBQ Chicken Flatbread recipe is a crowd-pleaser that promises bold flavors and crispy textures. With simple ingredients and quick steps, you can whip up this tasty dish in no time. Get ready to indulge in a mouthwatering creation that you can customize to your liking! Let’s dive into the details.
Ingredients
Main Ingredients Overview
For this BBQ chicken flatbread, you will need a few key items:
– 2 large flatbreads or naan
– 1 cup cooked chicken, shredded
– 1/2 cup BBQ sauce
– 1 cup mozzarella cheese, shredded
These main ingredients create a tasty base for your meal. The flatbreads serve as a perfect canvas. The shredded chicken brings protein and flavor. The BBQ sauce adds that sweet and smoky taste. Lastly, the mozzarella melts beautifully, making everything gooey and yummy.
Additional Ingredients for Flavor
To amp up the taste, include these extras:
– 1/2 red onion, thinly sliced
– 1/2 cup corn (canned or fresh)
– 1/4 cup fresh cilantro, chopped
– Salt and pepper to taste
– Olive oil for brushing
These ingredients add depth and color. The red onion gives a nice crunch and sharpness. Corn adds sweetness and a fun texture. The cilantro brings freshness, while salt and pepper boost all the flavors. Olive oil helps create a crispy crust.
Optional Ingredients for Customization
Feel free to customize your flatbread with these options:
– Sliced jalapeños for heat
– Avocado for creaminess
– Different cheeses like cheddar or gouda
– Your favorite vegetables like bell peppers or spinach
These optional ingredients let you make the recipe your own. Add spice with jalapeños or creaminess with avocado. Using different cheeses can change the flavor profile. Adding veggies boosts nutrition and adds color. Enjoy experimenting with your flavors!
Step-by-Step Instructions
Prepping the Oven and Flatbreads
Start by preheating your oven to 400°F (200°C). This temperature ensures your flatbreads will be crispy and delicious. While the oven heats, lay out your flatbreads or naan on a baking sheet lined with parchment paper. This step makes cleanup easier later. Lightly brush olive oil on each flatbread. This adds flavor and helps with crispiness.
Combining Chicken and BBQ Sauce
In a medium bowl, mix the shredded chicken with the BBQ sauce. Use your hands or a spoon to coat every piece of chicken well. This sauce gives the chicken a smoky flavor. Once mixed, set it aside so the flavors can blend.
Assembling and Baking the Flatbreads
Spread the saucy chicken evenly over the flatbreads. Make sure each bite has that tasty BBQ chicken flavor. Next, sprinkle the shredded mozzarella cheese on top. This will melt and become gooey during baking.
Then, add the thinly sliced red onion and corn. These ingredients add color and sweetness to your flatbread. Season with salt and pepper to enhance the flavors.
Now, slide the baking sheet into the oven. Bake for 12 to 15 minutes. Watch closely as the cheese melts and the edges turn golden-brown.
Tips for Achieving Perfect Crispiness
To get perfectly crispy flatbreads, make sure to brush the oil evenly. Don’t overload the flatbread with toppings; this helps them cook evenly.
How to Know When They’re Done
You’ll know the flatbreads are ready when the cheese bubbles and the edges are golden. Let them cool for a few minutes after baking. This makes cutting them easier. Before serving, add fresh cilantro on top for a burst of flavor. Now, slice them into pieces and enjoy!
Tips & Tricks
Best Practices for Cooking Chicken
To cook chicken perfectly, start with fresh or thawed meat. Make sure the chicken is fully cooked. The safe internal temperature for chicken is 165°F (75°C). You can use a meat thermometer for this. Shredded chicken works best for flatbreads. You can use rotisserie chicken for a quick option. Just shred it and mix it with the BBQ sauce.
How to Customize Your Flatbread
You can make your flatbread unique by adding toppings. Try adding bell peppers or jalapeños for extra flavor. You can swap mozzarella for sharp cheddar or pepper jack cheese. If you want a healthier version, add spinach or kale. For a sweeter taste, consider adding pineapple chunks. The options are endless, so feel free to explore!
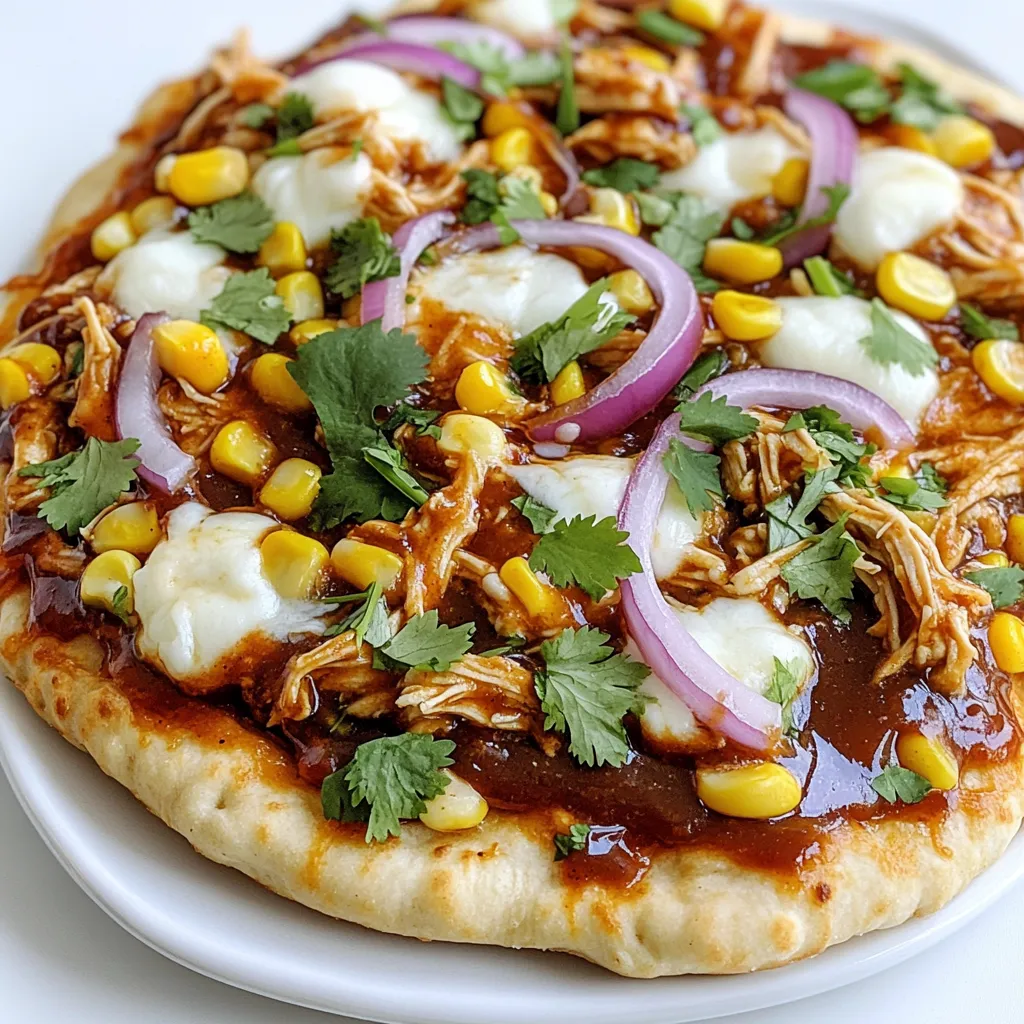
Serving Suggestions and Pairings
Serve your BBQ chicken flatbread on a wooden board for a rustic look. A small bowl of extra BBQ sauce makes a great dip. Pair it with a fresh salad for balance. You can also serve it with chips or a veggie platter. This meal is perfect for game day or a casual dinner with friends. Enjoy your tasty creation!
Variations
BBQ Chicken Flatbread with Veggies
You can add veggies to your BBQ chicken flatbread for extra flavor and crunch. Use bell peppers, zucchini, or spinach. Slice the veggies thinly and spread them on top of the cheese. This adds color and nutrition to your meal.
Spicy BBQ Chicken Flatbread
If you like heat, try a spicy BBQ chicken flatbread. Mix some hot sauce into the BBQ sauce. You can also sprinkle some red pepper flakes on top before baking. This gives the flatbread a nice kick that pairs well with the sweet BBQ flavor.
Vegetarian BBQ Flatbread Options
For a vegetarian twist, swap out the chicken with grilled mushrooms or eggplant. You can also use black beans or chickpeas for protein. Top with your favorite veggies, like onions and peppers. Drizzle with BBQ sauce for a tasty meat-free option.
Storage Info
How to Store Leftovers
To keep your BBQ chicken flatbread fresh, let it cool first. Wrap each flatbread tightly in plastic wrap or foil. Place them in an airtight container. This way, they stay tasty for up to three days in the fridge.
Reheating Instructions
When you want to enjoy your leftovers, preheat your oven to 350°F (175°C). Place the flatbreads on a baking sheet. Heat them for about 10-12 minutes. This will help the cheese melt again and the flatbread crisp up nicely. You can also use a microwave, but it may not be as crispy.
Freezing Flatbreads for Future Meals
If you want to save flatbreads for later, wrap them tightly in plastic wrap. Then, place them in a freezer-safe bag. They can stay fresh for up to three months. When you’re ready to eat, thaw them in the fridge overnight. Then, reheat as mentioned above.
FAQs
Can I make BBQ chicken flatbread ahead of time?
Yes, you can make BBQ chicken flatbread ahead of time. Prepare the flatbreads and store them in the fridge. Just assemble them, but don’t bake yet. You can bake them later when you are ready to eat. This saves time and makes serving easier.
What are the best BBQ sauces to use?
The best BBQ sauces depend on your taste. Use a sweet sauce for a tasty blend. A tangy sauce adds a nice kick. A smoky sauce gives depth to the flavor. Try your favorite brand or homemade sauce for the best results.
How do I make homemade flatbreads?
Making homemade flatbreads is simple. You need flour, water, salt, and yeast. Mix the dry ingredients first. Then add water to form a dough. Knead it well and let it rise. Roll it out and cook on a hot pan for a few minutes on each side.
Can I use other cheeses for this recipe?
Yes, you can use other cheeses for BBQ chicken flatbread. Cheddar cheese offers a sharp flavor. Gouda adds a rich, smoky taste. Feta brings a tangy touch. Mix and match to find your favorite combination!
Are there gluten-free options available?
Yes, there are gluten-free options for flatbreads. Use gluten-free flour blends or store-bought gluten-free flatbreads. You can also make cauliflower flatbreads as a healthy choice. Just ensure all other ingredients are gluten-free as well.
This blog covered all you need for BBQ chicken flatbreads. We explored main and extra ingredients, step-by-step cooking, and tips for success. You can customize the flatbreads to fit your taste.
Remember to store leftovers the right way and enjoy them later. With this guide, you can make a fun meal that everyone will love. Happy cooking!


