Salted Caramel Cottage Cheese Pudding Delight

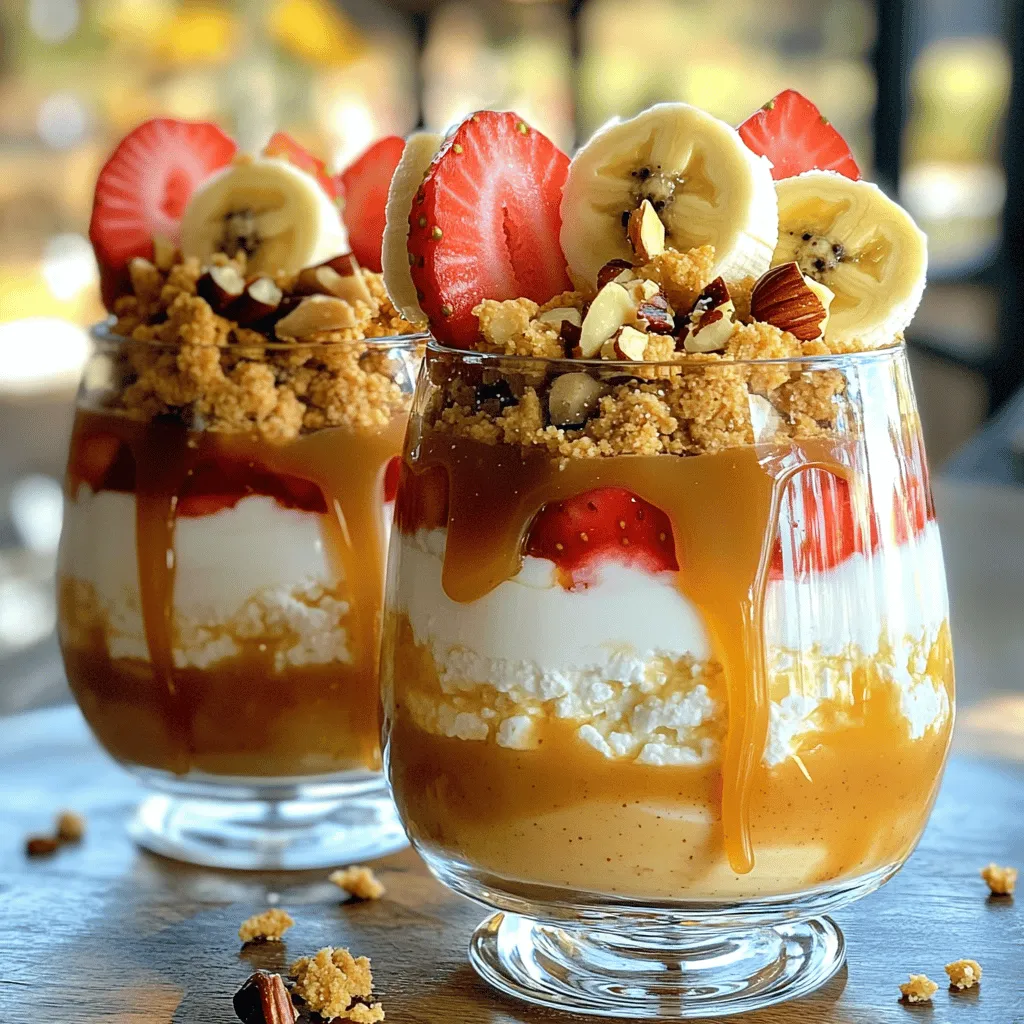
If you love dessert but want something healthy, you’ll enjoy my Salted Caramel Cottage Cheese Pudding Delight! This recipe combines creamy cottage cheese and Greek yogurt with rich caramel sauce and a hint of sea salt. It’s easy to make and packed with flavor. Plus, you can customize it with your favorite toppings. Get ready to impress your taste buds with a dessert that feels indulgent but is good for you!
Ingredients
Main Ingredients
– 2 cups cottage cheese
– 1/2 cup Greek yogurt
– 1/3 cup caramel sauce
Cottage cheese is the base of this pudding. It gives a creamy texture. Greek yogurt adds a nice tang and boosts protein. Caramel sauce brings sweetness and a rich flavor.
Additional Ingredients
– 1 teaspoon vanilla extract
– 1/4 teaspoon sea salt (plus extra for garnish)
– 1 tablespoon maple syrup (optional)
Vanilla extract enhances the overall flavor. Sea salt balances the sweetness. You can add maple syrup for extra sweetness if you like.
Toppings and Garnishes
– 1/2 cup crushed graham crackers
– 1/4 cup chopped nuts (such as pecans or walnuts)
– Fresh fruit (strawberries or bananas)
Crushed graham crackers add a nice crunch. Chopped nuts bring texture and flavor. Fresh fruit on top makes the pudding look appealing and fresh. Use strawberries or bananas for the best taste.
Step-by-Step Instructions
Prepare the Base Mixture
First, grab a large mixing bowl. Add 2 cups of cottage cheese and 1/2 cup of Greek yogurt. Use a whisk to blend them well. Keep whisking until the mixture turns smooth and creamy. This will be the base of your pudding.
Add Flavorings
Next, pour in 1/3 cup of caramel sauce. Add 1 teaspoon of vanilla extract and 1/4 teaspoon of sea salt. If you want it sweeter, stir in 1 tablespoon of maple syrup. Mix everything together until all ingredients are fully combined. The flavors will blend beautifully.
Make the Topping
Now, take a separate bowl. Combine 1/2 cup of crushed graham crackers with 1/4 cup of chopped nuts. I like using pecans or walnuts for a nice crunch. Mix them until they are well combined. This will give your pudding a delightful texture.
Assemble the Pudding
Grab your serving glasses or bowls. Start by spooning a layer of the cottage cheese mixture at the bottom. Then, add a layer of the graham cracker and nut mix. Repeat this layering until you fill the glasses. Make sure the final layer is the cottage cheese mixture for a nice look.
Final Touches
For the finishing touch, drizzle some extra caramel sauce on top of the last layer. Sprinkle a little extra sea salt over it to enhance the flavor. Now, chill your pudding in the fridge for at least 30 minutes. This allows all the flavors to come together. Enjoy your delicious treat!
Tips & Tricks
Perfecting the Texture
To make your pudding smooth, mix well. I suggest using a hand mixer or a blender. These tools help combine the cottage cheese and Greek yogurt nicely. This makes a creamier pudding and ensures no lumps remain. A good texture makes the dish more enjoyable.
Enhancing Flavor
Want to amp up the taste? Add cinnamon or a pinch of nutmeg. They pair well with the caramel flavor. You can also try using almond or coconut extract for a unique twist. Each option brings a different layer of flavor to your pudding.
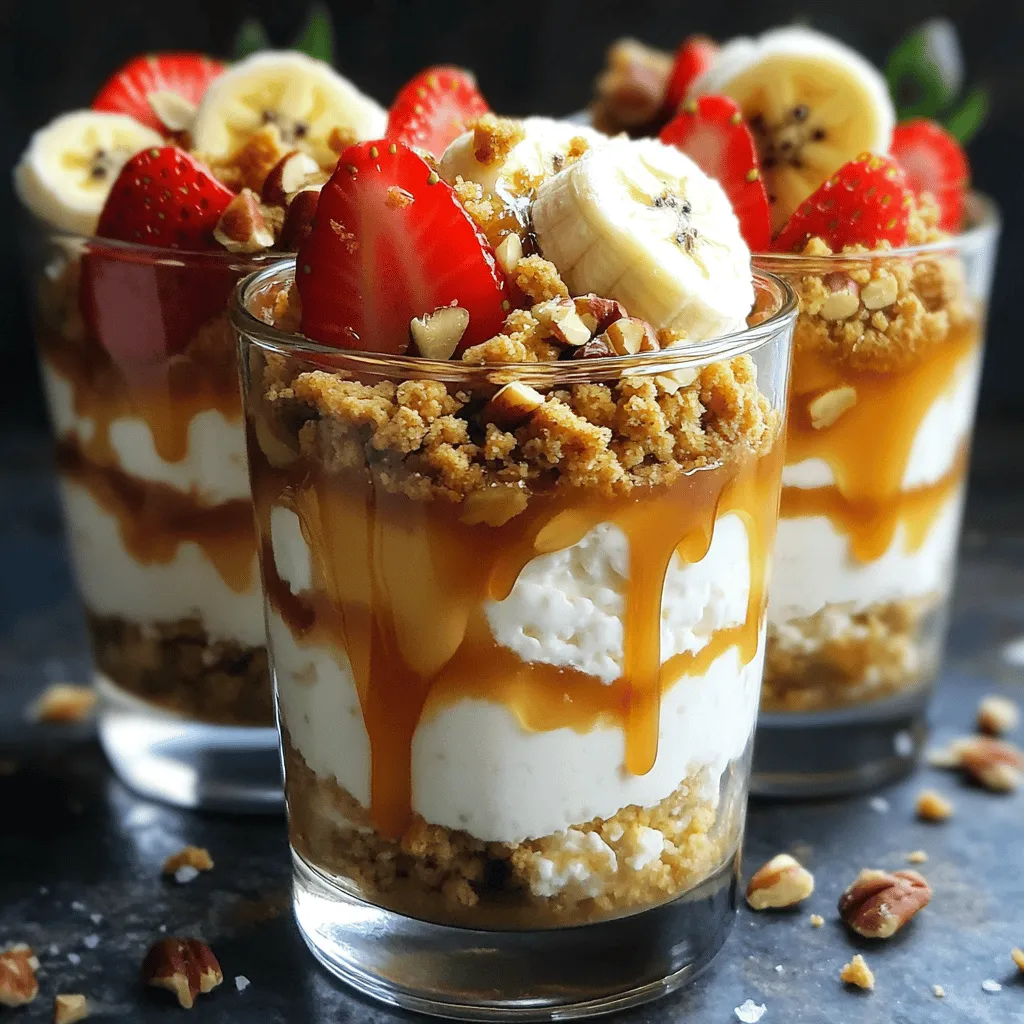
Presentation Tips
For a beautiful dessert, layer the pudding in clear glasses. This shows off the layers. Top the pudding with fresh fruit like strawberries or bananas. Add a drizzle of caramel sauce to make it shine. A sprinkle of sea salt gives a nice finish. Serve it chilled for the best experience.

Variations
Flavor Variations
You can change the flavors to fit your taste. For a fun twist, try chocolate caramel cottage cheese pudding. Just add cocoa powder to the cottage cheese mix. The rich chocolate pairs well with the sweet caramel.
Another option is to mix in peanut butter. Stir in a few tablespoons of peanut butter with the cottage cheese. This gives a nutty taste that takes the pudding to a new level.
Dietary Adjustments
If you want a healthier version, there are options for low-sugar or dairy-free pudding. Use unsweetened almond milk instead of Greek yogurt. This makes it dairy-free and lighter. You can also replace the caramel sauce with a low-sugar option.
For those needing substitutes, try silken tofu instead of cottage cheese. Blend it until smooth. This keeps the creamy texture while making it dairy-free.
Seasonal Toppings
You can change the toppings with the seasons. In autumn, add pumpkin puree to the pudding mix. This gives a warm, cozy flavor. A sprinkle of cinnamon also adds spice.
In spring, top it with fresh seasonal berries. Strawberries, blueberries, or raspberries will not only look nice but also add a fresh taste. This makes the pudding bright and cheerful for spring days.
Storage Info
Refrigeration Instructions
To store leftovers, place the pudding in an airtight container. This keeps it fresh. You can store it in the fridge for up to three days. After that, the texture and taste may change.
Freezing Instructions
Yes, you can freeze this pudding. Use freezer-safe containers to keep it from getting freezer burn. To thaw, place it in the fridge overnight. This helps it regain its creaminess. Avoid microwaving, as it can change the texture.
Shelf Life
The pudding lasts about three days in the fridge. If frozen, it can last up to two months. Always check for off smells or changes in texture before eating. Enjoy your tasty treat while it’s fresh!
FAQs
What can I use instead of cottage cheese?
You can swap cottage cheese for Greek yogurt. This makes the pudding creamier. Another option is ricotta cheese. It offers a smoother texture and a mild taste. If you want a dairy-free choice, try silken tofu. Blend it until smooth for a similar consistency. Each option alters the taste a bit, so choose what you like best.
How long can I store Salted Caramel Cottage Cheese Pudding?
You can keep this pudding in the fridge for up to three days. Make sure to store it in an airtight container. This keeps it fresh and tasty. If you see any change in color or smell, it’s best to toss it out. Enjoy it while it’s still at its best!
Can I make this pudding ahead of time?
Yes, you can prepare this pudding a day in advance. Just follow the steps and chill it in the fridge. When it’s time to serve, add the toppings. This way, they stay crunchy and fresh. Prepping ahead makes hosting easier and more fun!
Is this recipe suitable for a gluten-free diet?
Yes, you can make this pudding gluten-free. Use gluten-free graham crackers or a nut crust. You can also skip the crumbs and focus on the creamy layers. This way, everyone can enjoy the dessert without worry!
This blog post walked you through creating a delicious salted caramel cottage cheese pudding. You learned about the key ingredients, step-by-step instructions, and tips for the best texture and flavor. We explored variations to suit your taste and dietary needs. Remember, presentation matters; use fruit and caramel to make it shine. Enjoy this easy dessert at any time. It’s a great treat for sharing or savoring alone!


![- Fresh strawberries - Vanilla sponge cake - Heavy whipping cream - Granulated sugar - Powdered sugar - Lemon juice - Fresh mint leaves - Alternative decoration options The main ingredients in this trifle are fresh strawberries, vanilla sponge cake, and heavy whipping cream. You will want ripe strawberries for the best taste. They add a sweet and juicy flavor. The vanilla sponge cake gives the trifle its light and fluffy base. You can use store-bought or homemade cake—whichever you prefer! For the cream, we use heavy whipping cream. It whips up nicely to form soft peaks. This cream adds richness and makes the trifle feel special. Next, we have some additional ingredients. Granulated sugar helps sweeten the strawberries. It helps bring out their natural juice. Powdered sugar sweetens the whipped cream while keeping it smooth. Lemon juice adds a nice touch of tartness and brightens the flavors. For garnishes, fresh mint leaves add a pop of color and freshness. You can also use extra strawberry slices for decoration. If you want to get creative, consider adding chocolate shavings or crushed cookies on top. These small touches can enhance the trifle's look and taste. For the full recipe, check out the details above! To start, we need to macerate the strawberries. This means we will make them sweeter and juicier. - Ingredients: - 4 cups fresh strawberries, hulled and sliced - 1/4 cup granulated sugar - 1 tablespoon lemon juice In a medium bowl, combine the sliced strawberries, sugar, and lemon juice. Toss them gently to coat. This step helps the strawberries release their juices. Let this sit for 15 to 20 minutes. You will see them get juicy and sweet. Next, let's prepare the whipped cream. This will add a light and fluffy layer to our trifle. - Ingredients: - 2 cups heavy whipping cream - 1/4 cup powdered sugar - 1 teaspoon vanilla extract In a large bowl, mix the heavy whipping cream, powdered sugar, and vanilla extract. Using an electric mixer, beat this mixture on medium-high speed. Keep mixing until soft peaks form, which takes about 3 to 5 minutes. Be careful not to over-whip. We want it to stay light and fluffy. Now comes the fun part: assembling the trifle! This is where our layers come together. 1. Start by placing a layer of sponge cake cubes at the bottom of your trifle bowl. Spread them evenly. 2. Next, add a generous layer of macerated strawberries on top of the sponge cake. Make sure to include those sweet juices. 3. Follow with a layer of the freshly whipped cream. Repeat the layering process with sponge cake, strawberries, and whipped cream until you reach the desired height. Usually, two to three layers work well. For the top layer, add a smooth layer of whipped cream. Decorate with fresh strawberry slices and a sprig of mint. Cover with plastic wrap and chill in the fridge for at least 2 hours. This chilling time makes the flavors blend well. And there you have it! Your Strawberry Shortcake Trifle is ready to impress. For the complete recipe, check out the Full Recipe. To make your trifle shine, pay close attention to the whipped cream. Avoid over-whipping it. Ideal whipped cream is light and fluffy. If you whip it too long, it can become grainy. Watch it closely as you mix. Next, ensure your sponge cake absorbs flavors. Let the cake soak up the strawberry juice. This step is key for a moist and tasty dessert. Layer each ingredient gently, so the flavors meld well together. Choose clear glass bowls or cups for serving. This choice highlights the beautiful layers. You can see the juicy strawberries and fluffy cream through the glass. It adds a nice touch to your table. For garnish, use fresh mint leaves. A sprig on top creates a pop of color. You can also add extra strawberry slices to the top. This makes your trifle look even more appealing. Chill your trifle for at least 2 hours. This time allows the flavors to mix well. The cake absorbs the strawberry juices, enriching the taste. When ready to serve, take it out of the fridge. Use a large spoon to scoop out servings. This method keeps the layers intact and makes each bite delightful. {{image_4}} You can mix things up with different fruits. Other berries like blueberries or raspberries work great. Their tartness adds a nice twist. You can also add complementary fruits like bananas. Bananas bring a creamy texture that pairs well with the other layers. Do you want to try something new with the cake? You can use flavored cakes. Chocolate or lemon cakes add a fun taste. If you need gluten-free options, there are many gluten-free cakes available. You can use sponge cake made from almond flour or coconut flour. These options keep the dessert light and fluffy. Not a fan of whipped cream? You can substitute it with yogurt. Greek yogurt gives a nice tang and is a bit healthier. If you're looking for dairy-free options, try coconut cream. It’s rich and creamy, making it a great choice for this trifle. Feel free to explore these variations to make the Strawberry Shortcake Trifle your own. For a full recipe, check out the [Full Recipe]. After making your strawberry shortcake trifle, store it in the fridge. Cover it with plastic wrap or a lid. This keeps it fresh and prevents it from absorbing other smells. It stays fresh for up to three days. The flavors will meld and deepen over time, making it even tastier. You can freeze your trifle for later enjoyment. However, it’s best to freeze layers separately. Wrap the sponge cake and strawberries tightly in plastic wrap. Place the whipped cream in an airtight container. This helps keep the taste and texture. When ready to serve, move the layers to the fridge to thaw overnight. Once thawed, layer them again for a fresh look. You can get creative with leftover trifle. Try blending the leftover cake and cream into a milkshake. You can also make parfaits with yogurt and fruit. If you have sponge cake left, warm it in the oven. This brings back some of its soft texture, making it perfect for new desserts. Use these ideas to enjoy your trifle in new and fun ways! The trifle needs to chill for at least 2 hours. This allows the flavors to mix well. Chilling also helps the sponge cake soak up the strawberry juices. For the best taste, I recommend leaving it in the fridge longer if you can. The longer it chills, the better it gets. Yes, you can make this dessert a day in advance. Just assemble the trifle and chill it. This way, you save time on the day of serving. If you prepare it early, the flavors will deepen and blend even more. Just make sure to cover it well to keep it fresh. If you want a lighter version, you can use whipped topping. You can also try Greek yogurt for a creamy texture. Another option is coconut cream for a dairy-free choice. These substitutes may change the flavor, but they can work well in a pinch. This dessert recipe shines through simple, fresh ingredients and easy steps. We explored how to prepare fresh strawberries, make light whipped cream, and assemble a delicious trifle. With tips on texture, presentation, and storage, you can create impressive layers in no time. Remember, variations are endless—try different fruits or cakes. Enjoy your trifle today and impress your friends with your skills. Happy layering!](https://goldendishy.com/wp-content/uploads/2025/07/6bc930bf-8069-41ce-85f7-a06b19a5b93e-768x768.webp)

