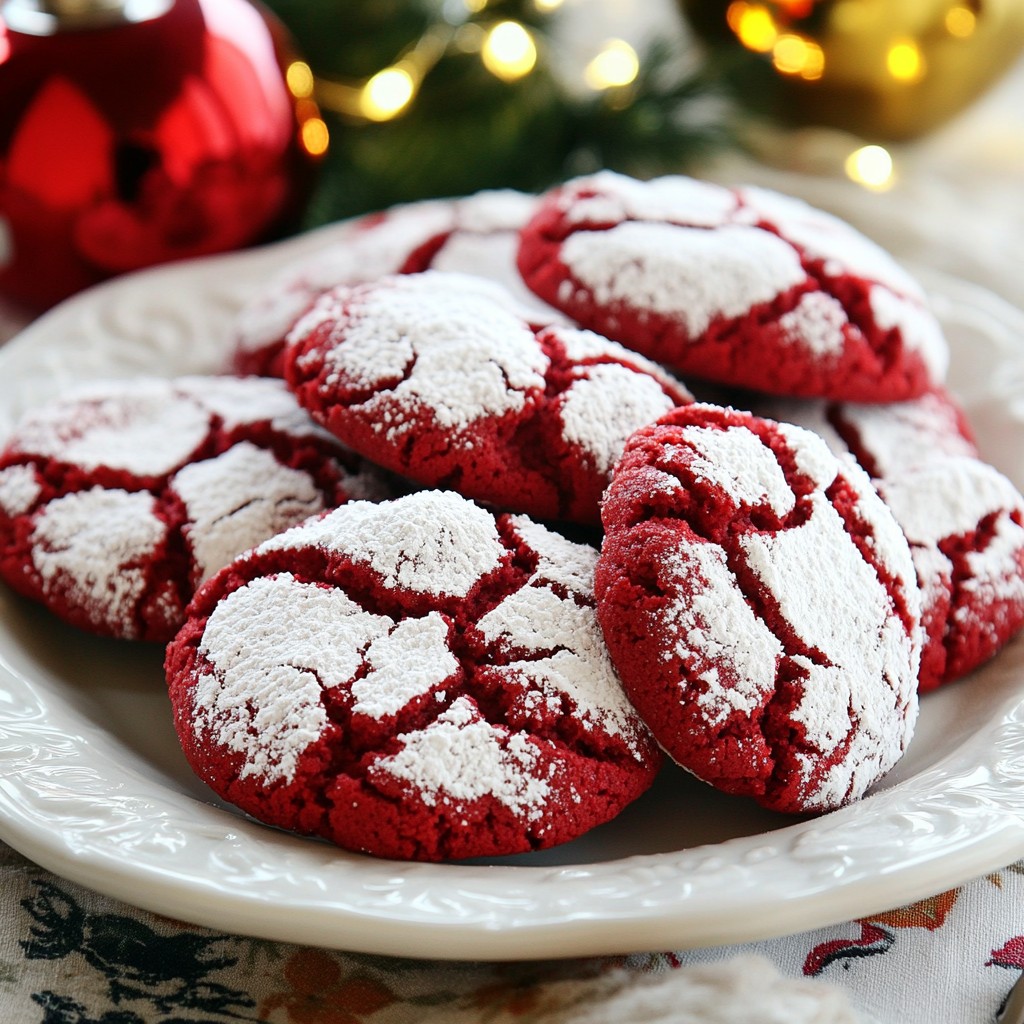
Looking to impress your friends or family with a delicious treat? My Red Velvet Crinkle Cookies are here to wow your taste buds! This guide is packed with easy-to-follow steps and tips to make these chewy, colorful cookies. You’ll learn what ingredients to use, how to mix, chill, and bake, plus fun variations to try. Get ready to create a dessert everyone will love—let's dive in!
Why I Love This Recipe
- Deliciously Unique Flavor: The rich cocoa and sweet vanilla create a delightful contrast that makes these cookies irresistible.
- Beautiful Presentation: The striking red color and powdered sugar coating make these cookies visually stunning for any occasion.
- Easy to Make: This simple recipe requires minimal ingredients and steps, making it perfect for bakers of all skill levels.
- Perfect for Sharing: With a yield of 24 cookies, they’re great for parties, gifts, or simply enjoying with friends and family.
Ingredients
List of Ingredients
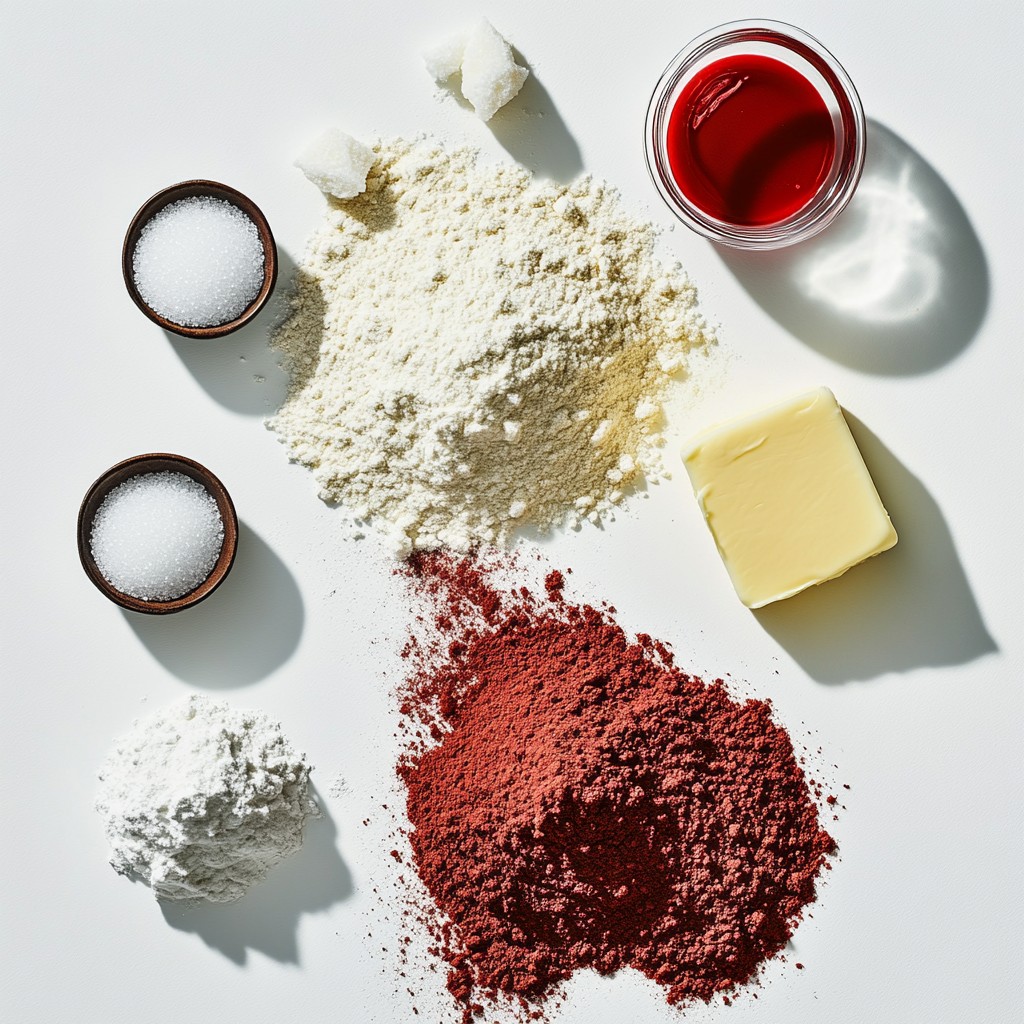
- 2 cups all-purpose flour
- 1 tablespoon unsweetened cocoa powder
- 1 teaspoon baking powder
- 1/2 teaspoon baking soda
- 1/4 teaspoon sea salt
- 1/2 cup unsalted butter, softened
- 1 cup granulated sugar
- 1 large egg, room temperature
- 1 tablespoon red food coloring
- 1 teaspoon pure vanilla extract
- 1/2 cup powdered sugar for coating
You need these ingredients to make Red Velvet Crinkle Cookies. Each part plays a role.
All-purpose flour gives the cookies their structure. I prefer using fresh flour for the best texture.
Unsweetened cocoa powder adds a rich chocolate flavor. It also enhances the cookie’s color.
Baking powder and baking soda help the cookies rise. They make the cookies soft and light.
Sea salt balances the sweetness. A little salt makes a big difference in taste.
Unsalted butter adds creaminess. It should be soft, so it mixes well with sugar.
Granulated sugar sweetens the cookies. It also helps them spread while baking.
A large egg, preferably at room temperature, binds the dough. It helps create a chewy texture.
Red food coloring gives the cookies their signature hue. Use gel or liquid, depending on what you have.
Vanilla extract brings warmth and depth. It complements the cocoa flavor nicely.
Powdered sugar is for coating. It gives the cookies their crinkly, snowy look.
Gather these ingredients, and you're ready to bake! Each one is key to making these cookies amazing.
Step-by-Step Instructions
Prepping the Oven and Baking Sheet
- Preheat your oven to 350°F (175°C).
- Line a baking sheet with parchment paper. This makes cleanup easy and prevents sticking.
Mixing Dry Ingredients
- In a bowl, whisk together:
- 2 cups all-purpose flour
- 1 tablespoon unsweetened cocoa powder
- 1 teaspoon baking powder
- 1/2 teaspoon baking soda
- 1/4 teaspoon sea salt
Set this mix aside while you work on the wet ingredients.
Creaming Butter and Sugar
- In a large bowl, beat together:
- 1/2 cup unsalted butter, softened
- 1 cup granulated sugar
Mix until fluffy and pale, about 3-4 minutes.
- Add in:
- 1 large egg
- 1 tablespoon red food coloring
- 1 teaspoon pure vanilla extract
Mix on low speed until well combined. The mix should stay light and airy.
Combining Mixtures
- Gradually mix your dry ingredients into the wet mix.
- Use a spatula or mix on low speed. Stop mixing when the dough looks thick and slightly sticky. Don’t overmix!
Chilling the Dough
- Cover the dough with plastic wrap.
- Place it in the fridge for 30 minutes. This helps the flavors develop and shapes the cookies better.
Baking the Cookies
- After chilling, scoop the dough into balls, about 1 inch wide.
- Roll each ball in powdered sugar, ensuring they’re coated well.
- Place the balls on the baking sheet, about 2 inches apart.
- Bake for 10-12 minutes. The edges should be set, but the centers should feel soft.
- Let them cool on the sheet for 5 minutes. Then, transfer the cookies to a wire rack to cool completely.
Tips & Tricks
Achieving the Perfect Texture
Chilling the dough is key for great cookies. It helps the flavors mix and makes the dough easier to shape. I usually chill the dough for about 30 minutes. This way, your cookies will bake up nice and thick.
Baking time also affects texture. For chewy cookies, bake them for 10-12 minutes. The edges should be set, but the middle stays soft. If you want a crispier cookie, leave them in for a minute or two longer.
Common Mistakes to Avoid
One big mistake is overmixing the dough. When you combine the dry and wet ingredients, mix just until they come together. Overmixing can make your cookies tough.
Another common error is using the wrong oven temperature. Always check that your oven is set to 350°F (175°C). An oven that is too hot can burn the edges before the center cooks through.
Decorating Ideas
Dusting your cookies with powdered sugar adds a lovely touch. Use a fine sieve to sprinkle it lightly on top. This makes the cookies look beautiful and adds a sweet finish.
For serving, arrange the cookies on a pretty plate. You can stack a few and wrap them in clear cellophane. Tie with a ribbon for a charming gift. Everyone will love these treats!
Pro Tips
- Chill the Dough: Chilling the cookie dough for at least 30 minutes not only enhances the flavor but also makes it easier to handle and shape.
- Use Room Temperature Ingredients: Ensure your butter and egg are at room temperature for better incorporation and a smoother dough.
- Don’t Overbake: For chewy cookies, bake just until the edges are set and the centers look slightly underbaked. They will continue to firm up while cooling.
- Experiment with Colors: For a unique twist, try adding flavored extracts or different food colorings to customize your cookies for various occasions.
Variations
Cream Cheese Frosting Option
You can add a tasty cream cheese frosting to your cookies. This makes them even more special.
Simple Cream Cheese Frosting Recipe:
- 8 ounces cream cheese, softened
- 1/4 cup unsalted butter, softened
- 2 cups powdered sugar
- 1 teaspoon vanilla extract
1. In a bowl, mix the cream cheese and butter until smooth.
2. Gradually add in the powdered sugar.
3. Stir in the vanilla extract.
Tips for Applying Frosting:
- Let the cookies cool completely before frosting.
- Use a knife or spatula to spread the frosting evenly.
- For a fun touch, sprinkle some extra cocoa powder on top.
Adding Different Flavors
You can change the flavors of your cookies to keep things exciting. Here are a few ideas:
- Mint: Add a few drops of mint extract to the dough.
- Orange Zest: Grate some orange peel and mix it into the dough.
- Different Cocoa Powder: Use dark cocoa for a richer taste.
These small changes can make a big difference!
Gluten-Free Version
If you need a gluten-free option, you can still enjoy these cookies. Just follow these tips:
- Use a gluten-free flour blend instead of all-purpose flour.
- Look for a blend that works well for baking.
Adjustments to Baking Time:
- Keep an eye on your cookies. They may need a minute or two less baking time.
- Check for the same signs of doneness: set edges and soft centers.
Storage Info
Optimal Storage Techniques
To keep your red velvet crinkle cookies fresh, store them in an airtight container. This method helps keep the cookies chewy. You can layer them with parchment paper to prevent sticking. Place the container in a cool, dry place. Avoid direct sunlight and moisture.
Freezing Cookies
You can freeze both the dough and the baked cookies. For the dough, scoop it into balls and freeze them on a baking sheet. Once frozen, put the dough balls in a freezer bag. For baked cookies, let them cool completely first. Then, wrap each cookie in plastic wrap and place them in a freezer bag.
To thaw cookies, take them out of the freezer and leave them at room temperature for about 30 minutes. This way, they warm up nicely and regain their soft texture.
Shelf Life
At room temperature, your red velvet crinkle cookies will stay fresh for about five days. Keep an eye out for signs of spoilage. If you see any mold or if the cookies smell off, it’s time to toss them out. Enjoy your delicious cookies while they’re fresh!
FAQs
What if I don't have red food coloring?
If you lack red food coloring, you have options. You can use beet juice or pomegranate juice for a natural red hue. These juices add color and a slight taste twist. You can also try a mix of cocoa powder and red gel food coloring for a deeper shade.
How can I tell when the cookies are done?
Watch for key signs while baking. The edges should look set and firm. The centers need to stay soft and slightly puffy. If the cookies crack on top, that’s a great indicator they are ready. Remove them from the oven when they look just right.
Can I double the recipe?
Yes, you can double the recipe. Just multiply all the ingredients by two. Make sure to mix the dough in a big bowl. This helps prevent spills. If you want to make fewer cookies, halve the ingredients.
What can I serve with Red Velvet Crinkle Cookies?
These cookies pair well with many treats. A glass of cold milk complements them nicely. You can also serve them with coffee or hot cocoa for a cozy feel. For dessert lovers, try them with a scoop of vanilla ice cream.
You now have a complete guide to making Red Velvet Crinkle Cookies. We covered every key step, from mixing ingredients to baking and decorating. Remember to chill your dough for the best texture. Avoid common mistakes like overmixing to get perfect cookies. Explore variations like cream cheese frosting or gluten-free options as you experiment. Store cookies properly to keep them fresh. With this knowledge, you can bake delicious cookies that impress. Enjoy your baking adventure and treat yourself with these tasty delights!