Craving a sweet treat that captures fall’s essence? You’re in luck! These Pumpkin Spice Cheesecake Cups are not only easy to make but also bursting with flavor. I’ll guide you through the simple steps, from selecting the best ingredients to perfecting that creamy texture. So grab your mixing bowls, and let’s create a delightful dessert that will impress everyone at your next gathering!
Ingredients
List of ingredients
– 1 cup graham cracker crumbs
– 1/4 cup unsalted butter, melted
– 2 teaspoons granulated sugar
– 8 oz cream cheese, softened to room temperature
– 1/2 cup powdered sugar
– 1/2 cup canned pumpkin puree
– 1 teaspoon pumpkin pie spice
– 1 teaspoon vanilla extract
– 1/2 teaspoon ground cinnamon
– Whipped cream, for topping
– Additional pumpkin pie spice, for garnish
Measurements and substitutes
For the crust, I use 1 cup of graham cracker crumbs. You can swap these for crushed cookies if you want a new flavor. The melted butter binds the crumbs. If you need a dairy-free option, try coconut oil instead. For sugar, granulated sugar works, but brown sugar adds a nice depth. Use 1/4 cup of brown sugar if you prefer. The cream cheese gives the cheesecake its rich taste. If you want a lighter option, use Greek yogurt instead. The pumpkin puree is key; it adds flavor and color. You can use fresh pumpkin, but canned is easier and just as good.
Tips for selecting quality ingredients
Choosing the right ingredients makes a big difference. Start with fresh cream cheese. It should be soft and smooth, not watery. For pumpkin, pick a brand that uses pure pumpkin with no added sugar or spices. The spices should smell strong and fresh. Check the dates on all ingredients, especially the cream cheese and spices. Freshness ensures better flavor. When you use quality items, your cheesecake cups will taste amazing. Always trust your taste buds when selecting ingredients.
Step-by-Step Instructions
Preparation of the graham cracker crust
Start by gathering your ingredients. You will need graham cracker crumbs, melted butter, and granulated sugar.
1. In a medium bowl, mix 1 cup of graham cracker crumbs, 1/4 cup of melted butter, and 2 teaspoons of granulated sugar.
2. Stir well until the crumbs soak up the butter.
3. Spoon this mixture into small cups or jars.
4. Press it down gently using the back of a spoon. This forms a solid crust layer at the bottom.
Making the pumpkin cheesecake filling
Now, let’s make the delicious pumpkin cheesecake filling.
1. In a large mixing bowl, beat 8 oz of softened cream cheese and 1/2 cup of powdered sugar with an electric mixer.
2. Mix until smooth and creamy.
3. Add in 1/2 cup of canned pumpkin puree, 1 teaspoon of pumpkin pie spice, 1 teaspoon of vanilla extract, and 1/2 teaspoon of ground cinnamon.
4. Beat the mixture again until all is well blended and silky.
Chilling and serving the dessert
It’s time to layer and chill your dessert.
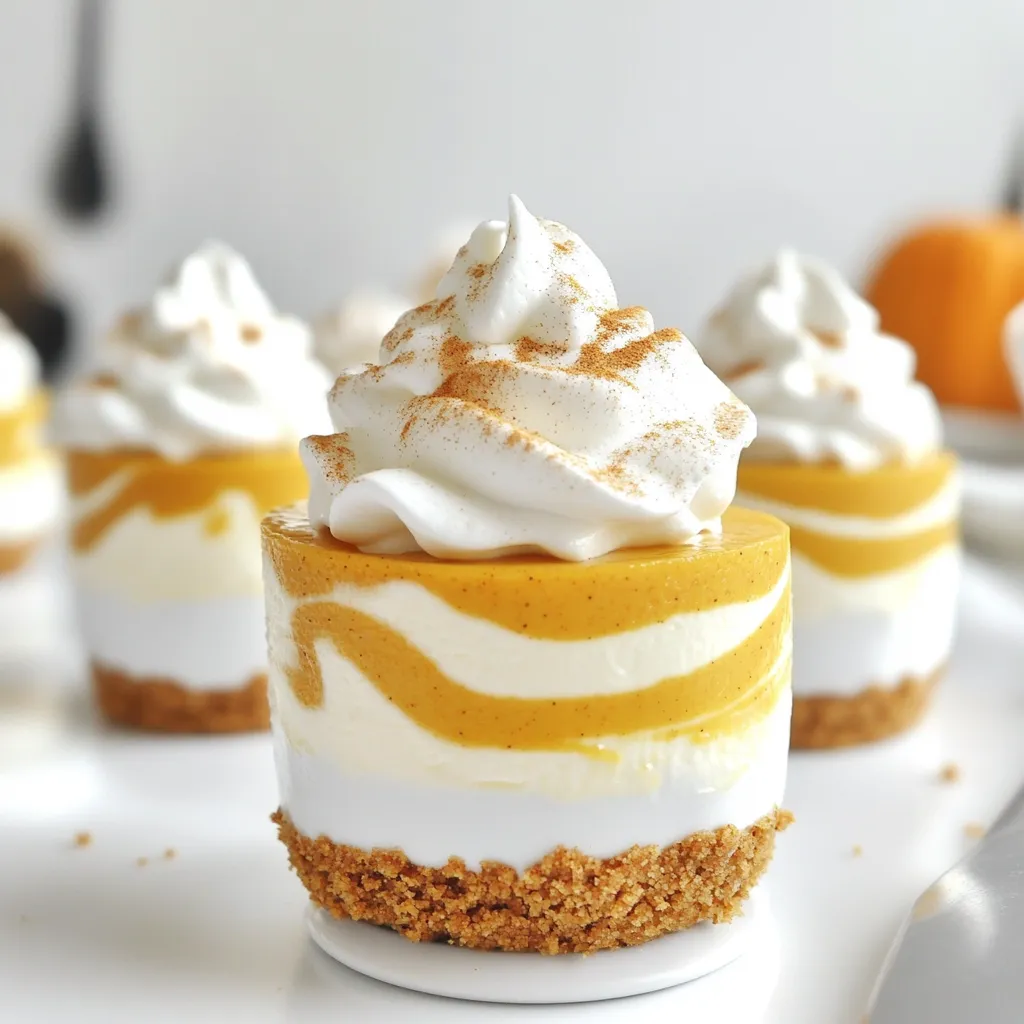
1. Use a spoon or piping bag to layer the pumpkin cheesecake filling over the crust in each cup.
2. Smooth the top for a nice finish.
3. Place the cups in the refrigerator. Allow them to chill for at least 2 hours. This helps the cheesecake set properly.
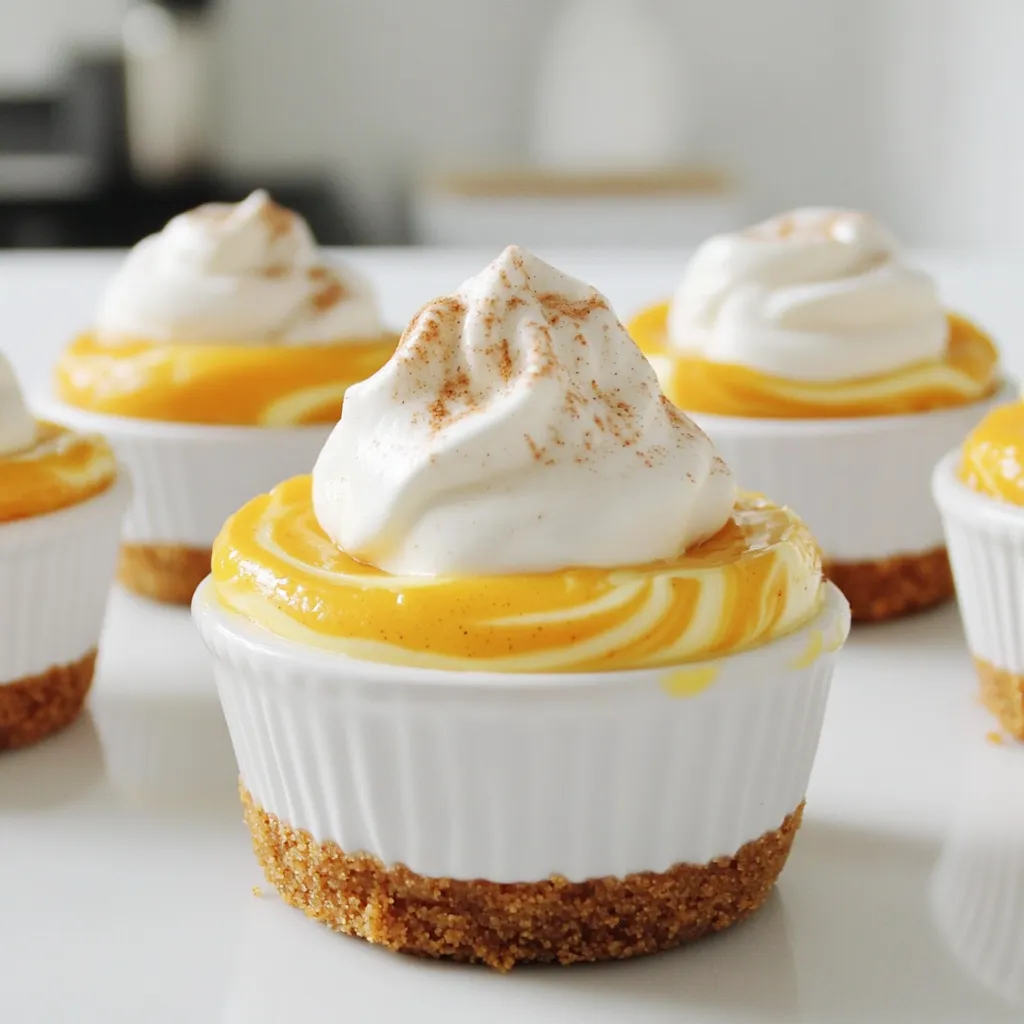
4. Before serving, add a dollop of whipped cream on top of each cup.
5. Sprinkle a little extra pumpkin pie spice for flair.
Enjoy these tasty pumpkin spice cheesecake cups!
Tips & Tricks
How to achieve the perfect cheesecake texture
To get the best texture, start with room-temperature cream cheese. Cold cream cheese gives lumps. Mix the cream cheese and powdered sugar until smooth. Then, blend in the pumpkin puree and spices. Make sure everything is mixed well. This helps create a creamy, silky filling. Chilling the cups for at least two hours helps them set properly. The longer they chill, the firmer they get.
Common mistakes to avoid
One big mistake is not pressing the crust enough. If the crust is loose, it will fall apart. Make sure to press down firmly with a spoon. Another mistake is overmixing the filling. Mixing too much adds air, which can make your cheesecake too fluffy. Lastly, avoid skipping the chilling time. This step is key for the cheesecake to set up right.
Presentation ideas for serving
Make your cheesecake cups look special with simple touches. Use clear cups to show off the layers. Top each cup with whipped cream and a sprinkle of pumpkin pie spice. You can add edible flowers or autumn leaves for fun color. Serving on a nice platter adds to the charm. For a cozy feel, place the cups on a table with small pumpkins around them.
Variations
Gluten-free alternatives
You can easily make these pumpkin spice cheesecake cups gluten-free. Swap the graham cracker crumbs for gluten-free cookie crumbs. There are many tasty options available, like almond flour cookies or gluten-free graham crackers. Just crush them the same way. You can also use crushed gluten-free oats mixed with a bit of melted butter for a different texture.
Vegan substitutions for ingredients
If you want a vegan version, there are simple swaps. Replace the cream cheese with a vegan cream cheese option. Look for brands made from nuts or soy. Use maple syrup instead of powdered sugar for sweetness. For the crust, you can use dairy-free margarine instead of butter. This way, you keep the creamy taste without using animal products.
Creative additions (like nuts or chocolate)
Feel free to get creative with your cheesecake cups! Add chopped nuts for a crunchy texture. Walnuts or pecans work well and add depth to the flavor. Chocolate lovers can mix in chocolate chips or swirl melted chocolate in the cheesecake filling. You can even top the whipped cream with a sprinkle of cocoa powder for extra flair. These simple tweaks can make your dessert even more special!
Storage Info
Best practices for storing cheesecake cups
To keep your pumpkin spice cheesecake cups fresh, cover them tightly. Use plastic wrap or a lid. Store them in the fridge for the best taste. Avoid stacking them to prevent spills.
How long they last in the fridge
When stored properly, these cheesecake cups last about 4 to 5 days in the fridge. After that, they may lose flavor and texture. If you notice any change in smell or appearance, it’s best to toss them.
Freezing options and tips
You can freeze these cheesecake cups for up to 3 months. To freeze, cover each cup with plastic wrap and then foil. This helps prevent freezer burn. When you’re ready to enjoy them, thaw the cups in the fridge overnight. Do not refreeze after thawing.
FAQs
Can I make these cheesecake cups ahead of time?
Yes, you can make these cheesecake cups ahead of time. I often prepare them the night before. This gives them enough time to chill and set in the fridge. They taste even better after a few hours! Just cover them well to keep them fresh.
What can I substitute for pumpkin puree?
If you don’t have pumpkin puree, you can use butternut squash puree. It gives a similar flavor and texture. You can also use sweet potato puree as an option. Both will work well in this recipe. Just make sure they are smooth and creamy.
How can I adjust the sweetness level?
To change the sweetness, you can add more or less powdered sugar. Start with a small amount and taste as you mix. If it’s not sweet enough, add more sugar a little at a time. You can also use maple syrup or honey for a different flavor.
In this blog post, we covered how to make delicious cheesecake cups, from choosing quality ingredients to tips for serving. I shared step-by-step instructions for the crust and filling, along with common mistakes to avoid. Remember, small changes like using vegan or gluten-free ingredients can still lead to tasty treats. Storing your desserts properly ensures freshness, and they can last a while in the fridge. Enjoy making these cheesecake cups, and don’t hesitate to try your own twist on the recipe!


