Pineapple Fried Rice Flavorful and Easy Weeknight Meal

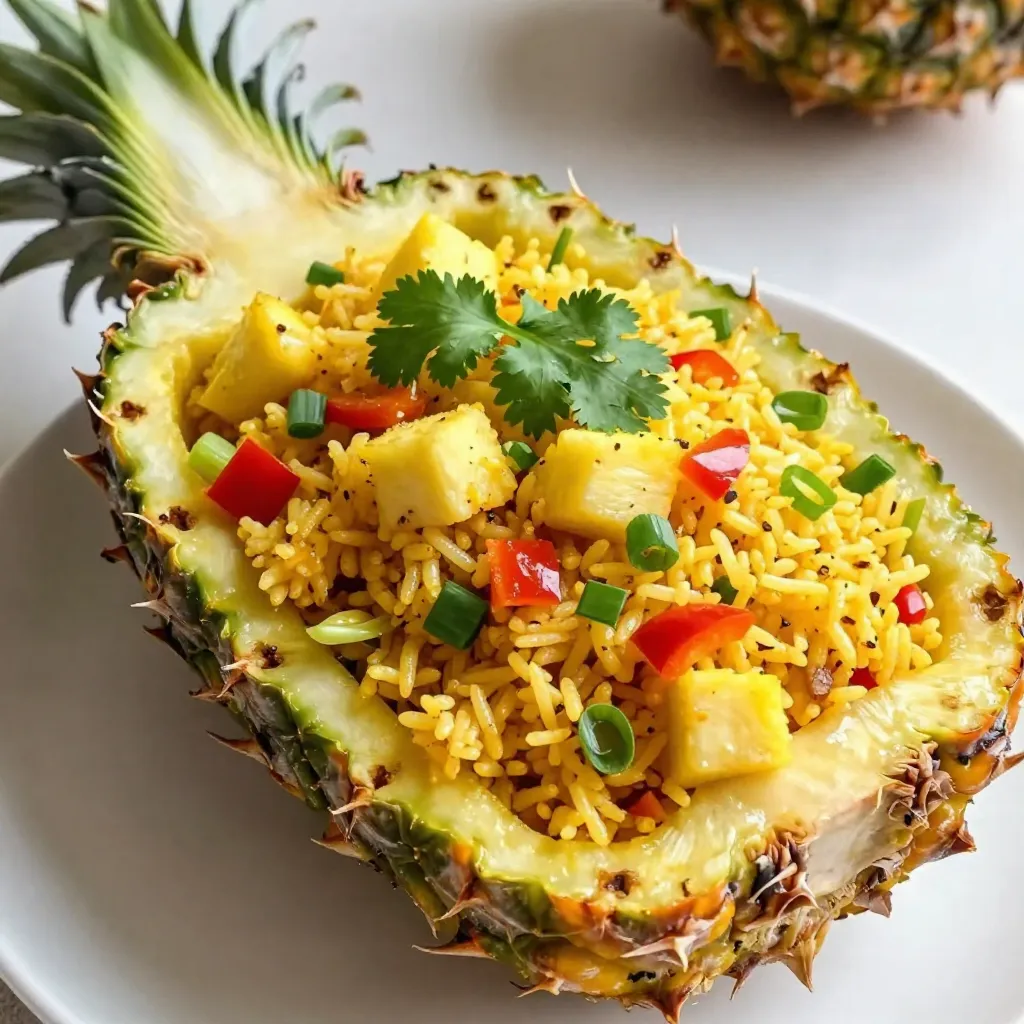
Looking for a tasty and simple dinner at home? Pineapple fried rice is your answer! This dish combines sweet pineapple, colorful veggies, and jasmine rice, all cooked to perfection. Whether you’re a busy parent or a novice cook, you can whip this up in no time. Let’s delve into easy steps and tips that will turn your weeknight meals into a delightful experience. Get ready to impress your family with this flavorful treat!
Why I Love This Recipe
- Fresh and Vibrant: This dish bursts with tropical flavors from the pineapple and fresh vegetables, making it a delightful meal that’s perfect for summer or whenever you crave something light and refreshing.
- Easy to Customize: You can easily adjust the ingredients based on what you have at home. Swap out vegetables or add proteins like shrimp or chicken for a personalized touch.
- Stunning Presentation: Serving the fried rice in the hollowed-out pineapple halves not only looks impressive but also adds an extra layer of flavor to the dish.
- Quick and Convenient: With just 25 minutes from start to finish, this recipe is perfect for busy weeknights when you want a delicious homemade meal without spending hours in the kitchen.
Ingredients
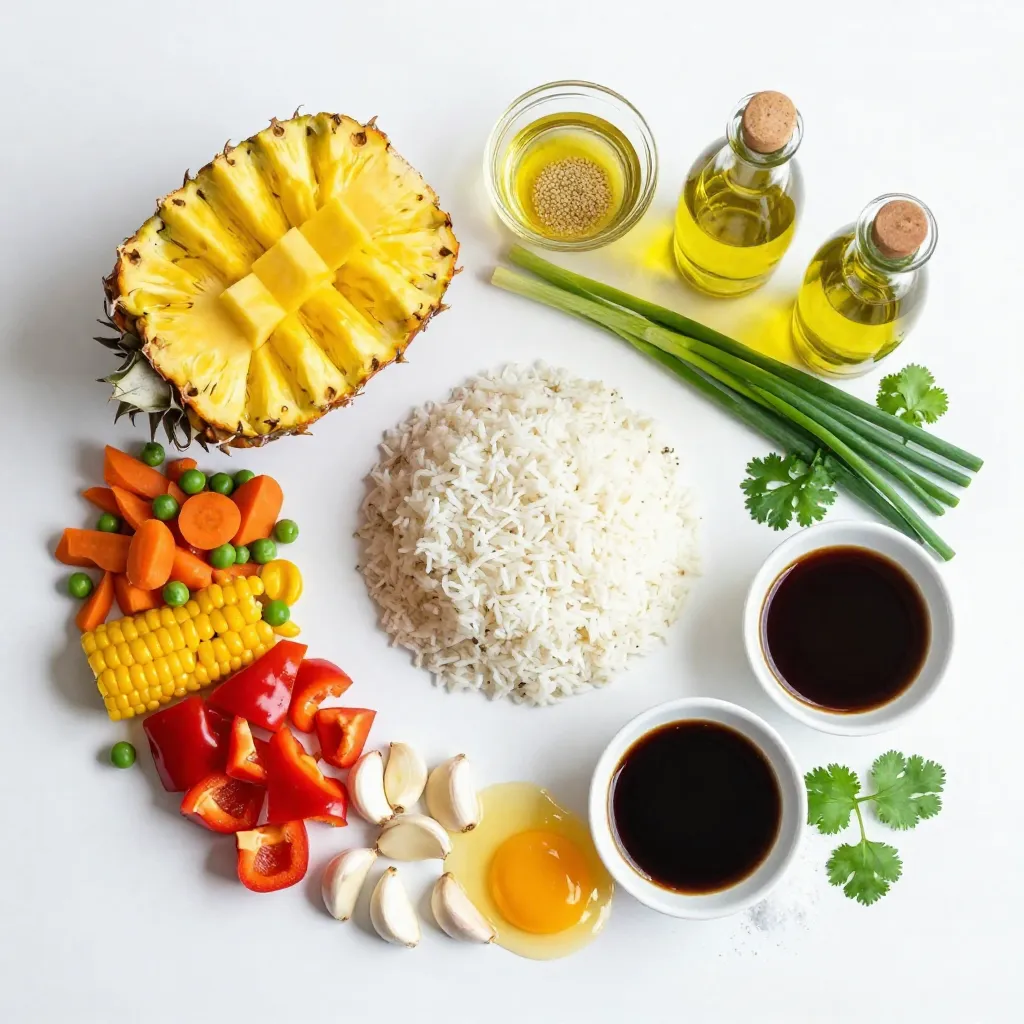
For a tasty Pineapple Fried Rice, gather these simple ingredients:
– 2 cups cooked jasmine rice
– 1 ripe pineapple
– 1 cup mixed vegetables (like carrots, peas, and corn)
– 1 red bell pepper
– 3 green onions
– 2 cloves garlic
– 2 tablespoons soy sauce
– 1 tablespoon sesame oil
– 1 tablespoon olive oil
– 2 large eggs
– Salt and pepper to taste
– Fresh cilantro for garnish
Using day-old jasmine rice works best here. It gives the dish a great texture. Choose a ripe pineapple for a sweet taste. The mixed vegetables add color and nutrients. Red bell pepper adds a nice crunch. Green onions bring a fresh flavor. Garlic gives a lovely aroma. Soy sauce and sesame oil add depth to the dish. Olive oil is perfect for cooking. The eggs help bind everything together. Lastly, cilantro adds freshness as a garnish.

Step-by-Step Instructions
Preparation of Pineapple
To start, cut the ripe pineapple in half. Use a spoon or knife to scoop out the flesh. Be careful not to cut through the shell. Once you have the flesh out, chop it into small, bite-sized pieces. Set these aside and keep the hollowed halves for later.
Sautéing the Aromatics
Next, grab a large skillet or wok. Heat olive oil over medium-high heat. After the oil gets hot, add minced garlic. Sauté it for about 30 seconds until it smells great. Watch closely so it doesn’t brown.
Adding Vegetables and Scrambling Eggs
Now it’s time for the veggies. Add mixed vegetables and diced red bell pepper to the skillet. Stir-fry for about 3 to 4 minutes until the veggies are tender. Push the veggies to one side of the skillet to make room. Pour the beaten eggs into the empty side. Scramble them until fully cooked, about 1 to 2 minutes. Mix the eggs into the veggies.
Combining Key Ingredients
Add the cooked jasmine rice and diced pineapple to the skillet. Pour in soy sauce and sesame oil. Mix everything well so the rice gets coated with the sauce. Heat it until everything is warm.
Final Seasoning and Serving
Incorporate chopped green onions into the mix. Season with salt and pepper to your taste. Stir-fry everything for another 2 to 3 minutes. This makes the rice slightly crispy. When done, take the skillet off the heat. Spoon the fried rice into the hollowed-out pineapple halves. This makes a fun and colorful presentation.
Tips & Tricks
Best Rice to Use
Using day-old jasmine rice is key. Fresh rice is too moist and sticky. Letting it cool overnight helps it dry out. This gives you a better texture for frying. The rice gets fluffy and won’t clump together. It makes your dish light and easy to mix.
Enhancing Flavor
Want more flavor? Try adding some garlic powder or ginger. A splash of fish sauce brings depth too. You can also add chili flakes for heat. If you like sweet, a touch of hoisin sauce works well. Taste as you go to find your perfect mix.
Cooking Methods
A wok is best for stir-frying. It heats up fast and cooks evenly. The high sides help keep your food contained. If you don’t have a wok, a large skillet works fine. Just make sure it has enough space for all your ingredients. The key is to keep everything moving for even cooking.
Pro Tips
- Use Day-Old Rice: Using day-old jasmine rice gives the best texture for fried rice, preventing it from becoming mushy.
- Customize Your Veggies: Feel free to substitute or add other vegetables like bell peppers, snap peas, or broccoli based on your preference.
- Adjust Seasoning: Taste the dish as you cook and adjust the soy sauce and sesame oil to suit your taste for the perfect flavor balance.
- Garnish Generously: Don’t skip the cilantro garnish; it adds freshness and enhances the tropical vibe of the dish.
Variations
Vegetarian Option
You can make this dish vegetarian by using tofu instead of eggs. Start by pressing firm tofu to remove extra moisture. Cut it into small cubes. Sauté the tofu in olive oil until it gets golden. Add it to your vegetable mix. This adds protein and keeps it plant-based. You can also use chickpeas for a different texture.
Gluten-Free Adaptations
For those who need a gluten-free option, swap out soy sauce for tamari. Tamari has a similar taste but is made without wheat. You can also use coconut aminos, which is a great soy sauce alternative. Both options keep the dish flavorful and safe for gluten-free diets.
Other Add-ins
Feel free to get creative with your add-ins. You can swap the mixed vegetables for what you have on hand. Broccoli, snap peas, or bell peppers all work well. You might also add proteins like shrimp or chicken for a heartier meal. Just remember to cook them before adding to the fried rice mixture.
Storage Info
Storing Leftovers
To keep your leftover pineapple fried rice fresh, use airtight containers. Wait for the rice to cool before packing. Store it in the fridge for up to three days. If you want to keep it longer, freezing is a great option.
Reheating Guidelines
When reheating, the goal is to keep the texture and flavor. The best way is to use a skillet. Heat a little oil in the skillet. Add the rice and stir it often. You can also use the microwave. Just cover it with a damp paper towel to keep moisture.
Freezing Pineapple Fried Rice
You can freeze pineapple fried rice for up to a month. First, let it cool completely. Scoop it into freezer bags, removing as much air as possible. When ready to eat, thaw it overnight in the fridge. Reheat it in a skillet or microwave. Enjoy the fresh taste even after freezing!
FAQs
Can I use fresh pineapple instead of canned?
Yes, you can use fresh pineapple. Fresh pineapple tastes sweeter and brighter. The texture is firmer, which adds a nice crunch. Canned pineapple is softer and can be juicier. If using canned, drain it well to avoid extra moisture in the dish. Both options work well, but fresh gives a better flavor punch.
How can I make Pineapple Fried Rice spicier?
To add spice, you can include chopped chili peppers. Sriracha or chili sauce works too. Adding a dash of red pepper flakes gives heat without changing the flavor much. Start small and taste as you go. You can always add more heat, but it’s hard to take it away.
Is Pineapple Fried Rice a good meal prep option?
Yes, it is great for meal prep. You can make a big batch and store it. It stays fresh for up to four days in the fridge. Use airtight containers to keep it tasty. Reheat it in a skillet for the best texture. This dish tastes great for lunch or dinner.
What are some good side dishes to serve with Pineapple Fried Rice?
Many sides go well with Pineapple Fried Rice. A simple green salad adds freshness. Egg rolls or spring rolls provide a crunchy contrast. You can also serve it with grilled chicken or shrimp for protein. Each option complements the sweet and savory flavors of the rice.
In this article, we explored making Pineapple Fried Rice, from selecting ingredients like jasmine rice and fresh pineapple to step-by-step cooking instructions. I shared tips for storing leftovers and adapting the dish to fit different diets. Remember, using day-old rice improves the texture. Feel free to experiment with add-ins and seasonings to suit your taste. Enjoy your delicious creation, and don’t hesitate to make it your ow

Tropical Pineapple Fried Rice
Ingredients
- 2 cups cooked jasmine rice
- 1 whole ripe pineapple
- 1 cup mixed vegetables
- 1 whole red bell pepper
- 3 whole green onions
- 2 cloves garlic
- 2 tablespoons soy sauce
- 1 tablespoon sesame oil
- 1 tablespoon olive oil
- 2 large eggs
- to taste salt
- to taste pepper
- to garnish fresh cilantro
Instructions
- Prepare the Pineapple: Start by slicing a ripe pineapple in half lengthwise. Use a spoon or knife to carefully scoop out the flesh, being cautious not to pierce the outer shell. Once removed, dice the pineapple into small, bite-sized pieces and set them aside. Keep the hollowed pineapple halves for serving later.
- Sauté the Aromatics: In a large skillet or wok, heat the olive oil over medium-high heat. Once hot, add the minced garlic and sauté for approximately 30 seconds, or until fragrant. Be careful not to let it brown.
- Add the Vegetables: Stir in the mixed vegetables and diced red bell pepper. Continue to stir-fry the mixture for 3-4 minutes, or until the vegetables are tender yet still vibrant in color.
- Scramble the Eggs: Push the veggie mixture to one side of the skillet, creating an open space. Pour the beaten eggs into the empty side and scramble until they are fully cooked, about 1-2 minutes. Once done, incorporate the scrambled eggs into the vegetable mixture.
- Combine Rice and Pineapple: Add the cooked jasmine rice and the diced pineapple to the skillet. Pour in the soy sauce and sesame oil, then mix all the ingredients thoroughly. Ensure the rice is evenly coated with the sauces and heated through.
- Season and Finish: Incorporate the chopped green onions into the rice mixture. Season with salt and pepper to taste. Stir-fry everything together for an additional 2-3 minutes until the rice is heated through and has a slightly crispy texture.
- Serve and Enjoy: Remove the skillet from the heat. Spoon the flavorful fried rice into the hollowed-out pineapple halves for a stunning presentation.


![Zesty Spaghetti Aglio e Olio Ingredients: - 400g spaghetti - 6 cloves garlic, thinly sliced - ½ cup extra virgin olive oil - 1 teaspoon red pepper flakes (or to taste) - Zest of 1 lemon - Juice of 1 lemon - ¼ cup fresh parsley, finely chopped - Salt, to taste - Freshly grated Parmesan cheese (optional, for garnish) Spaghetti Aglio e Olio shines with simple, fresh ingredients. Each plays a vital role. - Spaghetti: This serves as the base of the dish. Choose high-quality pasta for the best texture. - Garlic: Fresh garlic gives a rich flavor. Use thin slices for even cooking. - Olive Oil: Extra virgin olive oil adds depth. It also helps infuse the garlic flavor. - Red Pepper Flakes: These provide heat. Adjust the amount to match your spice level. - Lemon: Zest and juice add brightness. They balance the richness of the oil. - Parsley: Fresh parsley adds color and freshness. It complements the garlic. Sometimes, you may need to swap ingredients. Here are some great options: - Pasta: Use any long pasta, like linguine or fettuccine. - Garlic: Garlic powder can work in a pinch, but fresh is best. - Olive Oil: Avocado oil is a good alternative. It has a similar flavor. - Red Pepper Flakes: Fresh chili or hot sauce can replace flakes for heat. - Lemon: Lime juice can work if you’re out of lemons. - Parsley: Basil or chives can add a different yet tasty note. This dish is all about the balance of flavors. Each ingredient enhances the others. Enjoy your cooking journey with Spaghetti Aglio e Olio! Start by filling a large pot with water. Add a lot of salt to the water. This step helps to flavor the spaghetti. Bring the water to a rolling boil. Add the spaghetti and cook it according to the package instructions. Usually, this takes about 8-10 minutes for 'al dente' pasta. Once it is cooked, save 1 cup of the pasta water. Drain the spaghetti in a colander. In a large skillet, heat the extra virgin olive oil over medium heat. When the oil is warm, add the thinly sliced garlic and red pepper flakes. Sauté the garlic gently, stirring often for about 2-3 minutes. Watch the garlic closely; you want it golden brown and fragrant, not burnt. Burnt garlic can turn the dish bitter, which is not what we want! Once the garlic is ready, carefully add the drained spaghetti to the skillet. Use tongs or a pasta fork to toss the spaghetti. Make sure each strand is coated in the garlic oil. If the pasta looks dry, add some reserved pasta water, one tablespoon at a time. Keep tossing until you reach the sauciness you like. Now, remove the skillet from the heat. Add the lemon zest and juice to the pasta. Toss everything well to mix. Season with salt according to your taste. Then, gently fold in the finely chopped parsley. This adds color and flavor to your dish. To get the best spaghetti, cook it until it is 'al dente.' This means it should still have a little bite. Fill a large pot with water and add a good amount of salt. Bring the water to a boil. Add the spaghetti and follow the package instructions. Usually, this takes about 8 to 10 minutes. Before draining, save a cup of the cooking water. This water helps to moisten the pasta later. Garlic is key in Spaghetti Aglio e Olio. Use fresh cloves and slice them thinly. Heat the olive oil in a skillet on medium heat. Add the sliced garlic and red pepper flakes. Stir gently for 2 to 3 minutes until the garlic turns golden. Be careful not to burn it! After mixing in lemon zest and juice, you add a bright taste. The lemon cuts through the richness and lifts the dish. Serving matters! Use warm bowls to keep your pasta hot. After plating, drizzle some of the leftover garlic oil over the spaghetti. This adds flavor and shine. Garnish with fresh parsley for color. A lemon wedge on the side adds a fun touch. When your guests squeeze it over their pasta, the dish becomes even more zesty. For a special finish, you can sprinkle on some grated Parmesan cheese. This makes the dish look gourmet, even though it’s simple to make. Enjoy your flavorful garlic pasta dish! For the complete recipe, check out the full recipe. {{image_4}} You can easily make Spaghetti Aglio e Olio heartier by adding proteins like shrimp or chicken. For shrimp, use raw, peeled shrimp. Sauté them in the garlic oil for about 3-4 minutes until they are pink and cooked through. If you prefer chicken, use diced chicken breast. Cook it in the oil until it's no longer pink. This adds great flavor and makes the dish more filling. If you want a vegetarian twist, consider adding greens. Spinach or kale works great. Add them to the skillet after the garlic has cooked. Stir until the greens wilt and mix well with the garlic oil. This not only adds color but also boosts the nutrition of your meal. You can also use peas for a pop of sweetness. For those who love heat, you can adjust the red pepper flakes to your taste. Start with the recommended amount, then add more if you want it spicier. If you want a unique twist, try adding sliced fresh chili peppers or a dash of hot sauce. This will give your dish a vibrant kick and enhance the overall flavor profile. Experimenting with these variations makes Spaghetti Aglio e Olio fun and exciting. You can enjoy it just the way you like! For the full recipe, check out the details above. To keep your leftover spaghetti aglio e olio fresh, follow these steps: - Let the pasta cool down to room temperature. - Place it in an airtight container. - Store it in the fridge for up to three days. This method helps maintain the flavors and texture of your dish. When reheating spaghetti aglio e olio, I recommend these tips: - Use a skillet over medium heat. - Add a splash of olive oil for moisture. - Stir frequently to prevent sticking. You can also microwave it. Just cover it and add a little water. Heat in short bursts, stirring in between. If you want to freeze spaghetti aglio e olio, do this: - Place cooled pasta in a freezer-safe bag. - Remove excess air and seal tightly. - Store in the freezer for up to two months. When ready to eat, thaw in the fridge overnight. Reheat on the stove for the best taste. Enjoy your flavorful garlic pasta dish again! For the full recipe, check out the [Full Recipe]. Spaghetti Aglio e Olio is a simple pasta dish from Italy. It features spaghetti tossed with garlic and olive oil. The dish gets a kick from red pepper flakes. It’s quick to make and uses few ingredients. This makes it perfect for a weeknight meal. You can find the full recipe [here](#). Yes, you can easily make this dish vegan. Just skip the Parmesan cheese that some people use. The rest of the recipe is naturally vegan. The garlic oil and pasta create a rich flavor on their own. You won’t miss the cheese at all! To make Spaghetti Aglio e Olio less spicy, reduce the red pepper flakes. Start with half a teaspoon instead of a full teaspoon. You can also omit them if you prefer no heat. The garlic and olive oil will still give great flavor. Adjusting the spice level allows everyone to enjoy this dish. You’ve learned how to make Spaghetti Aglio e Olio. We covered essential ingredients and tasty substitutes. The step-by-step guide helped simplify cooking and mixing. Tips showed how to perfect texture and flavor. The variations let you customize your dish, making it unique. Lastly, we talked about storing and reheating leftovers. Now, you can enjoy this dish any time. With simple steps, you’ll impress family and friends. Dive into your kitchen and try it out today!](https://goldendishy.com/wp-content/uploads/2025/06/d19134da-6fc7-4b27-a706-dd24852a29ee-768x768.webp)


![For this tasty dish, you need the following main ingredients: - 1 block (15 oz) firm tofu, pressed and cut into 1-inch cubes - ½ cup soy sauce (or tamari for a gluten-free option) - ¼ cup pure maple syrup - 2 tablespoons rice vinegar - 2 tablespoons sesame oil - 3 cloves garlic, finely minced - 1 tablespoon freshly grated ginger - 2 tablespoons cornstarch - 1 tablespoon sesame seeds (for garnish) - 3 green onions, thinly sliced (for garnish) These ingredients create a savory sauce that brings the tofu to life. Firm tofu works best because it absorbs flavors well and holds its shape during baking. The soy sauce adds saltiness, while maple syrup gives a hint of sweetness. Garlic and ginger provide warmth and depth to the dish. You can add a few optional ingredients to boost the flavor even more: - 1 tablespoon sriracha or chili paste for heat - 1 tablespoon mirin for extra sweetness - 1 teaspoon sesame oil for richer flavor These options allow you to customize the dish to your taste. If you like a little heat, sriracha will spice things up. Mirin adds a sweet and tangy note that pairs well with the other flavors. If you have dietary restrictions, here are some great substitutes: - Use tempeh instead of tofu for more protein and a firmer texture - Coconut aminos can replace soy sauce for a soy-free option - Use agave syrup instead of maple syrup for a different sweetness These substitutes keep the dish delicious while catering to different diets. Tempeh offers a nutty flavor and is packed with protein. Coconut aminos give a similar taste without soy. Agave syrup is a simple way to adjust sweetness levels. For more details, check the Full Recipe. First, you need to prepare the tofu. Start with one block of firm tofu. Press it between two plates to remove excess water. This step is key for better texture. After pressing, cut the tofu into 1-inch cubes. This size helps it cook evenly. Next, let’s make the teriyaki sauce. In a medium bowl, mix together the following ingredients: - ½ cup soy sauce (or tamari) - ¼ cup pure maple syrup - 2 tablespoons rice vinegar - 2 tablespoons sesame oil - 3 cloves garlic, finely minced - 1 tablespoon freshly grated ginger Whisk these ingredients until smooth. This sauce adds rich flavor to the tofu. Now, it’s time to bake the tofu. Preheat your oven to 400°F (200°C). Line a baking sheet with parchment paper. This prevents sticking. Place the cubed tofu in a bowl and sprinkle with 2 tablespoons of cornstarch. Gently toss until each piece is coated. Spread the tofu on the baking sheet in a single layer. Drizzle half of the teriyaki sauce over the tofu. Bake for 25-30 minutes. Halfway through, turn the tofu cubes for even cooking. After baking, pour the remaining teriyaki sauce over the tofu. Toss gently to coat. Return the tofu to the oven for another 5-10 minutes. This step caramelizes the sauce, making it sticky and flavorful. Once baked, remove the tofu from the oven. Finish by sprinkling sesame seeds and sliced green onions on top. This adds color and crunch. Enjoy your tasty baked teriyaki tofu! For the complete recipe, check out the Full Recipe. To get crispy tofu, press it well. Remove as much moisture as you can. After cutting it, coat each cube in cornstarch. This step is key for that crunch. Bake at 400°F for 25-30 minutes. Flip the tofu halfway through for even cooking. The golden brown color means it is ready. Use fresh garlic and ginger for the best taste. These ingredients boost the teriyaki sauce’s flavor. Let your tofu soak in the sauce for a bit. This helps it absorb all those yummy flavors. Drizzle some sauce just before the end of baking. It adds a sticky glaze that is hard to resist. Don’t skip pressing the tofu. It will turn out soggy if you do. Avoid using too much sauce too soon. This can make your tofu mushy instead of crispy. Make sure to coat each piece evenly with cornstarch. If you don’t, some cubes may not get crispy. For the best results, follow the [Full Recipe]. {{image_4}} You can make your baked teriyaki tofu even more colorful and tasty by adding vegetables. Carrots, bell peppers, and broccoli work well. Just chop them into bite-sized pieces. Toss them with the tofu before baking. This step adds nutrients and makes the dish pop with color. If you want to switch up the protein, try using tempeh or seitan instead of tofu. Both options absorb flavors well and have great textures. Tempeh is nutty and has a firm bite. Seitan mimics meat and is very chewy. These choices keep the meal exciting and cater to different tastes. To keep this dish gluten-free, use tamari instead of soy sauce. Tamari is a great choice and tastes the same. For a nut-free option, skip the sesame oil and use olive oil instead. This way, you can enjoy the dish while sticking to your dietary needs. For the full recipe, check the earlier section. To keep your baked teriyaki tofu fresh, store it in an airtight container. Let the tofu cool down first. It can last in the fridge for up to four days. If you notice any moisture, use a paper towel to absorb it before sealing the container. This helps keep the tofu from getting soggy. When you are ready to enjoy leftovers, the best way to reheat the tofu is in the oven. Preheat your oven to 350°F (175°C). Spread the tofu on a baking sheet and cover it with foil. Heat for about 10-15 minutes. This method helps restore some crispiness. You can also microwave it for quicker results. Just remember to cover it with a damp paper towel to keep it moist. Yes, you can freeze baked teriyaki tofu! Start by letting it cool completely. Place the tofu in a freezer bag, removing as much air as possible. It can stay frozen for up to three months. When you’re ready to eat, thaw it in the fridge overnight. Then, reheat as mentioned above. Enjoy your flavorful tofu anytime! Tofu is done when it turns golden brown and crispy. You should bake it for 25 to 30 minutes. Halfway through, turn the tofu cubes for even cooking. It should feel firm to the touch and have a nice texture. Once you see a beautiful caramel color, it's ready to enjoy! Yes, you can! Try soy sauce with honey or maple syrup. A sweet chili sauce works well too. For a spicy kick, use sriracha mixed with soy. Each sauce will give a new flavor twist to your baked tofu. Feel free to explore and find what you love! Baked teriyaki tofu pairs well with steamed rice or quinoa. You can also serve it with stir-fried vegetables for a colorful plate. A fresh salad adds crunch and balance. For a complete meal, add some pickled veggies on the side. This dish is versatile and fits many sides! In this guide, we explored how to make baked teriyaki tofu. We discussed key ingredients, step-by-step prep, and tips for crispiness. You learned about tasty variations and storage tips. Always remember, cooking is fun and easy. With the right ingredients and methods, you can make delicious meals. Enjoy your kitchen journey with baked teriyaki tofu. Happy cooking!](https://goldendishy.com/wp-content/uploads/2025/07/16dcdce2-c600-4865-9aa6-5e182bb228ee-768x768.webp)