Peanut Butter S’mores Cups Irresistible Delight Treat

If you love sweet treats, you’ll adore these Peanut Butter S’mores Cups! They combine buttery graham crackers, creamy peanut butter, and gooey marshmallows for a perfect dessert. This easy recipe is perfect for any occasion, whether it’s a family night or a party. Follow along as I guide you through the steps to whip up this irresistible delight. You’re only a few ingredients away from a new favorite!
Ingredients
Full List of Ingredients
– 1 cup graham cracker crumbs
– 1/4 cup granulated sugar
– 1/3 cup unsalted butter (melted)
– 1 cup creamy peanut butter
– 1 cup mini marshmallows
– 1 cup semi-sweet chocolate chips
– 1 teaspoon vanilla extract
– Pinch of salt
To make Peanut Butter S’mores Cups, gather these simple ingredients. Each one plays a key role in building layers of flavor. The graham cracker crumbs and sugar create a sweet crust. Butter binds it all together, giving it a rich taste.
Creamy peanut butter brings that iconic flavor we love. Mini marshmallows add a soft, gooey texture. Semi-sweet chocolate chips provide a sweet finish that makes this treat irresistible. A touch of vanilla extract enhances the overall flavor. Lastly, a pinch of salt balances the sweetness.
This combination of ingredients makes for a fun and tasty dessert. Each bite combines crunchy, creamy, and soft textures. It’s a treat that everyone will enjoy. Prepare to impress your family and friends with these delicious cups!
Step-by-Step Instructions
Preparation Steps
1. Preheat your oven to 350°F (175°C). This helps get the cups nice and warm.
2. Line a standard muffin tin with paper liners. This makes it easy to lift the cups later.
3. In a bowl, mix 1 cup of graham cracker crumbs, 1/4 cup of sugar, and 1/3 cup of melted butter. Stir well until it looks like wet sand.
Building the Cups
1. Take about 1 tablespoon of the mixture and press it into each muffin liner. Use the back of a spoon to make it firm.
2. Place the muffin tin in the oven. Bake for 5 minutes. This makes the crust crispy.
3. Once baked, remove the tin and let the crusts cool for a few minutes.
Assembling the Peanut Butter S’mores Cups
1. In a new bowl, mix 1 cup of creamy peanut butter, 1 teaspoon of vanilla extract, and a pinch of salt. Stir until smooth and creamy.
2. Spoon 1 tablespoon of the peanut butter mix over each crust. Spread it evenly.
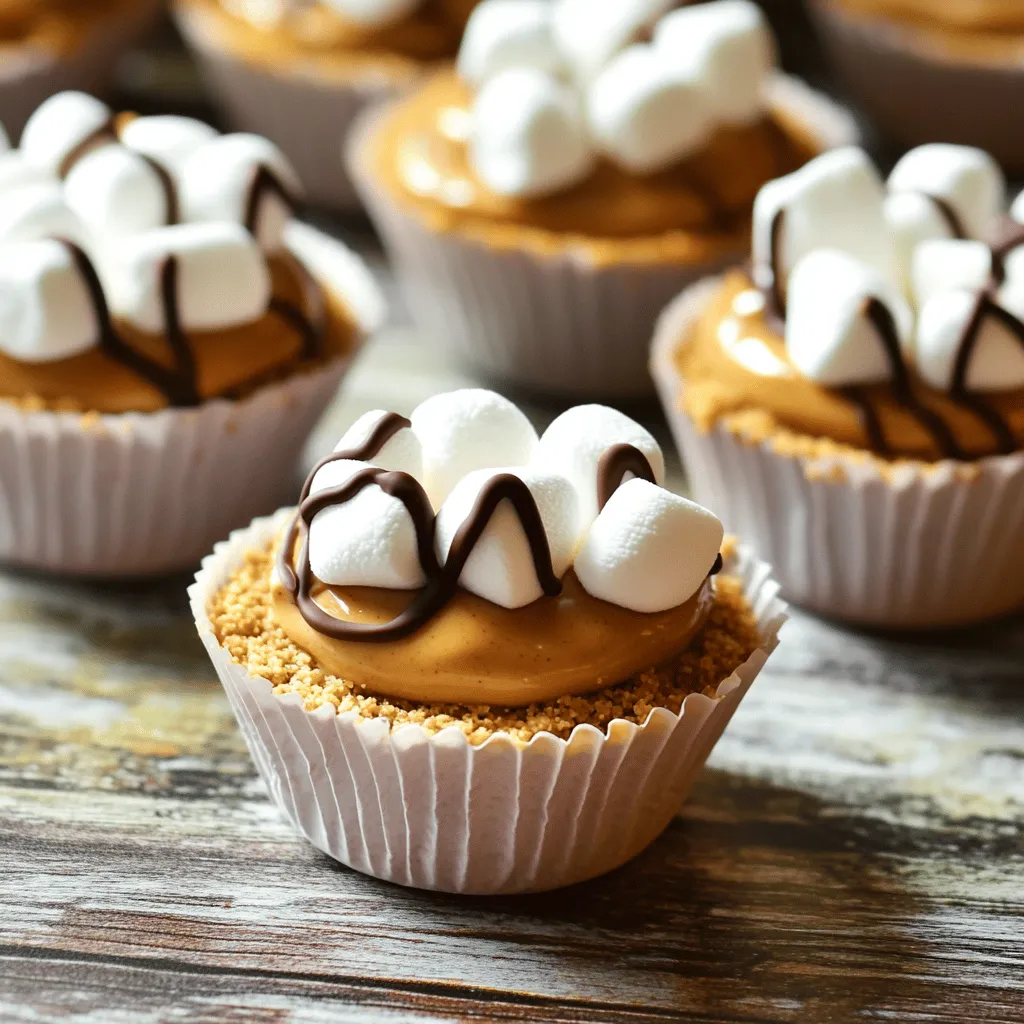
3. Sprinkle mini marshmallows on top of the peanut butter. Make sure they cover it well.
4. Melt 1 cup of semi-sweet chocolate chips in a microwave-safe bowl. Heat in 30-second bursts, stirring each time until smooth.
5. Drizzle the melted chocolate over the mini marshmallows. Make sure they are shiny and covered.
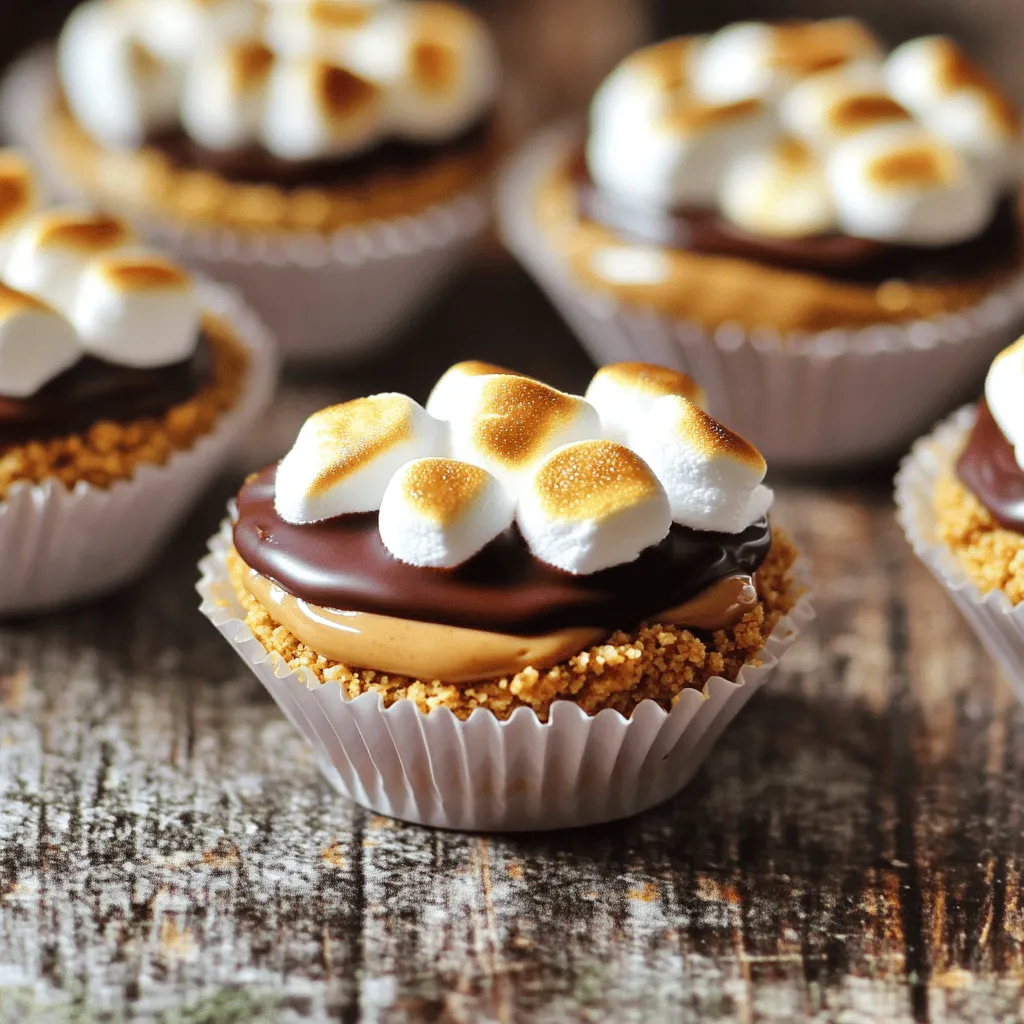
6. Place the cups back into the oven for 5 minutes. Look for golden brown marshmallows.
7. Remove the muffin tin and let the cups cool for at least 10 minutes. Then, chill them in the fridge for 30 minutes.
8. After they set, gently peel away the paper liners. Enjoy your tasty Peanut Butter S’mores Cups!
Tips & Tricks
Perfecting the Graham Cracker Crust
To make the best graham cracker crust, ensure even moisture. This helps the crust hold together. Mix the crumbs, sugar, and melted butter well. You want a wet sand texture. Use a flat-bottomed measuring cup to press the crust. This tool gives even pressure and a firm base.
Melting Chocolate Efficiently
Avoid seized chocolate by not overheating it. Melt chocolate in short bursts. Microwave in 30-second intervals. Stir each time until smooth. If you prefer, use a double boiler. Just fill a pot with water and place a bowl on top. The steam will melt the chocolate gently.
Serving Suggestions
Serve these cups on a rustic wooden platter. It adds a cozy vibe to your treats. For a fun pop, use a colorful dessert stand. Garnish with extra mini marshmallows or some crushed graham crackers on top. This adds texture and looks great!

Variations
Alternative Nut Butters
You can switch peanut butter for almond or cashew butter. Each nut brings a unique taste. Almond butter offers a hint of sweetness, while cashew butter is creamy and smooth. These swaps keep the recipe fun and fresh.
Flavor Add-ins
Adding chocolate chips or peanut butter chips can enhance flavor. You can mix in a half cup of these chips into your peanut butter filling. For a twist, sprinkle in some cinnamon. Cinnamon adds warmth and depth, making each bite special.
Gluten-Free Options
If you need a gluten-free treat, swap regular graham crackers for gluten-free ones. Many brands offer tasty options that fit this need. This change keeps the dessert inclusive, so everyone can enjoy it without worry.
Storage Info
Best Practices for Storing
To keep your Peanut Butter S’mores Cups fresh, store them in the fridge. Place them in an airtight container. This way, they won’t dry out, and they’ll stay tasty. You can keep them in the fridge for about one week. If you want to save them longer, try freezing them.
Freezing Peanut Butter S’mores Cups
To freeze your Peanut Butter S’mores Cups, first let them cool completely. Then, wrap each cup in plastic wrap or foil. Place them in a freezer-safe bag or container. This helps to keep them fresh and tasty. They can stay in the freezer for up to three months.
When you’re ready to enjoy them, take them out of the freezer. Let them thaw in the fridge for a few hours. If you’re in a hurry, you can also let them sit at room temperature for about 30 minutes. Enjoy your delicious treat!
FAQs
Can I make these Peanut Butter S’mores Cups ahead of time?
Yes, you can make these cups ahead of time. They store well in the fridge for up to five days. Just wait until they cool down completely before storing. I like to keep them in an airtight container. This keeps them fresh and tasty. If you want to make them even earlier, you can freeze them. Just wrap each cup in plastic wrap. They will stay good for up to three months. To enjoy, thaw them in the fridge overnight before serving.
Are Peanut Butter S’mores Cups suitable for gluten-free diets?
Yes, you can make these cups gluten-free. Just use gluten-free graham crackers instead of regular ones. Many brands offer great options that taste just as good. You can find these in most grocery stores. Always check the labels to ensure no gluten is present. This way, everyone can enjoy these tasty treats!
How can I modify the recipe for dietary restrictions?
You can modify this recipe for different diets. For a nut-free version, use sun butter or soy nut butter instead of peanut butter. If you want a vegan option, use dairy-free chocolate chips and coconut oil instead of butter. You can also find vegan marshmallows for a complete swap. These changes let you enjoy the flavors while meeting your needs.
You learned how to make delicious Peanut Butter S’mores Cups. I shared the full list of ingredients and gave you step-by-step instructions. You now have tips to perfect the crust and melt chocolate easily. The variations allow you to customize these treats based on your tastes or needs. Plus, you got storage tips for keeping them fresh. Try making these for your next gathering; they will impress everyone! Enjoy every bite of your sweet creations!


![- 1 ripe avocado, peeled and pitted - 1/2 cup unsweetened cocoa powder - 1/2 cup maple syrup or honey - 1/4 cup almond butter or peanut butter - 1/2 cup whole wheat flour - 1/2 teaspoon baking soda - 1/4 teaspoon salt - 1 teaspoon pure vanilla extract - 1/2 cup dark chocolate chips The key ingredient here is the avocado. Why choose avocado for brownies? It adds creaminess and healthy fats. This makes the brownies moist without extra oil. Next, we have cocoa powder. It gives the brownies a rich chocolate taste. The maple syrup or honey acts as a natural sweetener. I prefer maple syrup for its unique flavor. Almond butter or peanut butter brings a nutty taste. Whole wheat flour adds fiber, making these brownies healthier. Baking soda helps the brownies rise. Salt enhances all the flavors. Finally, dark chocolate chips are a must for that gooey chocolate burst. Using avocado offers many perks. It is rich in vitamins and healthy fats. These fats can help lower bad cholesterol. The fiber in avocado also aids digestion. Cocoa powder is full of antioxidants. It can improve heart health while making brownies delicious. Maple syrup is a lower glycemic option. It can provide a steady energy boost without a sugar crash. Switching to whole wheat flour adds more nutrients. It has more fiber than white flour. This helps keep you full longer. If you need gluten-free options, use almond flour instead of whole wheat. It works well and keeps the taste rich. For a vegan-friendly version, replace honey with maple syrup. Use a nut butter that fits your diet. You can also find dairy-free chocolate chips easily. These easy swaps ensure everyone can enjoy these healthy chocolate avocado brownies! - Preheat your oven to 350°F (175°C). - Line an 8x8 inch baking pan with parchment paper. Leave some paper hanging over the edges. This helps with easy removal later. - Take your ripe avocado and mash it in a bowl. You want it smooth and creamy. You can also use a food processor for this step. - In the same bowl, add maple syrup (or honey), almond butter, and vanilla extract. Mix until everything is blended well. - In a different bowl, whisk together cocoa powder, whole wheat flour, baking soda, and salt. Make sure these dry ingredients are mixed well. - Gradually add the dry mix to the wet mix. Stir gently until just combined. It’s okay to have a few lumps; this helps keep the brownies soft. - Fold in dark chocolate chips so they are evenly spread in the batter. - Pour the batter into your prepared pan. Use a spatula to smooth it out evenly. - Place the pan in your oven. Bake for 20-25 minutes. - To check if they are done, insert a toothpick into the center. It should come out with a few moist crumbs but not wet batter. - Once baked, let the brownies cool in the pan on a wire rack for 15 minutes. Use the parchment paper to lift them out. Let them cool further before cutting into squares. Enjoy making these Healthy Chocolate Avocado Brownies with the [Full Recipe]. To make your brownies just right, avoid overmixing. When you combine wet and dry ingredients, mix gently. A few lumps are okay. This keeps your brownies soft and fudgy. Even baking is also key. Make sure to spread the batter evenly in the pan. This helps them bake at the same time. For a lovely presentation, dust the brownies with cocoa powder or powdered sugar. You can also serve them with fresh berries. A dollop of yogurt adds creaminess and balances the rich chocolate. These simple touches make your brownies look great on any plate. You can boost the taste of your brownies easily. Try adding spices like cinnamon or a pinch of sea salt. A splash of almond or peppermint extract gives a fun twist. Using flavored chocolate chips adds another layer of taste. Think about using orange or hazelnut chips for a unique flavor profile. Check out the Full Recipe for more ideas! {{image_4}} To make these brownies gluten-free, swap whole wheat flour for almond flour or coconut flour. These options keep the texture rich and moist while avoiding gluten. Just remember to adjust the amount, as almond flour is more absorbent. For a vegan twist, replace honey with maple syrup. You can also use a plant-based nut butter, like almond or sunflower seed butter, instead of peanut butter. This keeps the flavor intact without any animal products. You can add a fresh twist to these brownies by mixing in mint extract. Use about 1 teaspoon of pure mint extract for a refreshing flavor. This makes mint chocolate avocado brownies that are perfect for any mint lover! Another fun option is to create a peanut butter swirl. Drop spoonfuls of peanut butter into the brownie batter before baking. Use a knife to swirl it around for a beautiful marbled look. This adds a delicious peanut flavor that pairs well with chocolate. If you want to change the serving size, you can easily convert the recipe. For a smaller batch, halve the ingredients. Use a smaller pan, like 6x6 inches, and keep an eye on the baking time. Smaller brownies will bake faster. You can also bake these brownies in a larger pan for thinner squares. A 9x13 inch pan works well, but adjust the baking time to about 15-20 minutes. Check for doneness with a toothpick, just like before. For the full recipe, check out the details above! To keep your brownies fresh, store them in an airtight container. This prevents air from making them dry. You can also place a slice of bread in the container. The bread helps maintain moisture. Always let brownies cool before storing. This avoids steam build-up, which can make them soggy. If you want to freeze brownies, first cut them into squares. Wrap each piece tightly in plastic wrap. Then, place them in a freezer-safe bag or container. This helps avoid freezer burn. When you're ready to eat them, just take out a piece and let it thaw at room temperature. You can also warm them in the microwave for a few seconds. Brownies last about 3-4 days at room temperature. If you see any mold, throw them away. To keep them fresh longer, refrigerate or freeze them. Refrigeration can extend their life to about a week. For best taste, enjoy them within a few days. For the full recipe, check out the provided details. Can I use ripe bananas instead of avocado? Yes, you can use ripe bananas. They add sweetness and moisture. However, the flavor changes slightly. Bananas may make the brownies taste fruitier. If you love banana, give it a try! How can I make these brownies less sweet? To reduce sweetness, cut back on the maple syrup or honey. You can also swap some sweetener for unsweetened applesauce. This keeps the texture but lowers the sugar. What is the best way to test brownies for doneness? The best way is to use a toothpick. Insert it in the center. If it comes out with a few moist crumbs, the brownies are done. If it has wet batter, bake a bit longer. Can these brownies be made without flour? Yes, you can make them without flour. Use a blend of nut flour or almond flour instead. This gives a nutty flavor and keeps the brownies moist. How many calories are in a serving? Each brownie has about 100 calories. This can change based on the ingredients you use. For example, using less sweetener or different nut butter may alter the calorie count. What are good dairy-free alternatives for chocolate chips? Look for dairy-free dark chocolate chips. Many brands make these with coconut or almond milk. You can also chop up a dairy-free chocolate bar for chunks. In this article, I covered a delicious brownie recipe that uses healthy ingredients. You learned about the key components, their nutritional benefits, and how to adapt the recipe for dietary needs. I shared step-by-step instructions for baking these brownies to perfection. With tips on flavor and texture, you can create the best version. Remember to store your leftovers properly to keep them fresh. Enjoy baking these brownies, knowing they are a tasty treat that can fit your diet!](https://goldendishy.com/wp-content/uploads/2025/06/19347e51-2d6e-4328-baa5-83086a8293f2-768x768.webp)


