Peanut Butter Chocolate Protein Bites Quick Treat Recipe

Looking for a quick, tasty snack that packs a protein punch? You’ve found it! My Peanut Butter Chocolate Protein Bites are easy to make and full of flavor. With just a few simple ingredients, you can whip up these treats in no time. Perfect for anyone on the go or wanting a sweet yet healthy option!It’s easy to make, fun to eat, and healthy too. The protein bites are great for a quick snack or dessert.
Detailed Ingredient List
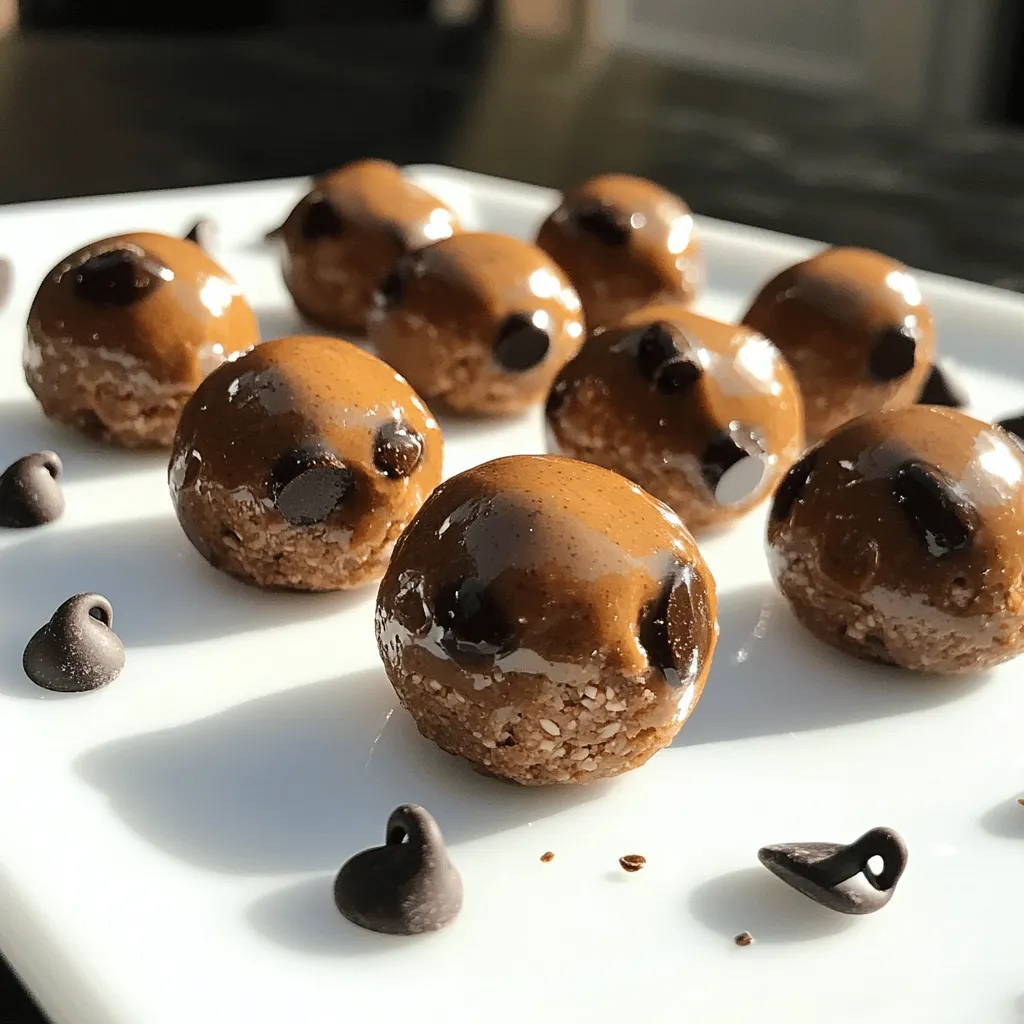
To make Peanut Butter Chocolate Protein Bites, you need the following ingredients:
– 1 cup natural peanut butter
– 1/2 cup honey or maple syrup (for a vegan option)
– 1 cup rolled oats
– 1/2 cup chocolate protein powder
– 1/4 cup dark chocolate chips
– 1/4 cup ground flaxseed
– 1 teaspoon vanilla extract
– A pinch of sea salt
Each ingredient plays a key role. Natural peanut butter gives a creamy base. Honey or maple syrup adds sweetness and binds everything. Rolled oats add texture and fiber, while chocolate protein powder boosts the protein content. Dark chocolate chips provide delicious bursts of flavor. Ground flaxseed adds healthy fats. Vanilla extract enhances the overall taste, and sea salt balances the sweetness.
Nutritional Information
These bites are packed with nutrients. Each serving offers a good mix of protein, fiber, and healthy fats. They provide energy without causing a sugar crash.
– Calories: Approximately 100 per bite
– Protein: 5g
– Carbohydrates: 12g
– Fat: 4g
– Fiber: 2g
This snack fits well into any diet. It’s a great choice for athletes or busy people. You can enjoy these bites guilt-free, knowing they are good for you.
Step-by-Step Instructions
Preparation Method
To get started, gather your ingredients. You need natural peanut butter, honey or maple syrup, rolled oats, chocolate protein powder, dark chocolate chips, ground flaxseed, vanilla extract, and sea salt. This recipe is quick and easy, perfect for a snack or energy boost. First, take a large mixing bowl. Combine the peanut butter and honey (or maple syrup) in this bowl. Use a spatula or spoon to mix them until smooth and creamy.
Mixing and Forming Bites
Next, add the rolled oats, chocolate protein powder, ground flaxseed, and a pinch of sea salt. Stir well until everything is mixed and thick. It should feel slightly sticky. Now it’s time for the fun part! Fold in the dark chocolate chips gently. This step ensures you get a burst of chocolate in every bite. With clean hands, take about a tablespoon of this mixture. Roll it into a ball shape. Keep going until you form all the mixture into bite-sized balls. Place them on a parchment-lined tray or plate as you go.
Refrigeration and Serving Suggestions
Once all the bites are shaped, transfer the tray to an airtight container. Put it in the fridge for at least 30 minutes. This will help the bites firm up nicely. After they chill, they are ready to eat! For serving, arrange the protein bites on a nice platter. You can sprinkle extra dark chocolate chips or crushed nuts on top for a great look. Pair these bites with a glass of your favorite plant-based milk for a tasty treat. Enjoy your Peanut Butter Chocolate Protein Bites!
Tips & Tricks
Perfecting Texture
To get that perfect bite, use natural peanut butter. It keeps the bites creamy. If it’s too thick, add a little honey. This will help create a smoother texture. Mixing in rolled oats gives a nice chewiness. Make sure to measure them right. Too many oats can make them dry.
Preventing Stickiness
If the mixture is too sticky, wet your hands. This keeps the mixture from sticking to your fingers. You can also use a little oil on your hands. This helps form nice balls without a mess. If you find it too sticky, chill the mixture for about 10 minutes before rolling.
Measuring and Substitutions
Always use a dry measuring cup for oats and protein powder. This ensures accuracy. If you want to change flavors, try almond butter instead of peanut butter. For sweetness, you can use agave or maple syrup. They work great in this recipe. Just remember to adjust the amount based on your taste preference.

Variations
Flavor Add-ins (like coconut or nuts)
You can make these protein bites even more fun! Add shredded coconut for a tropical twist. Just mix in about 1/4 cup of it. Want some crunch? Toss in chopped nuts like almonds or walnuts. About 1/4 cup works well here too. These add-ins will change the taste and texture, making each bite a surprise!
Using Different Sweeteners (avocado or agave)
You can swap honey or maple syrup for a different sweetener. Try using mashed avocado for a creamy texture. This adds healthy fats and keeps it smooth. You can also use agave syrup for a lighter sweetness. Both options work great and keep the bites delicious!
Protein Powder Substitutions
Not a fan of chocolate protein powder? You can easily switch it out. Use vanilla protein powder for a sweeter flavor. If you want something different, try pea or hemp protein. These options still give you the protein boost you need without losing taste.
Storage Info
Best Storage Practices
Store your peanut butter chocolate protein bites in an airtight container. This keeps them fresh and prevents them from drying out. You can use a glass jar or a plastic container. If you place parchment paper between layers, it helps to avoid sticking.
Shelf Life and Freezing Tips
These bites last about a week in the fridge. For longer storage, freeze them. They can stay fresh in the freezer for up to three months. To freeze, place them in a single layer on a tray. Once frozen, transfer them to a freezer-safe bag.
Reheating and Serving After Storage
You don’t need to reheat these bites. They’re great cold or at room temperature. If you prefer a warm treat, heat them for just a few seconds in the microwave. Serve them as a snack or a quick breakfast. Enjoy them with a glass of milk or your favorite smoothie!
FAQs
Can I use crunchy peanut butter?
Yes, you can use crunchy peanut butter. It adds a nice texture. You will enjoy the extra crunch in each bite. Just remember, it may change the consistency a bit. The bites might be less smooth but still tasty.
How long do these protein bites last?
These protein bites can last about one week in the fridge. Store them in an airtight container to keep them fresh. If you want to keep them longer, you can freeze them. They will last for up to three months in the freezer.
Are there nut-free options for this recipe?
Yes, you can make nut-free protein bites. Use sun butter or soy nut butter instead of peanut butter. These options work great and keep the flavor. Just ensure you check for allergies when serving to others. If you want a different flavor, try using pumpkin seed butter.
We covered the key ingredients and steps for making tasty protein bites. You learned about flavors, storage tips, and answers to common questions. With these tips, you can create bites that fit your taste and needs. Remember, you can mix flavors and make this recipe your own. Don’t hesitate to experiment and adjust, as that’s the fun part. Enjoy making these bites, and share them with friends!


![- 1 cup rolled oats - 1/2 cup natural peanut butter (smooth or crunchy) - 1/3 cup honey or maple syrup The main ingredients form the base of these bites. Rolled oats give them a hearty texture and fiber. Natural peanut butter adds creaminess and protein. Honey or maple syrup provides natural sweetness. - 1/2 cup ground flaxseed - 1/4 cup mini chocolate chips - 1/4 cup chia seeds These add-ins let you customize your bites. Ground flaxseed boosts nutrition and fiber. Mini chocolate chips make them fun and tasty. Chia seeds add crunch and healthy fats. - 1/2 teaspoon ground cinnamon - A pinch of salt Seasonings enhance the flavor. Ground cinnamon adds warmth and sweetness. A pinch of salt balances the flavors, making them pop. These ingredients come together to create a snack that is both simple and packed with energy. You can find the full recipe above to guide you through the steps of making these no-bake energy bites. - Measure 1 cup of rolled oats. - Mix 1/2 cup ground flaxseed and 1/4 cup chia seeds. - In a separate bowl, combine 1/2 cup natural peanut butter and 1/3 cup honey or maple syrup. Start by mixing the dry ingredients in a large bowl. This includes your oats, flaxseed, chia seeds, chocolate chips, cinnamon, and salt. Stir well to make sure everything is evenly spread. Then, in your other bowl, blend the peanut butter and honey until smooth. This makes a sticky base for your bites. Next, pour the wet mix into the dry mix. Use a spoon or your hands to combine them. You want to make sure everything is well mixed. The result should feel sticky but hold its shape when pressed. Now it's time to scoop out the mixture. Use clean hands to grab small amounts, about the size of a tablespoon. Roll these into balls and place them on a baking sheet lined with parchment paper. Once all your bites are shaped, pop the sheet in the fridge for at least 30 minutes. This helps them set, making them easier to eat. After chilling, your No-Bake Energy Bites are ready! For more details on the recipe, check the Full Recipe. You can easily swap ingredients for your No-Bake Energy Bites. If you want a vegan option, replace honey with maple syrup. It will still add sweetness and help bind the bites. For nut-free alternatives, use sun butter or soy nut butter instead of peanut butter. These options keep the texture while avoiding nuts. Getting the right texture is key. If your mixture feels too dry, add a bit more nut butter or syrup. This will help everything stick together. When rolling your bites, keep your hands slightly wet. This helps prevent sticking. Aim for even sizes to get uniform bites that chill well. To boost flavor, add spices like vanilla or nutmeg. These can add a nice kick and make them more exciting. You can also use flavored nut butters, like almond or cashew butter. This twist changes the taste while keeping the bites healthy. If you're looking for the complete instructions, check the Full Recipe. {{image_4}} You can mix flavors to make the bites even more fun. One favorite is chocolate peanut butter. Just add cocoa powder or more mini chocolate chips. This gives you a rich taste. Another great option is almond joy-inspired bites. Use almond butter, shredded coconut, and chopped almonds. This adds a tropical twist. Want to make these bites even better? Consider adding protein powder. It boosts protein without changing the taste. You can also mix in dried fruits like raisins or cranberries. These add natural sweetness and fiber. Pumpkin seeds or sunflower seeds work great too. They add crunch and healthy fats. You can create themed bites for different times of the year. In fall, try pumpkin spice bites. Just add pumpkin puree and pumpkin spice. For winter holidays, think about gingerbread energy bites. Mix in ginger, nutmeg, and a bit of molasses. These variations keep your snacks exciting and seasonal. For the full recipe, check out the No-Bake Energizing Peanut Butter Bliss Bites. To keep your energy bites fresh, store them in airtight containers. Glass or plastic containers work well. Make sure to seal them tight. This helps prevent them from drying out. For longer freshness, keep them in the fridge. They taste great cold and stay firm. You should eat your energy bites within one week. After that, they may lose flavor and texture. Signs of spoilage include a strange smell or dry spots. If they feel crumbly or hard, it’s time to toss them. You can freeze your energy bites for later. To freeze, place them in a single layer on a baking sheet. Once frozen, transfer them to a freezer bag. Make sure to remove as much air as possible. They can last up to three months in the freezer. To thaw, simply take out what you need. Leave them on the counter for about 30 minutes. You can also pop them in the fridge overnight. Now you have a quick snack ready anytime! No-Bake Energy Bites stay fresh for about one week in the fridge. Store them in an airtight container. This keeps them tasty and safe to eat. Yes, you can make No-Bake Energy Bites ahead of time! They are perfect for meal prep. Make a batch on the weekend, and enjoy them all week long. Common allergens include peanut butter and honey. Some people may be allergic to oats or chia seeds. Always check for allergies when sharing these bites with others. Absolutely! You can swap peanut butter for almond or cashew butter. Just make sure the nut butter is smooth enough to mix well. You can modify the recipe to suit your needs. Use maple syrup instead of honey for vegan bites. For nut-free options, try sunflower seed butter. Add dried fruits or seeds for extra flavor and nutrition. Check the [Full Recipe] for more ideas. In this blog post, we explored how to make tasty no-bake energy bites. We covered the main ingredients, like oats and peanut butter. You learned about optional add-ins and seasonings you can try. I shared step-by-step instructions to guide you through the process. Remember, you can customize your bites to fit your taste. Try different flavors, adjust for allergens, and store them properly. Enjoy creating these healthy snacks that fit your needs. Happy snacking!](https://goldendishy.com/wp-content/uploads/2025/06/48776490-fb92-4f64-9515-66f21e34c535-768x768.webp)


![To make healthy peanut butter oat bars, you need a few key items: - 2 cups rolled oats - 1/2 cup natural peanut butter - 1/4 cup honey or maple syrup - 1/4 cup unsweetened applesauce - 1/2 cup mixed nuts (almonds, walnuts, cashews), roughly chopped - 1/4 cup dark chocolate chips (optional) - 1/2 teaspoon ground cinnamon - 1/4 teaspoon sea salt These ingredients work together to create a tasty and nutritious snack. The oats provide fiber, while the peanut butter adds protein and healthy fats. Honey or maple syrup gives sweetness, and applesauce keeps the bars moist. You can easily change your bars by adding extra flavors or textures. Here are some fun options: - Dried fruits (like cranberries or raisins) - Seeds (like chia or flaxseed) - Protein powder for an extra boost - Coconut flakes for added flavor Feel free to mix and match these add-ins to suit your taste. These oat bars pack a nutritious punch. Here’s a quick look at what you’ll get: - Calories: About 150 per bar - Protein: Around 5g, thanks to the peanut butter and nuts - Fiber: Approximately 3g from the oats and nuts - Healthy Fats: Includes unsaturated fats from the peanut butter and nuts These bars not only taste great but also fuel your body. With their balanced nutrition, they make a perfect snack or breakfast option. For the complete recipe, check the Full Recipe link. Start by preheating your oven to 350°F (175°C). This step ensures even baking. Next, grab an 8x8-inch baking pan. Line it with parchment paper, letting some paper hang over the edges. This makes it easy to lift the bars out later. In a large mixing bowl, combine 2 cups of rolled oats, 1/2 teaspoon of ground cinnamon, and 1/4 teaspoon of sea salt. Stir well until the dry ingredients are mixed evenly. This mix creates a solid base for your bars. In a separate bowl, blend together 1/2 cup of natural peanut butter, 1/4 cup of honey or maple syrup, and 1/4 cup of unsweetened applesauce. Mix vigorously until the mixture is smooth. Pour this wet mixture into the bowl with the dry ingredients. Stir thoroughly, ensuring all the oats are coated. Now, it’s time for the fun part! Fold in 1/2 cup of roughly chopped mixed nuts and 1/4 cup of dark chocolate chips, if you want a sweet touch. Make sure to distribute these extras evenly throughout the batter. Spoon the mixture into your prepared baking pan. Use a spatula or your hands to press the mixture down firmly. This ensures the bars hold their shape while baking. Bake in the preheated oven for 20-25 minutes. Look for a lovely golden brown color on the edges. Once done, remove the pan from the oven. Let it cool for about 10 minutes. Use the parchment paper to lift the bars from the pan and place them on a wire rack. Allow them to cool completely before cutting into your desired size. You can store any leftovers in an airtight container to keep them fresh. Enjoy these tasty treats as a snack or a quick breakfast! For the complete recipe, see the Full Recipe section. To get the best texture for your peanut butter oat bars, use rolled oats. They stay chewy and hold together well. If you want a softer bar, add a bit more applesauce. For crunch, add more nuts. Press the mixture firmly into the pan. This helps the bars hold their shape when baked. Store your bars in an airtight container. This keeps them fresh and moist. You can also layer parchment paper between bars to prevent sticking. If you want to keep them longer, freeze them. They freeze well for up to three months. Just wrap them tightly in plastic wrap before placing them in a freezer bag. These bars make a great snack or breakfast. Cut them into small squares for easy grabbing. Pair them with yogurt or fruit for a balanced meal. You can also drizzle some honey on top for added sweetness. Feel free to explore the [Full Recipe] for more ideas on how to enjoy these delicious treats! {{image_4}} You can change up the nuts in your oat bars. Use almonds, walnuts, or cashews. If you like seeds, try adding pumpkin seeds or sunflower seeds. These options add crunch and healthy fats. Mix and match to find your favorite combination. If you want a different sweet taste, try maple syrup instead of honey. You can also use agave nectar for a milder flavor. For a low-calorie option, consider stevia or monk fruit sweetener. Each sweetener changes the taste just a little. Adding fruits and spices can make your bars pop with flavor. Try mashed bananas or dried fruits like cranberries or apricots. For spices, add a pinch of nutmeg or ginger for warmth. You can even fold in some cocoa powder for a chocolatey twist. These small changes can make your bars exciting and unique. To keep your healthy peanut butter oat bars fresh, store them in an airtight container. This helps to lock in moisture and flavor. You can keep them at room temperature for up to a week. If you want them to last longer, consider refrigerating them. The cool air helps maintain their taste and texture. Freezing is a great way to extend the life of your oat bars. Wrap each bar tightly in plastic wrap. Then place them in a freezer-safe bag or container. You can freeze the bars for up to three months. When you're ready to enjoy them, just take out a bar and let it thaw on the counter. If you prefer warm bars, you can reheat them. Simply place a bar in the microwave for about 15-20 seconds. This warms them up nicely and brings back their fresh-baked taste. If you stored them in the fridge, let them sit at room temperature for a few minutes before warming to avoid cold centers. For more details, check out the Full Recipe. Yes, you can swap peanut butter for almond, cashew, or sunbutter. Each nut butter brings its own flavor. Almond butter gives a creamy texture, while cashew butter is milder. Sunbutter is a great option for nut allergies. Just make sure to choose a natural nut butter without added sugars or oils. These oat bars last about one week at room temperature. Keep them in an airtight container. For longer storage, they can stay fresh in the fridge for about two weeks. If you want to enjoy them later, freeze the bars. They can last up to three months in the freezer. Just thaw them when you are ready to eat. Yes, this recipe is gluten-free if you use certified gluten-free oats. Most rolled oats are naturally gluten-free. However, some brands may process oats with gluten-containing grains. Always check the label before buying. This way, you can enjoy your oat bars without worry. Yes, you can skip added sugars. Use ripe bananas instead of honey or maple syrup. Applesauce also adds natural sweetness. You can add a bit more applesauce if you want a sweeter taste. This keeps the oat bars healthy and tasty without extra sugar. You now have a complete guide to making healthy peanut butter oat bars. We covered essential ingredients and fun add-ins to suit your taste. Step-by-step instructions ensure your bars come out perfectly every time. I shared tips for the best texture and storage methods to keep them fresh. You can also explore different variations for added flavor. These oat bars are easy to make, fun to customize, and nutritious. Enjoy your delicious, homemade snacks!](https://goldendishy.com/wp-content/uploads/2025/07/83a658d4-f414-4ba0-9f79-92aafa211a05-768x768.webp)
. To keep your scones fresh, let them cool completely. Place them in an airtight container. You can store them at room temperature for up to three days. If you live in a humid area, refrigerate them to prevent spoilage. Use parchment paper between layers to keep them from sticking. Reheat your scones for the best taste. Preheat your oven to 350°F (175°C). Place the scones on a baking sheet. Heat them for about 5 to 10 minutes, or until warm. You can also use a microwave. Heat them for 15 to 20 seconds. This warms them quickly but may make them soft. To freeze scones, wrap each one in plastic wrap. Place them in a freezer bag or airtight container. Label with the date for easy tracking. They can last up to three months in the freezer. When ready to eat, thaw them in the fridge overnight. Reheat as mentioned above for a fresh taste. Check the Full Recipe for more tips on making these treats! To make cinnamon roll scones, follow this simple process. First, mix the dry ingredients in a bowl. This includes flour, sugar, baking powder, salt, and cinnamon. Next, cut in cold butter until the mix looks crumbly. Then, whisk buttermilk, melted butter, and vanilla in another bowl. Combine the wet and dry mixes gently. Pat the dough into a rectangle, brush melted butter, and sprinkle brown sugar for the swirl. Roll it up, slice it, and bake. For the full recipe, check the details above. Yes, you can use milk instead of buttermilk. If you do, add a splash of lemon juice or vinegar. This helps the milk mimic buttermilk's tangy flavor. It also makes the scones soft and fluffy. However, buttermilk adds a richer taste. Serve cinnamon roll scones warm for the best taste. Drizzle the icing over the top just before serving. You can also sprinkle a little cinnamon on top for added flavor. Pair them with coffee or tea for a relaxing treat. They look great on a nice platter. Cinnamon roll scones last for about two days at room temperature. To keep them fresh longer, store them in an airtight container. You can also refrigerate them for up to a week. Just warm them in the oven before serving to regain that fresh-baked taste. Yes, you can make cinnamon roll scones ahead of time. Prepare the dough, and cut the scones. Then, place them on a baking sheet and freeze until firm. After that, transfer them to a bag or container. When you’re ready, bake them straight from the freezer, adding a few extra minutes to the baking time. This way, you enjoy fresh scones anytime! Making scones is simple and fun. You learned about ingredients, tools, and baking steps. I shared tips to help you avoid mistakes and find the best flavors. You also discovered flavor variations and storage methods. Scones can be your tasty treat for any occasion. With a few easy steps, you can impress your friends. Enjoy baking, and don’t forget to share your tasty results!](https://goldendishy.com/wp-content/uploads/2025/07/878de396-77ac-4fc1-b8cf-b56551936fe1-768x768.webp)
