Peach Salsa Fresh and Flavorful Summer Delight

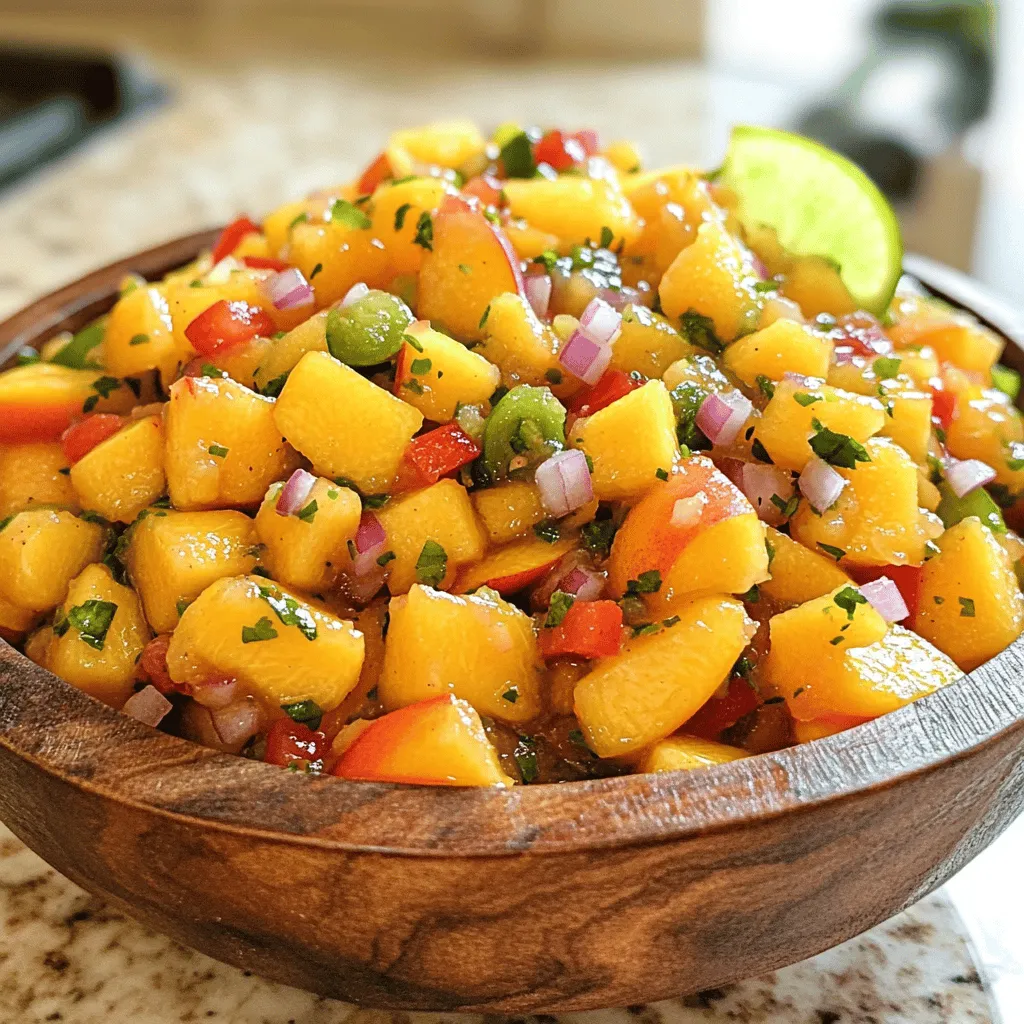
Are you ready to savor the taste of summer? This Peach Salsa is fresh and packed with flavor! Perfect for backyard BBQs, it combines ripe peaches with crisp veggies and zesty lime. In this blog post, I’ll guide you through the simple steps to create this vibrant dish, share tips for the best results, and explore fun variations. Let’s dive into making a delicious peach salsa that will impress your friends and family!
Ingredients
Fresh Ingredients for Peach Salsa
– 2 ripe peaches
– 1 medium red bell pepper
– ½ small red onion
– 1 jalapeño
– ¼ cup fresh cilantro
– Juice of 1 lime
– 1 teaspoon honey or agave syrup (optional)
– Salt and freshly ground black pepper
To make a great peach salsa, you need fresh ingredients. Using ripe peaches is key. They should be soft and fragrant. The bell pepper adds crunch and sweetness. Red onion gives a nice bite.
Jalapeño adds heat, so adjust it based on your taste. If you like it milder, remove the seeds. Fresh cilantro brings a bright flavor that balances the dish. Lime juice adds acidity, making the salsa lively. The optional honey or agave syrup can enhance sweetness.
Always season with salt and black pepper to bring out the flavors. This combination creates a fresh and vibrant salsa that shines.
Step-by-Step Instructions
Preparation of Ingredients
– Dice 2 ripe peaches into small cubes.
– Chop 1 medium red bell pepper into even pieces.
– Mince ½ small red onion into tiny bits.
– Mince 1 jalapeño, removing the seeds for less heat.
Mixing the Salsa
– In a medium mixing bowl, combine the diced peaches, chopped red bell pepper, minced onion, and jalapeño.
– Gently stir the mixture to keep the peaches intact.
– Add ¼ cup of finely chopped cilantro to the bowl.
– Squeeze the juice of 1 lime over the mixture.
Seasoning and Serving
– Toss the ingredients together gently until coated.
– Season with salt and freshly ground black pepper to taste.
– Let the salsa sit for at least 15 minutes. This time lets the flavors blend.
Tips & Tricks
Making Perfect Peach Salsa
First, always choose ripe peaches. They should feel soft, but not mushy. A good peach has a sweet smell and vibrant color. Ripe peaches make the salsa shine.
Next, balance the sweetness with lime juice. The tartness helps enhance the peach flavor. Start with the juice of one lime. You can add more if needed. If you like it sweeter, drizzle in a bit of honey or agave syrup. Just a teaspoon will do!
Presentation Tips
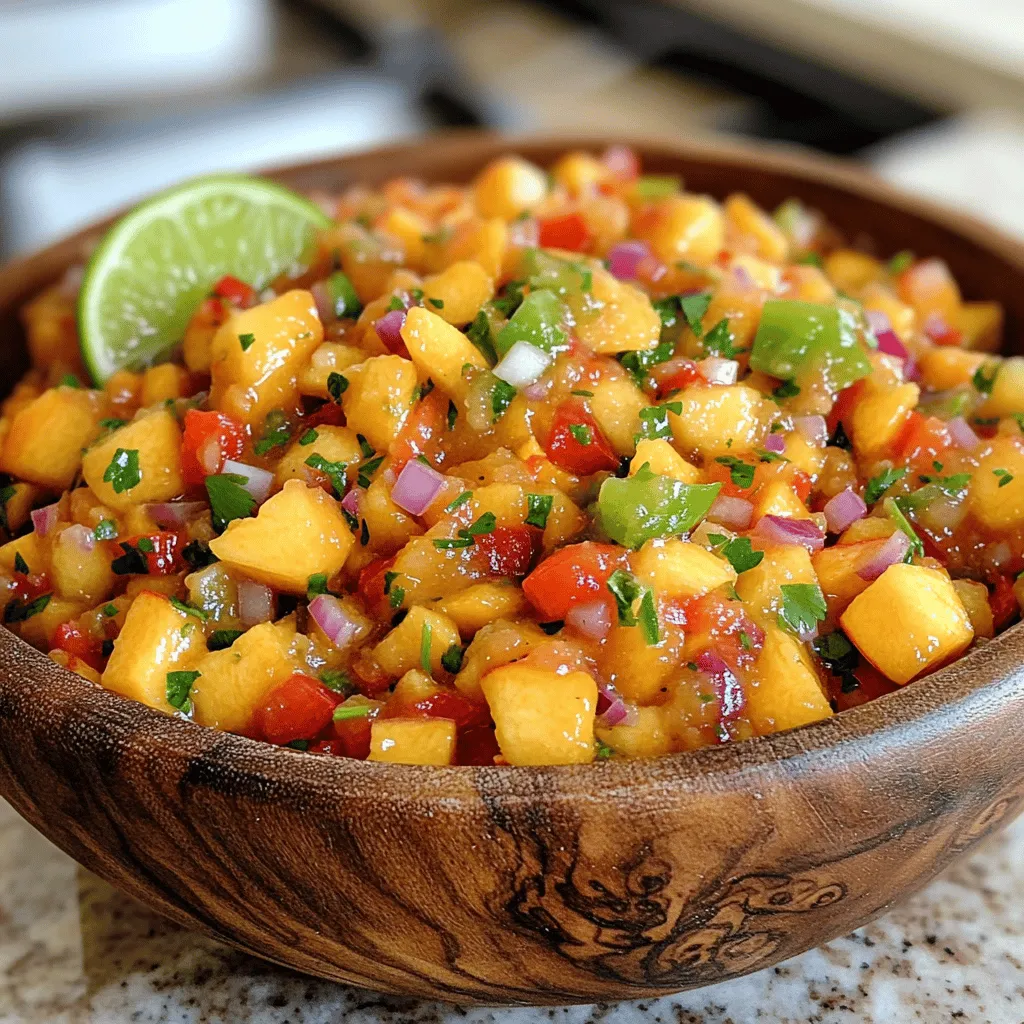
Serve your Peach Salsa Fiesta in a colorful bowl. Bright colors make the dish more inviting. You can use bowls in shades of blue or green for a nice contrast.
For garnish, consider adding extra cilantro leaves. This not only looks great but also boosts the aroma. You might also sprinkle some diced red bell pepper on top. This adds a pop of color and texture.
For an eye-catching setup, pair the salsa with tortilla chips. This creates a fun and tasty snack or appetizer. Explore different serving styles to find what you like best!

Variations
Different Ingredient Options
You can easily switch things up in your peach salsa. Try adding mango for a tropical twist. Mango adds a nice sweetness that pairs well with peaches. You can also use avocado for a creamy texture. Avocado makes the salsa richer and more filling.
If you want to change the flavor, consider alternative onions. Instead of red onion, use green onions. Green onions offer a milder taste and a fresh crunch. They are a great choice if you prefer a gentler onion flavor.
Flavor Profile Adjustments
Adjusting the heat level is easy. If you like spice, add more jalapeño. Start with one and keep adding until it’s just right for you. The heat from the jalapeño will give your salsa a nice kick.
You can also sweeten your salsa in different ways. Try using mango nectar instead of honey. It adds sweetness without overpowering the peaches. This small change can make a big difference in taste.
Nutritional Info & Benefits
Health Benefits of Peach Salsa
Peach salsa is not just tasty; it’s also good for you! Peaches are full of vitamins, especially vitamin C. This vitamin helps your body stay strong and fight off sickness. The antioxidants in peaches also help protect your cells from damage. The salsa is low in calories, making it a smart choice for snacks or meals. You can enjoy it without worrying about extra calories. Plus, it has a mix of flavors that can brighten up any dish.
Nutritional Breakdown
In each serving of peach salsa, you get the following nutrients:
– Calories: About 50
– Protein: 1 gram
– Fat: 0 grams
– Carbohydrates: 13 grams
This makes peach salsa a healthy, low-calorie option. It fits well into many diets, allowing you to enjoy great taste while staying healthy.
FAQs
How long does peach salsa last?
Peach salsa lasts about 3 to 5 days in the fridge. Store it in an airtight container. This keeps it fresh and tasty. You might notice that the peaches soften over time. If you want to enjoy it longer, keep an eye on freshness.
Can I freeze peach salsa?
Yes, you can freeze peach salsa! Use a freezer-safe container. Leave some space at the top for expansion. When you are ready to use it, thaw it in the fridge overnight. This helps keep the flavors intact. Avoid refreezing after thawing to maintain the best taste.
What can I serve with peach salsa?
Peach salsa pairs well with many dishes. Here are some ideas:
– Chips: Serve it with tortilla chips for a fun snack.
– Grilled meats: Top grilled chicken or fish for a fresh twist.
– Tacos: Add it to your tacos for a burst of flavor.
– Salads: Mix it into salads for added sweetness and crunch.
Peach salsa is fresh, vibrant, and easy to make. We covered key ingredients, like ripe peaches and bell peppers, and walked through each step. You learned tips to enhance flavor and make it look great. Options for variations let you adapt it to your taste. Plus, it’s healthy and packed with nutrients. Now you have all you need to impress friends and family with your homemade peach salsa. Enjoy the deliciousness and health benefits of this simple dish!


![- 2 medium zucchinis, grated - 2 medium carrots, grated - 1/2 cup all-purpose flour - 1/4 cup grated Parmesan cheese - 1 large egg - 2 green onions, finely chopped - 2 cloves garlic, minced - 1 teaspoon dried oregano - 1/2 teaspoon salt - 1/4 teaspoon black pepper - Olive oil for frying These ingredients form the base of your zucchini carrot fritters. The grated zucchini and carrots give them a fresh taste and bright color. The flour and cheese help bind everything together, while the egg adds richness. Don’t forget the seasonings! They bring out all the flavors. - Fresh herbs like parsley or dill - Additional cheese variants such as feta or cheddar These optional ingredients can elevate your fritters. Fresh herbs add a burst of flavor and color. You can also mix in different cheeses for a unique twist. - Gluten-free options: Use almond flour or gluten-free flour - Dairy-free alternatives: Replace cheese with nutritional yeast If you need to make dietary changes, these substitutions work well. Gluten-free flour keeps the fritters light and fluffy. Nutritional yeast adds a cheesy flavor without dairy. You can still enjoy delicious fritters that fit your needs. Check the [Full Recipe] for more details! - Grating Vegetables Start by grating the zucchinis and carrots. I use a box grater for this. It makes the job easy and quick. - Removing Excess Moisture After grating, place the vegetables in a clean kitchen towel. Twist and squeeze to remove as much liquid as possible. This step is key. It helps the fritters stay firm and not soggy. - Combining Dry and Wet Ingredients In a large bowl, mix the drained zucchini and carrot with flour, Parmesan cheese, egg, green onions, garlic, oregano, salt, and pepper. Stir well to combine. You want a smooth and even mixture. - Ensuring a Cohesive Mixture Check that all ingredients are mixed thoroughly. The batter should hold together well. This cohesive mixture is vital for great fritters. - Heating the Skillet Heat a non-stick skillet over medium heat. Add a couple of tablespoons of olive oil. Wait until the oil is hot and shimmering but not smoking. - Frying Tips for Crispiness Scoop about 2 tablespoons of the fritter mix into the skillet. Flatten each scoop gently with a spatula. This helps them cook evenly. Fry each fritter for about 3-4 minutes on each side. Look for a golden brown color and a crispy texture. If needed, fry in batches, adding more oil as you go. Serve them warm, and enjoy the tasty crunch! For the full recipe, check out the [Full Recipe]. To make great zucchini carrot fritters, moisture removal is key. Grated vegetables hold a lot of water. If you don’t squeeze them dry, your fritters turn out soggy. After grating, use a clean kitchen towel. Place the veggies in the towel and twist it tightly. This method gets rid of extra liquid, ensuring crispy fritters. Cooking temperature control is also important. Use medium heat for frying. If the temperature is too low, the fritters will absorb too much oil. If it's too high, they will burn on the outside and stay raw inside. A good test is to add a small bit of batter to the pan. If it sizzles right away, you're ready to go! For dipping sauces, yogurt pairs perfectly. You can also try a spicy mayo or tzatziki. These sauces enhance the flavors and add creaminess. For sides, serve your fritters with a crisp salad or roasted veggies. Both options balance the meal nicely. Adding spices can elevate your fritters. Try a pinch of cayenne for heat or smoked paprika for depth. Herbs like dill or parsley can also add freshness. You can mix in other vegetables too. Finely chopped bell peppers or spinach work well. They add color and nutrition, making your fritters even better. For the full recipe, check out the complete guide above! {{image_4}} You can switch up the flavors in your zucchini carrot fritters to keep things interesting. - Spicy Zucchini Carrot Fritters: Add some heat! Mix in chopped jalapeños or red pepper flakes. This will give your fritters a nice kick. You can also serve them with a spicy dipping sauce. - Mediterranean-Inspired Fritters: Want a fresh twist? Use feta cheese, fresh dill, and olives in your batter. These flavors will transport you to the sunny Mediterranean coast. You can easily modify this recipe to fit your dietary needs. - Vegan Version: Replace the egg with a flaxseed or chia seed mix. Combine 1 tablespoon of seeds with 2.5 tablespoons of water. Let it sit until it becomes gel-like. This will bind your fritters well. - Low-Carb Options: For a low-carb twist, swap all-purpose flour for almond flour. This keeps your fritters tasty and lower in carbs. The shape and size of your fritters can change how you serve them. - Mini Bites for Appetizers: Form smaller fritters for easy snacking. They are perfect for parties and gatherings. Just adjust the cooking time to avoid burning. - Larger Fritters for Main Dishes: Make bigger fritters for a hearty meal. Serve them with a salad for a complete dish. They also hold up nicely on a bun for a veggie burger. You can find the full recipe for zucchini carrot fritters above. Enjoy experimenting with these variations to suit your taste! How do you store leftover fritters? Place them in an airtight container. Use parchment paper between layers to keep them crisp. This helps prevent sogginess. What are the best practices for freshness? Store fritters in the fridge for up to three days. Keep the container sealed tight. This keeps them tasty and prevents drying out. Should you freeze fritters before or after cooking? You can freeze them both ways. For the best texture, freeze them uncooked. It helps keep them crisp when cooked later. What are the thawing and reheating tips? Thaw the fritters in the fridge overnight. Reheat them in a skillet over medium heat. Add a little oil for that crispy edge. How long do refrigerated fritters last? They stay good for about three days in the fridge. After that, the texture and flavor may change. What is the freezer storage timeframe? Frozen fritters can last up to two months. Make sure they are in a sealed bag or container. This protects against freezer burn. For more details, check the [Full Recipe]. Yes, you can use frozen zucchini or carrots. However, they will change the texture and flavor. Frozen veggies often hold more water. This extra moisture can make fritters soggy. If you use frozen, let them thaw and squeeze out the water. After that, they can work well in your fritters. To make fritters crispy, focus on a few key tips. First, remove as much moisture as possible from the grated vegetables. Use a clean towel to squeeze out water. Next, heat your oil until it's hot but not smoking. Fry fritters in small batches and leave space between them. This way, they cook evenly. You have many tasty options for dips. Here are some favorites: - Greek yogurt with lemon juice - Spicy sriracha mayo - Creamy ranch dressing - Simple tzatziki sauce These dips add flavor and complement the fritters well. They enhance the meal, making it even more enjoyable. For a full recipe, check the details above! Zucchini and carrot fritters are simple to make and delicious. We covered essential ingredients, like grated veggies, flour, and cheese. You learned how to prepare, mix, and fry the batter for perfect bites. I shared tips to ensure crispness and flavor, plus variations for diets. Don’t forget to store any extras properly! Now you can enjoy these fritters at any meal, with great dips, or as snacks. Have fun cooking and experimenting with these ideas!](https://goldendishy.com/wp-content/uploads/2025/06/18ed450f-8e43-4a66-9091-0bc3385fc8fe-768x768.webp)
![- 1 can (15 oz) chickpeas, drained and rinsed - 1 can (5 oz) tuna in water, drained - 1/4 cup Greek yogurt or vegan mayonnaise (optional) - 1 tablespoon Dijon mustard - 1/2 red bell pepper, finely chopped - 1/4 red onion, finely chopped - 1/4 cup fresh parsley, chopped - 1 tablespoon fresh lemon juice - Seasoning: Salt and pepper to taste - Optional: 1 ripe avocado, diced To make this salad, gather all the ingredients listed above. The chickpeas and tuna serve as the base. Chickpeas give a nice texture, while tuna adds protein. The Greek yogurt or vegan mayo brings creaminess. Dijon mustard gives it a tangy kick. Chop the red bell pepper and red onion finely for a nice crunch. Fresh parsley adds color and flavor. A squeeze of lemon juice brightens up the dish. You can also add diced avocado for extra creaminess. This Easy Chickpea Tuna Salad is perfect for lunch or a light dinner. You can follow the [Full Recipe] for step-by-step guidance. - Lightly mash the chickpeas in a large mixing bowl. - Combine the drained tuna with the chickpeas. - Whisk together Greek yogurt, Dijon mustard, and lemon juice in a small bowl. - Pour the yogurt mixture over the chickpeas and tuna. - Fold in the chopped red bell pepper, red onion, parsley, and optional avocado. - Season with salt and pepper to taste. - Serve immediately or chill before serving. This Easy Chickpea Tuna Salad is simple and quick. You can find the Full Recipe for more details. Enjoy it as a meal or snack! - Use freshly squeezed lemon juice for a brighter flavor. This adds freshness. - Adjust seasoning to taste. Start with a little and add more if needed. - Pair the salad with whole grain crackers. This adds crunch and fullness. - Serve as a filling for lettuce wraps. It makes a great low-carb meal. - Garnish with extra parsley and lemon wedges. This makes your dish look bright and inviting. - Use a colorful bowl to showcase the vibrant ingredients. This enhances the overall experience. For the full recipe, check the detailed steps to create this delicious dish! {{image_4}} You can easily change up the recipe to suit your taste. If you want a plant-based option, swap Greek yogurt for vegan mayonnaise. This keeps the salad creamy and tasty. You can also switch the chickpeas for different beans. Black beans or white beans both work well. These swaps give you a fun twist on the classic recipe. Want to add some crunch? Diced celery is a great choice. It brings a nice texture to the salad. If you like salty flavors, try adding olives. They give a briny kick that pairs well with the other ingredients. Feel free to get creative with your flavor choices! If you need to make it gluten-free, check the ingredients you use. Most of the items in the salad should be gluten-free. Just make sure that any sauces or extras are also gluten-free. This way, you can enjoy the salad without worry. For the Full Recipe, check out the complete guide for making this delicious dish! Store your chickpea tuna salad in an airtight container. This keeps it fresh. Make sure the lid is on tight. For the best taste, eat it within 3-4 days. After this time, it may lose flavor. This salad is best served cold or at room temperature. Avoid reheating to keep the texture and taste just right. Enjoy it straight from the fridge for a quick meal! Yes, you can make it a few hours in advance. This gives the flavors time to meld together. I often make this salad in the morning for lunch later. It’s easy and saves time! Absolutely! This salad holds up well for meal prep. You can store it in the fridge for a few days. It remains tasty and fresh, making it a great option for busy weeks. This salad is high in protein, fiber, and healthy fats. Chickpeas provide protein and fiber, while tuna adds more protein. Greek yogurt gives creaminess and healthy fats. Overall, it's a nutritious choice for any meal. In this article, we explored how to make a tasty and simple Chickpea Tuna Salad. You learned the key ingredients and followed easy steps to prepare it. We discussed tips for adding flavor and how to store any leftovers. Finally, the salad’s health benefits make it a smart choice for meals. This salad is quick, nutritious, and great for any occasion. Enjoy making it in your own kitchen!](https://goldendishy.com/wp-content/uploads/2025/07/30687038-eca4-4cc3-b428-c7157439eb59-768x768.webp)


