Peach and Basil Flatbread Flavorful Summer Delight
![Creating Peach and Basil Flatbread is simple and fun. Here’s what you need: - Pre-made flatbread or naan - Ripe peaches - Fresh mozzarella cheese - Fresh basil leaves - Olive oil - Balsamic glaze (optional) - Salt and pepper - Red pepper flakes (optional) Each ingredient adds its own flair. The flatbread or naan forms a sturdy base. Ripe peaches bring sweetness. Fresh mozzarella melts beautifully, creating a rich layer. Fresh basil adds a burst of flavor that ties everything together. Olive oil enhances the taste and helps with crispness. Balsamic glaze can heighten the sweet and tangy notes. Remember to season with salt and pepper for balance. If you like some heat, sprinkle red pepper flakes on top. This mix of ingredients makes for a delightful summer treat. You can find the full recipe to guide you through the steps. 1. Preheat your oven to 425°F (220°C). This helps the flatbread bake evenly. 2. Line a baking sheet with parchment paper. This keeps the flatbread from sticking. Place your flatbread or naan on the lined sheet. 3. Brush the flatbread with olive oil using a spoon or brush. This adds flavor and helps it crisp up. 4. Spread the shredded mozzarella cheese evenly over the flatbread. This creates a creamy base. 5. Layer the thinly sliced peaches on top of the cheese. Make sure each slice is well-placed for the best taste. 6. Season with salt, pepper, and red pepper flakes if you like some heat. This adds extra flavor. 1. Bake the flatbread in the oven for 10-12 minutes. Keep an eye on it until the cheese melts and bubbles. 2. Watch for the cheese to brown lightly. This gives the flatbread a nice, toasty flavor. 1. After baking, take the flatbread out of the oven. Sprinkle the torn basil leaves on top while it's hot. This brings out the fresh aroma. 2. If you want, drizzle balsamic glaze over the flatbread for extra flavor. This adds a sweet and tangy twist. 3. Let the flatbread cool for a couple of minutes. Then slice it up for sharing or enjoying by yourself. This method makes a Peach and Basil Flatbread that bursts with flavor, perfect for summer. For the complete recipe, check [Full Recipe]. - Selecting ripe peaches for the best flavor Choose peaches that feel slightly soft but are not mushy. Look for a rich color, usually yellow or orange, indicating ripeness. The aroma should be sweet and fragrant. These factors ensure your flatbread bursts with juicy flavor. - Cheese melting tips for a creamy texture Use fresh mozzarella for the best melt. Shred it yourself for a creamier texture. Spread the cheese evenly on the flatbread, ensuring each bite has that gooey goodness. Bake until bubbly and golden for added richness. - Seasoning tricks for additional flavor enhancement Season your flatbread with salt and pepper. Add red pepper flakes for a spicy kick if you like heat. A drizzle of balsamic glaze at the end gives a sweet tang. These little touches elevate the dish. - Best sides or drinks to pair with the dish Serve with a fresh green salad or a cool cucumber salad. A chilled white wine or sparkling water pairs nicely. These sides balance the sweetness of the peaches and the creaminess of the cheese. - Presentation tips to impress guests Use a wooden board or a large platter for serving. Garnish with extra basil leaves for color. A small bowl of balsamic glaze on the side invites guests to add more if they wish. This presentation makes the dish even more tempting. For the full recipe, you can check out the details above. Enjoy creating your Peach and Basil Flatbread! {{image_4}} You can change the cheese to create new flavors. Goat cheese adds a tangy taste. Feta cheese brings a salty bite. Both pair well with peaches. You can also add proteins to make it heartier. Prosciutto gives a nice savory touch. Grilled chicken adds a juicy element. Both options enhance the flatbread's flavor. Try different toppings to switch things up. Arugula adds peppery notes. Toasted nuts give a crunchy texture. Both add depth and interest to each bite. You can also explore different herbs. Mint offers a refreshing twist, while thyme adds warmth. Each herb changes the flatbread's character, making it unique. For the full recipe, check the details above to get started on this delightful dish! To keep your Peach and Basil Flatbread fresh, store leftovers in the fridge. Wrap the flatbread in plastic wrap or foil. This helps to prevent it from drying out. You can also place it in an airtight container for extra protection. The flatbread lasts for about 2 to 3 days in the fridge. After that, the quality may decline. When reheating, the oven works best for keeping that crispy texture. Preheat your oven to 350°F (175°C). Place the flatbread directly on the oven rack or on a baking sheet. Heat for about 5 to 8 minutes until warm. If you use a microwave, the flatbread may become soggy. To maintain crispness, heat it in short bursts and check often. Enjoy your flatbread just like it was fresh from the oven! How do I know when the peaches are ripe enough? Look for peaches that are slightly soft to the touch. The color should be a warm golden hue. A sweet aroma is a good sign of ripeness too. If they feel hard, give them a few more days at room temperature. Can I use frozen flatbread or naan for this recipe? Yes, you can use frozen flatbread or naan. Just thaw them first. You may need to adjust baking time. Keep an eye on the cheese to avoid burning. What can I substitute for mozzarella cheese? If you don’t have mozzarella, try goat cheese or feta. They add a tangy flavor. You can also use provolone for a similar texture. How do I make this flatbread in advance? You can prepare the flatbread up to the baking step. Assemble it and store it in the fridge. Bake it when you are ready to serve. This keeps the flatbread fresh and tasty. For the best results, use it within a day. In this blog post, we explored how to make delicious Peach and Basil Flatbread. I shared key ingredients, easy steps, and tips for the best results. Remember to use ripe peaches and choose your cheese wisely. You can even mix in proteins or herbs for unique flavors. Storing leftovers properly keeps them fresh. With easy reheating tips, you can enjoy your flatbread again. Try this recipe for a tasty treat and impress your friends and family! Happy cooking!](https://goldendishy.com/wp-content/uploads/2025/07/1088bccc-4c8b-4254-a72a-0cec77bef739.webp)
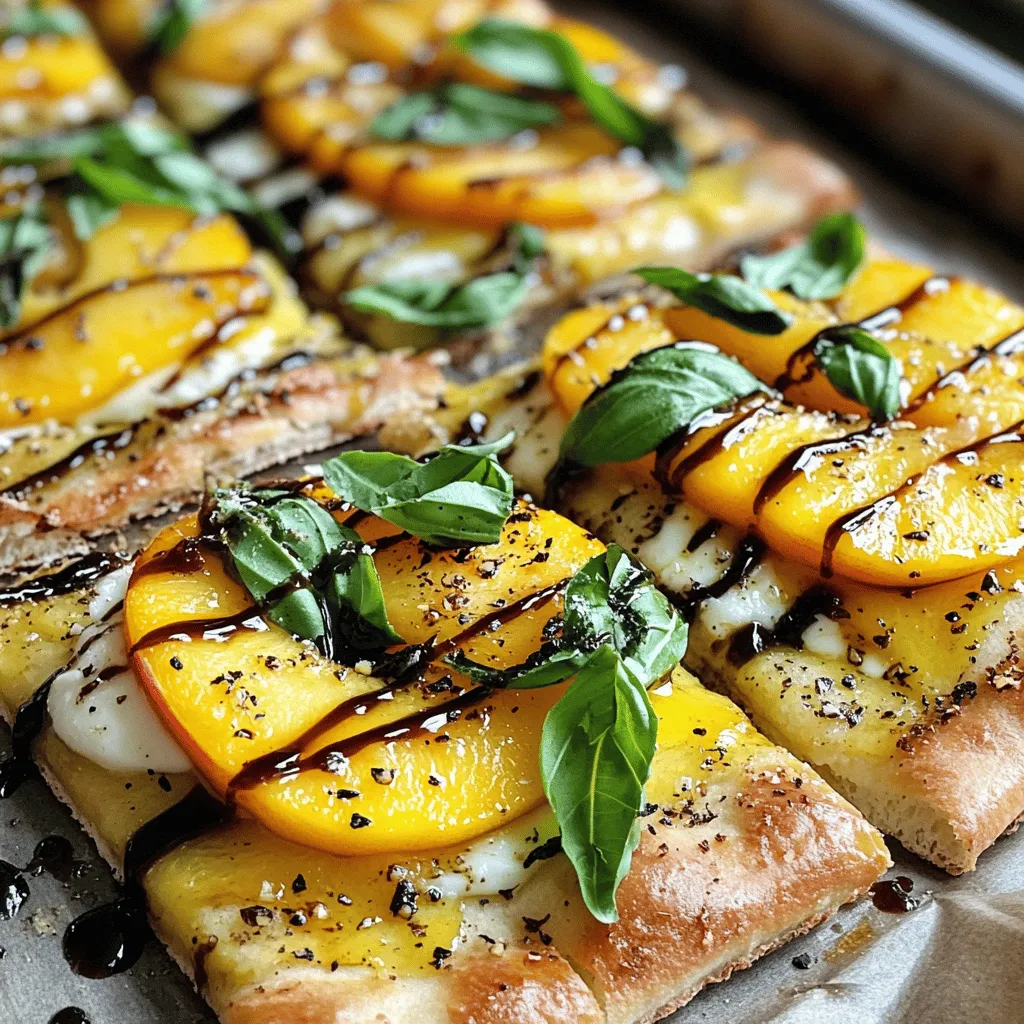
Are you ready to savor a fresh and tasty summer treat? Peach and basil flatbread combines sweet and savory in one bite. With just a few simple ingredients, you can impress family and friends with this easy-to-make dish. Whether it’s a sunny picnic or a cozy dinner at home, this flatbread will delight your taste buds. Let’s dive into the flavors and make something special today!
Ingredients
Creating Peach and Basil Flatbread is simple and fun. Here’s what you need:
– Pre-made flatbread or naan
– Ripe peaches
– Fresh mozzarella cheese
– Fresh basil leaves
– Olive oil
– Balsamic glaze (optional)
– Salt and pepper
– Red pepper flakes (optional)
Each ingredient adds its own flair. The flatbread or naan forms a sturdy base. Ripe peaches bring sweetness. Fresh mozzarella melts beautifully, creating a rich layer. Fresh basil adds a burst of flavor that ties everything together. Olive oil enhances the taste and helps with crispness. Balsamic glaze can heighten the sweet and tangy notes. Remember to season with salt and pepper for balance. If you like some heat, sprinkle red pepper flakes on top.
This mix of ingredients makes for a delightful summer treat.
Step-by-Step Instructions
Preparation Steps for Peach and Basil Flatbread
1. Preheat your oven to 425°F (220°C). This helps the flatbread bake evenly.
2. Line a baking sheet with parchment paper. This keeps the flatbread from sticking. Place your flatbread or naan on the lined sheet.
3. Brush the flatbread with olive oil using a spoon or brush. This adds flavor and helps it crisp up.
4. Spread the shredded mozzarella cheese evenly over the flatbread. This creates a creamy base.
5. Layer the thinly sliced peaches on top of the cheese. Make sure each slice is well-placed for the best taste.
6. Season with salt, pepper, and red pepper flakes if you like some heat. This adds extra flavor.
Baking Instructions
1. Bake the flatbread in the oven for 10-12 minutes. Keep an eye on it until the cheese melts and bubbles.
2. Watch for the cheese to brown lightly. This gives the flatbread a nice, toasty flavor.
Final Touches
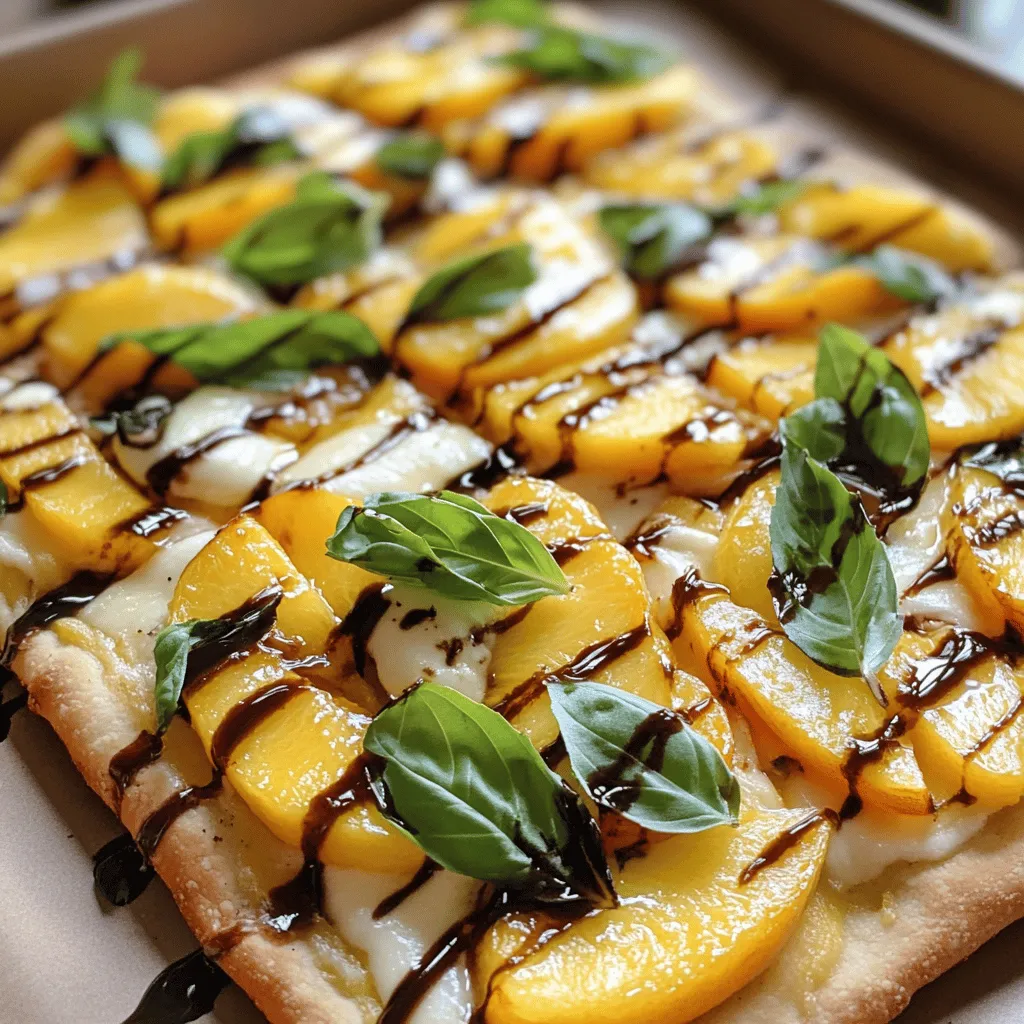
1. After baking, take the flatbread out of the oven. Sprinkle the torn basil leaves on top while it’s hot. This brings out the fresh aroma.
2. If you want, drizzle balsamic glaze over the flatbread for extra flavor. This adds a sweet and tangy twist.
3. Let the flatbread cool for a couple of minutes. Then slice it up for sharing or enjoying by yourself.
This method makes a Peach and Basil Flatbread that bursts with flavor, perfect for summer.
Tips & Tricks
Tips for Perfecting the Flatbread
– Selecting ripe peaches for the best flavor
Choose peaches that feel slightly soft but are not mushy. Look for a rich color, usually yellow or orange, indicating ripeness. The aroma should be sweet and fragrant. These factors ensure your flatbread bursts with juicy flavor.
– Cheese melting tips for a creamy texture
Use fresh mozzarella for the best melt. Shred it yourself for a creamier texture. Spread the cheese evenly on the flatbread, ensuring each bite has that gooey goodness. Bake until bubbly and golden for added richness.
– Seasoning tricks for additional flavor enhancement
Season your flatbread with salt and pepper. Add red pepper flakes for a spicy kick if you like heat. A drizzle of balsamic glaze at the end gives a sweet tang. These little touches elevate the dish.
Serving Suggestions
– Best sides or drinks to pair with the dish
Serve with a fresh green salad or a cool cucumber salad. A chilled white wine or sparkling water pairs nicely. These sides balance the sweetness of the peaches and the creaminess of the cheese.
– Presentation tips to impress guests
Use a wooden board or a large platter for serving. Garnish with extra basil leaves for color. A small bowl of balsamic glaze on the side invites guests to add more if they wish. This presentation makes the dish even more tempting.Enjoy creating your Peach and Basil Flatbread!

Variations
Ingredient Variations for Peach and Basil Flatbread
You can change the cheese to create new flavors. Goat cheese adds a tangy taste. Feta cheese brings a salty bite. Both pair well with peaches.
You can also add proteins to make it heartier. Prosciutto gives a nice savory touch. Grilled chicken adds a juicy element. Both options enhance the flatbread’s flavor.
Flavor Enhancements
Try different toppings to switch things up. Arugula adds peppery notes. Toasted nuts give a crunchy texture. Both add depth and interest to each bite.
You can also explore different herbs. Mint offers a refreshing twist, while thyme adds warmth. Each herb changes the flatbread’s character, making it unique.
Storage Info
Storing Leftover Flatbread
To keep your Peach and Basil Flatbread fresh, store leftovers in the fridge. Wrap the flatbread in plastic wrap or foil. This helps to prevent it from drying out. You can also place it in an airtight container for extra protection. The flatbread lasts for about 2 to 3 days in the fridge. After that, the quality may decline.
Reheating Instructions
When reheating, the oven works best for keeping that crispy texture. Preheat your oven to 350°F (175°C). Place the flatbread directly on the oven rack or on a baking sheet. Heat for about 5 to 8 minutes until warm. If you use a microwave, the flatbread may become soggy. To maintain crispness, heat it in short bursts and check often. Enjoy your flatbread just like it was fresh from the oven!
FAQs
Common Questions Related to Peach and Basil Flatbread
How do I know when the peaches are ripe enough?
Look for peaches that are slightly soft to the touch. The color should be a warm golden hue. A sweet aroma is a good sign of ripeness too. If they feel hard, give them a few more days at room temperature.
Can I use frozen flatbread or naan for this recipe?
Yes, you can use frozen flatbread or naan. Just thaw them first. You may need to adjust baking time. Keep an eye on the cheese to avoid burning.
What can I substitute for mozzarella cheese?
If you don’t have mozzarella, try goat cheese or feta. They add a tangy flavor. You can also use provolone for a similar texture.
How do I make this flatbread in advance?
You can prepare the flatbread up to the baking step. Assemble it and store it in the fridge. Bake it when you are ready to serve. This keeps the flatbread fresh and tasty. For the best results, use it within a day.
In this blog post, we explored how to make delicious Peach and Basil Flatbread. I shared key ingredients, easy steps, and tips for the best results. Remember to use ripe peaches and choose your cheese wisely. You can even mix in proteins or herbs for unique flavors. Storing leftovers properly keeps them fresh. With easy reheating tips, you can enjoy your flatbread again. Try this recipe for a tasty treat and impress your friends and family! Happy cooking!
![Creating Peach and Basil Flatbread is simple and fun. Here’s what you need: - Pre-made flatbread or naan - Ripe peaches - Fresh mozzarella cheese - Fresh basil leaves - Olive oil - Balsamic glaze (optional) - Salt and pepper - Red pepper flakes (optional) Each ingredient adds its own flair. The flatbread or naan forms a sturdy base. Ripe peaches bring sweetness. Fresh mozzarella melts beautifully, creating a rich layer. Fresh basil adds a burst of flavor that ties everything together. Olive oil enhances the taste and helps with crispness. Balsamic glaze can heighten the sweet and tangy notes. Remember to season with salt and pepper for balance. If you like some heat, sprinkle red pepper flakes on top. This mix of ingredients makes for a delightful summer treat. You can find the full recipe to guide you through the steps. 1. Preheat your oven to 425°F (220°C). This helps the flatbread bake evenly. 2. Line a baking sheet with parchment paper. This keeps the flatbread from sticking. Place your flatbread or naan on the lined sheet. 3. Brush the flatbread with olive oil using a spoon or brush. This adds flavor and helps it crisp up. 4. Spread the shredded mozzarella cheese evenly over the flatbread. This creates a creamy base. 5. Layer the thinly sliced peaches on top of the cheese. Make sure each slice is well-placed for the best taste. 6. Season with salt, pepper, and red pepper flakes if you like some heat. This adds extra flavor. 1. Bake the flatbread in the oven for 10-12 minutes. Keep an eye on it until the cheese melts and bubbles. 2. Watch for the cheese to brown lightly. This gives the flatbread a nice, toasty flavor. 1. After baking, take the flatbread out of the oven. Sprinkle the torn basil leaves on top while it's hot. This brings out the fresh aroma. 2. If you want, drizzle balsamic glaze over the flatbread for extra flavor. This adds a sweet and tangy twist. 3. Let the flatbread cool for a couple of minutes. Then slice it up for sharing or enjoying by yourself. This method makes a Peach and Basil Flatbread that bursts with flavor, perfect for summer. For the complete recipe, check [Full Recipe]. - Selecting ripe peaches for the best flavor Choose peaches that feel slightly soft but are not mushy. Look for a rich color, usually yellow or orange, indicating ripeness. The aroma should be sweet and fragrant. These factors ensure your flatbread bursts with juicy flavor. - Cheese melting tips for a creamy texture Use fresh mozzarella for the best melt. Shred it yourself for a creamier texture. Spread the cheese evenly on the flatbread, ensuring each bite has that gooey goodness. Bake until bubbly and golden for added richness. - Seasoning tricks for additional flavor enhancement Season your flatbread with salt and pepper. Add red pepper flakes for a spicy kick if you like heat. A drizzle of balsamic glaze at the end gives a sweet tang. These little touches elevate the dish. - Best sides or drinks to pair with the dish Serve with a fresh green salad or a cool cucumber salad. A chilled white wine or sparkling water pairs nicely. These sides balance the sweetness of the peaches and the creaminess of the cheese. - Presentation tips to impress guests Use a wooden board or a large platter for serving. Garnish with extra basil leaves for color. A small bowl of balsamic glaze on the side invites guests to add more if they wish. This presentation makes the dish even more tempting. For the full recipe, you can check out the details above. Enjoy creating your Peach and Basil Flatbread! {{image_4}} You can change the cheese to create new flavors. Goat cheese adds a tangy taste. Feta cheese brings a salty bite. Both pair well with peaches. You can also add proteins to make it heartier. Prosciutto gives a nice savory touch. Grilled chicken adds a juicy element. Both options enhance the flatbread's flavor. Try different toppings to switch things up. Arugula adds peppery notes. Toasted nuts give a crunchy texture. Both add depth and interest to each bite. You can also explore different herbs. Mint offers a refreshing twist, while thyme adds warmth. Each herb changes the flatbread's character, making it unique. For the full recipe, check the details above to get started on this delightful dish! To keep your Peach and Basil Flatbread fresh, store leftovers in the fridge. Wrap the flatbread in plastic wrap or foil. This helps to prevent it from drying out. You can also place it in an airtight container for extra protection. The flatbread lasts for about 2 to 3 days in the fridge. After that, the quality may decline. When reheating, the oven works best for keeping that crispy texture. Preheat your oven to 350°F (175°C). Place the flatbread directly on the oven rack or on a baking sheet. Heat for about 5 to 8 minutes until warm. If you use a microwave, the flatbread may become soggy. To maintain crispness, heat it in short bursts and check often. Enjoy your flatbread just like it was fresh from the oven! How do I know when the peaches are ripe enough? Look for peaches that are slightly soft to the touch. The color should be a warm golden hue. A sweet aroma is a good sign of ripeness too. If they feel hard, give them a few more days at room temperature. Can I use frozen flatbread or naan for this recipe? Yes, you can use frozen flatbread or naan. Just thaw them first. You may need to adjust baking time. Keep an eye on the cheese to avoid burning. What can I substitute for mozzarella cheese? If you don’t have mozzarella, try goat cheese or feta. They add a tangy flavor. You can also use provolone for a similar texture. How do I make this flatbread in advance? You can prepare the flatbread up to the baking step. Assemble it and store it in the fridge. Bake it when you are ready to serve. This keeps the flatbread fresh and tasty. For the best results, use it within a day. In this blog post, we explored how to make delicious Peach and Basil Flatbread. I shared key ingredients, easy steps, and tips for the best results. Remember to use ripe peaches and choose your cheese wisely. You can even mix in proteins or herbs for unique flavors. Storing leftovers properly keeps them fresh. With easy reheating tips, you can enjoy your flatbread again. Try this recipe for a tasty treat and impress your friends and family! Happy cooking!](https://goldendishy.com/wp-content/uploads/2025/07/1088bccc-4c8b-4254-a72a-0cec77bef739-300x300.webp)


![- 1 can (15 oz) chickpeas, thoroughly drained and rinsed - 1 large cucumber, diced into bite-sized pieces - 1 cup cherry tomatoes, halved for a burst of flavor - 1 red bell pepper, diced for sweetness and crunch - 1 small red onion, finely chopped for subtle sharpness - 1/4 cup fresh parsley, roughly chopped for a fresh aroma - 1/4 cup feta cheese, crumbled (optional; adds creaminess) - Juice of 2 fresh lemons, providing that zesty kick - 3 tablespoons extra-virgin olive oil for richness - 1 teaspoon Dijon mustard for a hint of tang - 1 teaspoon honey (or maple syrup for a vegan option) to balance flavors - Salt and freshly ground black pepper to taste This salad is packed with nutrients. It has about 200 calories per serving. You get protein from chickpeas, fiber from veggies, and healthy fats from olive oil. Plus, it provides vitamins A and C. This makes it not just tasty, but also good for you. Start by gathering a large mixing bowl. Add the chickpeas, diced cucumber, halved cherry tomatoes, red bell pepper, red onion, and parsley. Mix these fresh ingredients well. You want each piece to shine in your salad. If you enjoy cheese, sprinkle in the crumbled feta for a creamy touch. This adds a nice contrast to the crunch of the veggies. For the dressing, take a smaller bowl. Whisk together the lemon juice and olive oil. This forms the base of your zesty dressing. Next, add the Dijon mustard and honey. These ingredients give a perfect balance of flavor. Season with salt and black pepper. Whisk until the mixture looks smooth and well combined. Now it’s time to bring everything together. Drizzle the dressing over your salad mix. Use a spatula or wooden spoon to toss gently. You want all the ingredients to be evenly coated without mashing them. If you added feta, do a light toss to keep the cheese intact. Taste your salad and adjust the seasoning if needed. Cover it and let it chill in the fridge for at least 30 minutes. This helps the flavors meld beautifully. For the full recipe, you can refer back to the recipe card. To make your Zesty Lemon Chickpea Salad shine, focus on seasoning. Start with salt and pepper. Taste as you go. You may want more lemon juice for tang. If you like a sweeter flavor, drizzle more honey. For different dressings, try balsamic vinegar or apple cider vinegar. You can also mix in tahini for creaminess. Each option gives a new twist to the salad. Serving your salad well makes it more enticing. Use a large, colorful bowl for a rustic look. Add fresh parsley on top for a pop of green. You can even place lemon wedges around the bowl for a bright touch. If you want individual servings, use clear cups. This way, the layers show off the bright colors. A light drizzle of olive oil on each cup adds elegance. Prepping this salad in advance is easy. Make it a few hours before serving. The flavors develop more when they sit. For best results, chill the salad for at least 30 minutes. This helps the flavors mix well. You can store leftovers in the fridge for up to three days. Just keep the dressing separate if you want it fresh. For the full experience, check out the Full Recipe. {{image_4}} You can make this salad even better by adding veggies. Try adding avocados. They bring creaminess and healthy fats. Carrots can add a nice crunch. You can also toss in diced mango or apple. These fruits add sweetness and a fun twist. Want to make this salad heartier? Add some protein! Grilled chicken works great for meat lovers. Shrimp is a tasty option too. For a plant-based choice, use tofu. It soaks up flavors well and adds nutrition. Switch up the dressing for a new taste! Try using different vinegars, like balsamic or apple cider. You can also squeeze in more citrus juice for extra zing. For a creamier touch, mix in yogurt or tahini. Both add richness and make the salad more filling. Check out the [Full Recipe] to see how these variations can fit into your meal! Store your Zesty Lemon Chickpea Salad in a sealed container. This keeps it fresh and tasty. It lasts about 3 to 5 days in the fridge. Make sure to check for any signs of spoilage before eating. Freezing this salad is not ideal. The vegetables may lose their crunch. If you want to freeze it, consider freezing just the chickpeas. Place them in an airtight bag. When you want to use them, thaw overnight in the fridge. Leftover salad is great for new meals! You can add it to wraps for a quick lunch. Toss it in grain bowls for added flavor. Or, layer it in sandwiches for a fresh twist. You can even mix it into soups for a hearty touch. Enjoy creating new dishes with your leftover salad! For the full recipe, refer to the [Full Recipe]. Yes, you can make this salad ahead of time. In fact, it often tastes better after chilling. The flavors mix well when you let it sit. I suggest making it a few hours before serving. Just cover it with plastic wrap and place it in the fridge. This way, the lemon juice and olive oil soak into the chickpeas and veggies. You will enjoy a zesty and bright flavor profile! Yes, this salad is gluten-free. Chickpeas, fresh veggies, and the dressing contain no gluten. If you want to check other ingredients, always read the labels. Most items are safe, but it’s best to confirm. This makes the salad a great option for those with gluten sensitivities. You can serve it to everyone without worry! If you can’t eat chickpeas, no problem! You can use other beans like black beans or kidney beans. These will add protein and texture. Another option is to use cooked quinoa or lentils. These alternatives keep the salad hearty and filling. Each will bring a unique taste, so feel free to explore. Get creative based on what you have! This blog post provided a clear guide to making a Zesty Lemon Chickpea Salad. We covered the key ingredients, from fresh veggies to the zesty dressing. You learned how to prepare, dress, and assemble the salad for the best flavor. I shared tips for meal prep, variations to try, and how to store leftovers. Remember, this salad is not just easy to make; it’s also packed with nutrients. Enjoy your creation, explore the variations, and make it your own!](https://goldendishy.com/wp-content/uploads/2025/07/e89bc11c-d040-4055-8bd2-d62839faab5f-768x768.webp)
![- 1 bunch of fresh asparagus, trimmed (about 16-20 spears) - 1 cup freshly grated Parmesan cheese - 1/2 cup panko breadcrumbs - 3 cloves garlic, finely minced - 1 teaspoon garlic powder - 1/2 teaspoon fine sea salt - 1/4 teaspoon freshly ground black pepper - 2 large eggs, lightly beaten - 2 tablespoons extra virgin olive oil - 1 tablespoon fresh parsley, finely chopped For the best flavor, choose fresh asparagus that is bright green with firm stalks. Look for Parmesan cheese that you grate yourself. Pre-grated cheese often lacks the rich taste you want. When selecting panko breadcrumbs, ensure they are light and airy for that perfect crunch. It’s important to use fresh garlic for the best taste. Always measure your ingredients accurately for consistent results. Each serving of Garlic Parmesan Asparagus Fries offers a tasty balance of nutrients. These fries are low in calories and high in vitamins A and C. They provide healthy fats from olive oil and protein from eggs and cheese. One serving typically contains around 200 calories, 10g of protein, and 15g of fat. This makes them a healthier alternative to regular fries. Enjoy them guilt-free as a snack or side dish! To make Garlic Parmesan Asparagus Fries, start by gathering your ingredients. You will need fresh asparagus, Parmesan cheese, panko breadcrumbs, garlic, eggs, and olive oil. Next, preheat your oven to 425°F (220°C) and line a baking sheet with parchment paper for easy cleanup. In a shallow bowl, mix the panko breadcrumbs, grated Parmesan cheese, minced garlic, garlic powder, sea salt, and black pepper. Stir well to combine all the flavors. In another bowl, beat the eggs until they are smooth and a bit frothy. Now, take each asparagus spear and dip it in the egg mixture. Make sure to coat it well, but let any extra egg drip off. Then, roll the asparagus in the breadcrumb mix, pressing gently to ensure an even coat. Place the coated spears on your prepared baking sheet in a single layer. Drizzle the olive oil over the asparagus. This helps them get that nice crispy texture as they bake. Place the baking sheet in your oven. Bake the asparagus fries for about 15 to 20 minutes. Keep checking until they are fork-tender and the coating is a beautiful golden brown. Once done, take the baking sheet out of the oven. Let the fries cool for a few minutes. This step is important as it helps them crisp up even more. For a lovely presentation, serve your Garlic Parmesan Asparagus Fries on a long platter. Add a small bowl of marinara sauce or garlic aioli for dipping. This adds a tasty twist that everyone will love. Finally, sprinkle some fresh parsley on top for a touch of color and flavor. For the full recipe and more details, check out the [Full Recipe]. To get your Garlic Parmesan Asparagus Fries crispy, follow a few steps. First, use fresh asparagus. The fresher, the better! Next, coat each spear well with the egg and breadcrumb mixture. This helps the coating stick. Press the breadcrumbs onto the asparagus for a nice layer. Finally, drizzle olive oil over the fries. This adds flavor and aids crispiness. I’ve seen a few common mistakes in the kitchen. One is overcrowding the baking sheet. It causes steaming, making your fries soggy. Arrange the asparagus in a single layer. Another mistake is not preheating the oven. A hot oven ensures that the fries cook evenly. Lastly, don’t skip the panko breadcrumbs. They give the perfect crunch. Garnishing adds fun to your dish. Try these ideas to elevate your fries! First, sprinkle more parsley for color. You can also add lemon zest for a fresh taste. If you like heat, sprinkle some red pepper flakes on top. For a dip, serve marinara sauce or a creamy garlic aioli. These little touches make your Garlic Parmesan Asparagus Fries stand out. For the full recipe, check out the earlier section. {{image_4}} You can easily make these fries vegan. Instead of eggs, use a flax egg. Mix one tablespoon of ground flaxseed with three tablespoons of water. Let it sit for a few minutes to thicken. This mixture works great to bind the panko and cheese. For cheese, try using a vegan Parmesan. It adds flavor without dairy. This way, everyone can enjoy these tasty fries! To make Garlic Parmesan Asparagus Fries gluten-free, swap regular breadcrumbs for gluten-free panko. You can also use crushed nuts or almond flour. Both options give a nice crunch. Just ensure all your ingredients are gluten-free. This way, you can enjoy these fries without worry. Want to spice things up? Add some cayenne pepper or chili flakes to the breadcrumb mixture. This gives your fries a nice kick. You can also mix in some dried herbs like oregano or thyme. Fresh herbs like rosemary can add an amazing flavor too. Feel free to experiment and find your favorite taste! For the full recipe, check out the detailed instructions above. You can store leftover Garlic Parmesan Asparagus Fries in the fridge. Use an airtight container. They will stay fresh for up to three days. Make sure the fries are cool before sealing the container. This helps keep them crisp. To reheat, use an oven or air fryer. Preheat the oven to 350°F (175°C). Place the fries on a baking sheet. Heat for about 10 minutes. This keeps them crispy. Avoid using the microwave, as it makes them soggy. You can freeze these fries for later use. First, let them cool completely. Then, place them in a freezer-safe bag. Remove as much air as possible. They can last for up to three months. When ready to eat, bake from frozen at 425°F (220°C) for 20-25 minutes. Enjoy the crunch just like fresh! To make Garlic Parmesan Asparagus Fries, you start by preheating your oven to 425°F (220°C). Next, line a baking sheet with parchment paper. This helps with easy cleanup. Combine panko breadcrumbs, grated Parmesan cheese, minced garlic, garlic powder, sea salt, and black pepper in a shallow bowl. Mix them well. In another bowl, beat two eggs until they look frothy. Dip each asparagus spear into the eggs, letting the excess drip off. Roll them in the breadcrumb mix, ensuring they are coated evenly. Place the spears on the baking sheet in one layer. Drizzle olive oil on top. Bake for 15-20 minutes until crispy and golden. Finally, sprinkle fresh parsley on top for a nice finish. For the full recipe, check out the detailed instructions above. Yes, you can use frozen asparagus, but it may not be as crisp. Frozen asparagus tends to have more moisture. This can lead to soggy fries. If you use frozen asparagus, thaw and drain it well before coating. Pat it dry with a paper towel to remove excess water. This step helps keep the fries crispy when baked. If you need a substitute for Parmesan cheese, try nutritional yeast for a vegan option. It has a cheesy flavor and works well in this recipe. Grated Pecorino Romano offers a similar taste, though it is saltier. If you want a milder cheese, use grated mozzarella. Just remember, the flavor may change with these swaps, but they will still be tasty! This guide covers all you need for perfect Garlic Parmesan Asparagus Fries. We explored key ingredients, measurements, and nutrition. I provided step-by-step instructions to help you bake and serve. Plus, we shared tips for crispiness, mistakes to watch for, and fun garnishing ideas. In the end, try out variations like vegan or gluten-free. Proper storage can keep your fries fresh and tasty. With these insights, you can make delicious fries every time. Enjoy experimenting and sharing these yummy treats!](https://goldendishy.com/wp-content/uploads/2025/07/ccbce488-a3dc-4dce-b527-37d827ece95a-768x768.webp)


![Fresh corn is the star of this salad. Use about 3 cups of corn kernels, which equals around 4 ears of corn. To get the best flavor, choose corn that is sweet and crisp. You can also use frozen corn, but fresh offers a better taste and texture. This salad needs vibrant veggies for color and crunch: - 1 cup cherry tomatoes, halved - 1 red bell pepper, diced - 1/2 red onion, finely chopped - 1 jalapeño pepper, minced (remove seeds for less heat) - 1/4 cup fresh cilantro, chopped These veggies add freshness and a mix of flavors. The tomatoes bring sweetness, while the jalapeño offers a nice kick. The dressing ties everything together. Here’s what you need: - 1/4 cup freshly squeezed lime juice (about 2 limes) - 2 tablespoons extra virgin olive oil - 1 teaspoon ground cumin - Salt and black pepper to taste This zesty dressing balances the sweet corn and veggies. The lime juice adds brightness, while cumin gives depth. Check out the [Full Recipe] for detailed instructions on making this delicious Zesty Corn Salad! To start, you need fresh corn. If you have fresh corn, fill a large pot with water. Bring it to a rolling boil. Once it boils, add the corn cobs and blanch them for about 3 minutes. After that, take them out and let them cool. When cool, cut the kernels off the cobs with a sharp knife. If you want to use frozen corn, just thaw it and drain any extra liquid. In a big mixing bowl, combine the corn kernels with cherry tomatoes, red bell pepper, and red onion. Make sure to mix them well. This way, you spread the flavors evenly throughout the salad. Take a small mixing bowl to prepare the dressing. Whisk together freshly squeezed lime juice, olive oil, ground cumin, and some salt and black pepper. Mix until all the ingredients blend together well. This zesty dressing will bring everything to life. Now, drizzle the dressing over your mixed vegetables. Gently toss everything together so that all the ingredients get coated in the dressing. This step is key for flavor. Taste the salad and adjust the seasoning if needed. If you want more zing, add more lime juice or salt. For the best flavor, let the salad sit for at least 15 minutes before serving. This wait helps the flavors mix well. You can find the full recipe for Zesty Corn Salad with a Kick! to guide you through the steps. To enhance the taste of your zesty corn salad, let it rest. After mixing, cover it and chill for at least 15 minutes. This time allows the flavors to blend. The lime juice and spices soak into the corn and veggies. You will notice a big difference in taste. If you have more time, letting it sit for an hour is even better. You can swap some ingredients based on your taste. Don’t have fresh corn? Use canned or frozen corn instead. If you want a milder flavor, skip the jalapeño or use a bell pepper. You can also replace cilantro with parsley or green onions if you prefer. For a tangy twist, try lemon juice instead of lime juice. Get creative with what you have on hand! A good-looking salad makes it more fun to eat. Serve your corn salad in a bright bowl. Top it with extra cilantro leaves for color. Add lime wedges on the side for a fresh touch. For a fun idea, layer the salad in mason jars. This not only looks nice but makes serving easy. Plus, it’s perfect for picnics or gatherings. Check out the Full Recipe for more ideas to impress your guests! {{image_4}} You can add protein to your zesty corn salad for more flavor and nutrition. Grilled chicken or shrimp works great. You can also use black beans for a plant-based option. Just rinse and drain a can of beans. Mix them in with the veggies for a hearty meal. Feel free to play with the veggies. You can use cucumbers for a cool crunch. Avocado adds creaminess and healthy fats. Try adding radishes for a peppery bite, or corn peppers for more heat. Any colorful veggie will brighten your dish and add taste. Switch up the dressing to keep things fresh. Try adding honey for sweetness or garlic for a kick. A splash of balsamic vinegar can bring a lovely tang. If you're feeling adventurous, mix in some salsa or a dash of hot sauce for extra zest. Explore the full recipe for more ideas! You can store Zesty Corn Salad in the fridge. Place it in an airtight container. This keeps the flavors fresh and vibrant. Make sure to eat it within three to five days. If you notice any changes in smell or color, it’s best to toss it out. You can freeze this salad, but it’s not ideal. Freezing changes the texture of the corn and veggies. If you want to freeze it, pack it tightly in a freezer-safe container. It can last up to three months. When you’re ready to eat it, thaw it in the fridge overnight. Reheating is not recommended for Zesty Corn Salad. It’s best enjoyed cold or at room temperature. If you must warm it, do so gently in a pan over low heat. Avoid overheating to keep the veggies crisp and fresh. For a quick fix, serve it on top of warm grains or proteins for a tasty twist. Yes, you can use frozen corn in this recipe. Just thaw the corn and drain any extra liquid. Frozen corn saves time, and it still tastes great. It’s a good option if fresh corn is not available. Try it out for a quick fix! The Zesty Corn Salad can last about 3 to 5 days in the fridge. Make sure to store it in an airtight container. If the salad starts to look watery, give it a quick stir. It’s best to eat it fresh, but leftovers make a tasty snack. This salad pairs well with many dishes. You can serve it with grilled meats, tacos, or fish. It also makes a great side for barbecues or picnics. Try it alongside some tortilla chips for a fun twist! Yes, Zesty Corn Salad is gluten-free! All the ingredients are naturally free of gluten. You can enjoy it safely if you have gluten intolerance. This salad is a light and tasty choice for everyone. This blog post covered the key ingredients, steps, tips, and variations for Zesty Corn Salad. You can use fresh corn, mix in your favorite vegetables, and create a tasty dressing. Remember to store it properly for the best flavor. Feel free to experiment with ingredients to suit your taste. Whether you add protein or unique dressings, enjoy this salad your way. Make it a staple for meals or gatherings. Embrace the freshness and flavor of this salad, and get creative!](https://goldendishy.com/wp-content/uploads/2025/06/9c485b94-0626-453a-9168-3540dee7db81-768x768.webp)