One-Pot Cheeseburger Pasta Simple and Savory Dish

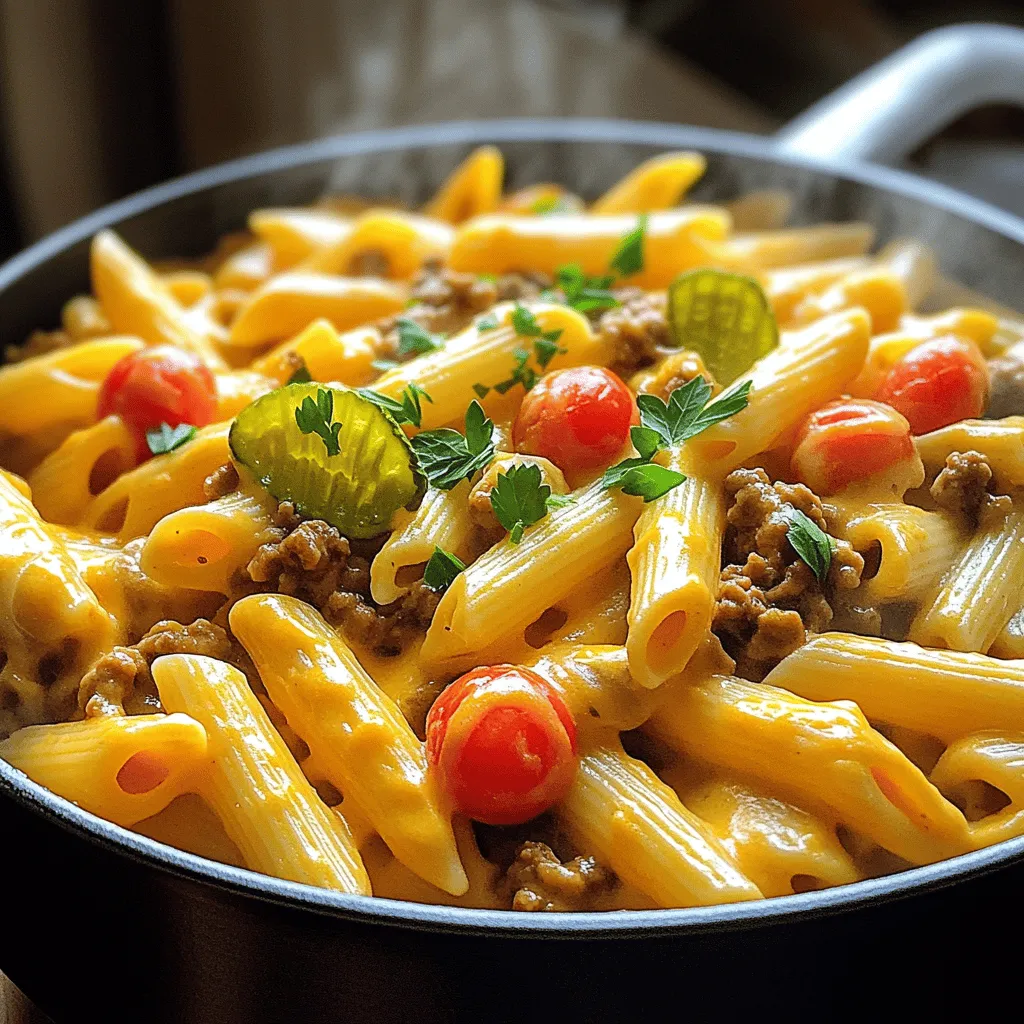
Craving a meal that’s both easy and delicious? One-Pot Cheeseburger Pasta is the dreamy dish you need! With just a handful of ingredients and minimal cleanup, you can enjoy a hearty meal in no time. This recipe combines the savory flavors of a cheeseburger with the comfort of pasta. Whether cooking for family or friends, this simple dish will impress everyone at the table. Let’s dive into the recipe!
Ingredients
Necessary Components
– 1 tablespoon olive oil
– 1 pound ground beef
– 1 small onion, finely chopped
– 2 cloves garlic, minced
– 1 teaspoon smoked paprika
– 1 teaspoon garlic powder
– 1 teaspoon onion powder
– Salt and pepper to taste
– 3 cups beef broth
– 1 cup uncooked penne pasta
– 1 cup cheddar cheese, shredded
– 1 cup cherry tomatoes, halved
– ½ cup pickles, diced (optional)
– Fresh parsley or chives, chopped for garnish
To make One-Pot Cheeseburger Pasta, gather your ingredients first. This step keeps everything organized and saves time. You want fresh ingredients for the best flavor.
Start with olive oil. This will help cook the beef and add some healthy fat. Ground beef is the star of this dish, giving it that classic cheeseburger taste. Finely chopped onion and minced garlic add depth and flavor.
The spices play a big role too. Smoked paprika brings warmth, while garlic and onion powders add a nice kick. Salt and pepper enhance everything.
Next comes the beef broth. It forms the base of your sauce and cooks the pasta. Use uncooked penne pasta, as it will soak up all the delicious flavors.
Cheddar cheese is essential for that creamy, cheesy goodness. Cherry tomatoes add freshness, and pickles (if you like) give a nice tang. Don’t forget fresh herbs for garnish. They add color and a burst of flavor.Enjoy cooking!
Step-by-Step Instructions
Preparation Steps
– Heat the Oil in a large pot: Start by warming 1 tablespoon of olive oil over medium heat. This helps to build flavor right from the start.
– Add Garlic after the onion is translucent: Once the onion is soft and clear, add 2 minced cloves of garlic. Cook it for about a minute. This step adds a great aroma.
– Brown the Beef until cooked through: Add 1 pound of ground beef to the pot. Break it apart with a spoon. Cook it for about 6-8 minutes until it’s brown and no longer pink. If there’s extra fat, drain it.
Cooking Process
– Season the Mixture with spices: Mix in 1 teaspoon of smoked paprika, 1 teaspoon of garlic powder, and 1 teaspoon of onion powder. Add salt and pepper to your taste. Stir well to blend all the flavors.
– Add Broth and Pasta, then boil and simmer: Pour in 3 cups of beef broth and bring it to a boil. Then, add 1 cup of uncooked penne pasta. Lower the heat and let it simmer for about 10-12 minutes. Stir it often so it doesn’t stick.
– Fold in Cheddar Cheese for creaminess: When the pasta is soft, take the pot off the heat. Add 1 cup of shredded cheddar cheese. Stir it in until it melts and makes the dish creamy.
Finalizing the Dish
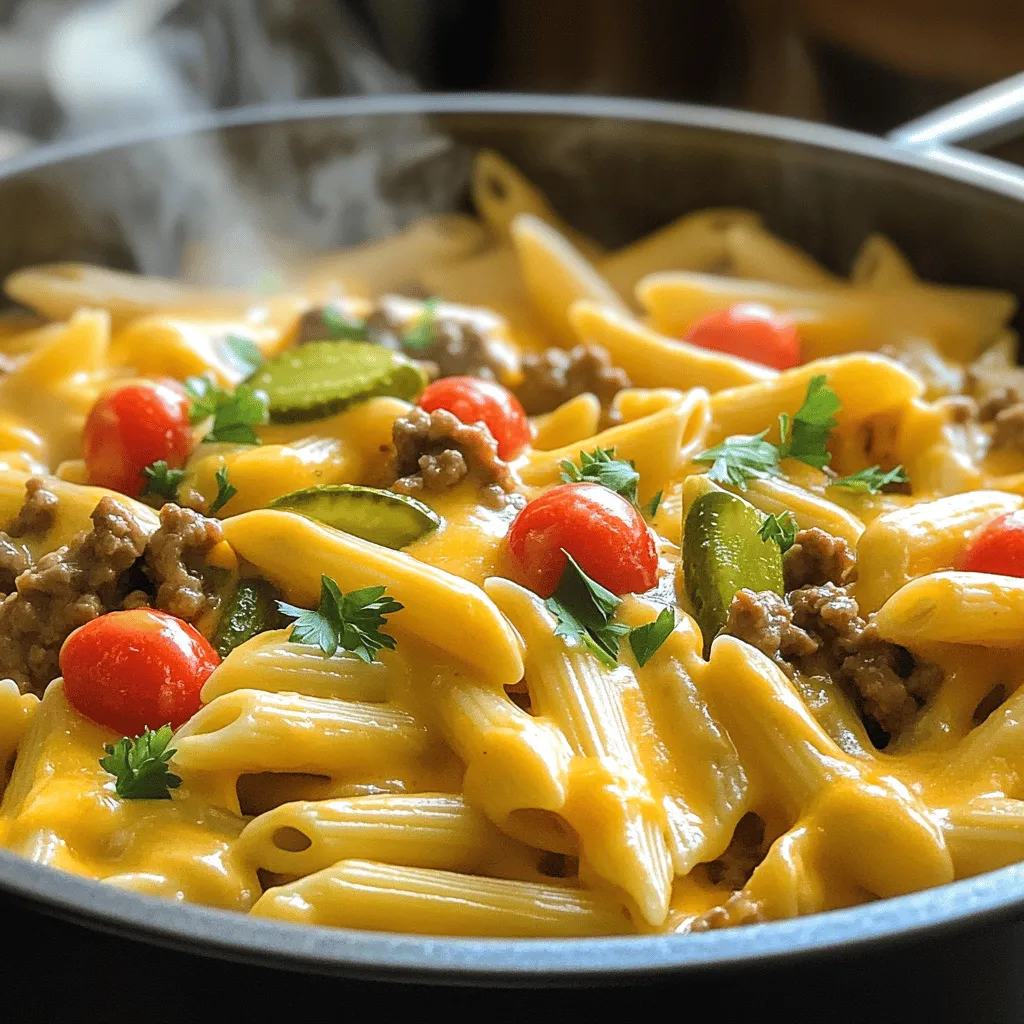
– Incorporate Fresh Ingredients for flavor: Gently mix in 1 cup of halved cherry tomatoes and ½ cup of diced pickles, if you like. They add freshness and a nice crunch.
– Taste and Adjust seasoning: Take a moment to taste your dish. Add more salt and pepper if needed. This step ensures your pasta is just right.
– Serve It Up with a garnish of herbs: Scoop the pasta into bowls and sprinkle some chopped parsley or chives on top. This adds a pop of color and flavor.
Tips & Tricks
Enhancing Flavor
– Use fresh ingredients for better taste. Fresh onions and garlic boost flavor.
– Recommended seasonings for extra zing include smoked paprika and garlic powder. These add depth and warmth.
Cooking Techniques
– Avoiding sticky pasta by stirring is key. Stir your pasta every few minutes. This keeps it from clumping together.
– Tips for browning beef correctly: cook over medium heat and break it apart well. This helps it brown evenly and prevents steaming.
Presentation Ideas
– Serving suggestions for visual appeal include using a colorful plate. You can add cherry tomatoes for a pop of color.
– Best garnishes to complement the dish are fresh parsley or chives. They add a bright touch and fresh flavor.

Variations
Ingredient Swaps
You can switch up the protein in this dish. Use ground turkey or chicken instead of beef. This makes it lighter but still tasty. If you need gluten-free options, try gluten-free pasta. It cooks well and holds the flavors nicely.
Flavor Enhancements
Want to change the flavor? Add different cheeses like mozzarella, gouda, or pepper jack. Each cheese adds its own twist to the dish. If you want a plant-based meal, use vegan cheese and swap the beef for lentils or mushrooms. This keeps it hearty but meat-free.
Serving Suggestions
Serve your One-Pot Cheeseburger Pasta with a fresh salad. A crisp garden salad pairs well with the creamy pasta. You can also transform this dish into a baked version. Just top with more cheese and bake until bubbly and golden. This makes for a wonderful family meal!
Storage Info
Refrigeration
To store your leftovers properly, let the pasta cool down first. Transfer the cooled cheeseburger pasta into an airtight container. This helps keep it fresh for later. I recommend using glass or BPA-free plastic containers. They seal well and are easy to clean.
Freezing Guidelines
For freezing cheeseburger pasta, wait until it cools to room temperature. Portion the pasta into freezer-safe containers or bags. Squeeze out as much air as possible. This prevents freezer burn. To reheat, thaw it overnight in the fridge. Warm it on the stove or in the microwave until heated through.
Shelf Life
In the fridge, your cheeseburger pasta lasts about 3 to 4 days. Always check for signs of spoilage. Look for an off smell or a change in texture. If you see mold, it’s best to throw it away. Keeping an eye on these signs ensures your meals are fresh and safe.
FAQs
Common Questions
Can I make One-Pot Cheeseburger Pasta ahead of time?
Yes, you can make One-Pot Cheeseburger Pasta ahead. Store it in the fridge for up to three days. Just reheat it in a pot over low heat. You may need to add a splash of beef broth to bring back the creaminess.
How do I make this recipe dairy-free?
To make this recipe dairy-free, swap the cheddar cheese for a dairy-free cheese. Nutritional yeast can add a cheesy flavor too. Check labels to ensure your ingredients are dairy-free.
Can I add vegetables to the dish?
Absolutely! You can add vegetables like bell peppers, spinach, or zucchini. Just chop them small and add them when you brown the beef. This adds more flavor and nutrition to your meal.
Cooking Techniques
How can I prevent the pasta from overcooking?
Stir the pasta often while it cooks. This helps it cook evenly and prevents sticking. Follow the package instructions for cooking time. Check the pasta a minute or two early to ensure it’s al dente.
What can I use instead of beef broth?
You can use chicken broth or vegetable broth as a substitute. For a richer flavor, try using water with a little soy sauce or Worcestershire sauce. This will enhance the taste of the dish.
Ingredient Substitutions
Is there a substitute for cheddar cheese?
Yes, you can use mozzarella or pepper jack for a twist. Cream cheese or goat cheese can also add a great flavor. Choose what you like best to create your own unique dish.
Can I use other types of pasta in this recipe?
Certainly! You can use any pasta shape you prefer. Fusilli, rotini, or even macaroni work well. Adjust the cooking time based on the pasta you choose to ensure it cooks perfectly.
This blog post showed how to make a tasty one-pot cheeseburger pasta. We covered the key ingredients, step-by-step instructions, and helpful tips. By using fresh items and trying new cheeses, you can make this dish even better. Remember, you can swap ingredients for your taste or needs. Don’t forget about proper storage tips for leftovers! Enjoy cooking and share this idea with others who love easy, delicious meals.


![- 2 boneless, skinless chicken breasts - 8 oz fettuccine pasta - 2 cups fresh spinach, roughly chopped - 1 cup heavy cream - 1 cup finely grated Parmesan cheese - 2 tablespoons olive oil - 2 cloves garlic, minced - Salt and freshly ground black pepper, to taste - Fresh basil leaves, for garnish (optional) - Red pepper flakes, for a spicy kick (optional) When I cook Chicken and Spinach Alfredo, I gather these key ingredients first. The chicken breasts are a must because they add protein and flavor. I prefer fettuccine pasta for its wide shape, which holds the creamy sauce well. Fresh spinach adds a pop of green and nutrients, making the dish feel lighter. Next, I grab heavy cream. It’s the star of the sauce, bringing that rich, smooth texture. Of course, Parmesan cheese can't be skipped. It gives depth and a savory taste that blends perfectly with the cream. In the additional ingredients, olive oil is essential for cooking. It adds a nice flavor base. Minced garlic brings a wonderful aroma and a bit of zing. I always keep salt and pepper handy to season the dish just right. Lastly, I suggest garnishing with fresh basil for that extra flair. A sprinkle of red pepper flakes can bring heat if you like a spicy bite. For the full list of ingredients, check out the Full Recipe. First, I boil a large pot of salted water. Once it bubbles, I add the fettuccine. I cook it until it's al dente, which takes about 8-10 minutes. After cooking, I drain the pasta but keep a small cup of the pasta water for later. While the pasta cooks, I heat olive oil in a skillet over medium heat. I take the chicken breasts and season them with salt and pepper on both sides. I place the chicken in the hot skillet and cook for about 6-7 minutes on each side. When they turn golden brown and are fully cooked, I remove them from the skillet. I let them rest for a few minutes before slicing them into thin strips. In the same skillet, I lower the heat and add minced garlic. I sauté it for about 30 seconds until it smells amazing. Then, I slowly pour in heavy cream while stirring. I let it simmer gently, making sure it doesn’t boil. Next, I whisk in grated Parmesan cheese until the sauce is smooth and creamy. I add the chopped spinach and let it cook for 1-2 minutes until it wilts. Now, I carefully fold the cooked fettuccine into the creamy sauce. I mix it well so each strand is coated. If the sauce is too thick, I add a bit of the reserved pasta water to get the right consistency. Finally, I arrange the sliced chicken on top of the pasta. If I want a spicy touch, I sprinkle some red pepper flakes over everything. For the full recipe, check out the earlier section. - Adjusting seasoning: Start by tasting your sauce as you cook. Add more salt or pepper if needed. A pinch of nutmeg can also enhance the flavor. This small touch makes a big difference. - Whisking technique for smooth sauce: When you add the cream and cheese, whisk constantly. This helps to blend everything smoothly. It prevents lumps and ensures a creamy texture. - Presentation tips: Serve the Chicken and Spinach Alfredo in shallow bowls. Drizzle extra sauce on top for a rich look. Finish with freshly grated Parmesan and a basil sprig. This adds color and makes the dish pop. - Best accompaniments: Garlic bread or a fresh salad pairs perfectly. The crunch of the salad balances the creaminess of the dish. A glass of white wine complements the flavors well too. - Multitasking during prep: While the pasta cooks, focus on the chicken. Season it and cook it in the same skillet. This saves time and adds flavor to the sauce. Always keep an eye on the pasta so it doesn’t overcook. By using these tips, you can make your Chicken and Spinach Alfredo even better. Each step adds to the dish's overall experience, making it truly enjoyable. Enjoy the process and get creative! {{image_4}} You can switch out the chicken for other proteins. Shrimp works great in this dish. It adds a nice flavor and cooks quickly. Tofu is a good option for a vegetarian meal. Just make sure to season it well before cooking. For pasta, fettuccine is classic, but you can try penne or whole wheat. Penne holds the sauce well due to its shape. Whole wheat adds a nutty flavor and more fiber. Want to boost nutrition? Add seasonal vegetables. Broccoli brings crunch and color. You can steam it lightly before adding. Bell peppers add sweetness and vibrancy. Slice them thinly to mix in easily. Feel free to experiment! Seasonal vegetables can change the dish each time. Enhancing flavor is simple. You can add herbs like Italian seasoning for a savory kick. A sprinkle of lemon zest brightens the dish and adds freshness. For a bit of heat, red pepper flakes are great. Just a pinch goes a long way. These variations keep your Chicken and Spinach Alfredo fun and fresh. Check out the Full Recipe to get started! After you enjoy your Chicken and Spinach Alfredo, store any leftovers in the fridge. Use an airtight container to keep it fresh. You can keep it for about 3 to 4 days. To reheat, put the pasta in a pan over low heat. Add a splash of water or cream to help it warm evenly. Stir often to keep it creamy and avoid burning. If you want to keep it longer, you can freeze Chicken and Spinach Alfredo. Place it in a freezer-safe container or bag. Make sure to remove as much air as possible. It can last in the freezer for up to 2 months. When you are ready to eat it, take it out and thaw it in the fridge overnight. To reheat, warm it in a pan over low heat, adding a bit of water or cream to restore its creaminess. For the complete recipe, check the [Full Recipe]. Chicken and Spinach Alfredo lasts about 3 to 4 days in the fridge. Store it in an airtight container to keep it fresh. Make sure to cool it down before placing it in the fridge. This helps prevent condensation, which can make the dish soggy. Yes, you can make this recipe ahead of time. Cook the pasta and chicken in advance. Store them separately from the sauce. When you’re ready to eat, just heat everything together. This keeps the pasta from getting mushy. For the best taste, try to eat it within a few days. You can use half-and-half for a lighter option. If you want a dairy-free choice, try coconut cream or cashew cream. Both options give a nice creamy texture. You may need to adjust the seasonings to match your taste. Yes, you can make this dish gluten-free. Use gluten-free pasta such as rice or corn pasta. For the sauce, just check the labels on your cream and cheese. Most are gluten-free, but it’s good to be sure. This way, everyone can enjoy your Chicken and Spinach Alfredo. For the full recipe, check the details above! This blog post covered the key ingredients and steps for making Chicken and Spinach Alfredo. We discussed how to prepare the pasta, cook the chicken, and create a creamy sauce. Plus, I shared tips for enhancing flavors and serving. Remember, you can mix it up with different proteins and veggies. Also, I provided storage advice to keep your meal fresh. Embrace your creativity in the kitchen. Enjoy a tasty meal and share it with friends or family!](https://goldendishy.com/wp-content/uploads/2025/06/ee4d0533-23fd-4fc4-b715-1820a1e3e494-768x768.webp)
![To make Avocado Lime Crema Tacos, you need some fresh and simple ingredients. Here’s what you will need: - Fresh produce: - 2 ripe avocados - 1 cup cherry tomatoes, halved - 1 cup shredded red cabbage - 1/2 cup fresh cilantro leaves, roughly chopped - Pantry staples: - 8 small corn tortillas - 1/2 cup Greek yogurt - 2 tablespoons fresh lime juice - Zest of 1 lime - 1 clove garlic, finely minced - 1/4 teaspoon ground cumin - Sea salt, to taste - Optional toppings: - Sliced jalapeños - Radish slices - Crumbled feta cheese When you gather these ingredients, aim for ripe avocados. They will make your crema smooth and creamy. Fresh cilantro adds a burst of flavor to the tacos. You can also adjust the optional toppings based on your taste. If you want more heat, add jalapeños. For a crunchy touch, sprinkle some radish slices. You can find the full recipe in the article for detailed steps. Enjoy the fresh tastes of these tacos! To start, grab your food processor. Add the ripe avocados, Greek yogurt, fresh lime juice, lime zest, minced garlic, ground cumin, and a pinch of sea salt. Blend it all together until smooth and creamy. If it seems too thick, add a bit more lime juice. Taste it and adjust the salt or lime juice to your liking. A little extra zing can really elevate the flavor! Use a non-stick skillet for this step. Heat it over medium heat. Toast each corn tortilla for about 30 seconds on one side. Flip it and toast for another 30 seconds. The tortillas should feel warm and soft. Once done, stack them and wrap them in a clean kitchen towel to keep them warm. This keeps them from getting dry. Now, take a warm tortilla and spread a generous dollop of your avocado lime crema right in the center. Next, add a handful of shredded red cabbage for crunch. Layer on some halved cherry tomatoes for a fresh bite. Finally, sprinkle chopped fresh cilantro on top for a burst of flavor. For a fun twist, try adding some sliced jalapeños for heat, radish slices for crunch, or crumbled feta cheese for a savory touch. Serve your tacos right away. Enjoy them while they are fresh and bursting with flavor! Remember, you can find the full recipe [here]. You can switch up the base in your crema. Try sour cream or Greek yogurt for a tangy twist. If you want a dairy-free option, use silken tofu or cashew cream. For extra flavor, add herbs like cilantro or dill. You can also mix in spices such as smoked paprika or chipotle for a smoky kick. To balance flavors, add a mix of textures. Use crunchy cabbage, juicy tomatoes, and creamy crema. These layers make each bite exciting. To avoid tearing the tortillas, warm them first. Heat them in a skillet for about 30 seconds on each side. This softens them, making them easier to fold without breaking. Pair your tacos with simple sides. A fresh salad or rice works well. You might also enjoy them with a light drink like agua fresca or sparkling water. For garnishes, lime wedges and extra cilantro make your tacos look vibrant and fresh. These touches enhance both taste and presentation. For the Full Recipe, refer to the earlier section. {{image_4}} For a tasty vegetarian or vegan taco, swap Greek yogurt for cashew cream or coconut yogurt. Both options keep the creamy texture and flavor. You can also add black beans or roasted chickpeas for protein. These legumes add a nice texture and a mild flavor. Toss in some grilled zucchini or bell peppers for extra color and taste. Fresh herbs like mint or basil can bring a surprise twist. If you want to add protein, consider grilled chicken or shrimp. Marinate chicken in lime juice, garlic, and cumin for at least 30 minutes before grilling. For shrimp, a quick toss with olive oil and lime juice works well. Both options cook fast, making them easy to prepare. You could also try seared steak or fish for a heartier bite. Just remember to let the meat rest before slicing to keep it juicy. Tacos can take on many flavors based on where you are. In Mexico, you might find tacos with carne asada, topped with fresh cilantro and onions. In California, fish tacos with mango salsa are popular. Seasonal ingredients can also add a fresh touch. In summer, add sweet corn or peaches. In fall, roasted butternut squash or cranberries can provide a warm, cozy vibe. Each variation opens a new door to flavor! For full recipe details, check out the [Full Recipe]. You can store leftover tacos in different ways. If you have assembled tacos, wrap them in foil or plastic wrap. This keeps them fresh for a short time. Unassembled tacos store better. Keep the tortillas, crema, and toppings separate. Use airtight containers for each. This helps keep everything fresh. - Assembled Tacos: Wrap well in foil or plastic wrap. - Unassembled Tacos: Store tortillas, crema, and toppings in airtight containers. Store everything in the fridge. Consume within two days for best taste. To reheat tortillas, use a skillet. Heat it on medium for a few minutes. Place the tortilla for about 15 seconds on each side. This warms them without losing their texture. For the crema, avoid reheating. Instead, store it in the fridge. Use it cold or at room temperature. This keeps the fresh flavor. - Tortilla Method: Heat on medium in a skillet for 15 seconds per side. - Crema Storage: Keep it cold or at room temperature. These simple steps ensure your Avocado Lime Crema Tacos stay delicious! You can add heat with sliced jalapeños. Place them on top of the crema. For more heat, use hot sauce. A few drops can spice things up without being too much. Try different hot sauces to find your favorite flavor. This small change can make your tacos zing! Yes, you can make the crema ahead of time. Store it in an airtight container in the fridge. It stays fresh for about two days. To keep the color bright, add a little extra lime juice. Stir before using to bring back its smooth texture. If you can't find corn tortillas, use flour tortillas instead. They are soft and easy to fold. You can also use lettuce leaves for a low-carb option. For gluten-free diets, look for rice or almond flour tortillas. Each option gives a unique taste to your tacos. Yes, this recipe is great for meal prep. You can prepare the crema and store it in the fridge. Warm the tortillas before serving. Assemble the tacos just before eating to keep everything fresh. This way, you have tasty meals ready for the week with little effort. For the full recipe, check out the details above! In this article, we explored how to make tasty Avocado Lime Crema Tacos. We covered the essential ingredients, step-by-step instructions, and helpful tips for perfecting your taco assembly. You can easily customize your crema and taco fillings to suit your taste. Remember, you can prepare these tacos in advance and store leftovers for later enjoyment. Embrace these ideas to make your taco nights fun and delicious! With a little practice, you’ll impress family and friends with your new skills. Enjoy every bite!](https://goldendishy.com/wp-content/uploads/2025/07/f06e457d-602e-41ec-b362-5499d4ba2f55-768x768.webp)

. This recipe includes all the details you need for perfecting this rich side dish. Enjoy making it! We covered the key steps to make creamy garlic mashed potatoes. First, we explored essential ingredients and shared brands to try. Next, I laid out easy prep instructions and tips for texture and flavor. Then, we looked at tasty variations, like vegan options. Finally, I highlighted how to store and reheat your potatoes. These mashed potatoes will elevate your meals. Try new variations to keep things exciting. Enjoy crafting this dish that your family will love!](https://goldendishy.com/wp-content/uploads/2025/06/88d864b9-3d37-4779-9fe5-8809feb11d6c-768x768.webp)