No-Bake Strawberry Cream Pie Simple and Delicious Treat

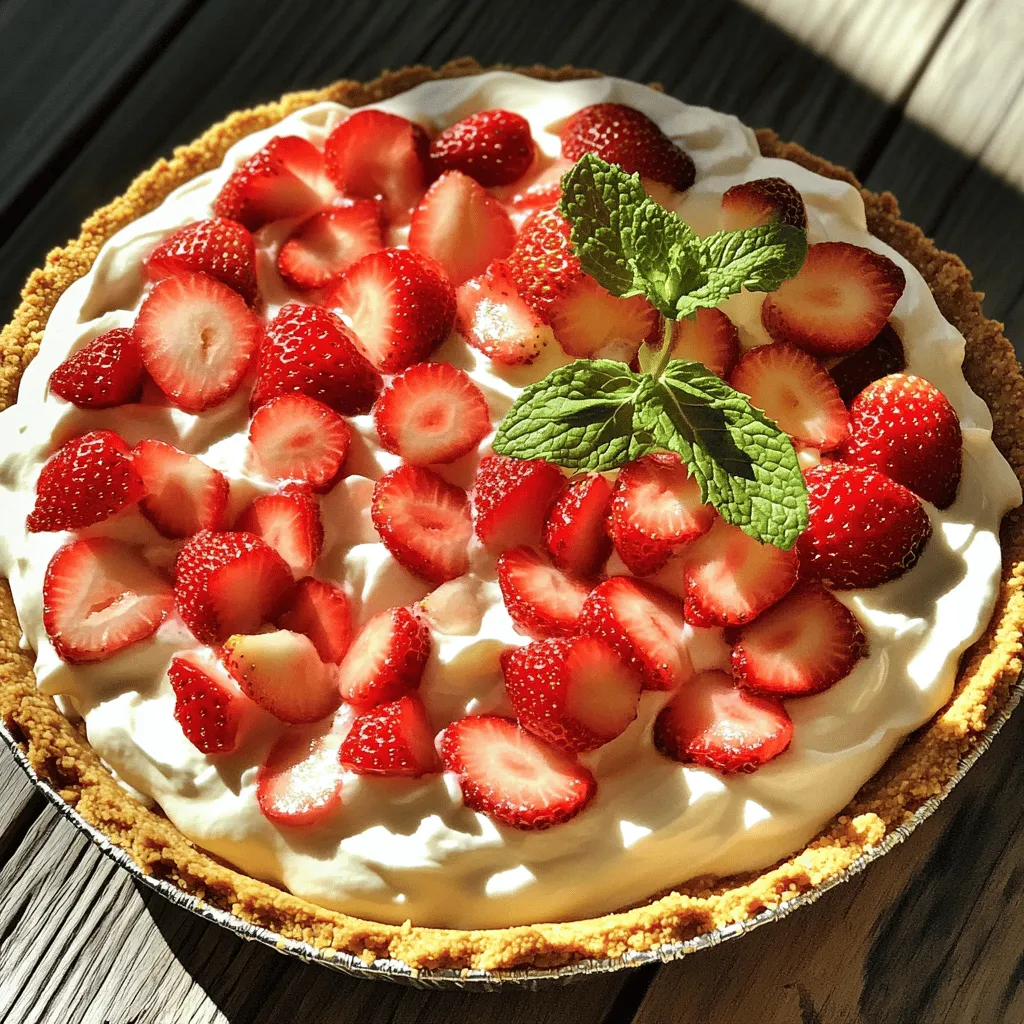
If you’re searching for a simple and delicious dessert, look no further! This No-Bake Strawberry Cream Pie will wow your taste buds. With fresh strawberries, creamy filling, and a graham cracker crust, it’s a treat everyone will love. Plus, you don’t need an oven! Let’s dive into this easy recipe that makes dessert both fun to make and delightful to eat. You’re just minutes away from a slice of paradise!
Ingredients
To make a No-Bake Strawberry Cream Pie, you need simple, fresh ingredients. Here’s what you’ll need:
– 1 pre-made graham cracker pie crust
– 2 cups fresh strawberries, hulled and halved
– 1 cup heavy whipping cream
– 1 cup cream cheese, softened to room temperature
– 1/2 cup powdered sugar
– 1 teaspoon vanilla extract
– 1 tablespoon freshly squeezed lemon juice
– Fresh mint leaves for garnish (optional)
These ingredients blend to create a creamy, fruity, and delightful pie. The pre-made graham cracker crust saves time and adds a sweet crunch. Fresh strawberries bring bright flavor and color. Heavy whipping cream and cream cheese make the filling rich and fluffy. Powdered sugar adds just the right sweetness. Vanilla and lemon juice enhance the overall taste. You can top it with mint leaves for a touch of elegance.
Step-by-Step Instructions
Preparation Overview
Making a No-Bake Strawberry Cream Pie is simple and fun. You start by gathering all your ingredients. You will need a graham cracker crust, fresh strawberries, heavy whipping cream, cream cheese, powdered sugar, vanilla extract, and lemon juice. Once you have everything, follow the steps carefully for the best results.
Whipping the Cream
To make perfect whipped cream, use a medium mixing bowl. Set an electric mixer to medium speed. Beat the heavy whipping cream until soft peaks form. Be careful not to over-whip. The cream should be smooth and fluffy, not grainy or stiff. This step is key for a light pie filling.
Preparing the Cream Cheese Mixture
In a large bowl, add softened cream cheese, powdered sugar, vanilla extract, and lemon juice. Use a spatula or mixing spoon to blend these ingredients. Mix until the texture is completely smooth. This creamy base is crucial for the pie’s flavor.
Combining Mixtures & Adding Strawberries
Now, it’s time to combine the mixtures. Gently fold the whipped cream into the cream cheese mixture. Use a spatula for this. Do it slowly to keep the air in the whipped cream. Then, add the halved strawberries, mixing them in evenly. Reserve some strawberries for later.
Filling the Pie Crust & Chilling
Pour the strawberry cream mixture into the graham cracker crust. Use a spatula to spread it evenly. Cover the pie with plastic wrap. Refrigerate for at least four hours. For best flavor, let it chill overnight. This helps the pie set properly.
Garnishing for Presentation
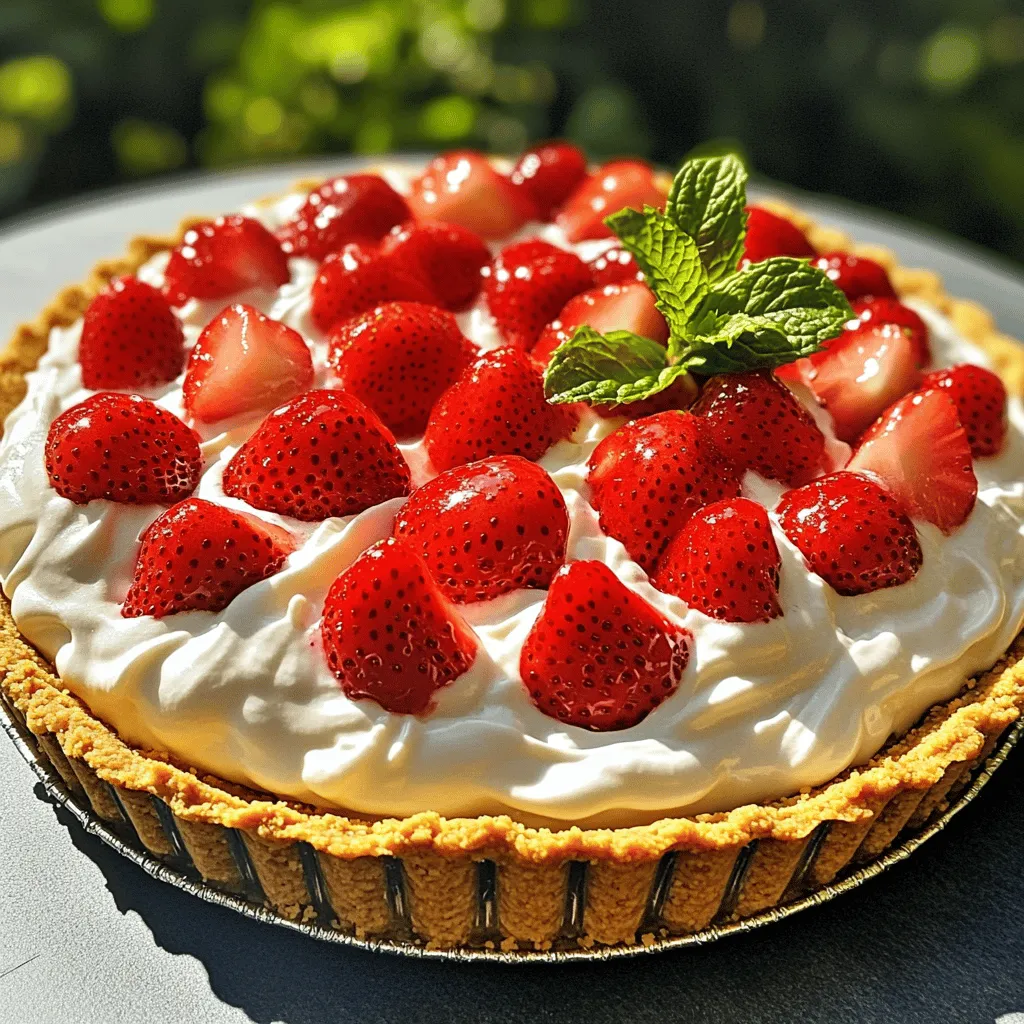
Before serving, it’s time to make the pie look pretty. Take the reserved strawberries and arrange them on top. You can add fresh mint leaves for a splash of color. This final touch makes your pie look as good as it tastes.
Follow this guide, and you’ll create a delightful No-Bake Strawberry Cream Pie.
Tips & Tricks
Achieving the Best Texture
To get a light and airy texture for your pie filling, whip the heavy cream until soft peaks form. This step is key! Use a medium bowl and an electric mixer for the best results. Be careful not to over-whip, as the cream can turn grainy and lose its fluffiness. Gently fold this whipped cream into the cream cheese mixture. This folding action keeps air in the cream, making your filling light and delicious.
Substitutions and Modifications
If you have dietary needs, you can easily modify this recipe. For a dairy-free version, use coconut cream instead of heavy cream and dairy-free cream cheese. You can also swap the graham cracker crust for a gluten-free crust. If you want to cut sugar, use a sugar substitute like stevia or erythritol. These changes can make the pie fit various diets while still tasting great.
Serving Suggestions
This pie pairs well with many treats. I love to serve it with a scoop of vanilla ice cream on the side. You can also add a dollop of whipped cream on top for extra sweetness. Fresh mint leaves make a lovely garnish and add a pop of color. For a fun twist, serve the pie with a berry sauce drizzled over each slice. This adds flavor and makes your dessert look fancy.

Variations
Adding Other Fruits
You can change up your no-bake strawberry cream pie with other fruits. Blueberries, raspberries, and peaches work great. Just make sure to cut them into small pieces. You can even mix fruits for a colorful pie. For example, half strawberries and half blueberries create a fun look. The flavors blend well, too.
Flavored Cream Cheese
Using flavored cream cheese adds a fun twist. You can find options like strawberry, vanilla, or even lemon. Just swap the plain cream cheese for your flavored choice. This adds extra taste and may surprise your guests. It’s an easy way to make the pie unique.
Topping Ideas
Toppings can make your pie shine. Here are some fun ideas:
– Crushed graham crackers for crunch
– Chocolate shavings for a sweet touch
– Whipped cream for extra fluffiness
– Sliced almonds for a nutty flavor
– Fresh mint leaves for color and taste
You can mix and match these toppings to suit your style. Let your creativity flow and impress your friends!
Storage Info
Refrigeration
To store your No-Bake Strawberry Cream Pie, keep it in the fridge. Cover the pie with plastic wrap or place it in an airtight container. This helps keep the pie fresh and prevents it from absorbing any odors. Make sure to chill it for at least 4 hours before serving. If you have leftovers, they will stay fresh for about 3 to 4 days.
Freezing Tips
You can freeze No-Bake Strawberry Cream Pie, but keep in mind it may change the texture. To freeze, wrap the pie tightly in plastic wrap and then in aluminum foil. This protects it from freezer burn. It can last up to 2 months in the freezer. When you’re ready to enjoy it, let it thaw overnight in the fridge. This will help it regain some of its original texture.
Shelf Life
In the fridge, the pie lasts about 3 to 4 days. After that, the cream can separate, and the strawberries may lose their freshness. If you freeze it, remember to consume it within 2 months for the best taste. Always check for any signs of spoilage before serving. Enjoy this easy treat while it’s still fresh!
FAQs
Can I make this pie in advance?
Yes, you can make this pie ahead of time. It actually tastes better when chilled. I suggest making it the night before. This gives the pie time to set and the flavors to blend nicely. Just cover it well with plastic wrap. Store it in the fridge until you are ready to serve.
What type of cream cheese should I use?
Use full-fat cream cheese for the best results. It makes the filling rich and creamy. You can also use low-fat cream cheese if you want a lighter option. Just keep in mind that the taste and texture may change a bit.
How can I make this recipe gluten-free?
To make this pie gluten-free, choose a gluten-free graham cracker crust. Many brands offer gluten-free options now. You can also make your own crust using gluten-free cookies or oats. Just ensure all other ingredients are gluten-free as well.
What other fruit can I use instead of strawberries?
You can switch strawberries for other fruits easily. Here are some great options:
– Raspberries
– Blueberries
– Peaches
– Kiwi
– Mixed berries
These fruits will add different flavors and colors to your pie. Feel free to mix and match!
You’ve learned how to make a delicious No-Bake Strawberry Cream Pie. We covered the key ingredients, step-by-step instructions, and helpful tips. Now, you can impress friends and family with this simple dessert. Remember, you can get creative with fruits and flavors. Don’t hesitate to try different toppings or adjustments. Your pie can be a unique creation. Enjoy your delicious pie-making journey!


![To bake a delicious Raspberry Lemon Loaf, you need these key ingredients: - 1 ½ cups all-purpose flour - 1 teaspoon baking powder - ½ teaspoon baking soda - ¼ teaspoon salt - ½ cup unsalted butter, softened - 1 cup granulated sugar - 2 large eggs, at room temperature - 1 teaspoon pure vanilla extract - Zest of 1 lemon, finely grated - ½ cup freshly squeezed lemon juice - 1 cup fresh raspberries (or frozen, thawed, and drained) - ¼ cup powdered sugar for glazing - 1 tablespoon freshly squeezed lemon juice for glazing You can add extra flavor or texture with these options: - ½ cup chopped nuts, like walnuts or almonds - ½ teaspoon almond extract for a nutty taste - Lemon zest can be increased for a stronger flavor - A handful of blueberries can mix well with raspberries If you run out of an ingredient, here are some swaps: - Use coconut oil instead of butter for a dairy-free version - Applesauce can replace eggs for a vegan loaf - If you lack lemon juice, use lime juice instead - Whole wheat flour can stand in for all-purpose flour, but it may change the texture With these ingredients and options, you can customize your Raspberry Lemon Loaf to fit your taste! Start by preheating your oven to 350°F (175°C). Grab a 9x5 inch loaf pan. Grease it with butter and lightly dust it with flour. This will help the loaf come out easily. In a medium bowl, whisk together the following: - 1 ½ cups all-purpose flour - 1 teaspoon baking powder - ½ teaspoon baking soda - ¼ teaspoon salt Set this mixture aside for later use. This step ensures the leavening agents are evenly distributed. In a large mixing bowl, use an electric mixer to cream together: - ½ cup unsalted butter, softened - 1 cup granulated sugar Beat them for about 3-5 minutes. The mixture should turn light and fluffy. This helps air to blend into the butter. Now, add 2 large eggs one at a time. Mix well after each addition. Next, stir in: - 1 teaspoon pure vanilla extract - Zest of 1 lemon Make sure everything combines fully. This adds a nice flavor to your loaf. Slowly pour in ½ cup of freshly squeezed lemon juice. Mix gently until it blends well with the other wet ingredients. This step gives your loaf a bright, zesty taste. Gradually add the dry mixture to the wet mix. Stir gently until just combined. Be careful not to overmix. This keeps your loaf light and airy. Now, it’s time to add the fun part! Gently fold in 1 cup of fresh raspberries. If you use frozen ones, coat them lightly in flour. This helps them stay suspended in the batter. Pour the batter into your prepared loaf pan. Smooth the top with a spatula. Bake in the preheated oven for 50-60 minutes. Check for doneness by inserting a toothpick in the center. It should come out clean. Once baked, let the loaf cool in the pan for about 10 minutes. Then transfer it to a wire rack to cool completely. For glazing, mix together: - ¼ cup powdered sugar - 1 tablespoon freshly squeezed lemon juice Drizzle this glaze over the cooled loaf for a sweet finish. Slice the loaf into generous pieces. Enjoy the burst of raspberry and lemon flavors in every bite! You can serve it on pretty plates. Garnish with fresh raspberries and a sprinkle of lemon zest for an elegant touch. This loaf is perfect for breakfast or a sweet snack! For the Full Recipe, check out the detailed instructions. One big mistake is overmixing the batter. This can make the loaf tough. Mix until just combined for a light texture. Another mistake is not checking the oven temperature. An oven thermometer can help ensure accuracy. Also, if you forget to grease your pan, the loaf may stick. Always prepare your pan before pouring in the batter. For a soft and moist loaf, use room temperature ingredients. Cold butter or eggs can lead to uneven mixing. When folding in raspberries, do it gently. This helps keep them whole and prevents a mushy loaf. Make sure your oven is fully preheated. This ensures even baking and a perfect rise. To boost flavor, add more lemon zest. This can brighten the taste. You can also mix in a dash of almond extract for a unique twist. If you want a sweeter glaze, add more powdered sugar. For a touch of spice, a pinch of cinnamon can be delightful. Enjoy experimenting with flavors to find your perfect blend! {{image_4}} To make a gluten-free version, swap the all-purpose flour with a gluten-free blend. Use one that works well for baking. The texture may change slightly, but the taste will still shine. This version is just as delicious and perfect for those with gluten issues. For a vegan twist, replace the eggs with flax eggs. Mix one tablespoon of ground flaxseed with three tablespoons of water. Let it sit for five minutes. Use a plant-based butter instead of regular butter. This keeps the loaf moist and tasty while being dairy-free. You can switch out the raspberries for other fruits! Blueberries or strawberries work well. For a tropical touch, try diced pineapple or mango. Each fruit brings its own flavor, making your loaf unique. Experiment and find your favorite mix! For the full recipe, refer to the section above. After you bake your Raspberry Lemon Loaf, let it cool completely. Wrap it tightly in plastic wrap or foil. You can also place it in an airtight container. Store it at room temperature for up to three days. If you prefer, keep it in the fridge for about a week. This helps keep it fresh and moist. To freeze the loaf, first cool it completely. Then, slice it into even pieces. Wrap each slice in plastic wrap. Next, place the wrapped slices in a freezer-safe bag. You can freeze them for up to three months. When you’re ready to enjoy a slice, thaw it in the fridge overnight or let it sit at room temperature for a few hours. Reheating is simple. You can use a microwave or an oven. For the microwave, heat a slice for about 15-20 seconds. Check if it’s warm enough. If you use the oven, preheat it to 350°F (175°C). Place the slice on a baking sheet for about 5-10 minutes. This method keeps the loaf soft and tasty. Enjoy your Raspberry Lemon Loaf warm with a cup of tea or coffee! You can check if your loaf is done by inserting a toothpick in the center. If it comes out clean or with just a few crumbs, your loaf is ready. You can also look for a golden-brown crust and a slight spring back when you gently press the top. Yes, you can use frozen raspberries! Just make sure to thaw them and drain off any extra liquid. Toss them in some flour before folding them into the batter. This helps to keep them from sinking to the bottom while baking. If you don't have lemon juice, you can use lime juice or even apple cider vinegar. Both options will give a nice tang to your loaf. Just remember that the flavor will change slightly. The Raspberry Lemon Loaf will stay fresh for about 3-4 days at room temperature if stored in an airtight container. It also freezes well for up to 3 months. Just wrap it tightly before freezing. Absolutely! You can make the loaf a day or two ahead of time. Store it in an airtight container to keep it moist. You can also prepare the batter in advance and bake it later for a fresh treat. Be sure to check the [Full Recipe] for more tips! Here is the full recipe for Raspberry Lemon Dream Loaf. This treat is bright, sweet, and tangy. You will want to make it again and again. Ingredients: - 1 ½ cups all-purpose flour - 1 teaspoon baking powder - ½ teaspoon baking soda - ¼ teaspoon salt - ½ cup unsalted butter, softened to room temperature - 1 cup granulated sugar - 2 large eggs, at room temperature - 1 teaspoon pure vanilla extract - Zest of 1 lemon, finely grated - ½ cup freshly squeezed lemon juice - 1 cup fresh raspberries (or frozen raspberries, thawed and drained) - ¼ cup powdered sugar for glazing - 1 tablespoon freshly squeezed lemon juice for glazing This loaf serves about 10 people. Each slice has around 200 calories. You get a nice mix of carbs, fat, and protein. The fresh raspberries add fiber and vitamins, too. Slice the loaf into thick pieces. Each slice is perfect for a dessert or a snack. You can serve it on its own or with a cup of tea. The bright flavors make it a crowd-pleaser. For a fancy touch, add a few raspberries on top. Enjoy every bite! In this article, we explored the essential ingredients for a Raspberry Lemon Loaf, including optional add-ins and substitutions. I provided clear, step-by-step instructions to guide you from mixing to baking. We discussed tips for avoiding mistakes and achieving the right texture. You also learned about variations, storage methods, and answers to common questions. Now, with these insights, you can create a delicious loaf that suits your taste and needs. Enjoy baking and sharing this delightful treat!](https://goldendishy.com/wp-content/uploads/2025/07/83025fd5-21c0-4ee2-bbe4-d247d9a88122-768x768.webp)


