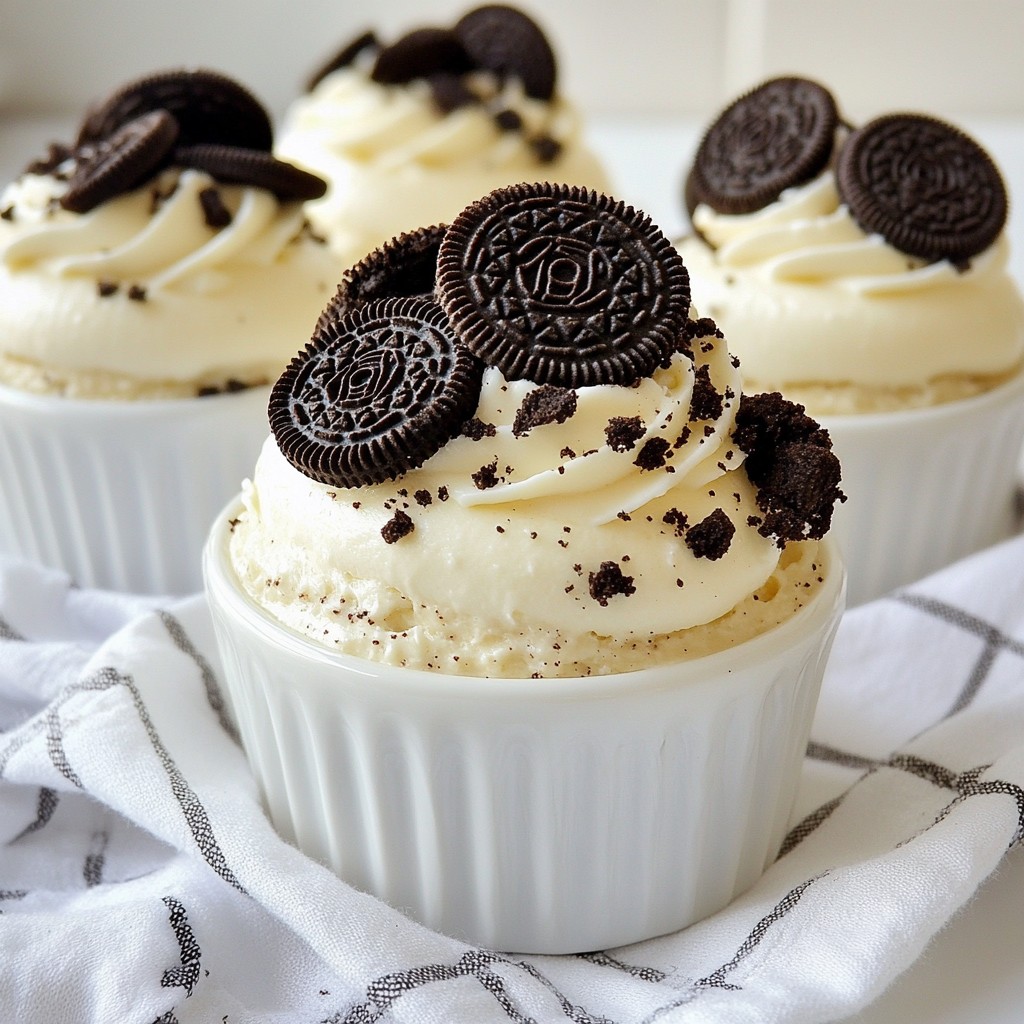
Looking for a crowd-pleasing dessert that's easy to whip up? You’ll love No-Bake Oreo Cheesecake Cups! These delightful treats combine creamy cheesecake, rich Oreo flavors, and a quick, no-bake method. Perfect for parties, they’ll impress your guests without all the fuss. Let’s dive into the simple ingredients and step-by-step instructions to create these sweet wonders. You’re just a few minutes away from dessert bliss!
Why I Love This Recipe
- Easy to Make: This no-bake cheesecake is simple and quick to prepare, making it perfect for any occasion.
- Decadent Flavor: The combination of creamy cheesecake and crunchy Oreo cookies creates a rich and indulgent dessert.
- Customizable: You can easily adjust the recipe by adding different toppings or mixing in your favorite candies.
- Perfect for Sharing: These individual cups are great for parties, allowing everyone to enjoy their own serving.
Ingredients
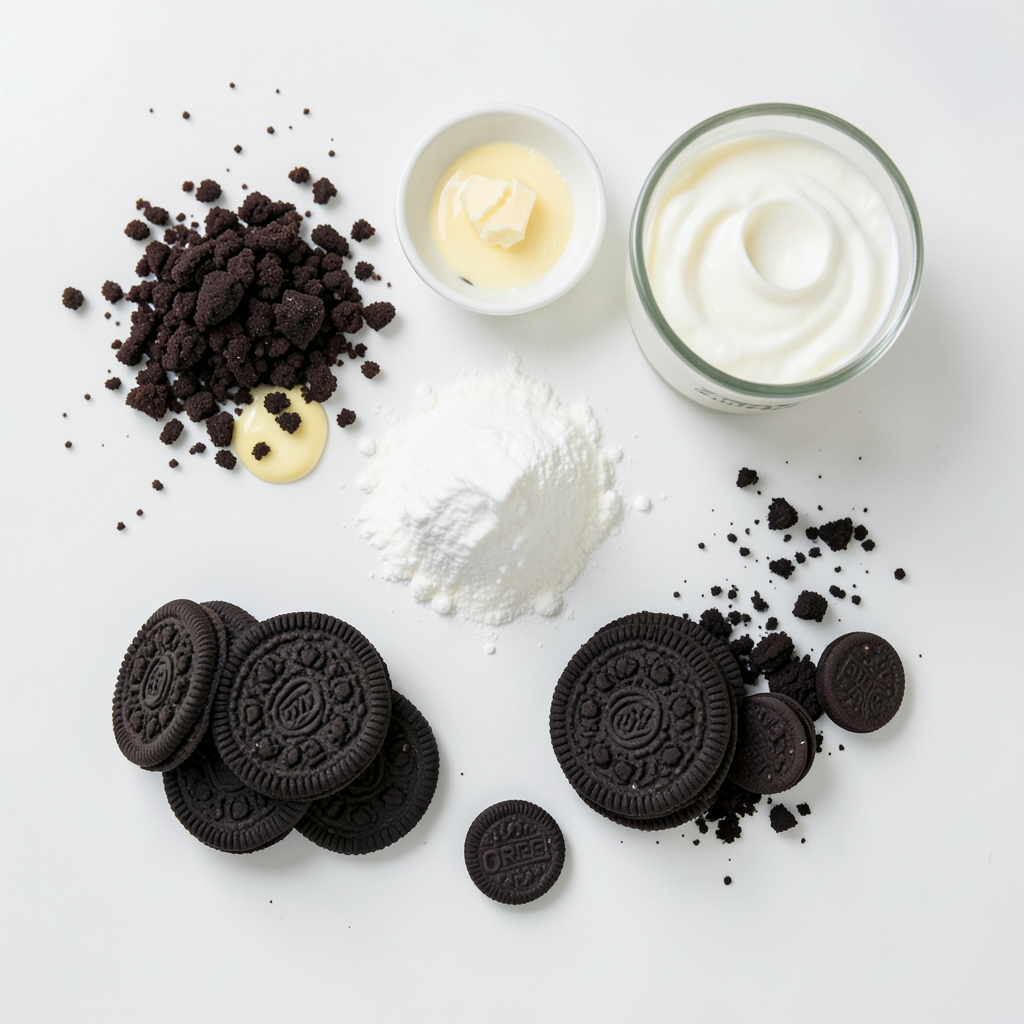
To make No-Bake Oreo Cheesecake Cups, you need these simple ingredients:
- 1 ½ cups Oreo cookie crumbs
- 4 tablespoons unsalted butter, melted
- 8 oz cream cheese, softened to room temperature
- ½ cup powdered sugar
- 1 teaspoon pure vanilla extract
- 1 cup heavy whipping cream
- 8 Oreos, coarsely crushed for incorporation and decoration
- Additional mini Oreos for topping
Each ingredient plays a role in creating that rich and creamy dessert. The Oreo cookie crumbs form a crunchy crust that pairs perfectly with the smooth filling. Unsalted butter helps bind the crumbs together, giving it a sturdy base.
Cream cheese adds a rich texture, while powdered sugar gives it sweetness. The vanilla extract adds a lovely flavor that enhances the dish. Heavy whipping cream is key for that light and airy texture we love in cheesecakes. Lastly, the coarsely crushed Oreos bring in that signature cookie taste, making every bite delicious.
Gather these ingredients, and you are ready to whip up a treat that will impress your guests!
Step-by-Step Instructions
Preparing the Crust
To start, gather your ingredients. You need 1 ½ cups of Oreo cookie crumbs and 4 tablespoons of melted unsalted butter. In a medium bowl, mix the cookie crumbs and butter. Use a fork or spatula to blend until the mix looks like wet sand. This texture helps the crust hold together.
Next, divide the crust mix into 6 small dessert cups. Use your fingers or the back of a spoon to press the mixture down firmly. Make sure it’s even at the bottom. This step is key for a perfect base. Place the cups in the fridge to chill while you make the filling.
Making the Cheesecake Filling
Now, let’s move on to the filling. Take 8 ounces of softened cream cheese and place it in a large mixing bowl. Use an electric mixer on medium speed to beat the cream cheese until it is smooth and creamy. This should take about 1 to 2 minutes.
Gradually add in ½ cup of powdered sugar and 1 teaspoon of pure vanilla extract. Mix until everything is fully blended. The filling should be silky and delicious.
Whipping the Cream
For a light and fluffy texture, you need to whip 1 cup of heavy whipping cream. Use a separate chilled bowl for this. Beat the cream with an electric mixer until stiff peaks form. This step is crucial for making the cheesecake light.
Be careful when folding the whipped cream into the cream cheese mixture. Use a rubber spatula and gently combine them. Avoid deflating the whipped cream. Once mixed, stir in the coarsely crushed Oreos. This adds a nice crunch to your filling.
Assembling the Cups
After the crust has chilled, take the cups out of the fridge. Use a spoon to fill each cup with the Oreo cheesecake mixture. Layer it gently on top of the crust. Fill each cup to the rim for a lovely look.
Now, cover each cup with plastic wrap and put them back in the fridge. They need to chill for at least 4 hours, but overnight is best. This helps the filling set properly.
Tips & Tricks
Perfecting the Texture
To get the right filling texture, focus on two key steps. First, make sure your cream cheese is soft. This helps it blend smoothly. Second, when you whip the cream, beat until stiff peaks form. This gives your filling lightness.
Common mistakes can lead to a lumpy filling. Avoid over-mixing the cream cheese. If you mix too long, it can get grainy. Also, don’t rush the whipping process. Take your time to fold the whipped cream gently into the mixture. This keeps the air in, making your cheesecake fluffy.
Presentation Tips
Serving your cheesecake cups nicely makes a big impact. Use clear dessert cups to showcase the layers. You can place them on a colorful tray for a fun look.
Garnishes add charm. Sprinkle crushed Oreos on top for texture. A few mini Oreos not only taste great but also look cute. You can even add fresh mint leaves for a pop of color. These small touches make your dessert stand out at any party!
Pro Tips
- Chill Your Tools: Before whipping the cream, chill your mixing bowl and beaters in the freezer for about 10-15 minutes. This helps achieve stiff peaks more easily.
- Oreo Variations: Experiment with different flavors of Oreos to create unique varieties of cheesecake cups, such as mint or peanut butter.
- Crust Consistency: Make sure the crust mixture is moist enough to hold together when pressed but not too wet. Adjust the butter if necessary for the right texture.
- Top It Off: For an elegant finish, consider drizzling melted chocolate or caramel sauce over the top of the cheesecake cups before serving.
Variations
Flavor Variations
You can switch up the flavors in your No-Bake Oreo Cheesecake Cups. Adding different extracts can change the taste. Try almond extract for a nutty flavor. For a holiday twist, use peppermint extract. Just a few drops can bring a fresh vibe to your dessert.
You can also use different cookies. Instead of Oreos, try chocolate graham crackers or vanilla wafers. Each cookie gives a unique taste. You can even mix cookies for a fun surprise!
Dietary Modifications
If you need gluten-free options, use gluten-free Oreo cookies. They taste just like the originals. You won’t miss the regular ones at all.
For dairy-free alternatives, use vegan cream cheese. You can also whip coconut cream instead of heavy cream. Both swaps keep the dessert creamy and delicious. Many people will love these options, even if they usually avoid dairy.
Storage Info
How to Store Leftovers
To keep your No-Bake Oreo Cheesecake Cups fresh, use airtight containers. Glass containers work great. They prevent air from spoiling the taste. Store the cups in the refrigerator. The cheesecake cups stay good for about 3 to 5 days. This way, you can enjoy them later!
Freezing Instructions
You can freeze these cheesecake cups for longer storage. First, cover each cup tightly with plastic wrap. Then, place them in a freezer-safe container. They will last for up to 2 months in the freezer. When you want to eat them, move the cups to the fridge. Let them thaw overnight. They will taste just as good as fresh!
FAQs
Can I use different cookies for the crust?
Yes, you can! Many cookies work well. Try using graham crackers or chocolate wafer cookies. These add unique flavors to the crust. Just crush them and mix with melted butter like you do with Oreos.
How long can I keep No-Bake Oreo Cheesecake Cups in the fridge?
You can keep these cups in the fridge for up to four days. Store them in airtight containers to keep them fresh. They taste great even after a few days, making them perfect for snacking.
Can I make these cups in advance for a party?
Absolutely! These cheesecake cups are perfect for making ahead. Prepare them a day before your party. Just chill them overnight. They will be set and ready to impress your guests when it’s time to serve.
How do I make these cheesecake cups less sweet?
To reduce the sweetness, cut back on the powdered sugar. You can also use less cream cheese or swap it for Greek yogurt. Another option is to add a bit of lemon juice for a fresh tang. Experiment until you find what you like best!
You now have all the tools to create delicious No-Bake Oreo Cheesecake Cups. We explored the ingredients, from Oreo crumbs to mini Oreos for topping. I walked you through the step-by-step process, from making the crust to whipping the cream. Plus, I shared tips for texture and presentation. Don't forget the variations for flavor and dietary needs. Store your leftovers the right way to keep them fresh. Enjoy these treats at your next gathering, or simply treat yourself. With a bit of practice, you will impress everyone with your baking skills.