No-Bake Energy Bites Simple and Tasty Snack
![- 1 cup rolled oats - 1/2 cup natural peanut butter (smooth or crunchy) - 1/3 cup honey or maple syrup The main ingredients form the base of these bites. Rolled oats give them a hearty texture and fiber. Natural peanut butter adds creaminess and protein. Honey or maple syrup provides natural sweetness. - 1/2 cup ground flaxseed - 1/4 cup mini chocolate chips - 1/4 cup chia seeds These add-ins let you customize your bites. Ground flaxseed boosts nutrition and fiber. Mini chocolate chips make them fun and tasty. Chia seeds add crunch and healthy fats. - 1/2 teaspoon ground cinnamon - A pinch of salt Seasonings enhance the flavor. Ground cinnamon adds warmth and sweetness. A pinch of salt balances the flavors, making them pop. These ingredients come together to create a snack that is both simple and packed with energy. You can find the full recipe above to guide you through the steps of making these no-bake energy bites. - Measure 1 cup of rolled oats. - Mix 1/2 cup ground flaxseed and 1/4 cup chia seeds. - In a separate bowl, combine 1/2 cup natural peanut butter and 1/3 cup honey or maple syrup. Start by mixing the dry ingredients in a large bowl. This includes your oats, flaxseed, chia seeds, chocolate chips, cinnamon, and salt. Stir well to make sure everything is evenly spread. Then, in your other bowl, blend the peanut butter and honey until smooth. This makes a sticky base for your bites. Next, pour the wet mix into the dry mix. Use a spoon or your hands to combine them. You want to make sure everything is well mixed. The result should feel sticky but hold its shape when pressed. Now it's time to scoop out the mixture. Use clean hands to grab small amounts, about the size of a tablespoon. Roll these into balls and place them on a baking sheet lined with parchment paper. Once all your bites are shaped, pop the sheet in the fridge for at least 30 minutes. This helps them set, making them easier to eat. After chilling, your No-Bake Energy Bites are ready! For more details on the recipe, check the Full Recipe. You can easily swap ingredients for your No-Bake Energy Bites. If you want a vegan option, replace honey with maple syrup. It will still add sweetness and help bind the bites. For nut-free alternatives, use sun butter or soy nut butter instead of peanut butter. These options keep the texture while avoiding nuts. Getting the right texture is key. If your mixture feels too dry, add a bit more nut butter or syrup. This will help everything stick together. When rolling your bites, keep your hands slightly wet. This helps prevent sticking. Aim for even sizes to get uniform bites that chill well. To boost flavor, add spices like vanilla or nutmeg. These can add a nice kick and make them more exciting. You can also use flavored nut butters, like almond or cashew butter. This twist changes the taste while keeping the bites healthy. If you're looking for the complete instructions, check the Full Recipe. {{image_4}} You can mix flavors to make the bites even more fun. One favorite is chocolate peanut butter. Just add cocoa powder or more mini chocolate chips. This gives you a rich taste. Another great option is almond joy-inspired bites. Use almond butter, shredded coconut, and chopped almonds. This adds a tropical twist. Want to make these bites even better? Consider adding protein powder. It boosts protein without changing the taste. You can also mix in dried fruits like raisins or cranberries. These add natural sweetness and fiber. Pumpkin seeds or sunflower seeds work great too. They add crunch and healthy fats. You can create themed bites for different times of the year. In fall, try pumpkin spice bites. Just add pumpkin puree and pumpkin spice. For winter holidays, think about gingerbread energy bites. Mix in ginger, nutmeg, and a bit of molasses. These variations keep your snacks exciting and seasonal. For the full recipe, check out the No-Bake Energizing Peanut Butter Bliss Bites. To keep your energy bites fresh, store them in airtight containers. Glass or plastic containers work well. Make sure to seal them tight. This helps prevent them from drying out. For longer freshness, keep them in the fridge. They taste great cold and stay firm. You should eat your energy bites within one week. After that, they may lose flavor and texture. Signs of spoilage include a strange smell or dry spots. If they feel crumbly or hard, it’s time to toss them. You can freeze your energy bites for later. To freeze, place them in a single layer on a baking sheet. Once frozen, transfer them to a freezer bag. Make sure to remove as much air as possible. They can last up to three months in the freezer. To thaw, simply take out what you need. Leave them on the counter for about 30 minutes. You can also pop them in the fridge overnight. Now you have a quick snack ready anytime! No-Bake Energy Bites stay fresh for about one week in the fridge. Store them in an airtight container. This keeps them tasty and safe to eat. Yes, you can make No-Bake Energy Bites ahead of time! They are perfect for meal prep. Make a batch on the weekend, and enjoy them all week long. Common allergens include peanut butter and honey. Some people may be allergic to oats or chia seeds. Always check for allergies when sharing these bites with others. Absolutely! You can swap peanut butter for almond or cashew butter. Just make sure the nut butter is smooth enough to mix well. You can modify the recipe to suit your needs. Use maple syrup instead of honey for vegan bites. For nut-free options, try sunflower seed butter. Add dried fruits or seeds for extra flavor and nutrition. Check the [Full Recipe] for more ideas. In this blog post, we explored how to make tasty no-bake energy bites. We covered the main ingredients, like oats and peanut butter. You learned about optional add-ins and seasonings you can try. I shared step-by-step instructions to guide you through the process. Remember, you can customize your bites to fit your taste. Try different flavors, adjust for allergens, and store them properly. Enjoy creating these healthy snacks that fit your needs. Happy snacking!](https://goldendishy.com/wp-content/uploads/2025/06/48776490-fb92-4f64-9515-66f21e34c535.webp)
Fuel your day with my no-bake energy bites! These simple snacks are packed with flavor and nutrition, making them the perfect boost for busy lives. With just a few key ingredients like rolled oats and peanut butter, you can whip them up in no time. Plus, you can add fun extras to suit your taste. Ready to transform your snacking game? Let’s dive into the delicious details!
Ingredients
Primary Ingredients
– 1 cup rolled oats
– 1/2 cup natural peanut butter (smooth or crunchy)
– 1/3 cup honey or maple syrup
The main ingredients form the base of these bites. Rolled oats give them a hearty texture and fiber. Natural peanut butter adds creaminess and protein. Honey or maple syrup provides natural sweetness.
Optional Add-ins
– 1/2 cup ground flaxseed
– 1/4 cup mini chocolate chips
– 1/4 cup chia seeds
These add-ins let you customize your bites. Ground flaxseed boosts nutrition and fiber. Mini chocolate chips make them fun and tasty. Chia seeds add crunch and healthy fats.
Seasoning Elements
– 1/2 teaspoon ground cinnamon
– A pinch of salt
Seasonings enhance the flavor. Ground cinnamon adds warmth and sweetness. A pinch of salt balances the flavors, making them pop.
These ingredients come together to create a snack that is both simple and packed with energy.
Step-by-Step Instructions
Prepping Ingredients
– Measure 1 cup of rolled oats.
– Mix 1/2 cup ground flaxseed and 1/4 cup chia seeds.
– In a separate bowl, combine 1/2 cup natural peanut butter and 1/3 cup honey or maple syrup.
Start by mixing the dry ingredients in a large bowl. This includes your oats, flaxseed, chia seeds, chocolate chips, cinnamon, and salt. Stir well to make sure everything is evenly spread. Then, in your other bowl, blend the peanut butter and honey until smooth. This makes a sticky base for your bites.
Mixing Process
Next, pour the wet mix into the dry mix. Use a spoon or your hands to combine them. You want to make sure everything is well mixed. The result should feel sticky but hold its shape when pressed.
Shaping and Chilling
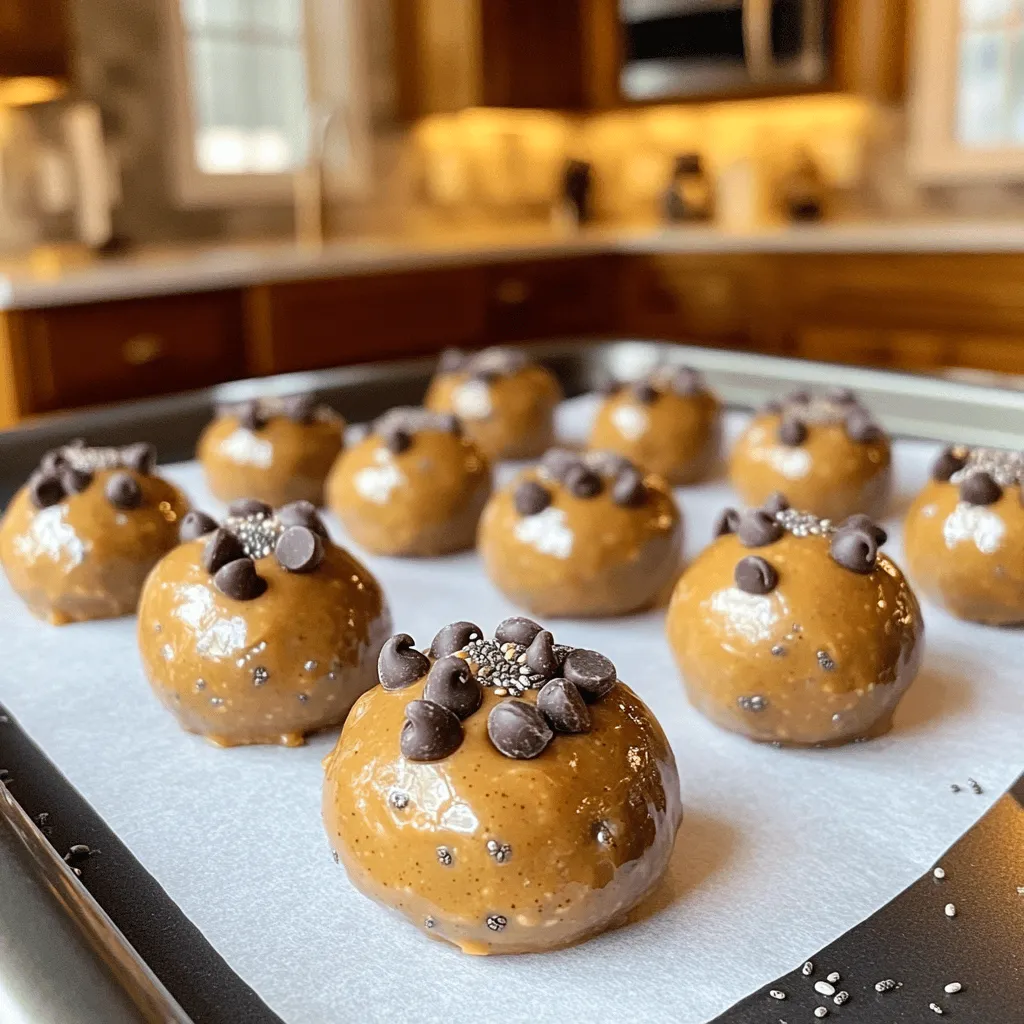
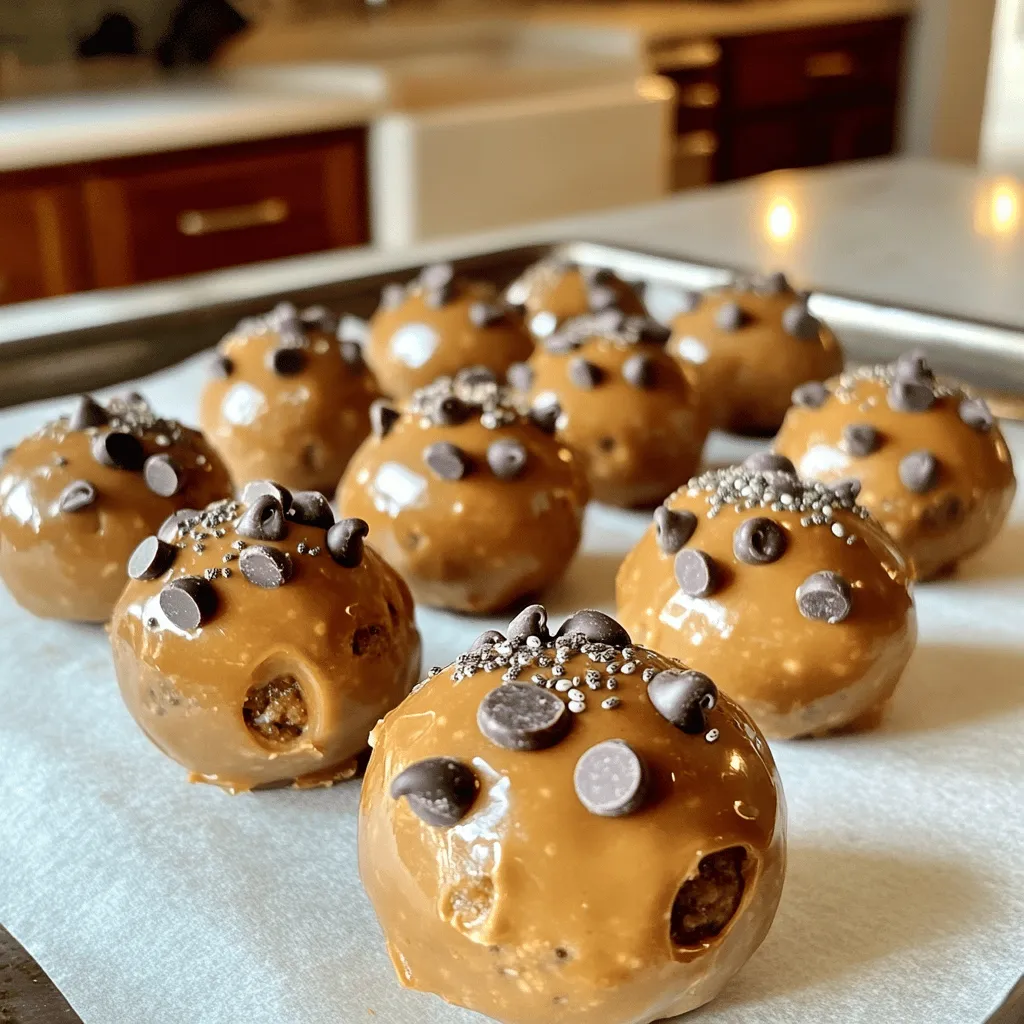
Now it’s time to scoop out the mixture. Use clean hands to grab small amounts, about the size of a tablespoon. Roll these into balls and place them on a baking sheet lined with parchment paper. Once all your bites are shaped, pop the sheet in the fridge for at least 30 minutes. This helps them set, making them easier to eat.
After chilling, your No-Bake Energy Bites are ready!
Tips & Tricks
Ingredient Substitutions
You can easily swap ingredients for your No-Bake Energy Bites. If you want a vegan option, replace honey with maple syrup. It will still add sweetness and help bind the bites. For nut-free alternatives, use sun butter or soy nut butter instead of peanut butter. These options keep the texture while avoiding nuts.
Ensuring Proper Texture
Getting the right texture is key. If your mixture feels too dry, add a bit more nut butter or syrup. This will help everything stick together. When rolling your bites, keep your hands slightly wet. This helps prevent sticking. Aim for even sizes to get uniform bites that chill well.
Enhancing Flavor Profile
To boost flavor, add spices like vanilla or nutmeg. These can add a nice kick and make them more exciting. You can also use flavored nut butters, like almond or cashew butter. This twist changes the taste while keeping the bites healthy.

Variations
Flavor Combinations
You can mix flavors to make the bites even more fun. One favorite is chocolate peanut butter. Just add cocoa powder or more mini chocolate chips. This gives you a rich taste. Another great option is almond joy-inspired bites. Use almond butter, shredded coconut, and chopped almonds. This adds a tropical twist.
Boosting Nutritional Value
Want to make these bites even better? Consider adding protein powder. It boosts protein without changing the taste. You can also mix in dried fruits like raisins or cranberries. These add natural sweetness and fiber. Pumpkin seeds or sunflower seeds work great too. They add crunch and healthy fats.
Themed Bites
You can create themed bites for different times of the year. In fall, try pumpkin spice bites. Just add pumpkin puree and pumpkin spice. For winter holidays, think about gingerbread energy bites. Mix in ginger, nutmeg, and a bit of molasses. These variations keep your snacks exciting and seasonal.
Storage Info
Best Storage Methods
To keep your energy bites fresh, store them in airtight containers. Glass or plastic containers work well. Make sure to seal them tight. This helps prevent them from drying out. For longer freshness, keep them in the fridge. They taste great cold and stay firm.
Shelf Life
You should eat your energy bites within one week. After that, they may lose flavor and texture. Signs of spoilage include a strange smell or dry spots. If they feel crumbly or hard, it’s time to toss them.
Freezing Energy Bites
You can freeze your energy bites for later. To freeze, place them in a single layer on a baking sheet. Once frozen, transfer them to a freezer bag. Make sure to remove as much air as possible. They can last up to three months in the freezer.
To thaw, simply take out what you need. Leave them on the counter for about 30 minutes. You can also pop them in the fridge overnight. Now you have a quick snack ready anytime!
FAQs
How long do No-Bake Energy Bites last?
No-Bake Energy Bites stay fresh for about one week in the fridge. Store them in an airtight container. This keeps them tasty and safe to eat.
Can I make No-Bake Energy Bites ahead of time?
Yes, you can make No-Bake Energy Bites ahead of time! They are perfect for meal prep. Make a batch on the weekend, and enjoy them all week long.
What are some common allergens in No-Bake Energy Bites?
Common allergens include peanut butter and honey. Some people may be allergic to oats or chia seeds. Always check for allergies when sharing these bites with others.
Can I use different types of nut butter?
Absolutely! You can swap peanut butter for almond or cashew butter. Just make sure the nut butter is smooth enough to mix well.
How to customize No-Bake Energy Bites for dietary preferences?
You can modify the recipe to suit your needs. Use maple syrup instead of honey for vegan bites. For nut-free options, try sunflower seed butter. Add dried fruits or seeds for extra flavor and nutrition.
In this blog post, we explored how to make tasty no-bake energy bites. We covered the main ingredients, like oats and peanut butter. You learned about optional add-ins and seasonings you can try. I shared step-by-step instructions to guide you through the process.
Remember, you can customize your bites to fit your taste. Try different flavors, adjust for allergens, and store them properly. Enjoy creating these healthy snacks that fit your needs. Happy snacking!
![- 1 cup rolled oats - 1/2 cup natural peanut butter (smooth or crunchy) - 1/3 cup honey or maple syrup The main ingredients form the base of these bites. Rolled oats give them a hearty texture and fiber. Natural peanut butter adds creaminess and protein. Honey or maple syrup provides natural sweetness. - 1/2 cup ground flaxseed - 1/4 cup mini chocolate chips - 1/4 cup chia seeds These add-ins let you customize your bites. Ground flaxseed boosts nutrition and fiber. Mini chocolate chips make them fun and tasty. Chia seeds add crunch and healthy fats. - 1/2 teaspoon ground cinnamon - A pinch of salt Seasonings enhance the flavor. Ground cinnamon adds warmth and sweetness. A pinch of salt balances the flavors, making them pop. These ingredients come together to create a snack that is both simple and packed with energy. You can find the full recipe above to guide you through the steps of making these no-bake energy bites. - Measure 1 cup of rolled oats. - Mix 1/2 cup ground flaxseed and 1/4 cup chia seeds. - In a separate bowl, combine 1/2 cup natural peanut butter and 1/3 cup honey or maple syrup. Start by mixing the dry ingredients in a large bowl. This includes your oats, flaxseed, chia seeds, chocolate chips, cinnamon, and salt. Stir well to make sure everything is evenly spread. Then, in your other bowl, blend the peanut butter and honey until smooth. This makes a sticky base for your bites. Next, pour the wet mix into the dry mix. Use a spoon or your hands to combine them. You want to make sure everything is well mixed. The result should feel sticky but hold its shape when pressed. Now it's time to scoop out the mixture. Use clean hands to grab small amounts, about the size of a tablespoon. Roll these into balls and place them on a baking sheet lined with parchment paper. Once all your bites are shaped, pop the sheet in the fridge for at least 30 minutes. This helps them set, making them easier to eat. After chilling, your No-Bake Energy Bites are ready! For more details on the recipe, check the Full Recipe. You can easily swap ingredients for your No-Bake Energy Bites. If you want a vegan option, replace honey with maple syrup. It will still add sweetness and help bind the bites. For nut-free alternatives, use sun butter or soy nut butter instead of peanut butter. These options keep the texture while avoiding nuts. Getting the right texture is key. If your mixture feels too dry, add a bit more nut butter or syrup. This will help everything stick together. When rolling your bites, keep your hands slightly wet. This helps prevent sticking. Aim for even sizes to get uniform bites that chill well. To boost flavor, add spices like vanilla or nutmeg. These can add a nice kick and make them more exciting. You can also use flavored nut butters, like almond or cashew butter. This twist changes the taste while keeping the bites healthy. If you're looking for the complete instructions, check the Full Recipe. {{image_4}} You can mix flavors to make the bites even more fun. One favorite is chocolate peanut butter. Just add cocoa powder or more mini chocolate chips. This gives you a rich taste. Another great option is almond joy-inspired bites. Use almond butter, shredded coconut, and chopped almonds. This adds a tropical twist. Want to make these bites even better? Consider adding protein powder. It boosts protein without changing the taste. You can also mix in dried fruits like raisins or cranberries. These add natural sweetness and fiber. Pumpkin seeds or sunflower seeds work great too. They add crunch and healthy fats. You can create themed bites for different times of the year. In fall, try pumpkin spice bites. Just add pumpkin puree and pumpkin spice. For winter holidays, think about gingerbread energy bites. Mix in ginger, nutmeg, and a bit of molasses. These variations keep your snacks exciting and seasonal. For the full recipe, check out the No-Bake Energizing Peanut Butter Bliss Bites. To keep your energy bites fresh, store them in airtight containers. Glass or plastic containers work well. Make sure to seal them tight. This helps prevent them from drying out. For longer freshness, keep them in the fridge. They taste great cold and stay firm. You should eat your energy bites within one week. After that, they may lose flavor and texture. Signs of spoilage include a strange smell or dry spots. If they feel crumbly or hard, it’s time to toss them. You can freeze your energy bites for later. To freeze, place them in a single layer on a baking sheet. Once frozen, transfer them to a freezer bag. Make sure to remove as much air as possible. They can last up to three months in the freezer. To thaw, simply take out what you need. Leave them on the counter for about 30 minutes. You can also pop them in the fridge overnight. Now you have a quick snack ready anytime! No-Bake Energy Bites stay fresh for about one week in the fridge. Store them in an airtight container. This keeps them tasty and safe to eat. Yes, you can make No-Bake Energy Bites ahead of time! They are perfect for meal prep. Make a batch on the weekend, and enjoy them all week long. Common allergens include peanut butter and honey. Some people may be allergic to oats or chia seeds. Always check for allergies when sharing these bites with others. Absolutely! You can swap peanut butter for almond or cashew butter. Just make sure the nut butter is smooth enough to mix well. You can modify the recipe to suit your needs. Use maple syrup instead of honey for vegan bites. For nut-free options, try sunflower seed butter. Add dried fruits or seeds for extra flavor and nutrition. Check the [Full Recipe] for more ideas. In this blog post, we explored how to make tasty no-bake energy bites. We covered the main ingredients, like oats and peanut butter. You learned about optional add-ins and seasonings you can try. I shared step-by-step instructions to guide you through the process. Remember, you can customize your bites to fit your taste. Try different flavors, adjust for allergens, and store them properly. Enjoy creating these healthy snacks that fit your needs. Happy snacking!](https://goldendishy.com/wp-content/uploads/2025/06/48776490-fb92-4f64-9515-66f21e34c535-300x300.webp)


![To bake a delicious Raspberry Lemon Loaf, you need these key ingredients: - 1 ½ cups all-purpose flour - 1 teaspoon baking powder - ½ teaspoon baking soda - ¼ teaspoon salt - ½ cup unsalted butter, softened - 1 cup granulated sugar - 2 large eggs, at room temperature - 1 teaspoon pure vanilla extract - Zest of 1 lemon, finely grated - ½ cup freshly squeezed lemon juice - 1 cup fresh raspberries (or frozen, thawed, and drained) - ¼ cup powdered sugar for glazing - 1 tablespoon freshly squeezed lemon juice for glazing You can add extra flavor or texture with these options: - ½ cup chopped nuts, like walnuts or almonds - ½ teaspoon almond extract for a nutty taste - Lemon zest can be increased for a stronger flavor - A handful of blueberries can mix well with raspberries If you run out of an ingredient, here are some swaps: - Use coconut oil instead of butter for a dairy-free version - Applesauce can replace eggs for a vegan loaf - If you lack lemon juice, use lime juice instead - Whole wheat flour can stand in for all-purpose flour, but it may change the texture With these ingredients and options, you can customize your Raspberry Lemon Loaf to fit your taste! Start by preheating your oven to 350°F (175°C). Grab a 9x5 inch loaf pan. Grease it with butter and lightly dust it with flour. This will help the loaf come out easily. In a medium bowl, whisk together the following: - 1 ½ cups all-purpose flour - 1 teaspoon baking powder - ½ teaspoon baking soda - ¼ teaspoon salt Set this mixture aside for later use. This step ensures the leavening agents are evenly distributed. In a large mixing bowl, use an electric mixer to cream together: - ½ cup unsalted butter, softened - 1 cup granulated sugar Beat them for about 3-5 minutes. The mixture should turn light and fluffy. This helps air to blend into the butter. Now, add 2 large eggs one at a time. Mix well after each addition. Next, stir in: - 1 teaspoon pure vanilla extract - Zest of 1 lemon Make sure everything combines fully. This adds a nice flavor to your loaf. Slowly pour in ½ cup of freshly squeezed lemon juice. Mix gently until it blends well with the other wet ingredients. This step gives your loaf a bright, zesty taste. Gradually add the dry mixture to the wet mix. Stir gently until just combined. Be careful not to overmix. This keeps your loaf light and airy. Now, it’s time to add the fun part! Gently fold in 1 cup of fresh raspberries. If you use frozen ones, coat them lightly in flour. This helps them stay suspended in the batter. Pour the batter into your prepared loaf pan. Smooth the top with a spatula. Bake in the preheated oven for 50-60 minutes. Check for doneness by inserting a toothpick in the center. It should come out clean. Once baked, let the loaf cool in the pan for about 10 minutes. Then transfer it to a wire rack to cool completely. For glazing, mix together: - ¼ cup powdered sugar - 1 tablespoon freshly squeezed lemon juice Drizzle this glaze over the cooled loaf for a sweet finish. Slice the loaf into generous pieces. Enjoy the burst of raspberry and lemon flavors in every bite! You can serve it on pretty plates. Garnish with fresh raspberries and a sprinkle of lemon zest for an elegant touch. This loaf is perfect for breakfast or a sweet snack! For the Full Recipe, check out the detailed instructions. One big mistake is overmixing the batter. This can make the loaf tough. Mix until just combined for a light texture. Another mistake is not checking the oven temperature. An oven thermometer can help ensure accuracy. Also, if you forget to grease your pan, the loaf may stick. Always prepare your pan before pouring in the batter. For a soft and moist loaf, use room temperature ingredients. Cold butter or eggs can lead to uneven mixing. When folding in raspberries, do it gently. This helps keep them whole and prevents a mushy loaf. Make sure your oven is fully preheated. This ensures even baking and a perfect rise. To boost flavor, add more lemon zest. This can brighten the taste. You can also mix in a dash of almond extract for a unique twist. If you want a sweeter glaze, add more powdered sugar. For a touch of spice, a pinch of cinnamon can be delightful. Enjoy experimenting with flavors to find your perfect blend! {{image_4}} To make a gluten-free version, swap the all-purpose flour with a gluten-free blend. Use one that works well for baking. The texture may change slightly, but the taste will still shine. This version is just as delicious and perfect for those with gluten issues. For a vegan twist, replace the eggs with flax eggs. Mix one tablespoon of ground flaxseed with three tablespoons of water. Let it sit for five minutes. Use a plant-based butter instead of regular butter. This keeps the loaf moist and tasty while being dairy-free. You can switch out the raspberries for other fruits! Blueberries or strawberries work well. For a tropical touch, try diced pineapple or mango. Each fruit brings its own flavor, making your loaf unique. Experiment and find your favorite mix! For the full recipe, refer to the section above. After you bake your Raspberry Lemon Loaf, let it cool completely. Wrap it tightly in plastic wrap or foil. You can also place it in an airtight container. Store it at room temperature for up to three days. If you prefer, keep it in the fridge for about a week. This helps keep it fresh and moist. To freeze the loaf, first cool it completely. Then, slice it into even pieces. Wrap each slice in plastic wrap. Next, place the wrapped slices in a freezer-safe bag. You can freeze them for up to three months. When you’re ready to enjoy a slice, thaw it in the fridge overnight or let it sit at room temperature for a few hours. Reheating is simple. You can use a microwave or an oven. For the microwave, heat a slice for about 15-20 seconds. Check if it’s warm enough. If you use the oven, preheat it to 350°F (175°C). Place the slice on a baking sheet for about 5-10 minutes. This method keeps the loaf soft and tasty. Enjoy your Raspberry Lemon Loaf warm with a cup of tea or coffee! You can check if your loaf is done by inserting a toothpick in the center. If it comes out clean or with just a few crumbs, your loaf is ready. You can also look for a golden-brown crust and a slight spring back when you gently press the top. Yes, you can use frozen raspberries! Just make sure to thaw them and drain off any extra liquid. Toss them in some flour before folding them into the batter. This helps to keep them from sinking to the bottom while baking. If you don't have lemon juice, you can use lime juice or even apple cider vinegar. Both options will give a nice tang to your loaf. Just remember that the flavor will change slightly. The Raspberry Lemon Loaf will stay fresh for about 3-4 days at room temperature if stored in an airtight container. It also freezes well for up to 3 months. Just wrap it tightly before freezing. Absolutely! You can make the loaf a day or two ahead of time. Store it in an airtight container to keep it moist. You can also prepare the batter in advance and bake it later for a fresh treat. Be sure to check the [Full Recipe] for more tips! Here is the full recipe for Raspberry Lemon Dream Loaf. This treat is bright, sweet, and tangy. You will want to make it again and again. Ingredients: - 1 ½ cups all-purpose flour - 1 teaspoon baking powder - ½ teaspoon baking soda - ¼ teaspoon salt - ½ cup unsalted butter, softened to room temperature - 1 cup granulated sugar - 2 large eggs, at room temperature - 1 teaspoon pure vanilla extract - Zest of 1 lemon, finely grated - ½ cup freshly squeezed lemon juice - 1 cup fresh raspberries (or frozen raspberries, thawed and drained) - ¼ cup powdered sugar for glazing - 1 tablespoon freshly squeezed lemon juice for glazing This loaf serves about 10 people. Each slice has around 200 calories. You get a nice mix of carbs, fat, and protein. The fresh raspberries add fiber and vitamins, too. Slice the loaf into thick pieces. Each slice is perfect for a dessert or a snack. You can serve it on its own or with a cup of tea. The bright flavors make it a crowd-pleaser. For a fancy touch, add a few raspberries on top. Enjoy every bite! In this article, we explored the essential ingredients for a Raspberry Lemon Loaf, including optional add-ins and substitutions. I provided clear, step-by-step instructions to guide you from mixing to baking. We discussed tips for avoiding mistakes and achieving the right texture. You also learned about variations, storage methods, and answers to common questions. Now, with these insights, you can create a delicious loaf that suits your taste and needs. Enjoy baking and sharing this delightful treat!](https://goldendishy.com/wp-content/uploads/2025/07/83025fd5-21c0-4ee2-bbe4-d247d9a88122-768x768.webp)