No Bake Chocolate Coconut Almond Bars Delicious Treat

If you’re searching for a quick and tasty snack, you’ll love No Bake Chocolate Coconut Almond Bars. These treats combine the rich flavors of chocolate and almond, with a hint of coconut for tropical flair. Best of all, no oven is needed! Join me as we explore a simple recipe that’s easy to follow, and perfect for adding a sweet touch to your day. Let’s get started and satisfy your sweet tooth!
Ingredients
To make No Bake Chocolate Coconut Almond Bars, you need some simple and healthy ingredients. Here’s what you will need:
– 1 cup rolled oats
– 1 cup almond flour
– 1/2 cup unsweetened shredded coconut
– 1/2 cup almond butter
– 1/3 cup pure maple syrup or honey
– 1/4 cup unsweetened cocoa powder
– 1 teaspoon pure vanilla extract
– 1/4 teaspoon sea salt
– 1/4 cup dark chocolate chips
– Extra shredded coconut for garnish
These ingredients come together to create a tasty treat. The oats and almond flour give a nice base. The coconut adds a sweet, chewy texture. Almond butter and maple syrup hold everything together while adding flavor. Cocoa powder gives a rich chocolate taste. Dark chocolate chips on top make it even better. Don’t forget the extra coconut for a lovely finish!
Step-by-Step Instructions
Preparation of Dry Ingredients
First, grab a large mixing bowl. Combine these dry ingredients:
– 1 cup rolled oats
– 1 cup almond flour
– 1/2 cup unsweetened shredded coconut
– 1/4 cup unsweetened cocoa powder
– 1/4 teaspoon sea salt
Stir well to mix. Make sure the dry ingredients are even and clump-free.
Mixing Wet Ingredients
In another bowl, whisk together these wet ingredients:
– 1/2 cup almond butter
– 1/3 cup pure maple syrup (or honey)
– 1 teaspoon pure vanilla extract
Mix until smooth and creamy. The goal is to blend all flavors well.
Combining Ingredients
Next, pour the wet mixture into the bowl of dry ingredients. Use a spatula or your hands to mix. Combine well until everything is moist and sticky. This step is key for the bars to hold together.
Pressing and Setting
Now, take an 8×8 inch baking dish and line it with parchment paper. Leave some paper hanging over the edges. Transfer the mixture into the dish. Press it down firmly. Aim for an even layer. This helps the bars stay compact.
Melting Chocolate and Adding Toppings
To make the topping, melt 1/4 cup of dark chocolate chips. Use a small microwave-safe bowl. Heat in 20-second intervals, stirring in between until smooth. Drizzle the melted chocolate over the mixture in the baking dish. Spread it evenly with a spatula.
Sprinkle extra shredded coconut on top for a nice finish.
Chilling and Serving
Put the baking dish in the refrigerator. Chill for at least 1 to 2 hours until set. After chilling, lift the bars out using the parchment paper. Transfer them to a cutting board. Cut into squares or rectangles as you like. Enjoy your tasty treats!
Tips & Tricks
Best Practices for Preparation
Make sure your ingredients are at room temperature. This helps them mix better. Soft almond butter blends easily with other ingredients. It also makes your bars smooth and creamy.
Customizing Flavor
You can swap almond butter for other nut butters. Peanut butter or sunflower seed butter works great too. Each nut butter gives a unique taste to your bars. Try different flavors to find your favorite.
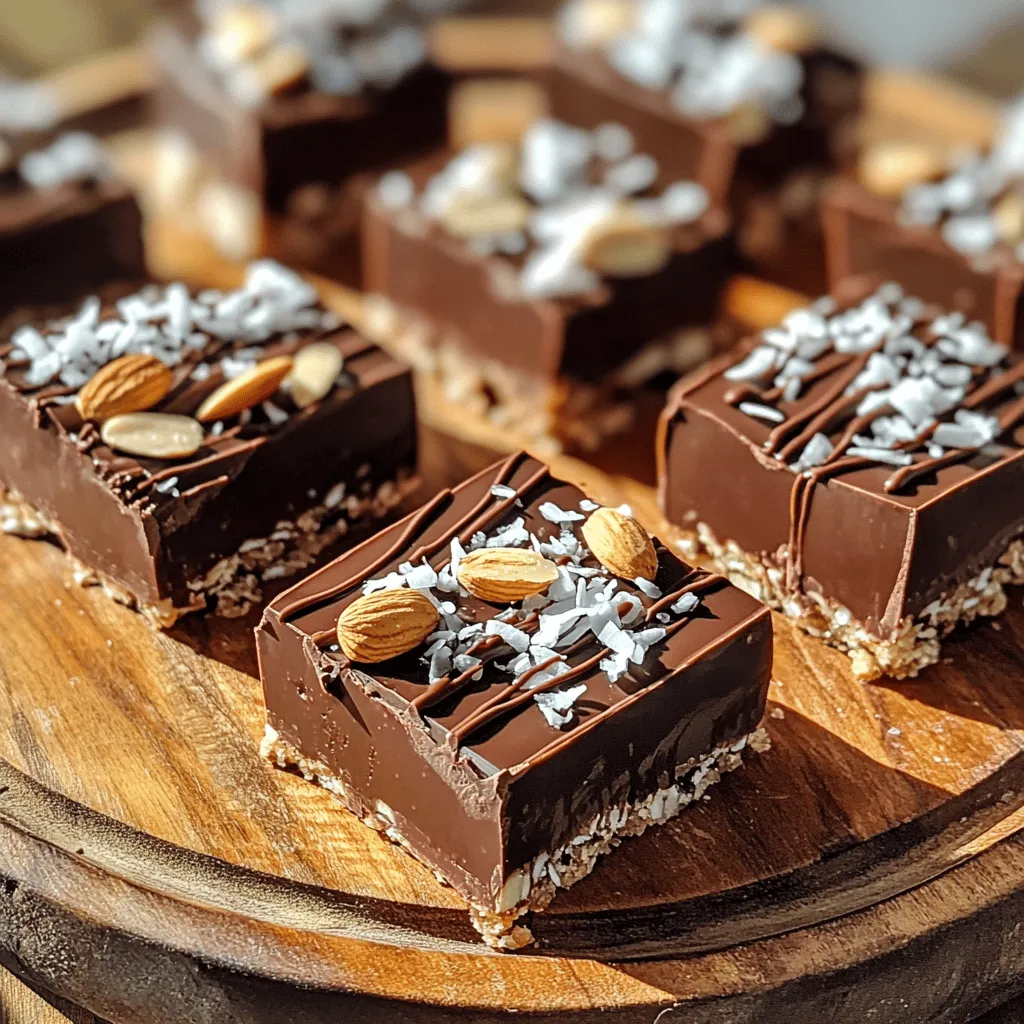
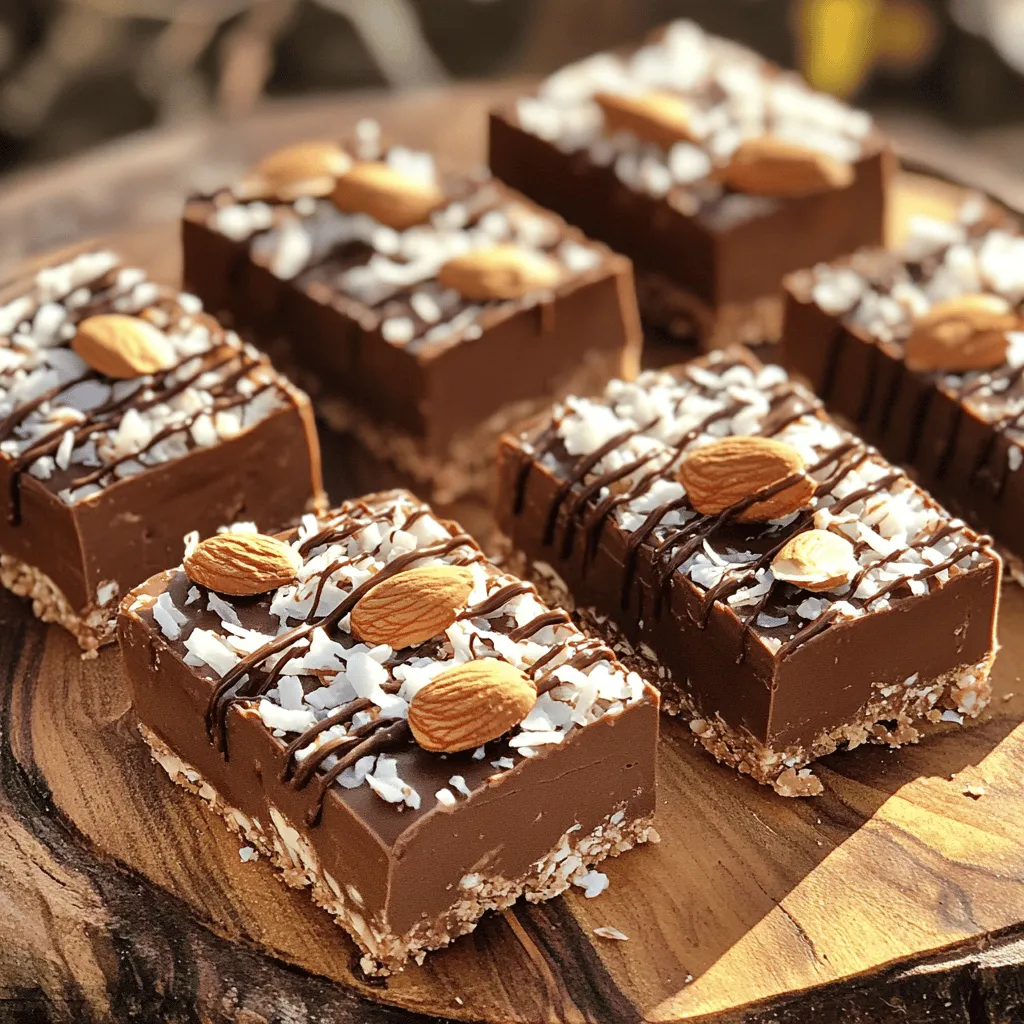
Serving Presentation Ideas
Serve your bars on a rustic wooden platter. Add a drizzle of melted chocolate on top for flair. You can also garnish with whole almonds and extra shredded coconut. This adds color and makes your dessert look fancy.

Variations
Adding Other Nuts or Seeds
You can make these bars even better. Try adding walnuts, pecans, or chia seeds. These add crunch and boost nutrition. Walnuts bring healthy fats. Pecans give a nice, sweet flavor. Chia seeds are great for fiber and protein. Just mix them into your dry ingredients before you combine everything.
Different Sweetener Options
If you want to switch up the taste, try different sweeteners. Agave syrup is a good choice for a lighter flavor. Brown rice syrup offers a unique taste that pairs well with chocolate. You can use these in place of maple syrup or honey. Adjust the amount to your liking, but keep it close to 1/3 cup.
Flavor Enhancements
Want to take it up a notch? Add some cinnamon or a pinch of sea salt. Cinnamon adds warmth and depth to the chocolate flavor. A pinch of sea salt enhances sweetness and balances all the flavors. Just mix these in with the dry ingredients for a tasty twist.
Storage Info
Recommended Storage Methods
To keep your No Bake Chocolate Coconut Almond Bars fresh, store them in an airtight container in the refrigerator. This will help maintain their soft texture and rich flavor. Make sure the container is sealed well to avoid any unwanted odors from other foods.
Freezing Instructions
If you want to enjoy these bars later, freeze them individually. This way, you can grab one whenever you crave a sweet treat. Wrap each bar tightly in plastic wrap and place them in a freezer-safe bag. This method allows for longer shelf life and easy access.
Shelf Life of Bars
You can enjoy these bars within 1 week when stored in the refrigerator. If you freeze them, they can last up to 3 months. Just remember to let them thaw in the fridge for a few hours before enjoying. This makes them a great option for meal prep or snacks on the go.
FAQs
How do I make No Bake Chocolate Coconut Almond Bars vegan?
To make these bars vegan, switch honey for maple syrup. You also need to pick dairy-free chocolate chips. This change keeps the sweet taste while making it plant-based.
Can I use something other than almond flour?
Yes, you can replace almond flour with oat flour or coconut flour. Both options work well and keep the bars tasty. Experiment with each to find your favorite flavor and texture.
How can I make these bars more chocolatey?
To ramp up the chocolate flavor, simply add more cocoa powder or extra chocolate chips. This will give your bars a rich taste that chocolate lovers will adore.
This post covered a simple way to make No Bake Chocolate Coconut Almond Bars. You learned how to prepare the ingredients, mix them, and chill until ready to eat. You can customize these bars with different nuts or sweeteners to fit your taste. Remember to store them properly for the best freshness. Enjoy experimenting with your recipes, and feel free to try new flavors. These bars are tasty and versatile, perfect for snacks or dessert. Enjoy your cooking!


![- Sweet Potatoes and Main Components - 4 medium sweet potatoes, peeled and cut into 1-inch cubes - 1/4 cup unsalted butter, melted and slightly cooled - 2 large eggs, lightly beaten - Sweeteners and Flavor Enhancers - 1/2 cup packed brown sugar - 1/2 teaspoon ground cinnamon - 1/4 teaspoon ground nutmeg - 1/2 teaspoon pure vanilla extract - 1/4 teaspoon salt - Optional Toppings - 1 cup mini marshmallows (optional but recommended) - 1/2 cup crushed pecans (for topping) This sweet potato casserole is simple yet rich in flavor. The sweet potatoes provide a creamy base, while the butter and eggs bind everything together. The brown sugar adds a delightful sweetness, balanced by the warm spices of cinnamon and nutmeg. Don't skip the vanilla extract; it elevates the dish. For toppings, mini marshmallows add a fun touch, while crushed pecans give a nice crunch. You can always mix and match to suit your taste. This blend of ingredients makes the casserole a crowd-pleaser at any gathering. For the full recipe, check out Sweet Potato Delight Casserole. 1. Preheat the oven to 350°F (175°C). This warms the oven for baking. 2. Fill a large pot with water. Bring it to a boil, then add the sweet potatoes. Cook for 15-20 minutes until fork-tender. Drain them and let them cool. 3. In a bowl, mash the sweet potatoes until smooth. You can use a potato masher or fork for this. 4. Add brown sugar, melted butter, cinnamon, nutmeg, vanilla, and salt to the mashed sweet potatoes. Mix until everything is well combined, and the sugar is dissolved. 5. Fold in the beaten eggs carefully. Mix until fully combined with the sweet potato mix. 1. Grease a 9x13-inch baking dish with butter or cooking spray. Pour the sweet potato mixture into the dish. Spread it evenly with a spatula. 2. If you want extra sweetness, sprinkle mini marshmallows on top. 3. In a small bowl, mix crushed pecans with a tablespoon of brown sugar. Sprinkle this mix over the casserole for crunch and flavor. 4. Bake in the preheated oven for 25-30 minutes. The top should turn a golden brown color when done. 1. Let the casserole cool for a few minutes before serving. This helps it set and makes it easier to serve. 2. Serve in the baking dish for a rustic look. You can garnish with fresh mint or a dusting of cinnamon for a fun touch. Enjoy your Sweet Potato Delight Casserole! - Overcooking Sweet Potatoes: Cooking sweet potatoes too long can make them mushy. Aim for fork-tender. - Skipping the Cooling Time: Letting the potatoes cool helps the mix set well. Don't rush this step. - Balancing Sweetness: Sweet potatoes are naturally sweet. Adjust the brown sugar to your taste. - Experimenting with Spices: Try adding ginger or cloves for a unique twist. A little spice goes a long way. - Recommended Kitchen Tools: Use a potato masher for smooth sweet potatoes. A large bowl helps mix well. - Desired Texture and Consistency: Aim for a creamy texture. It should hold together but still be spoonable. Remember, these tips will help you create a perfect Sweet Potato Delight Casserole. Enjoy the process! {{image_4}} You can easily make a vegan sweet potato casserole. Just swap the eggs and butter. Use flaxseed meal mixed with water instead of eggs. For butter, use coconut oil or vegan butter. This keeps the dish creamy and tasty without dairy. For a gluten-free version, ensure your toppings are gluten-free. Most sweet potatoes are naturally gluten-free. Just check labels on any extras like marshmallows or sugar. If you want nut-free choices, skip the pecans. Instead, try using crushed graham crackers or oats. This gives a nice crunch without nuts. You can also add a sprinkle of cinnamon for more flavor. For sweeteners, you have options. Maple syrup or honey can replace brown sugar. These sweeteners add a different taste and can be healthier. Just remember to adjust the amount to keep it sweet. Check out the [Full Recipe] for more on making this dish your own! To keep your sweet potato casserole fresh, use these tips: - Refrigeration Tips: Allow the casserole to cool completely. Transfer it to an airtight container or cover the dish tightly with plastic wrap. Store it in the fridge for up to three days. This keeps it safe and tasty. - Freezing for Later: If you want to save some for later, freezing works well. Wrap the casserole tightly in plastic wrap, then in aluminum foil. This prevents freezer burn. You can freeze it for up to three months. When ready, thaw it in the fridge overnight before reheating. To enjoy your leftovers, follow these methods: - Best Methods for Reheating: The oven is the best choice for reheating. Preheat it to 350°F (175°C). Place the casserole in an oven-safe dish. Cover it with foil to keep it moist. Heat for about 20-25 minutes. - Ensuring Optimal Texture: To keep the topping crisp, remove the foil for the last 10 minutes. This helps the top brown nicely. If you use the microwave, heat in short bursts and stir in between to avoid hot spots. You can use unsweetened applesauce as a great egg substitute. Use 1/4 cup of applesauce for each egg. This keeps the dish moist and adds some natural sweetness. You can also try mashed bananas or flaxseed meal mixed with water. Use 1 tablespoon of flaxseed meal and 3 tablespoons of water, letting it sit for a few minutes to thicken. Sweet potato casserole lasts about 3 to 5 days in the fridge. Make sure to cover it tightly with plastic wrap or foil. This keeps it fresh and prevents it from absorbing other fridge odors. If you notice any off smell or mold, it’s best to throw it out. Yes, you can make sweet potato casserole ahead of time! Prepare it a day in advance and store it in the fridge. Just cover it well. When you are ready to bake, let it sit at room temperature for about 30 minutes before putting it in the oven. This helps it cook evenly. You can also freeze it for up to 2 months. Just thaw it in the fridge before baking. Check out the Full Recipe for more details! In this post, we explored sweet potato casserole, covering ingredients, preparation, and tips. We also discussed variations, storage, and common questions. Sweet potato casserole is easy to make and delicious. You can adjust it to fit your diet. Remember to avoid overcooking and cool it before serving. Enjoy making this comforting dish and share it with others!](https://goldendishy.com/wp-content/uploads/2025/07/98319592-8ca0-4761-9e68-56bba1fc8594-768x768.webp)


