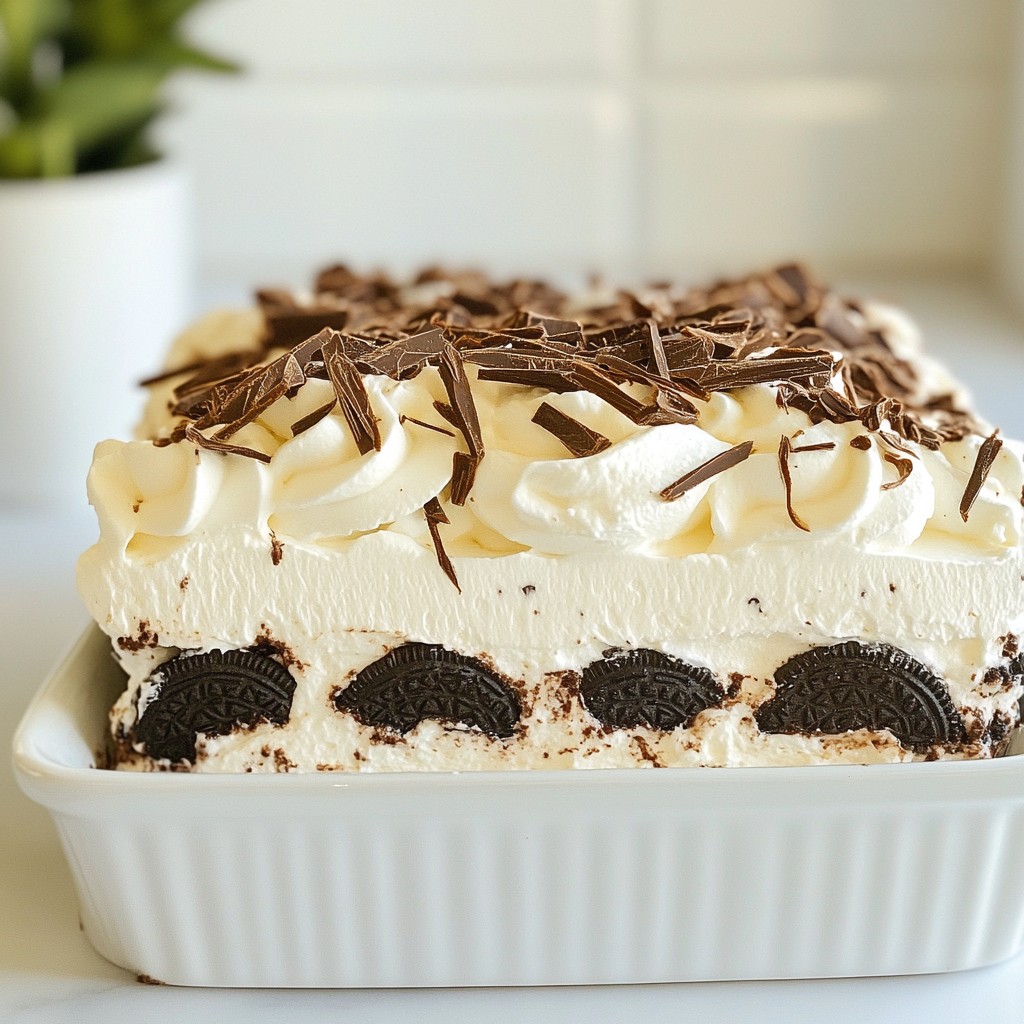
Craving a sweet treat that’s quick, easy, and oh-so-delicious? Look no further! My Mocha Oreo Icebox Cake is the perfect no-bake dessert for any occasion. With rich coffee flavors and crunchy cookie layers, this dessert has everything you need to impress your family and friends. Stick around as I guide you through the simple steps to create this delightful cake that everyone will love. Let’s dive in!
Why I Love This Recipe
- Decadent Flavor: This dessert combines the rich taste of mocha with the classic crunch of Oreos, creating a delightful treat that coffee lovers will adore.
- No-Bake Convenience: Perfect for warm days, this icebox cake requires no baking, making it an easy option for gatherings and parties.
- Make-Ahead Friendly: With a chilling time that allows the flavors to meld, you can prepare it in advance, ensuring a stress-free dessert experience.
- Customizable Toppings: You can personalize this cake with your favorite toppings, like chocolate shavings or additional whipped cream, making it uniquely yours.
Ingredients
List of Ingredients
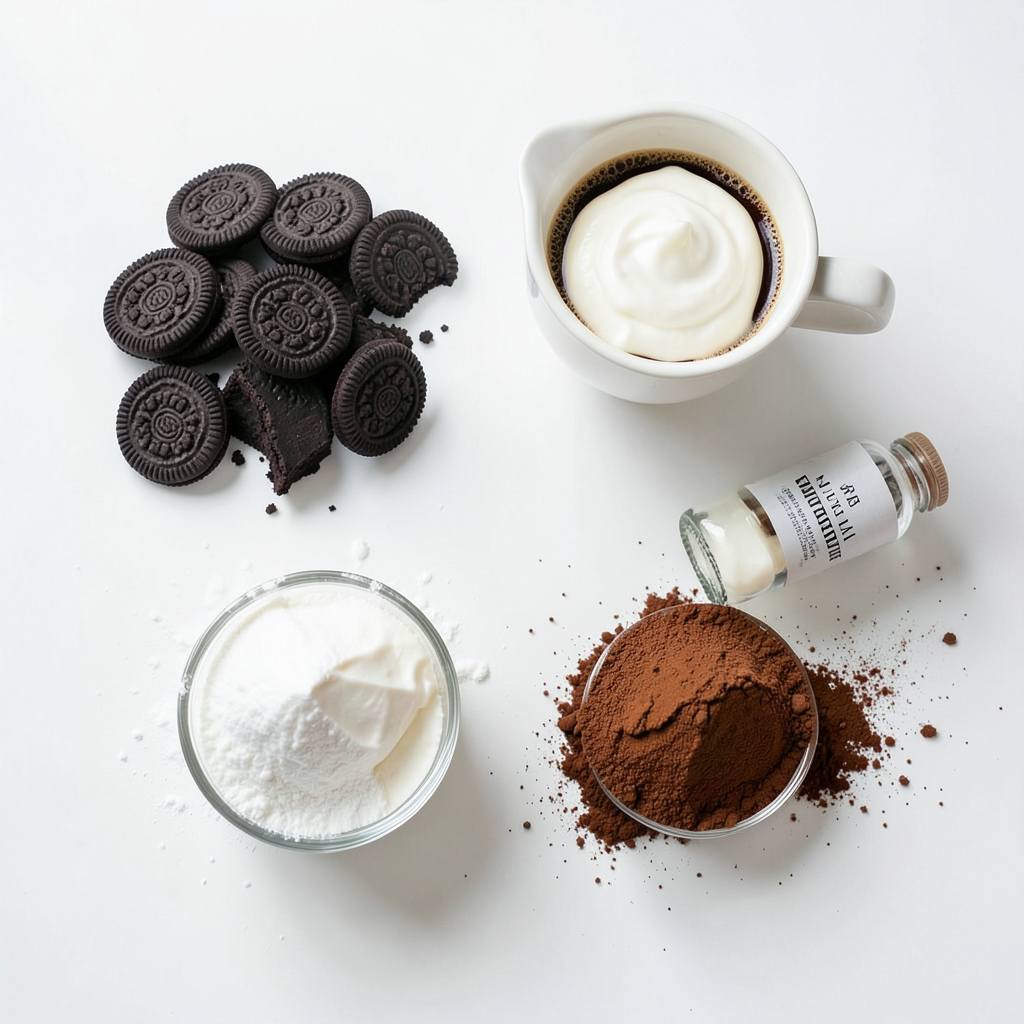
- 24 Oreo cookies, crushed
- 2 cups brewed coffee, cooled to room temperature
- 1 cup heavy whipping cream
- 1 cup mascarpone cheese
- 1 cup powdered sugar
- 2 teaspoons vanilla extract
- 2 tablespoons cocoa powder
- Chocolate shavings for garnish (optional)
- Extra whipped cream for topping (optional)
Ingredient Substitutions
You can swap the mascarpone cheese with cream cheese for a tangy twist. If you want a lighter cake, use low-fat whipped cream instead. For a non-dairy option, try coconut cream. If you don’t have Oreo cookies, chocolate wafer cookies work well. You can also use instant coffee in place of brewed coffee if you’re in a pinch. Adjust the amount to taste.
Measurement Conversions
- 1 cup = 240 milliliters
- 1 tablespoon = 15 milliliters
- 1 teaspoon = 5 milliliters
- 24 Oreo cookies = about 300 grams
- 1 cup heavy whipping cream = 240 milliliters
These conversions help you adjust the recipe for different serving sizes. Always measure ingredients carefully for the best results.
Step-by-Step Instructions
Detailed Preparation Steps
1. In a large bowl, mix heavy whipping cream, mascarpone cheese, powdered sugar, vanilla extract, and cocoa powder. Use a hand mixer on medium speed. Beat until soft peaks form. Be careful not to overbeat. You want a smooth texture.
2. Dip each Oreo cookie quickly into the brewed coffee. Let them soak for just 2-3 seconds. This makes the cookies moist but not mushy.
3. Take a rectangular dish, about 9x13 inches. Place a layer of soaked Oreo cookies at the bottom. Align them neatly for a nice look.
4. Spread half the whipped cream mixture evenly over the cookies. Make sure it covers all the cookies.
5. Add another layer of soaked Oreo cookies on top of the whipped cream. Then, spread the rest of the whipped cream mixture over this layer.
6. Smooth the top of the cake with a spatula. Cover the dish tightly with plastic wrap. This keeps moisture in.
7. Chill the cake in the fridge for at least 4 hours. For the best taste, let it set overnight. The flavors will blend nicely.
8. When ready to serve, take the cake out of the fridge. Optionally, add a dollop of whipped cream on top. Sprinkle chocolate shavings for a fancy touch.
Tips for Layers and Serving
- Use a sharp knife to cut the cake. This helps keep the layers neat.
- Serve the cake in slices to show off the lovely layers.
- Use decorative plates for a fun presentation.
- Add a cinnamon stick or coffee beans on the side for a special touch.
Visual Guide or Video Tutorial
I recommend watching a video tutorial for a visual guide. Seeing the steps makes it easier to follow along. You can find great resources on popular cooking sites or video platforms. This way, you can make sure you’re on the right track!
Tips & Tricks
Common Mistakes to Avoid
Avoid soaking the Oreo cookies too long. Just a quick dip is best. If you soak them too long, they can fall apart. Also, watch the cream mixture. Overbeating can make it grainy. Aim for soft peaks, not stiff ones. Lastly, keep the cake covered tightly in the fridge. This keeps it fresh and moist.
How to Achieve the Best Texture
To get a creamy and smooth texture, mix the heavy cream and mascarpone well. Use a hand mixer on medium speed. Stop when you see soft peaks. This helps the cake stay light and fluffy. Let it chill for at least four hours. For the best results, let it sit overnight. This helps all the flavors blend perfectly.
Enhancements for Flavor and Presentation
For extra flavor, try adding a splash of coffee liqueur to the cream mix. This gives a nice kick. You can also mix in a bit of cinnamon for warmth. For a stunning look, top the cake with chocolate shavings. You can also add extra whipped cream on top. Using decorative plates makes it look even more special. A cinnamon stick or coffee beans on the side adds charm, too.
Pro Tips
- Crush the Oreos Well: Make sure the Oreo cookies are crushed finely to create a smooth layer in your cake. This will help with the overall texture and allow the whipped cream mixture to adhere better.
- Chill the Mixing Bowl: For even better whipped cream, chill your mixing bowl and beaters in the freezer for about 10 minutes before whipping. This helps the cream whip up faster and increases its volume.
- Proper Coffee Soaking: Be quick when dipping the Oreos in coffee; a 2-3 second soak is ideal to keep them from getting too soggy. This will maintain the structure of the cake while infusing it with coffee flavor.
- Let It Set: Allow the cake to chill overnight if possible. This resting time enhances the flavors and helps the layers meld together for a more delicious and cohesive dessert.
Variations
Alternative Cookie Options
You can switch up the Oreo cookies for different flavors. Try using chocolate mint Oreos for a fresh twist. Golden Oreos also work well for a lighter taste. Even peanut butter Oreos add a fun flavor. Each option gives your cake a unique touch.
Different Flavor Additions
Adding flavors can change the game. A splash of caramel syrup brings a sweet kick. Use almond extract instead of vanilla for a nutty taste. You could also mix in a bit of espresso powder for a stronger coffee flavor. Just a little can make a big difference.
Seasonal or Holiday Variations
Get creative for holidays! For Christmas, add crushed peppermint on top. For fall, mix in pumpkin spice into the whipped cream. During summer, fresh berries make a delightful topping. These changes make the cake festive and fun for any occasion.
Storage Info
Best Practices for Storing
To keep your Mocha Oreo Icebox Cake fresh, store it in the fridge. Cover it tightly with plastic wrap or use an airtight container. This helps prevent the cake from absorbing any odors from the fridge. The cool temperature keeps the layers nice and firm.
Freezing Instructions
Yes, you can freeze this cake! First, make sure to wrap it well in plastic wrap, then place it in a freezer-safe container. This helps avoid freezer burn. When you're ready to enjoy it, let it thaw in the fridge overnight. This keeps the texture smooth.
Shelf Life and Freshness Tips
The cake stays fresh in the fridge for about 4 to 5 days. After that, the cookies might get soggy. If you freeze it, it can last up to 2 months. Always check for any off smells or changes in texture before serving. Enjoy it while it’s fresh for the best taste!
FAQs
How do I make the cake less sweet?
To make the cake less sweet, cut back on the powdered sugar. Use only ½ cup instead of 1 cup. You can also add more cocoa powder. This will balance the sweetness from the Oreos.
Can I use decaf coffee?
Yes, you can use decaf coffee. The coffee adds flavor without the caffeine kick. It keeps the mocha taste while being caffeine-free. Just brew the decaf as you would regular coffee.
What is the best way to serve the cake?
Serve the cake chilled. Cut it into neat slices to show the layers. You can add whipped cream on top for fun. Chocolate shavings or a sprinkle of cocoa powder also look great.
How long can I keep the cake in the fridge?
You can keep the cake in the fridge for up to 5 days. Make sure to cover it tightly with plastic wrap. This keeps it fresh and prevents it from drying out.
Can I use a different type of cream cheese?
Yes, you can use any cream cheese you like. Low-fat or flavored cream cheese works well. Just make sure it is softened for easy mixing.
In this post, we covered key ingredients, step-by-step instructions, and useful tips. We explored substitutions, measurement conversions, and how to store your cake properly. Remember to avoid common mistakes to get the best texture. You can try fun variations and flavor additions to make your cake unique. Now, you're ready to bake and create a tasty treat that suits your style. Enjoy every slice and make it your own!