Looking for a delicious treat that’s easy to make? You’ll love these Maple Pecan Scones! In this simple recipe guide, I’ll show you all the key ingredients, step-by-step instructions, and some clever tips to ensure perfect scones every time. Plus, I’ll share fun variations and storage tips to keep your scones fresh. Let’s dive in and bake something delicious together!
Ingredients
Key Ingredients for Maple Pecan Scones
To make tasty Maple Pecan Scones, you need some key ingredients. Here they are:
– 2 cups all-purpose flour
– 1/2 cup chopped pecans, plus extra for garnish
– 1/3 cup packed brown sugar
– 1 tablespoon baking powder
– 1/2 teaspoon fine salt
– 1/2 teaspoon ground cinnamon
– 1/4 cup cold unsalted butter, cut into small cubes
– 1/2 cup heavy cream, chilled
– 1/4 cup pure maple syrup
– 1 large egg, at room temperature
– 1 teaspoon pure vanilla extract
– Additional maple syrup for drizzling (optional)
These ingredients work together to create a rich, flavorful scone. The maple syrup and pecans bring a sweet and nutty taste.
Optional Ingredients for Added Flavor
You can add a few optional ingredients to enhance your scones even more. Consider these:
– Dried cranberries or cherries for a tart kick
– Chocolate chips for a sweet treat
– Fresh herbs like rosemary for a savory twist
These extras can make your scones unique. Mix and match to find your favorite flavor.
Ingredient Substitutions
If you need to swap out some items, here are some good substitutions:
– Use whole wheat flour instead of all-purpose flour for more fiber.
– Swap brown sugar with coconut sugar for a different taste.
– Replace heavy cream with coconut cream for a dairy-free option.
– Use maple extract if you run out of pure maple syrup.
These swaps still keep the scones delicious. Feel free to get creative with what you have on hand.
Step-by-Step Instructions
Prepping the Oven and Baking Sheet
First, you need to preheat your oven. Set it to 400°F (200°C). While that heats up, grab a baking sheet. Line it with parchment paper. This step helps the scones not stick. It makes clean-up easy too.
Mixing Dry and Wet Ingredients
Now, let’s get to the mixing! In a large bowl, whisk these dry ingredients together:
– 2 cups all-purpose flour
– 1/2 cup chopped pecans
– 1/3 cup packed brown sugar
– 1 tablespoon baking powder
– 1/2 teaspoon fine salt
– 1/2 teaspoon ground cinnamon
Whisk until everything is mixed well. In another bowl, combine the wet ingredients. Take:
– 1/2 cup heavy cream
– 1/4 cup pure maple syrup
– 1 large egg
– 1 teaspoon pure vanilla extract
Whisk them together until smooth.
Shaping and Baking the Scones
Next, add the wet mix to the dry mix. Stir gently with a spatula. The dough should be sticky and chunky. Don’t overmix!
Now, turn the dough onto a floured surface. Knead it gently a few times. Shape it into a circle, about 1-inch thick. Cut it into 8 wedges. Place the wedges on the baking sheet, giving them some room to grow.
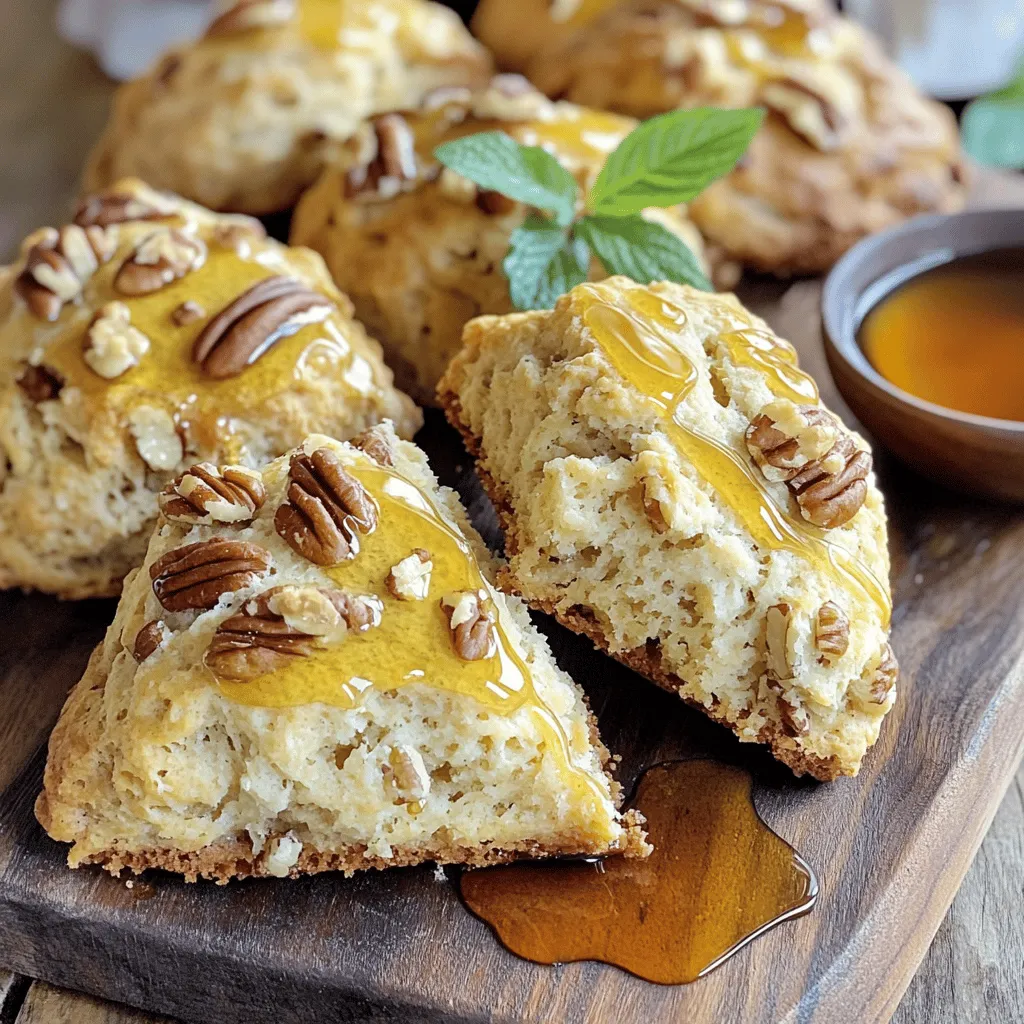
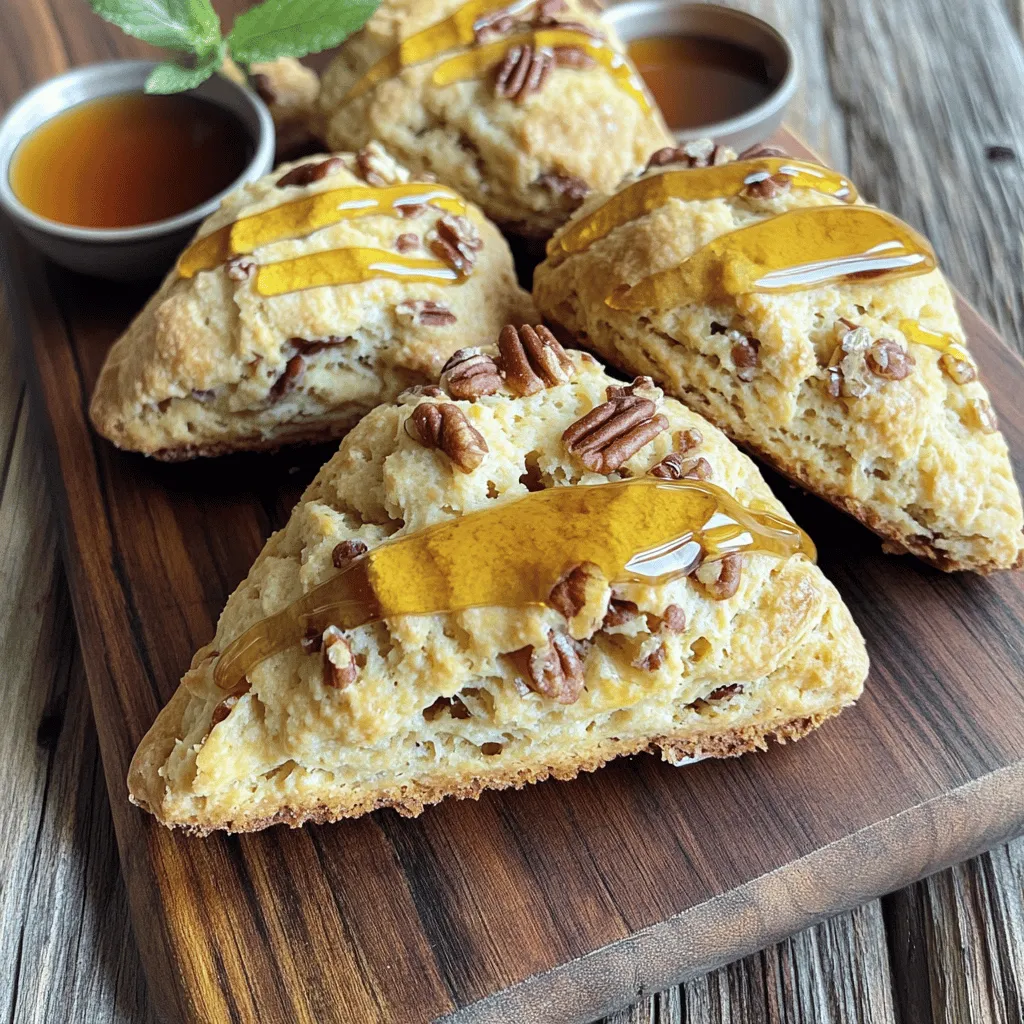
Bake your scones for 15-20 minutes. They should turn a light golden color and feel firm. Once done, let them cool on a wire rack. For extra flavor, drizzle with more maple syrup and sprinkle some chopped pecans on top. Enjoy your delicious maple pecan scones!
Tips & Tricks
Ensuring Perfect Texture
To get the best texture in your Maple Pecan Scones, focus on the butter. Use cold, unsalted butter. Cut it into small cubes and mix it with the flour until you see coarse crumbs. Some pieces should be the size of peas. This step keeps the scones flaky and tender.
Achieving the Right Bake Time
Baking time is key. Preheat your oven to 400°F (200°C). Bake the scones for 15 to 20 minutes. Watch them closely during the last few minutes. You want them lightly golden and firm to the touch. If you bake them too long, they will become dry.
Presentation Tips for Serving
Serving is just as important as baking. Place warm scones on a rustic wooden board or a nice platter. Drizzle with extra maple syrup for sweetness. Add chopped pecans on top for crunch. A sprig of mint or edible flowers can add color and make the dish more inviting.
Variations
Gluten-Free Version
You can make gluten-free maple pecan scones easily. Replace all-purpose flour with a gluten-free blend. Look for a mix that has xanthan gum, as it helps bind the ingredients. Keep the other ingredients the same. The texture may change a bit, but they will still taste great!
Vegan Maple Pecan Scones
To make vegan maple pecan scones, swap the heavy cream with almond milk or coconut milk. Use coconut oil instead of butter. You can also replace the egg with a flax egg. To make a flax egg, mix one tablespoon of ground flaxseed with three tablespoons of water. Let it sit for five minutes to thicken. These changes keep the scones tasty and fluffy!
Flavor Additions (Chocolate Chips, Dried Fruit)
You can add fun flavors to your scones. Try mixing in chocolate chips or dried fruit. For a sweet touch, add 1/2 cup of chocolate chips or chopped dried apricots. You can also use cranberries or raisins for a chewy texture. Mix these in when you fold in the pecans. This adds extra flavor and makes each bite exciting!
Storage Info
Storing Leftover Scones
To keep your maple pecan scones fresh, store them in an airtight container. Place a piece of parchment paper between layers to prevent sticking. They will stay good for about three days at room temperature. If you want to keep them longer, consider freezing them.
Reheating Instructions
To reheat your scones, preheat your oven to 350°F (175°C). Place the scones on a baking sheet and warm them for about 5-10 minutes. This helps restore their fresh-baked taste and texture. You can also microwave them for about 15-20 seconds, but the oven gives better results.
Freezing Scones for Later Use
If you want to freeze your scones, do it before baking. After shaping the dough into wedges, place them on a baking sheet. Freeze them for about an hour until firm, then transfer them to a freezer bag. They can stay frozen for up to three months. When ready to bake, just add a few extra minutes to the baking time.
FAQs
Can I make Maple Pecan Scones ahead of time?
Yes, you can make Maple Pecan Scones ahead of time. Prepare the dough and shape it into wedges. Then, wrap the dough in plastic wrap and store it in the fridge for up to two days. When you’re ready to bake, just slice and bake as usual. This method keeps them fresh and tasty.
How do I know when the scones are done baking?
You can tell when the scones are done by looking for a golden color on top. They should feel firm to the touch. You can also insert a toothpick into the center. If it comes out clean, the scones are ready.
What can I serve with Maple Pecan Scones?
Maple Pecan Scones pair well with many things. You can serve them with a drizzle of maple syrup for added sweetness. A dollop of clotted cream or butter also works great. Pair them with coffee or tea for a lovely breakfast or snack. For a fun twist, add fresh fruit or yogurt on the side.
Maple pecan scones bring warmth and flavor to your kitchen. We explored key ingredients and smart substitutions for a perfect batch. Step-by-step instructions ensured clear baking methods. Tips helped with texture and bake time, making your scones shine. We also discussed tasty variations to brighten your meals. Finally, proper storage methods keep leftovers fresh. Enjoy these scones with friends or alone—they’re a delight for all.


