Maple Glazed Donut Holes Irresistible Sweet Treats

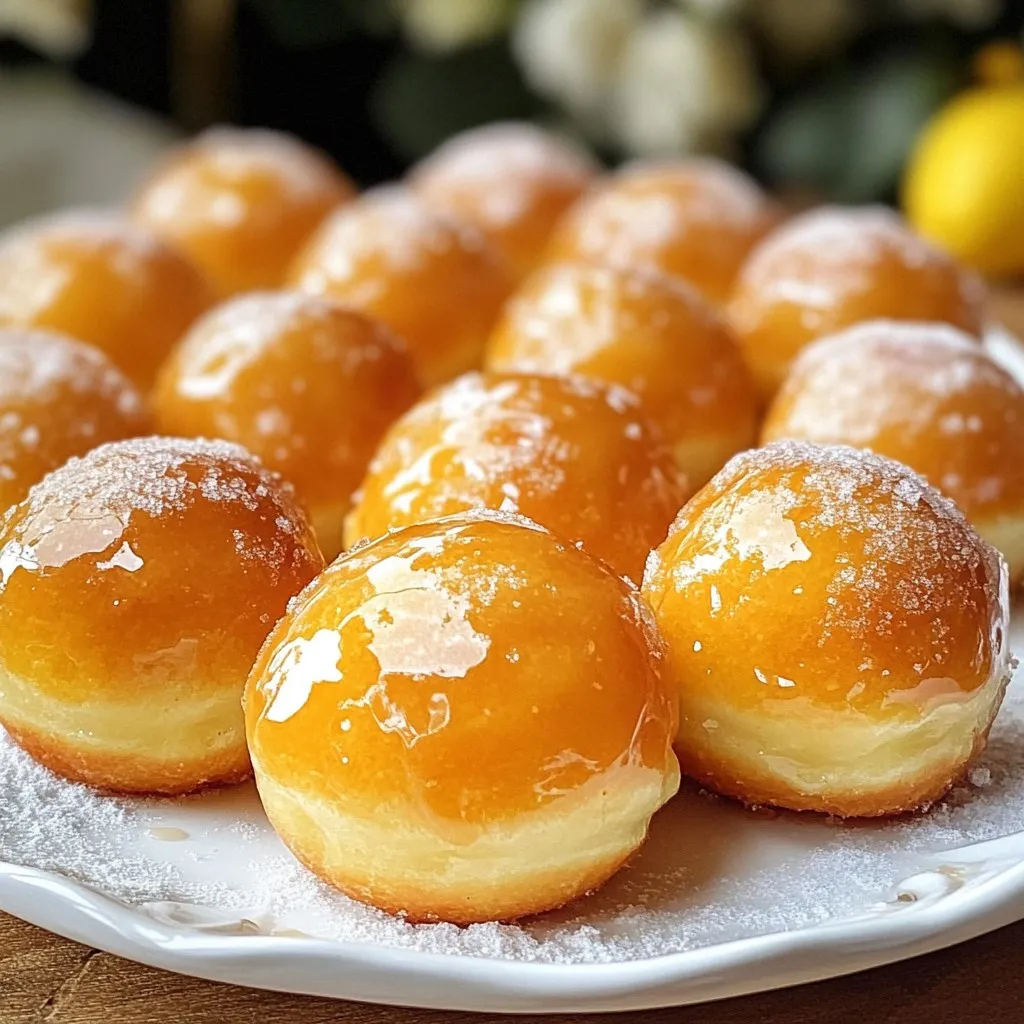
Craving a sweet treat that warms your heart? Look no further than maple glazed donut holes! These bite-sized delights are packed with flavor, making them perfect for snacks or desserts. In this post, I’ll guide you through simple steps to whip up these irresistible goodies at home. Get ready to impress family and friends with your baking skills and treat them to a taste of maple heaven!
Why I Love This Recipe
- Delicious Flavor: The combination of maple syrup and warm spices creates an irresistible taste that will have everyone coming back for more.
- Easy to Make: This recipe is straightforward and quick, perfect for both novice and experienced bakers alike.
- Perfect for Any Occasion: These donut holes are great for breakfast, brunch, or as a sweet treat to share at gatherings.
- Fun to Customize: You can add different spices or toppings to the glaze, allowing you to personalize these treats to your liking.
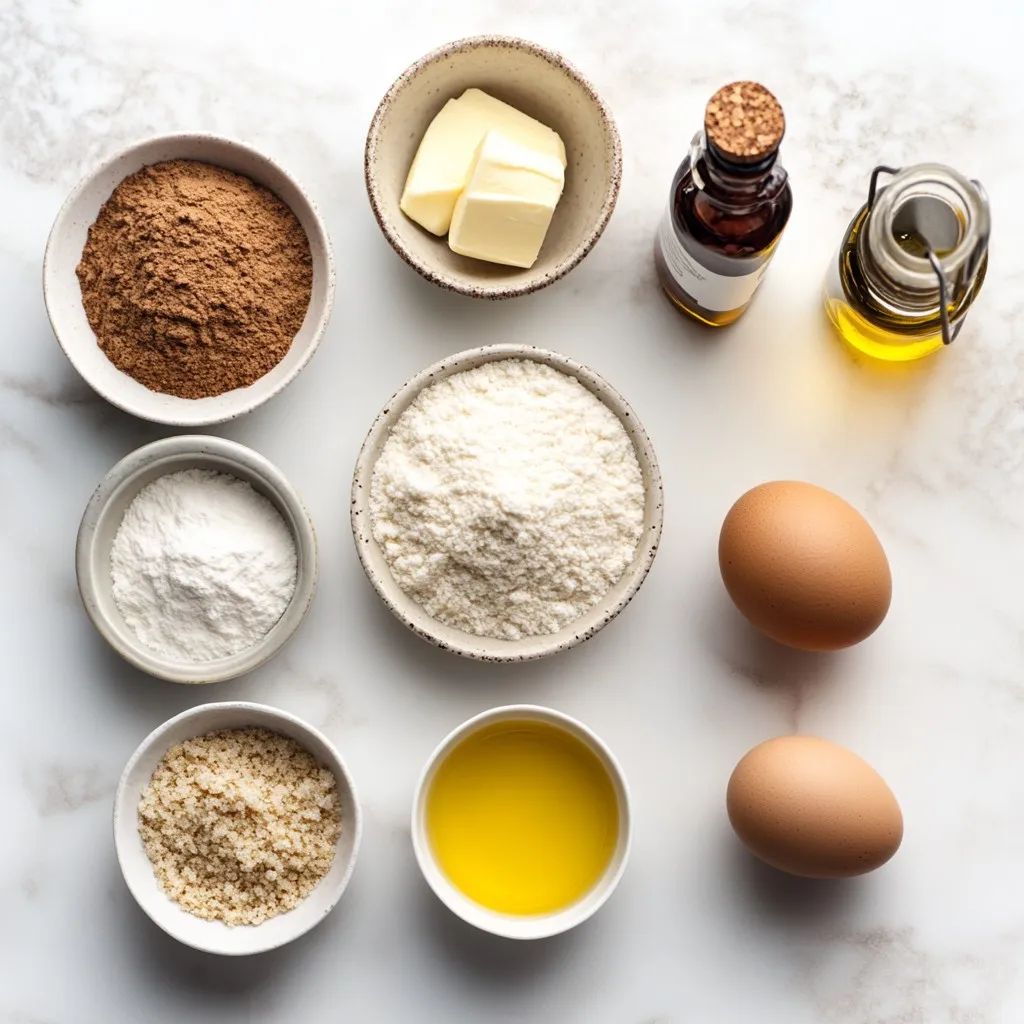
Ingredients
List of main ingredients
– 2 cups all-purpose flour
– 1/2 cup granulated sugar
– 1 tablespoon baking powder
– 1/2 teaspoon salt
– 1/2 teaspoon ground cinnamon
– 1/4 teaspoon ground nutmeg
– 2 large eggs
– 1/2 cup whole milk
– 1/4 cup unsalted butter, melted
– 1 teaspoon vanilla extract
– Oil for frying
When making maple glazed donut holes, get your ingredients ready. You need all-purpose flour for the base. The granulated sugar adds sweetness. Baking powder helps the donut holes rise. Salt enhances the flavor, while ground cinnamon and nutmeg add warmth and spice.
You will also need eggs, whole milk, and melted unsalted butter for moisture. Finally, don’t forget the vanilla extract for a rich aroma. The oil for frying is key to achieving that crispy outer layer.
Maple Glaze ingredients
– 1 cup powdered sugar
– 3 tablespoons pure maple syrup
– 1 tablespoon whole milk
– 1/2 teaspoon vanilla extract
For the maple glaze, start with powdered sugar. This gives the glaze a smooth texture. Pure maple syrup is what makes this glaze special. It adds a deep, sweet flavor. Whole milk helps thin the glaze to the right consistency. Lastly, a touch of vanilla extract boosts the glaze’s taste.
Gather all these ingredients to create a batch of tasty maple glazed donut holes that everyone will love!

Step-by-Step Instructions
Mixing the dry ingredients
Start with a large bowl. Add 2 cups of all-purpose flour, 1/2 cup of granulated sugar, and 1 tablespoon of baking powder. Next, include 1/2 teaspoon of salt, 1/2 teaspoon of ground cinnamon, and 1/4 teaspoon of ground nutmeg. Use a whisk to mix. Make sure everything blends well. You want a lump-free mix.
Preparing the wet mix
In a medium bowl, crack 2 large eggs. Beat them lightly until they are mixed. Then add 1/2 cup of whole milk, 1/4 cup of melted unsalted butter, and 1 teaspoon of vanilla extract. Stir these ingredients together until they are smooth. This step adds moisture and flavor to your donut holes.
Combining wet and dry mixtures
Now, slowly pour the wet mixture into the dry mix. Use a spatula to fold the batter gently. Be careful not to overmix. Overmixing can lead to tough donut holes. You just want the ingredients to come together.
Frying the donut holes
Heat oil in a deep pot or fryer to 350°F (175°C). This is the perfect temperature for frying. It helps the donut holes get crispy on the outside. Use a small cookie scoop or your hands to form the dough into small balls, about one inch in size. Fry them in batches. Cook for 2-3 minutes on each side until they are golden brown.
Preparing the maple glaze
While the donut holes fry, make the maple glaze. In a medium bowl, whisk together 1 cup of powdered sugar, 3 tablespoons of pure maple syrup, 1 tablespoon of whole milk, and 1/2 teaspoon of vanilla extract. Mix until smooth and creamy. This glaze will add a sweet finish to your treats.
Coating the donut holes
Once the donut holes are fried, remove them with a slotted spoon. Place them on paper towels to absorb extra oil. While they are still warm, dip each donut hole into the maple glaze. Make sure they are completely covered. This ensures every bite is sweet and delicious. Place the glazed donut holes on a wire rack to let any extra glaze drip off. Enjoy!
Tips & Tricks
Perfecting the frying technique
– Avoiding overcrowding in the fryer: Frying donut holes can be tricky. If you add too many, they won’t cook evenly. The oil temperature will drop, and your donut holes may turn out soggy. Fry in small batches. This allows each donut hole to float freely and brown nicely.
Ensuring a fluffy texture
– Best practices when mixing ingredients: The key to fluffy donut holes lies in how you mix. When combining wet and dry ingredients, stir gently. Overmixing can lead to tough donut holes. Stop mixing as soon as you see no dry flour. This keeps your donut holes soft and airy.
Glaze consistency
– Adjusting glaze thickness for personal preference: The glaze should be smooth and coat well. If it feels too thick, add a splash of milk. For a thicker glaze, add more powdered sugar. This way, you can achieve your ideal glaze thickness. Experiment until you find what you love.
Pro Tips
- Temperature Matters: Ensure your oil is at the right temperature (350°F/175°C) before frying. This helps to achieve that perfect crispy exterior while keeping the inside fluffy.
- Don’t Overmix: When combining the wet and dry ingredients, mix just until combined. Overmixing can lead to tough donut holes instead of light and airy ones.
- Glaze While Warm: For the best adhesion, dip your donut holes into the maple glaze while they are still warm. This will help the glaze to stick and soak into the donuts for maximum flavor.
- Storage Tips: If you have leftover donut holes, store them in an airtight container at room temperature for up to 2 days. For longer freshness, you can freeze them and reheat in the oven.

Variations
Flavor variations
You can easily change the flavor of your donut holes. Try adding spices like ginger or cardamom for a warm twist. A drop of almond extract adds a nice touch. You can even mix in citrus zest for a fresh taste. These small changes can make a big difference.
Toppings ideas
Toppings can take your donut holes to a new level. Consider adding colorful sprinkles for fun. Chopped nuts like pecans or walnuts add crunch. A drizzle of extra maple syrup enhances sweetness. Get creative with your favorite toppings to make them unique.
Using different types of glaze
If you’re feeling adventurous, switch up the glaze. A chocolate glaze pairs well with the donut holes. Simply melt some chocolate and mix it with cream. A vanilla glaze is another option, made with powdered sugar and vanilla extract. Each glaze gives a different flavor, making every batch special.
Storage Info
Best practices for storing donut holes
To keep your maple glazed donut holes fresh, store them at room temperature. Place them in an airtight container. If you need to keep them longer, you can refrigerate them. Just note that refrigeration can change their texture, making them less fluffy.
Reheating instructions
To reheat your donut holes, simply place them in a microwave for about 10-15 seconds. This warms them up without making them too dry. If you prefer a crispy outside, pop them in a toaster oven for a few minutes instead. This method helps restore their fresh-out-of-the-fryer crunch.
Shelf life
These sweet treats stay good for about 2-3 days at room temperature. If stored in the fridge, they can last up to a week. However, for the best taste and texture, enjoy them within the first few days.
FAQs
Can I use different types of flour?
Yes, you can use different flours. Gluten-free flour works well. However, it may change the texture. You might try almond flour or coconut flour. These can add a nutty taste. If you use them, follow the mix and bake times closely.
How do I make the donut holes healthier?
You can make these donut holes healthier. Try using less sugar or a sugar substitute. Applesauce can replace some butter. You can also bake instead of frying. This keeps the taste but cuts down on fat.
Where can I buy maple glazed donut holes?
You can find maple glazed donut holes at many bakeries. Donut shops often have them, too. Look for local spots that use fresh ingredients. Supermarkets may also carry them in the bakery section. Check for brands that focus on quality.
Making donut holes is fun and easy! We discussed the key ingredients and shared step-by-step instructions. I gave tips to fry them perfectly and achieve a fluffy texture. You can personalize these treats with various flavors and toppings. Don’t forget to store them right to keep them fresh. Experiment with different flours and healthier options, too. You now have the tools to create delicious maple glazed donut holes at home. Enjoy your baking journe

Maple Glazed Donut Holes
Ingredients
- 2 cups all-purpose flour
- 1/2 cup granulated sugar
- 1 tablespoon baking powder
- 1/2 teaspoon salt
- 1/2 teaspoon ground cinnamon
- 1/4 teaspoon ground nutmeg
- 2 large eggs
- 1/2 cup whole milk
- 1/4 cup unsalted butter, melted
- 1 teaspoon vanilla extract
- Oil for frying
- 1 cup powdered sugar
- 3 tablespoons pure maple syrup
- 1 tablespoon whole milk
- 1/2 teaspoon vanilla extract
Instructions
- In a large mixing bowl, combine the all-purpose flour, granulated sugar, baking powder, salt, ground cinnamon, and ground nutmeg. Use a whisk to mix until the ingredients are fully blended and free of lumps.
- In a separate medium-sized bowl, crack the two large eggs and beat them lightly. Then, add the whole milk, melted unsalted butter, and vanilla extract to the eggs. Mix them together until everything is smoothly integrated.
- Slowly pour the wet mixture into the bowl containing the dry ingredients. Gently stir the batter with a spatula until just combined—be careful not to overmix, as this could affect the texture.
- In a deep pot or fryer, heat the oil to 350°F (175°C). This temperature is ideal for frying and will ensure your donut holes are crispy on the outside.
- Using a small cookie scoop or your hands, form the dough into small balls, about one inch in diameter. You should be able to make around 24 donut holes.
- Carefully lower several donut holes into the hot oil, ensuring they are not overcrowded to allow for even cooking. Fry them for approximately 2-3 minutes on each side, or until they are golden brown and puffed.
- Once cooked, remove the donut holes using a slotted spoon and place them on a plate lined with paper towels to absorb excess oil.
- Meanwhile, prepare the maple glaze by whisking together the powdered sugar, pure maple syrup, whole milk, and vanilla extract in a medium bowl until the mixture achieves a smooth and creamy consistency.
- While the donut holes are still warm, dip each one generously into the maple glaze, making sure they are completely coated for maximum flavor.
- Place the glazed donut holes on a wire rack, allowing any excess glaze to drip off and set.


![- 1 cup all-purpose flour - 1 cup whole wheat flour - 1 tablespoon pumpkin pie spice - ½ cup granulated sugar - 1 can (15 oz) pumpkin puree - 2 large eggs - ½ cup brewed coffee, cooled - ⅓ cup vegetable oil - Optional mix-ins: ½ cup chocolate chips or nuts - Baking soda - Baking powder - Salt - Brown sugar - Pure vanilla extract The main ingredients form the base of your muffins. The blend of all-purpose and whole wheat flour adds great texture. Pumpkin puree brings moisture and a rich flavor. You can’t forget the pumpkin pie spice; it gives that cozy fall taste. Granulated sugar adds sweetness, while brown sugar provides depth. For the additional ingredients, eggs help the muffins rise and become fluffy. Brewed coffee gives a coffee kick, enhancing the flavor without being too strong. Vegetable oil keeps them moist. If you want, add chocolate chips or nuts for extra fun. Now, let’s talk staples. Baking soda and baking powder help the muffins rise. Salt balances the sweetness. Finally, pure vanilla extract adds a warm note that ties everything together. You can find the full recipe at the end. Set your oven to 350°F (175°C). This temperature helps the muffins rise nicely. Line or grease the muffin tin to keep the muffins from sticking. I prefer using paper liners for easy cleanup. In a large mixing bowl, whisk together the flours, baking soda, baking powder, pumpkin pie spice, and salt. This step is key for even flavor and texture. Make sure there are no lumps in the mixture. In another bowl, mix the granulated sugar and brown sugar until smooth. Then, add the pumpkin puree, eggs, cooled coffee, vegetable oil, and vanilla extract. Stir until everything is well combined. The mixture should look creamy and inviting. Gradually mix the dry ingredients into the wet mixture. Use a spatula to fold gently. Avoid overmixing; a few lumps are just fine. If you want, gently fold in chocolate chips or nuts for added flavor and texture. Spoon the batter into the muffin tins. Fill each cup about two-thirds full to allow for rising. Place the muffin tin in the oven and bake for 18-22 minutes. To check for doneness, insert a toothpick into a muffin. If it comes out clean, they are ready. Let the muffins cool in the pan for about 5 minutes. After that, transfer them to a wire rack to cool completely. Enjoy them warm for a cozy treat! For an extra touch, serve with cinnamon sugar or maple syrup. You can find the full recipe [here]. To make your muffins light and fluffy, avoid overmixing the batter. Stir gently until the dry and wet ingredients just come together. A few lumps are okay! Also, use room temperature ingredients. This helps the batter mix better and rise well. For a stronger coffee taste, try substituting brewed coffee with espresso. This adds depth to the flavor. Another great tip is to sprinkle some cinnamon sugar on top of the muffins before baking. This gives them a sweet, crispy crust that enhances their cozy taste. These muffins taste best when warm. Enjoy them with a fresh cup of coffee. For added sweetness, drizzle some maple syrup on top or spread a little cream cheese frosting. These simple touches make your cozy fall treat even more delightful! {{image_4}} You can easily make these muffins gluten-free. Simply swap the all-purpose flour with a gluten-free flour mix. Make sure to check the blend. Some mixes work better in baked goods than others. Using a good quality mix helps maintain texture and taste. If you want a dairy-free version, use almond milk instead of regular milk. Almond milk adds a light flavor that pairs well with the spices. For oil, replace vegetable oil with coconut oil. Coconut oil adds a subtle sweetness and complements the pumpkin nicely. To add some crunch, you can mix in nuts like walnuts or pecans. They add a nice texture and flavor. You can also play with spices. Try adding a pinch of nutmeg or cardamom for a twist. If you love chocolate, consider adding chocolate chunks. They melt perfectly and create a rich taste. To keep your pumpkin spice latte muffins fresh, place them in an airtight container at room temperature. This method helps maintain their soft texture and rich flavor. If you have a lot of muffins, you can stack them with parchment paper between layers. This prevents them from sticking together. If you want to enjoy these muffins later, freezing is a great option. First, let the muffins cool completely. Wrap each muffin in plastic wrap, then place them in a freezer bag. Make sure to remove as much air as possible to avoid freezer burn. You can store them in the freezer for up to three months. When you're ready to eat one, take it out and let it thaw at room temperature. You can also reheat it in the microwave for about 15-20 seconds. To keep your muffins moist and tasty over time, consider these tips: - Add a slice of bread to the container. This helps keep the muffins moist. - Avoid exposing them to direct sunlight or heat sources, as this can dry them out. - If you notice any muffins getting stale, you can toast them lightly. This can bring back some of their original flavor. Storing your pumpkin spice latte muffins correctly ensures you can enjoy their warm, cozy flavors for days to come. For the full recipe, check the earlier section! Yes, you can add more pumpkin puree. However, this change will affect the muffins. Adding extra puree makes the muffins moister. It may also make them denser. If you want a lighter muffin, keep the amount as in the Full Recipe. You can try adding an extra tablespoon at first. This way, you can see how the texture changes. These muffins last about three days at room temperature. Keep them in an airtight container. They can also last about a week in the fridge. The cold helps keep them fresh longer. If you want to save them for later, freeze them. They stay good for about three months in the freezer. Just remember to wrap them well. Yes, you can make these muffins without eggs. Here are some good substitutes: - 1/4 cup unsweetened applesauce - 1/4 cup mashed banana - 1 tablespoon flaxseed meal mixed with 2.5 tablespoons water Each option helps bind the muffins. They also add moisture. Choose the one you like best for a vegan version. You can use several options instead of brewed coffee. Here are some alternatives: - Brewed tea for a lighter flavor - Milk or almond milk for a creamy texture - Pumpkin spice tea for a fall twist These options help keep the muffins moist and tasty. You can experiment with what you have at home. These Pumpkin Spice Latte Muffins mix simple ingredients in easy steps. You learned how to combine flours, spices, and pumpkin puree for a tasty treat. I shared tips for perfect muffins and ways to store them well. Remember, you can adjust flavors to your liking. Try nuts or different spices for variety. Whether you enjoy them warm or frozen, these muffins are sure to please. Happy baking!](https://goldendishy.com/wp-content/uploads/2025/06/a78bef71-23f4-423c-981c-d5caf094e886-768x768.webp)
![- 1 cup cherries, pitted and chopped - 1 cup unsweetened applesauce - 1/2 cup peanut butter or almond butter - 1/2 cup honey or maple syrup - 1 teaspoon vanilla extract - 2 cups rolled oats - 1/2 cup chocolate protein powder - 1 teaspoon baking powder - 1/2 teaspoon baking soda - 1/4 teaspoon salt - 1/3 cup dark chocolate chips To make the best Cherry Chocolate Protein Muffins, you need fresh ingredients. Start with cherries. Choose ripe cherries for a sweet taste. Pitting and chopping them helps mix them into the batter easily. Next, use unsweetened applesauce. It adds moisture and replaces some fat. This keeps the muffins light and fluffy. If you prefer a nutty flavor, choose between peanut butter or almond butter. Both work well. For sweetness, you can pick honey or maple syrup. Each adds a unique flavor. Don’t forget the vanilla extract. It enhances the overall taste. Now, let’s talk about the dry ingredients. Rolled oats add texture and fiber. They also help bind the muffins. The chocolate protein powder is key for a protein boost. It makes these muffins a healthy snack. Add baking powder and baking soda for lift. This ensures your muffins rise well. Lastly, sprinkle in some salt to balance the sweetness. The dark chocolate chips are the fun part. They melt in the oven and create pockets of gooey chocolate. This makes every bite a treat! For the full recipe, check out the instructions in the next section. Enjoy every step of making these delicious muffins! 1. First, preheat your oven to 350°F (175°C). This step is key to baking muffins evenly. 2. Prepare your muffin tin by lining it with paper liners. You can also lightly grease each cup to help prevent sticking. 3. In a large mixing bowl, combine the unsweetened applesauce, your choice of nut butter, honey, and vanilla extract. Mix well with a whisk or spatula until smooth. 4. Now, it’s time to fold in the chopped cherries. Gently stir them into the wet mixture. Make sure they spread evenly throughout the batter. 5. In another bowl, whisk together the rolled oats, chocolate protein powder, baking powder, baking soda, and salt. This mix will give your muffins a nice rise. 6. Gradually add the dry mix to the wet mixture. Fold them together gently, being careful not to overmix. Overmixing can make your muffins tough. 7. Next, fold in the dark chocolate chips. Ensure they are well-distributed, so you get a chocolate burst in every bite. 8. Use a spoon or an ice cream scoop to pour the batter into the muffin tin. Fill each cup about 2/3 full to allow room for rising. 9. Bake the muffins in your preheated oven for 18-20 minutes. Check for doneness by inserting a toothpick into the center. If it comes out clean, they are ready! 10. Once baked, remove the muffins and let them cool in the tin for 5 minutes. Then, transfer them to a wire rack to cool completely. This step helps keep the texture light and fluffy. For the full recipe, check out the details above. Enjoy your delicious Cherry Chocolate Protein Muffins! To make the best Cherry Chocolate Protein Muffins, avoid overmixing the batter. Overmixing can lead to tough muffins. Mix just until the dry and wet ingredients combine. This keeps your muffins light and fluffy. Measuring ingredients accurately is also key. Use dry measuring cups for solids like oats and protein powder. For liquids, use a liquid measuring cup. This ensures you add the right amounts for great results. I love serving these muffins warm. They taste best right out of the oven. A light dusting of powdered sugar or a drizzle of melted dark chocolate adds a special touch. You can also pair them with Greek yogurt for extra protein and creaminess. For a balanced meal, enjoy these muffins with a side of fruit. Slices of banana or a handful of berries can brighten your plate and add freshness. These muffins are packed with health benefits. Protein powder offers a great source of protein. It helps build and repair muscles. This makes them perfect for post-workout snacks. Cherries are rich in antioxidants. They help fight inflammation and support heart health. Oats provide fiber, which is good for digestion. They also keep you feeling full longer, making these muffins a smart choice for any time of day. For the complete recipe, check out the [Full Recipe]. {{image_4}} You can make Cherry Chocolate Protein Muffins gluten-free by using certified gluten-free oats. Almond flour also works well here. For a vegan option, replace honey with maple syrup. Use a vegan protein powder to keep it plant-based. This way, everyone can enjoy these tasty muffins, no matter their diet. - Gluten-free: Use gluten-free oats and almond flour. - Vegan: Swap honey for maple syrup and use vegan protein powder. Spicing up your muffins can add a fun twist. Try adding 1 teaspoon of cinnamon or nutmeg to the mix. This small change can bring warmth and depth to the flavor. You might also want to mix in nuts or seeds. Chopped walnuts or sunflower seeds can add crunch and nutrition to your muffins. - Spices: Add 1 teaspoon of cinnamon or nutmeg. - Nuts or seeds: Incorporate chopped walnuts or sunflower seeds. You can customize these muffins with fruits that are in season. In summer, try adding blueberries or peaches. In fall, diced apples or pumpkin puree would be delightful. Different types of chocolate can also change the taste. Dark chocolate, milk chocolate, or even white chocolate can make the muffins exciting and unique. - Seasonal fruits: Use blueberries in summer or apples in fall. - Chocolate types: Experiment with dark, milk, or white chocolate. To keep your Cherry Chocolate Protein Muffins fresh, follow these simple steps: - Allow the muffins to cool completely before storage. - Use an airtight container to maintain moisture. - Place parchment paper between layers to avoid sticking. I find that glass containers work best because they help keep the muffins soft and fresh. Freezing muffins is a great way to enjoy them later. Here’s how to do it: - Allow the muffins to cool fully. - Wrap each muffin in plastic wrap or aluminum foil, then place them in a freezer bag. - Label the bag with the date for easy tracking. When you’re ready to eat, thaw the muffins by leaving them out at room temperature. For quicker results, pop them in the microwave for about 20 seconds. This method keeps them moist and tasty. Cherry Chocolate Protein Muffins can last: - At room temperature: 3 to 4 days in an airtight container. - In the fridge: 1 week if stored properly. This means you can enjoy these muffins without worry for several days! Remember to check for freshness before eating. Enjoy your delicious snacks! Can I make these muffins ahead of time? Yes, you can make these muffins ahead of time. They store well for a few days. Just make sure to keep them in an airtight container. You can also freeze them for longer storage. What can I use instead of protein powder? If you don't have protein powder, you can use ground oats or almond flour. This will change the texture a bit but keeps the muffins tasty. You might need to adjust the liquid in the recipe. How can I reduce sugar in the recipe? To cut down on sugar, use less honey or maple syrup. You can also swap in a sugar substitute like stevia. This will help keep the sweetness but lower the sugar content. Is it possible to use fresh cherries instead of frozen? Yes, fresh cherries work great too! Just chop them up and remove the pits. Fresh cherries can add a nice burst of flavor. They may make the muffins a bit moister, so keep an eye on baking time. What is the protein content per muffin? Each muffin has about 7 grams of protein. This comes mainly from the protein powder and nut butter. It makes a healthy snack or breakfast option. Are these muffins suitable for kids? Absolutely! These muffins are great for kids. They are tasty and packed with nutrients. Plus, the chocolate bits make them fun to eat. In this article, we explored how to make delicious Cherry Chocolate Protein Muffins. We covered ingredients, step-by-step instructions, and tips for perfecting the recipe. You learned how to store these muffins and adapt them for different diets. These muffins are not just tasty; they offer health benefits too. Experiment with flavors and enjoy them as snacks or meals. Now, grab your ingredients and start baking your own batch today!](https://goldendishy.com/wp-content/uploads/2025/07/bcf12119-4bc4-4824-810e-f617231ac2e7-768x768.webp)


