Maple Glazed Butternut Squash Savory Side Dish

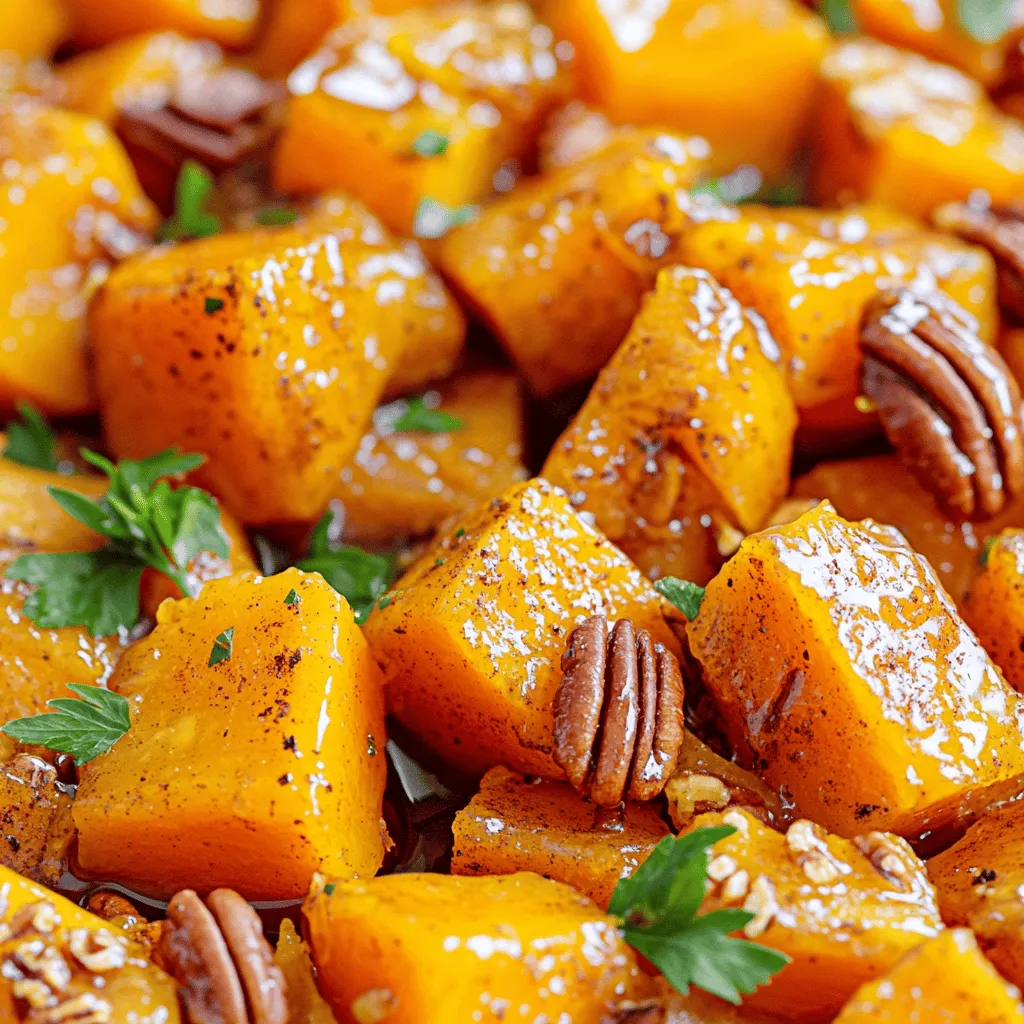
Looking for a warm, sweet side dish to elevate your meals? Maple glazed butternut squash is a perfect choice! This dish is easy to make and packed with flavor. I’ll guide you through the simple steps to prepare it and share tips to make it truly shine. Get ready to impress your guests and your taste buds with this savory delight! Let’s dive into the delicious world of maple glazed butternut squash.
Ingredients
Main Ingredients for Maple Glazed Butternut Squash
To make this tasty dish, you’ll need a few simple items. Here’s your shopping list:
– 1 medium butternut squash, peeled and cut into 1-inch cubes
– 3 tablespoons pure maple syrup
– 2 tablespoons extra virgin olive oil
– 1 teaspoon ground cinnamon
– 1/2 teaspoon ground nutmeg
– Salt and freshly ground black pepper to taste
These ingredients create a sweet and warm flavor that makes your squash shine.
Optional Add-ins
You can add some extra crunch or flavor. Here are some options:
– 1/4 cup pecans, roughly chopped (for added crunch)
– Fresh parsley, finely chopped (for brightness)
If you like nuts or fresh herbs, these will enhance your dish.
Nutritional Information
This dish is not only delicious but also healthy. Here are some quick facts:
– Butternut squash is high in vitamins A and C.
– Maple syrup adds natural sweetness without refined sugar.
– Pecan nuts provide healthy fats and protein.
Enjoy this savory side as part of a balanced meal.
Step-by-Step Instructions
Preparation Steps
To start, preheat your oven to 400°F (200°C). This temperature helps the squash roast evenly. Next, line a baking sheet with parchment paper. This will prevent the squash from sticking and make clean-up easier.
Coating the Squash
In a large bowl, add the cubed butternut squash. Pour in 3 tablespoons of maple syrup and 2 tablespoons of olive oil. Add 1 teaspoon of ground cinnamon and 1/2 teaspoon of ground nutmeg. Sprinkle with salt and pepper. Mix everything well. Make sure each cube is coated in that sweet and spicy blend.
Roasting Process
Spread the squash in a single layer on your baking sheet. Don’t overcrowd the pieces; this ensures they roast well. Place the baking sheet in the oven. Roast for about 25-30 minutes. Halfway through, stir the squash gently to help it cook evenly. Look for a golden-brown color and fork-tender texture. If you want to add pecans, sprinkle them on in the last 5 minutes. This gives them a nice crunch. Once done, remove the squash from the oven and let it cool slightly.
Tips & Tricks
Perfecting Flavor Profiles
To make maple glazed butternut squash shine, balance sweetness and spice. The maple syrup adds a rich sweetness, while ground cinnamon and nutmeg bring warmth. Adjust the maple syrup amount if you prefer less sweetness. A pinch of salt brightens the flavors. Experiment with adding a sprinkle of cayenne for a spicy kick. Sweetness paired with spice creates a delightful contrast that excites the palate.
Cooking Techniques
Roasting the butternut squash is the best method for this dish. Roasting caramelizes the sugars, giving it a sweet, nutty flavor. Other methods, like boiling, can make the squash mushy and watery. Roasting also allows for even cooking and browning. Use high heat to achieve a crispy outside and tender inside. This method enhances the natural flavor of the squash.
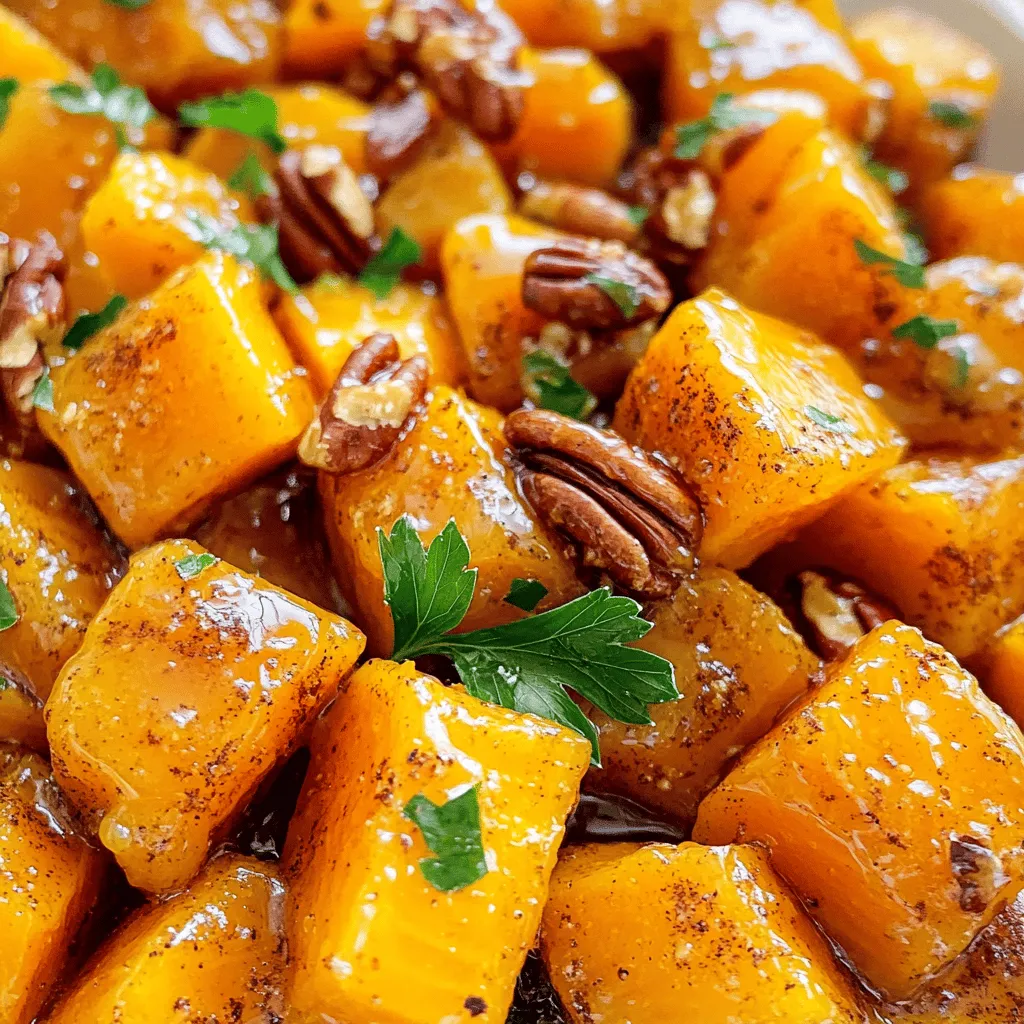
Presentation Ideas
Serving matters just as much as taste. Place your maple glazed butternut squash in a rustic wooden bowl. This adds a cozy touch to your dining table. Sprinkle extra pecans and parsley on top for color and crunch. You can also serve it alongside roasted meats or as a stand-alone dish. A bright orange squash with green parsley looks great on any plate. Consider using seasonal decor to enhance the dish’s autumn vibe.

Variations
Different Sweeteners to Use
You can change the flavor by using different sweeteners. Honey is a great swap for maple syrup. It adds its own unique taste. Brown sugar will also work well. It gives a rich, caramel flavor. Try agave syrup for a lighter touch. Each sweetener can create a different twist on the dish.
Alternative Seasonings
– Herbs and Spices to Enhance Flavor
You can play with spices to make this dish your own. Add cayenne pepper for a kick. It pairs nicely with the sweetness of the squash. You can also try fresh herbs like thyme or rosemary. They add a fresh note that brightens the dish. A pinch of cumin can bring warmth and depth as well.
Special Dietary Adaptations
– Gluten-Free and Vegan Options
This recipe is naturally gluten-free, so you’re already set! To keep it vegan, use pure maple syrup and olive oil. They are both plant-based and safe for all diets. If you want a nut-free version, skip the pecans or replace them with sunflower seeds. This keeps the crunch while avoiding allergens.
Storage Info
Storing Leftovers
Store leftover maple glazed butternut squash in an airtight container. Glass containers work best, but plastic ones are fine too. Keep the squash in the fridge. It will stay fresh for about 3 to 5 days. Make sure it cools down before you seal the container. This helps keep moisture out and flavor in.
Reheating Instructions
To reheat, you have a few options. The best way is to use the oven. Preheat it to 350°F (175°C). Spread the squash on a baking sheet and heat for about 10 to 15 minutes. This keeps it crispy and tasty. You can also use a microwave. Place the squash in a microwave-safe dish. Heat it in short bursts of 30 seconds. Stir in between to warm it evenly.
Freezing Maple Glazed Butternut Squash
Freezing is a great option too! First, allow the squash to cool completely. Then, place it in a freezer-safe bag or container. Try to remove as much air as possible to prevent freezer burn. It can last up to 3 months in the freezer. To thaw, move it to the fridge overnight. Reheat as mentioned above for the best taste and texture.
FAQs
Common Questions About Maple Glazed Butternut Squash
Maple glazed butternut squash is a sweet and savory side dish. It pairs well with many meals. The blend of maple syrup and spices makes it special. You can serve it at family dinners or holiday feasts. This dish is not just tasty; it is also colorful and bright.
How to Choose the Perfect Butternut Squash?
When selecting butternut squash, look for a firm and smooth skin. Choose one that feels heavy for its size. A good squash should have a deep tan color. Avoid any with soft spots or blemishes. A fresh squash has a sweet aroma, hinting at its flavor.
Can I Make This Recipe in Advance?
Yes, you can make this recipe ahead of time. Cook the squash and let it cool completely. Store it in an airtight container in the fridge. This way, you can enjoy it later without losing flavor.
– Tips for Meal Prep and Serving Later:
– Reheat the squash in the oven for best results.
– Add a little maple syrup while reheating to boost the flavor.
– Garnish with fresh parsley just before serving for a nice touch.
This blog post covered how to make maple glazed butternut squash. You learned about main ingredients and some optional add-ins. We explored step-by-step instructions for preparation and roasting. Tips helped you perfect the flavors and presentation.
In closing, this dish is simple and tasty. Whether you cook for yourself or guests, this recipe will impress. Enjoy experimenting with flavor variations and storage tips. Now, get ready to serve a delightful meal!


![- 2 cups cooked rice (white or brown) - 1 pound boneless, skinless chicken breasts, diced - 2 cups broccoli florets (fresh or frozen) - 1 can (10.5 oz) cream of mushroom soup (or any creamy soup of your choice) - 1 cup shredded cheddar cheese, divided - 1/2 cup milk - 1 teaspoon garlic powder - 1/2 teaspoon onion powder - 1 teaspoon dried thyme - Salt and pepper to taste - 1/2 cup breadcrumbs (optional, for topping) - 2 tablespoons olive oil I love using fresh ingredients when I make this casserole. The chicken gives it protein. Broccoli adds a nice crunch and color. You can use frozen broccoli if fresh isn’t available. It works just as well! I recommend using cream of mushroom soup for a rich flavor. You can swap it with any creamy soup you enjoy. The cheddar cheese is key for that melty goodness on top. Split the cheese; half goes in the mix, and half stays for the topping. For seasoning, garlic powder and dried thyme bring out the best taste. Adjust salt and pepper to fit your palate. If you want a crunchy top, add breadcrumbs for texture. Drizzle olive oil to keep it all moist and flavorful. This combination makes a cozy, tasty meal. You’ll love how easy it is to prepare. Check the [Full Recipe] for all the steps to make this dish shine! First, preheat your oven to 350°F (175°C). This step is key. A hot oven helps your casserole cook evenly. While it heats, prepare your baking dish. Grease a 9x13-inch dish with olive oil or cooking spray. This prevents sticking and makes for easy cleanup. Next, we cook the chicken. In a large skillet, heat 2 tablespoons of olive oil over medium heat. Once the oil is hot, add the diced chicken. Season the chicken with 1 teaspoon of garlic powder, 1/2 teaspoon of onion powder, 1 teaspoon of dried thyme, and salt and pepper to taste. Sauté it for about 5-7 minutes. Stir the chicken often to ensure even cooking. You want it to be fully cooked and lightly browned. In a large mixing bowl, combine your cooked rice, steamed broccoli florets, a can of cream of mushroom soup, and 1/2 cup of milk. Add half of your shredded cheddar cheese too. Mix these ingredients well until the mixture looks creamy. This step is important. A well-mixed casserole ensures every bite is full of flavor. Once your chicken is cooked, add it to the rice and broccoli mixture. Stir gently to combine everything evenly. Now, it’s time to bake. Spread the chicken and rice mixture in your greased baking dish. Sprinkle the remaining cheddar cheese over the top. If you want a crunchy topping, add 1/2 cup of breadcrumbs. Cover the dish tightly with aluminum foil. This keeps moisture in while baking. Place it in the preheated oven and bake for 25 minutes. After that, carefully remove the foil. Bake for an additional 10-15 minutes. You want the top to be golden brown and the cheese to be bubbling. When it's done, let the casserole rest for about 5 minutes. This helps the layers set before you serve. To make your chicken tender and moist, start with good-quality chicken. Sauté the diced chicken in olive oil over medium heat. Season it well with garlic powder, onion powder, thyme, salt, and pepper. Cook until it is no longer pink. This usually takes about 5-7 minutes. Stir it often for even cooking. For casserole success, preheat your oven to 350°F (175°C) before baking. Cover the dish with foil for the first part of baking. This keeps the dish moist. Remove the foil for the last 10-15 minutes to brown the cheese and breadcrumbs. For an appealing look, garnish your casserole with fresh parsley or chives. This adds a bright color and fresh flavor. You can also use individual ramekins for serving. This makes it easy to serve and adds a cozy touch to your table. Store leftovers in an airtight container in the fridge. They will last up to 3-4 days. If you want to freeze the casserole, wrap it tightly in foil or plastic wrap. It can last up to 3 months in the freezer. When reheating, you have two options: the microwave or the oven. For the microwave, heat in short bursts to avoid drying it out. Stir occasionally to heat evenly. For oven reheating, cover with foil and bake at 350°F (175°C) for about 20 minutes, or until heated through. {{image_4}} For a gluten-free option, swap the cream of mushroom soup with a gluten-free brand. You can also use gluten-free breadcrumbs or skip them altogether. For a low-fat version, cut back on cheese and milk. Use low-fat milk and just half the cheese. This keeps the dish tasty while reducing calories. You can change the flavor by adding different veggies. Carrots and bell peppers work great. They add color and crunch too! If you want a cheese twist, try mozzarella or pepper jack for a spicy kick. Each cheese brings its own unique taste, making each casserole a new experience. Using leftover rotisserie chicken is a smart time-saver. Just shred it and mix it in. For rice, consider quinoa or cauliflower rice for a low-carb option. Cauliflower rice is light and absorbs flavors well. It’s a great way to sneak in more veggies into your meal. Feel free to get creative. This dish is versatile, and you can tailor it to your taste! Chicken Broccoli Rice Casserole shines on its own, but you can enhance your meal with sides. Here are some tasty options: - Garlic Bread: Crisp and buttery, it pairs well with the creamy casserole. - Steamed Vegetables: Lightly steamed carrots or green beans add color and crunch. - Simple Salad: A fresh garden salad with lettuce, tomatoes, and cucumbers balances the rich flavors. For a quick salad, mix leafy greens with olive oil and lemon juice. This adds a refreshing touch to your meal. To complete your dinner, consider drinks that match the flavors of the casserole: - White Wine: A chilled Chardonnay or Sauvignon Blanc complements the dish well. - Sparkling Water: For a non-alcoholic option, sparkling water with lemon is refreshing. For kids, serve some apple juice or lemonade. These drinks are fun and pair nicely with the casserole's flavors. How long does it take to cook chicken in the casserole? It takes about 5 to 7 minutes to cook the chicken in the skillet. You want it cooked through and lightly browned. This step is key for flavor. Once you add the chicken to the casserole, it will bake for about 35 minutes. This helps all the flavors blend well. Can I prepare this dish ahead and refrigerate it? Yes, you can prepare the casserole ahead of time. Just mix all the ingredients as usual. Then, cover it and place it in the fridge. It’s best to bake it within 24 hours for best taste. What can I use instead of cream of mushroom soup? If you don’t have cream of mushroom soup, you can use cream of chicken soup. You can also make a homemade creamy base using sour cream or Greek yogurt mixed with milk. This keeps the dish rich and smooth. How do I store leftovers? To store leftovers, let the casserole cool first. Then, place it in an airtight container. It will stay fresh in the fridge for up to 3 days. Make sure to reheat only the portion you plan to eat. Can I freeze Chicken Broccoli Rice Casserole for future meals? Yes, you can freeze the casserole. Just cover it tightly with plastic wrap or foil. It will last in the freezer for up to 2 months. When ready to eat, thaw it in the fridge overnight before baking. For more details, check out the [Full Recipe]. It’s a great way to ensure you have all the steps at hand! In this article, we explored the key ingredients for Chicken Broccoli Rice Casserole and shared easy steps to make it. You learned about cooking tips, variations, and serving suggestions to enhance your meal. Remember, this dish is not only tasty but also nutritious. Try different ingredients to suit your taste or dietary needs. Enjoy creating this delicious casserole and share it with your family. You’ll love how simple and fun it is to prepare!](https://goldendishy.com/wp-content/uploads/2025/07/8f73cfa4-d8c9-44a2-908a-c2367089e61b-768x768.webp)


![To make these crispy fish tacos, gather these key items: - 1 lb white fish fillets (cod or tilapia work great) - 1 cup all-purpose flour - 1 cup cornmeal - 1 teaspoon paprika - 1/2 teaspoon cayenne pepper - 1/2 teaspoon garlic powder - 1/2 teaspoon salt - 1/4 teaspoon black pepper - 2 large eggs, beaten - Vegetable oil, for frying - 8 small corn tortillas The toppings add flavor and texture to your tacos. Here are my favorites: - 1/2 cup red cabbage, thinly sliced - 1 avocado, sliced - Fresh cilantro leaves, for garnish - Lime wedges, for serving To round out your meal, consider these sides: - Fresh salsa for a zesty kick - A drizzle of spicy crema for creaminess - Mexican rice for a hearty addition These ingredients make crispy fish tacos a fun and tasty weeknight meal. For the full recipe, be sure to check out the details above! Start by drying the fish fillets with paper towels. This step helps the coating stick better. Cut the fish into strips that are about 1 inch wide. This size cooks evenly and fits nicely in the tacos. In a medium bowl, mix the flour, cornmeal, paprika, cayenne pepper, garlic powder, salt, and black pepper. Stir until well combined. In another bowl, beat the eggs until smooth. This egg wash will help the coating stick. Heat about 1 inch of vegetable oil in a large skillet over medium-high heat. Check if the oil is hot by dropping in a pinch of the flour mix; if it sizzles, it's ready. Dip each fish strip into the egg wash, letting excess drip off. Then coat it in the flour mixture, pressing lightly to ensure it sticks. Place the coated fish in the hot oil, frying in batches to prevent overcrowding. Cook for 3-4 minutes on each side until golden brown. Transfer the fried fish to a plate lined with paper towels to absorb extra oil. Warm each corn tortilla in a dry skillet for about 30 seconds on each side. This makes them soft and easy to fold. For each tortilla, place 2-3 pieces of crispy fish. Top with sliced red cabbage, avocado, and fresh cilantro. Don’t forget to serve the tacos with lime wedges. A squeeze of lime adds a bright, fresh flavor. For the full recipe, you can check the complete details above. To get that perfect crunch, follow these steps: - Dry the Fish: Start by patting the fish fillets with paper towels. This removes moisture and helps them get crispy. - Use Cornmeal: Mixing cornmeal with flour gives extra texture and crunch. It makes the coating thicker and crispier. - Hot Oil: Make sure the oil is hot enough before frying. If it’s too cool, the fish will absorb oil and turn soggy. - Don’t Overcrowd: Fry the fish in batches. Too many pieces at once cools the oil and affects crispiness. Here are some common mistakes you should steer clear of: - Skipping the Egg Wash: The egg wash helps the coating stick. Don’t skip this step! - Not Heating the Oil Properly: Always test the oil. If it’s not hot, you’ll end up with greasy fish. - Using Wet Fish: Wet fish won’t fry well. Always dry them before coating. - Flipping Too Soon: Let the fish cook fully on one side before flipping. This helps it stay intact and crispy. Enhance your tacos with these tasty garnishes: - Fresh Cilantro: Adds a burst of freshness and color. - Avocado: Creamy avocado pairs well with crispy fish. - Lime Wedges: A squeeze of lime brightens up the flavors. - Salsa or Crema: A drizzle of spicy crema or your favorite salsa adds flavor and moisture. For the full recipe, check out [Full Recipe]. {{image_4}} If you want to try a different protein, shrimp works great. Just peel and devein before cooking. You can also use chicken strips. They need a bit more time to cook, so adjust frying time. Another option is tofu for a different texture. Press it to remove water and cut into strips. For a vegetarian twist, use cauliflower. Cut it into small florets, coat, and fry. It gets nice and crispy. If you want a vegan option, tempeh is fantastic. Slice it thin and marinate for flavor before frying. Just make sure to use a plant-based egg wash or a mixture of flour and water. To boost flavor, add lime zest to the coating mix. It brightens each bite. For spice, increase the cayenne pepper in the coating. You can also create a spicy sauce for drizzling on top. Mix yogurt or mayo with hot sauce for a creamy kick. Fresh herbs like cilantro or parsley can add freshness too. These variations keep the dish exciting, ensuring you can enjoy crispy fish tacos in many ways! Try out the full recipe to explore these options. To keep your crispy fish tacos fresh, store leftovers in an airtight container. Place the fish in one container and the toppings in another. This keeps the fish crispy and the toppings fresh. You can also wrap the tortillas in foil for better storage. To reheat, use the oven or an air fryer for best results. Preheat your oven to 350°F (175°C). Place the fish on a baking sheet and bake for about 10 minutes. If using an air fryer, heat it to 350°F (175°C) and fry for 5 minutes. This way, the fish stays crispy. Cooked fish lasts about 2-3 days in the fridge. Fresh toppings, like cabbage and avocado, can last 1-2 days. Store each item separately. If you have leftover tortillas, they can stay fresh in a sealed bag for up to a week. Always check for signs of spoilage before using any of the ingredients. For the full recipe, check the complete list of ingredients. I recommend using white fish like cod or tilapia. These fish have a mild flavor and cook well. They stay tender inside while getting crispy on the outside. Other good options include haddock or snapper. Yes, you can prepare the fish ahead of time. Cut the fish into strips and coat them. Keep the coated fish in the fridge for up to an hour. This helps the coating stick better when you fry them. If you can't find corn tortillas, flour tortillas are a good choice. You can also use lettuce leaves for a low-carb option. They add a nice crunch and freshness to your tacos. Crispy fish tacos can be gluten-free if you use gluten-free flour. Make sure to check the labels on your ingredients. Corn tortillas are naturally gluten-free, so they work well for this dish. For the best results, use gluten-free breadcrumbs or a gluten-free flour blend for coating the fish. Crispy fish tacos are a fun dish to make at home. We discussed key ingredients, topped it with tasty options, and paired it with sides. The steps from preparing the fish to frying it were simple and clear. Use my tips for crispy results and avoid common mistakes. You can also explore variations for flavors and dietary choices. Proper storage will keep your tacos fresh. Now, enjoy making and sharing your crispy fish tacos! They’re sure to impress.](https://goldendishy.com/wp-content/uploads/2025/06/e15c4a6f-d152-43b4-ae39-d2f9004115b6-768x768.webp)

