Loaded Sweet Potato Nachos Flavor-Packed Delight

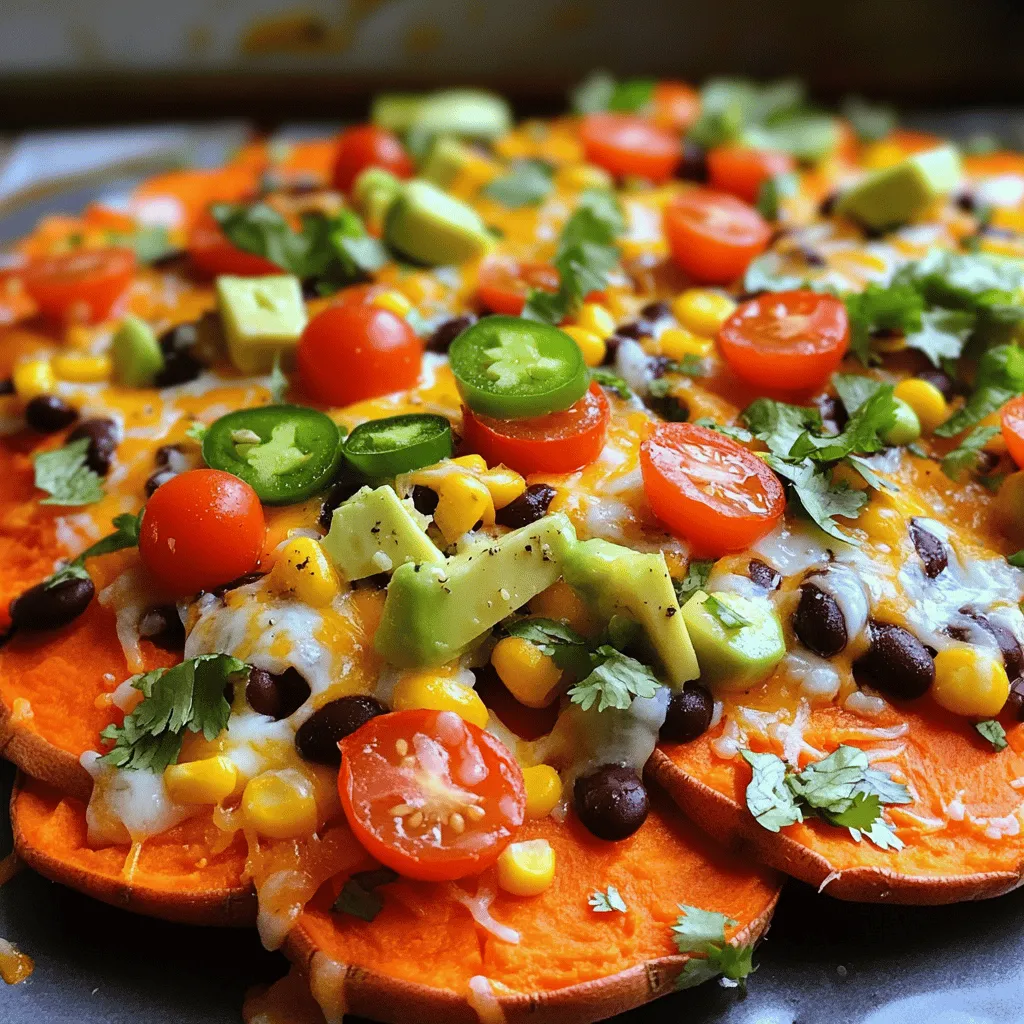
Are you ready to take your snack game to the next level? Loaded Sweet Potato Nachos are a flavor-packed delight that will make your taste buds dance. With crispy sweet potatoes topped with black beans, cheese, and fresh veggies, these nachos are fun and easy to make. Whether you’re entertaining friends or enjoying a cozy night in, this dish will impress. Let’s dive into the recipe and create something delicious together!
Ingredients
Main Ingredients
– 2 large sweet potatoes, sliced into thin rounds
– 2 tablespoons olive oil
– 1 teaspoon smoked paprika
– 1 teaspoon garlic powder
– Salt and pepper to taste
– 1 cup black beans, drained and rinsed
– 1 cup corn kernels (fresh, frozen, or canned)
– 1 avocado, diced
– 1 cup cherry tomatoes, halved
– 1 cup shredded cheese (cheddar or a dairy-free alternative)
These ingredients form the base of my loaded sweet potato nachos. The sweet potatoes bring a natural sweetness, while the beans and corn add protein and texture. The cheese melts into a gooey layer, making each bite a delight.
Optional Toppings
– ¼ cup Greek yogurt or sour cream
– Fresh cilantro, chopped
– Jalapeños, sliced
These toppings are not just for looks; they add layers of flavor. The Greek yogurt or sour cream adds creaminess. Fresh cilantro brings a burst of brightness, and jalapeños can spice things up if you like heat.
Equipment Needed
– Baking sheet
– Mixing bowl
– Knife
– Cutting board
You don’t need fancy gear to make these nachos. Just a few basic tools will do. A baking sheet helps with even cooking, and a good knife makes slicing sweet potatoes easy.
Step-by-Step Instructions
Preheat and Prepare
– Preheat the oven to 425°F (220°C).
– Slice sweet potatoes into thin rounds.
Start by preheating your oven. This step is key for crispy sweet potatoes. Next, grab your sweet potatoes. Cut them into thin rounds. This helps them cook evenly and get that nice crunch.
Coat and Arrange
– Drizzle olive oil and sprinkle seasonings on sweet potatoes.
– Toss to coat and arrange in a single layer on the baking sheet.
Now, take a large bowl. Drizzle olive oil over the sweet potato slices. Add smoked paprika, garlic powder, salt, and pepper. Toss well to coat each slice. Once coated, spread them out in a single layer on a baking sheet. This spacing helps them roast perfectly.
Bake and Load
– Roast sweet potatoes for 20-25 minutes, flipping halfway.
– Add toppings and return to oven until cheese melts.
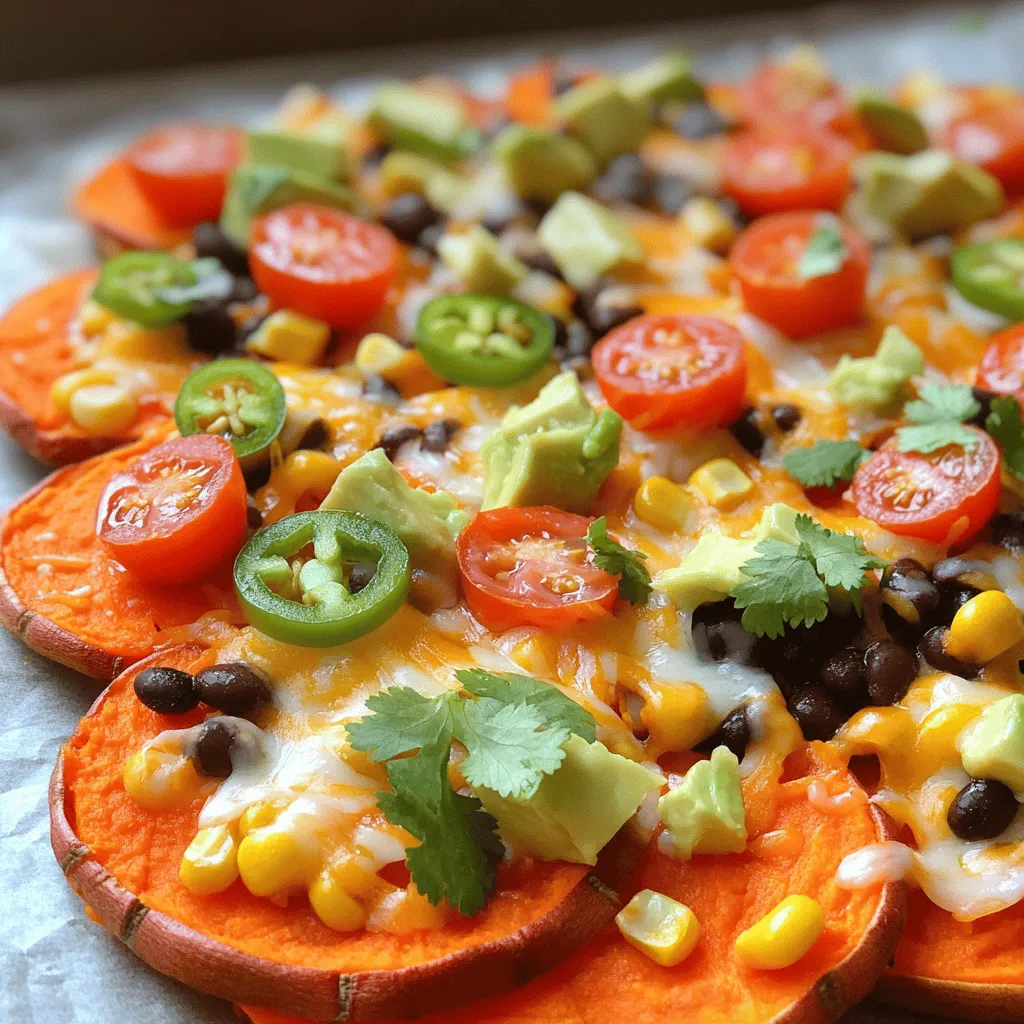
Place the baking sheet in the oven. Roast the sweet potatoes for 20 to 25 minutes. Flip them halfway through to ensure they cook evenly. After roasting, take them out and add your toppings. Spread black beans, corn, and shredded cheese evenly. Then, return the baking sheet to the oven. Bake until the cheese is melted and bubbly. This adds that delicious, gooey goodness to your nachos.Enjoy your loaded sweet potato nachos!
Tips & Tricks
Achieve the Perfect Crispiness
To get that nice crunch, slice the sweet potatoes evenly. This helps them cook the same way. Space them out well on the baking sheet. If they touch, they will steam and not crisp. I recommend a baking time of 20-25 minutes. Flipping them halfway ensures they turn golden and crisp around the edges.
Flavor Enhancements
Mixing different cheeses can really change the taste. Try using cheddar, pepper jack, or even a dairy-free option. Each cheese brings a unique flavor. You can also add spices like cumin or chili powder to kick things up. These spices add depth and make each bite exciting.
Presentation Suggestions
How you serve the nachos matters! Use a large, flat plate for an attractive look. Layer the toppings evenly for a colorful feast. Fresh herbs add a pop of green. Cilantro or green onions work great. You can also sprinkle some extra cheese on top for a beautiful finish. For a fun twist, add colorful toppings like diced peppers or radishes. These make the dish more inviting and fun to eat.

Variations
Vegetarian & Vegan Options
You can easily make these nachos vegetarian or vegan. For cheese, use dairy-free alternatives. Many brands offer tasty vegan cheese that melts well. This way, you keep all the flavor without animal products.
Adding unique veggies can boost flavor and nutrition. Try bell peppers, zucchini, or mushrooms. These add texture and color, making your dish pop. You can roast or sauté these vegetables before topping your nachos for extra taste.
Protein Boosts
Want to add more protein? Grilled chicken or ground turkey works great. Cook the meat and sprinkle it on top of your nachos. This makes them heartier and more filling.
You can also use protein toppings like black beans, chickpeas, or lentils. These options enhance the nutritional value of your nachos. They also add fiber, making your meal more balanced.
International Flavors
Get creative with international twists! Use salsa to add a fresh kick or guacamole for creaminess. Hot sauce can spice things up for those who enjoy heat.
You might also try using ingredients from different cuisines. For example, add taco seasoning for a Mexican flair or use pesto for an Italian touch. This keeps your loaded sweet potato nachos exciting and full of new tastes.
Storage Info
Storing Leftovers
To keep your loaded nachos fresh, store them in the fridge. First, let them cool down. Then, use an airtight container. These containers help seal in moisture and flavor. I recommend glass containers for better preservation. They keep your nachos tasting great for up to three days.
Reheating Tips
When you reheat nachos, you want to keep them crispy. The best way is to use an oven. Preheat your oven to 350°F (175°C). Place the nachos on a baking sheet. Heat for about 10 minutes. This method will refresh the texture. If you want a quick option, use a microwave. Just be aware that they may get a bit soggy. To avoid this, place a paper towel on top. This will help absorb extra moisture.
FAQs
Can I make Loaded Sweet Potato Nachos ahead of time?
Yes, you can prep ingredients in advance. Start by slicing the sweet potatoes. Store them in a bowl of water. This keeps them fresh and stops browning. You can also mix the spices and set them aside. Before serving, just roast the sweet potatoes. This saves time and keeps flavors bright.
How do I prevent soggy sweet potatoes?
To avoid soggy sweet potatoes, slice them thinly. Thin slices cook faster and get crispier. Make sure to spread them out on the baking sheet. Giving space helps hot air circulate. Roasting at a high temperature also aids in crispiness. Don’t skip flipping them halfway through. This ensures even cooking.
What can I substitute for cheese in this recipe?
If you want a cheese substitute, try nutritional yeast. It gives a nice cheesy flavor. You can also use a store-bought dairy-free cheese. There are many tasty options out there. For a creamy touch, add guacamole or a cashew cream. These add richness without dairy.
This post covered loaded sweet potato nachos, from key ingredients to helpful tips. You learned how to create a tasty dish with options for personal flair. Remember to choose your toppings wisely and cut sweet potatoes evenly for the best crunch. Whether you’re a fan of spicy or mild, there’s a version here for you. Enjoy experimenting with different flavors and share your creations. With a bit of practice, you’ll master this crowd-pleasing snack. Happy cooking!


![- 2 medium zucchinis - 1 cup cherry tomatoes - 1/4 cup fresh basil leaves The fresh produce makes this dish feel bright and lively. Zucchini adds a crunchy texture, while cherry tomatoes bring a sweet burst. Basil gives a fragrant touch that brightens every bite. When you use fresh ingredients, you elevate the salad. - 1 cup fresh mozzarella balls Fresh mozzarella balls, or bocconcini, are creamy and soft. They add richness to the salad that balances the fresh flavors. Their bite-sized shape makes them easy to enjoy. I recommend using high-quality mozzarella for the best taste. - 2 tablespoons balsamic glaze - 2 tablespoons extra-virgin olive oil - Salt and black pepper - 1 clove garlic (optional) The dressing ties all the ingredients together. Balsamic glaze provides sweetness and depth, while olive oil adds richness. Salt and pepper enhance the natural flavors. If you want an extra kick, add minced garlic. It brings a wonderful aroma and taste to the dish. For the full recipe, check out the detailed instructions on how to make this fresh and flavorful dish. To start, you need to spiralize the zucchinis. This will make long, noodle-like strands. A spiralizer works best for this task. If you do not have one, you can use a vegetable peeler. Just slice thin ribbons of zucchini instead. Next, combine all salad components in a large bowl. Add the spiralized zucchini, cherry tomatoes, and fresh mozzarella balls. This colorful mix creates a vibrant base for your salad. In a small bowl, whisk together balsamic glaze and olive oil. This will help blend the flavors nicely. If you want a bolder taste, add minced garlic to the dressing. The garlic gives it a nice kick. Now, pour the dressing over the zucchini noodle mixture. Sprinkle salt and black pepper to taste. These simple seasonings enhance the dish's flavors. Use your hands or tongs to toss the salad gently. Make sure all the ingredients are well coated. To finish, add the torn basil leaves on top of the salad. This adds a fresh aroma and flavor. Gently toss the salad again to mix the basil throughout. For serving, you can put it in a big bowl. A light drizzle of balsamic glaze on top makes it look even better. For the full details, check out the [Full Recipe]. If you want to switch things up, there are great options. For mozzarella, try using burrata. Burrata is creamier and adds a rich twist. You can also use vegan cheese if you prefer a plant-based option. For the dressing, consider a light vinaigrette. A mix of lemon juice, olive oil, and a dash of mustard works well. This gives a fresh flavor while cutting calories. To keep the salad fresh, store it properly. Use an airtight container to keep the salad from getting soggy. If you layer the ingredients, place the zucchini at the bottom. This helps keep moisture away from the tomatoes and cheese. On busy days, you can prep the salad in advance. Spiralize the zucchini and chop the tomatoes ahead of time. Just add the dressing and basil when you're ready to eat. This saves you time without losing flavor. To boost the taste, consider adding fresh herbs like oregano or parsley. They add depth and freshness. You can also sprinkle in some crushed red pepper for a bit of heat. For extra crunch, serve the salad with toasted pine nuts or sunflower seeds. These add a nice texture contrast and make the dish even more enjoyable. You can find the full recipe [here](#). {{image_4}} You can add protein to your Zucchini Noodle Caprese Salad for a fuller meal. Here are two great options: - Grilled chicken or shrimp: Both add a tasty twist and extra nutrients. Cook them simply with salt, pepper, and olive oil. Slice and mix them in. - Chickpeas for a vegetarian option: These add a nice crunch and plant-based protein. Just rinse and toss them in for a hearty touch. Mixing up flavors can keep this salad exciting. Here are some ideas: - Adding different dressing styles: Try pesto, ranch, or lemon vinaigrette for a fresh taste. Each will give your salad a unique flair. - Incorporating seasonal vegetables: Add bell peppers, corn, or avocado. These can enhance the texture and flavor while keeping it fresh and vibrant. How you serve this salad can change its vibe. Consider these styles: - Zucchini noodle bowls: Serve it in deep bowls for a casual gathering. It makes it easy for guests to dig in. - Plated salads for special occasions: For a fancy dinner, plate it neatly. This elevates the look and makes it feel more special. These variations can help you customize your Zucchini Noodle Caprese Salad. Choose your favorites to make it truly yours! For the full recipe, check out the details above. To store leftovers, place your Zucchini Noodle Caprese Salad in an airtight container. This keeps the salad fresh and prevents odors from mixing. Use a container that fits the salad snugly to minimize air exposure. Ideal storage containers: - Glass containers with tight lids - BPA-free plastic containers - Silicone food bags Zucchini noodles can stay fresh in the fridge for about 2 to 3 days. Cherry tomatoes and mozzarella also last up to this time frame. Always check for signs of spoilage. Signs of spoilage: - Slimy texture on zucchini - Mold growth on tomatoes - Sour smell from mozzarella Freezing zucchini noodles is a great way to keep them longer. However, fresh zucchini noodles can lose their texture when thawed. To freeze, spiralize the zucchini and place it in a freezer-safe bag. Remove as much air as possible before sealing. Best practices for freezing prepared salad: - Avoid freezing with the dressing; add it later. - Store without fresh basil, as it does not freeze well. - Use within 1 to 2 months for the best flavor. For the full recipe, refer back to the Zucchini Noodle Caprese Salad section. Zucchini noodles last about 3 to 5 days in the fridge. Store them in an airtight container. They will keep fresh and crisp during this time. If they start to look slimy, it’s best to toss them out. Yes, you can use other vegetables. Some great alternatives are carrots, cucumbers, and sweet potatoes. Each offers a unique taste and texture, making your salad fun and versatile. Yes, this salad is gluten-free. The main ingredients contain no gluten. Zucchini, tomatoes, and cheese all fit into a gluten-free diet. Enjoy this dish without worry! You can prep some parts ahead. Spiralize the zucchini and cut the tomatoes a day before. However, add the dressing just before serving. This keeps the salad fresh and crunchy. This salad pairs well with grilled chicken or shrimp. It also goes great with crusty bread or a light soup. For drinks, try a crisp white wine or sparkling water. Enjoy the mix of flavors! For the full recipe, check out the details above! This blog explored a delicious and fresh Zucchini Noodle Caprese Salad. You learned about key ingredients like zucchini, cherry tomatoes, and mozzarella. The instructions simplified making this dish with easy steps. Tips offered ways to customize and store your salad. Variations let you add protein or seasonal flavors. This salad is perfect for any meal. With its bright flavors, it suits busy days or special occasions. Enjoy your cooking adventure and make this salad often!](https://goldendishy.com/wp-content/uploads/2025/07/4c5bc4a7-43a5-40d0-aa85-49819cbbae48-768x768.webp)

![- 2 cups cooked chicken breast, shredded - 1 ripe avocado, mashed until smooth - 1/4 cup smooth Greek yogurt - 1 tablespoon freshly squeezed lemon juice - 1/4 cup red onion, finely chopped - 1/2 cup cherry tomatoes, halved - 1/4 cup celery, finely diced - 1/4 teaspoon garlic powder - Salt and freshly ground black pepper to taste - Fresh cilantro or parsley, chopped, for garnish The ingredients in creamy avocado chicken salad make it tasty and healthy. The chicken provides protein, while avocado adds healthy fats. Greek yogurt makes it creamy without extra calories. Fresh veggies like tomatoes and celery give a nice crunch. Using fresh ingredients is key. This brings out the best flavors. You can adjust the amounts based on what you like. For example, add more tomatoes if you love them. Don’t forget the seasoning! Salt and pepper enhance the taste. Fresh herbs like cilantro or parsley top it off perfectly. They add color and flavor. I recommend checking the full recipe for detailed steps. Enjoy making this delicious dish! - Combine mashed avocado, Greek yogurt, and lemon juice in a bowl. - Mix until smooth using a fork or whisk. To make the creamy dressing, start with a ripe avocado. Mash it in a bowl until it is smooth. Next, add 1/4 cup of Greek yogurt. This adds creaminess and protein. Then, squeeze in 1 tablespoon of lemon juice. This will brighten the flavor. Mix these three ingredients well with a fork or whisk. You want a creamy and smooth texture. This creamy dressing is the base of your salad and full of healthy fats. - Add shredded chicken to the avocado mixture. - Stir thoroughly to coat the chicken evenly. Now it’s time to add in the chicken. Use 2 cups of cooked chicken breast, shredded. You can use leftover chicken or rotisserie chicken for ease. Add the chicken to the creamy dressing. Stir well so every piece of chicken is coated. This adds protein and makes the salad filling. The creamy dressing brings all the flavors together. - Gently fold in red onion, cherry tomatoes, and celery. - Season with garlic powder, salt, and black pepper to taste. Next, let’s add some crunch and color. Gently fold in 1/4 cup of finely chopped red onion, 1/2 cup of halved cherry tomatoes, and 1/4 cup of diced celery. These veggies add freshness and texture. Now, season your salad. Add a pinch of garlic powder, salt, and freshly ground black pepper. Taste it and adjust the seasoning as needed. Mix gently so you don’t break the veggies. Now, your creamy avocado chicken salad is ready to serve! Check out the Full Recipe for more details. - Look for avocados that yield slightly to pressure. - Check the color; ripe avocados usually have a darker skin. Selecting the perfect avocado is key for your creamy avocado chicken salad. When you gently press the avocado, it should give a bit. This tells you it is ripe and ready to use. A darker skin tone often means ripeness, but don't rely on color alone. Always feel for that slight softness! - Use rotisserie chicken for convenience. - Ensure chicken is fully cooked; internal temperature should reach 165°F (75°C). Cooking the chicken can take time, but using rotisserie chicken saves you effort. It offers great flavor and saves cooking time. If you cook your own chicken, make sure to check the internal temperature. It needs to reach 165°F (75°C) to be safe to eat. - Serve in individual bowls, atop lettuce leaves, or in a wrap. - Consider a lemon wedge on the side for added flavor. Serving your salad can be fun! You can use individual bowls or place it on crisp lettuce leaves. If you want a wrap, that works too. A lemon wedge on the side brightens the meal and adds a zesty kick. For the full experience, try the [Full Recipe]. Enjoy your tasty and healthy choice! {{image_4}} You can make your creamy avocado chicken salad even better by adding fruits. Diced apples or grapes bring a nice sweetness. They also add a nice crunch. If you want a tropical twist, try adding mango. Its juicy flavor blends well with creamy avocado. Not in the mood for chicken? You can easily swap it out. Canned tuna or chickpeas work well for a vegetarian option. Both of these options add protein and flavor. If you love seafood, consider using grilled shrimp. It adds a fresh, light taste to the salad. Want to spice things up? Adding spices can really boost the flavor. Try cumin or smoked paprika for a warm kick. If you like heat, toss in some jalapeños. These will give your salad a spicy edge that keeps it exciting. Feel free to get creative with your mix-ins! Each variation gives you a new twist on this delicious dish. Check out the Full Recipe for more ideas. Store your creamy avocado chicken salad in an airtight container in the refrigerator. It will stay fresh for up to 2 days. I suggest enjoying it right after you make it. However, if you keep the ingredients separate, it can last a little longer. This way, you keep the textures nice. Do not freeze the salad. Avocado gets mushy when frozen. If you want to prepare ahead, consider freezing the chicken on its own. This will keep it fresh and ready for your salad. Prep your ingredients ahead of time. Store them separately to mix later. This salad is a great option for busy weeks. You can have a tasty meal ready in minutes! For the full recipe, check out the detailed instructions above. Typically lasts for about 2 days when stored properly. I recommend using an airtight container. This helps keep your salad fresh and tasty. After two days, the avocado may brown and lose its creamy texture. Yes, but it’s best to combine the ingredients just before serving to maintain freshness. If you prepare it early, store the salad components separately. This way, the avocado stays bright and creamy. Great with whole-grain bread, crackers, or a side of fruit. I love serving it on toast for a hearty lunch. Pairing it with fresh fruit offers a nice, sweet contrast. You can also use it as a filling in wraps for a tasty twist. For the full recipe, check out the detailed steps above. This creamy avocado chicken salad is easy to make and full of flavor. We covered the main ingredients, steps, and tips to perfect it. You learned how to mix chicken with creamy dressing and fresh veggies. Remember to store leftovers properly for the best taste. Enjoy this salad as a quick meal or snack. Feel free to customize with your favorite ingredients. With these simple tips, you can create a dish that is both healthy and delicious.](https://goldendishy.com/wp-content/uploads/2025/06/50306de2-9119-4a0c-8cb7-3da0c4c0a2a4-768x768.webp)