Loaded Potato Skins Flavorful and Simple Recipe

Are you ready to make the ultimate snack? Loaded potato skins are tasty and easy to whip up. With a few simple ingredients and quick steps, you can impress friends and family. I’ll share tips to avoid common mistakes and ideas for fun toppings. Let’s dive into this flavorful and simple recipe that will become a hit at your next gathering!
Ingredients
List of Ingredients
– 4 large russet potatoes
– 1 cup shredded sharp cheddar cheese
– 1 cup shredded pepper jack cheese
– 1/2 cup sour cream
– 1/4 cup sliced green onions
– 1/4 cup cooked bacon bits (optional)
– 1 jalapeño, finely diced
– 2 tablespoons olive oil
– 1 teaspoon garlic powder
– 1 teaspoon smoked paprika
– Salt and freshly ground black pepper to taste
Overview of Important Ingredients
Russet potatoes are key for this recipe. Their thick skin holds up well and gives a nice crunch. The sharp cheddar cheese adds a bold flavor, while pepper jack brings a spicy kick. Sour cream balances the heat with creaminess. Green onions add freshness and color, making each bite pop. Bacon bits add a savory touch, but feel free to skip them for a lighter snack.
Recommended Ingredient Substitutions
If you want a different flavor, try using sweet potatoes instead of russet potatoes. For cheese, mozzarella or gouda work well too. You can swap sour cream for Greek yogurt for a tangy twist. For a milder taste, omit the jalapeño or use bell peppers instead. If you prefer a vegetarian version, skip the bacon bits altogether. Use your creativity to make this dish your own!
Step-by-Step Instructions
Preparation Steps
1. Preheat your oven to 400°F (200°C). This will help cook the potatoes evenly.
2. Scrub the russet potatoes well under running water. Dry them with a towel.
3. Use a fork to prick each potato multiple times. This allows steam to escape while baking.
4. Coat each potato with olive oil. Sprinkle some salt on each one for flavor.
5. Place the potatoes directly on the oven rack. Bake them for 45-60 minutes. They should feel tender when pierced with a fork.
6. After baking, remove the potatoes and let them cool for about 10 minutes. This makes them easier to handle.
7. Lower the oven temperature to 425°F (220°C) for the next step.
Baking and Assembly Instructions
1. Cut each potato in half lengthwise. Use a spoon to scoop out some flesh, leaving about 1/4 inch of skin.
2. Save the scooped-out potato for mashed potatoes or other dishes.
3. Brush the inside of each potato skin with olive oil. Season with garlic powder, smoked paprika, salt, and black pepper.
4. Place the potato skins, cut-side up, on a baking sheet lined with parchment paper for easy cleanup.
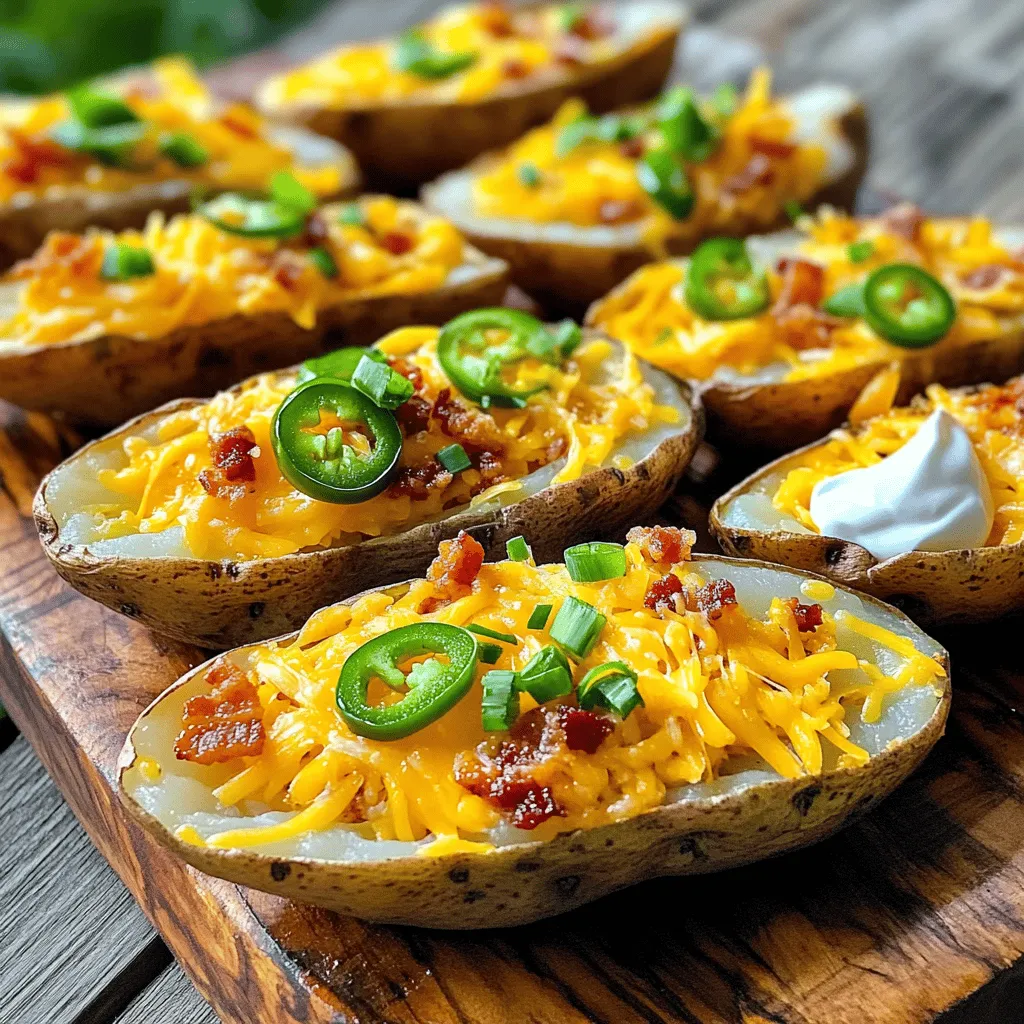
5. Fill each skin with a mix of shredded cheddar and pepper jack cheese. Add diced jalapeños and bacon bits if you like.
6. Bake the filled potato skins for an additional 10-15 minutes. Look for the cheese to melt and become bubbly.
7. Once they’re done, take them out and let them cool slightly before serving.
Visual Guides and Tips
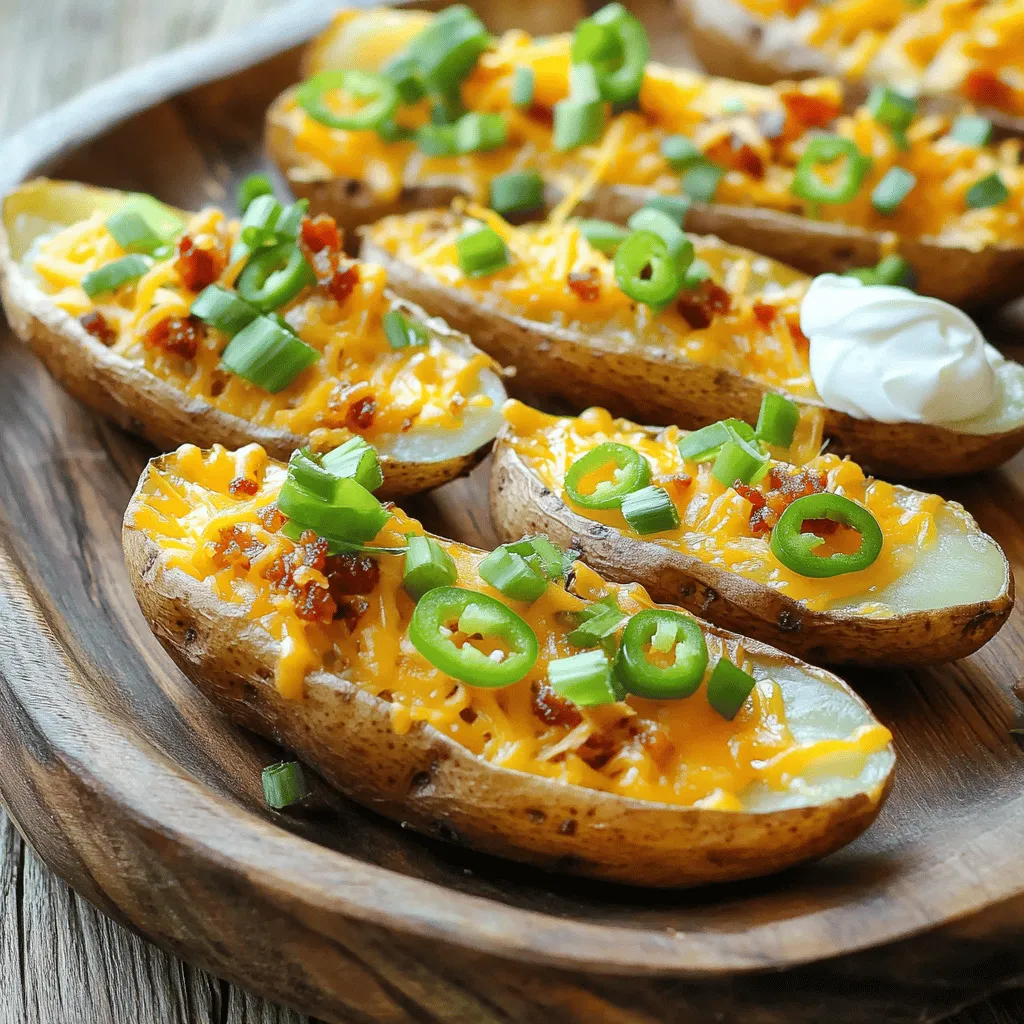
– For a great look, arrange the potato skins on a large platter. Angle them slightly for a fun display.
– Garnish with more green onions for color. Serve with a bowl of sour cream for dipping.
– Keep an eye on the cheese while baking to avoid burning. You want it to be perfectly melted and slightly golden.
Tips & Tricks
Cooking Tips for Perfect Potato Skins
To make your loaded potato skins perfect, follow these steps:
– Choose the Right Potatoes: Use large russet potatoes. They have a great texture.
– Bake Thoroughly: Bake potatoes at 400°F (200°C) for 45-60 minutes. They need to be soft.
– Scoop Carefully: When scooping out the insides, leave about 1/4 inch of potato. This keeps the skins sturdy.
– Season Well: Brush the insides with olive oil and sprinkle garlic powder, smoked paprika, salt, and pepper. This adds flavor.
Presentation and Serving Suggestions
Presentation is key for loaded potato skins. Here are some ideas:
– Use a Platter: Arrange the potato skins on a large platter. Angle them for a fun look.
– Garnish: Add chopped green onions on top for color. This makes them pop.
– Serve with Dips: Put a small bowl of sour cream nearby. It invites guests to dig in.
Common Mistakes to Avoid
Avoid these common mistakes for the best loaded potato skins:
– Undercooking Potatoes: Don’t rush the baking. Potatoes must be soft.
– Overstuffing: Fill the skins, but don’t overdo it. Too much filling makes them hard to eat.
– Skipping Seasoning: Don’t skip the seasonings. They make a huge difference.
These simple tips will help you create loaded potato skins that are both tasty and visually appealing.

Variations
Different Toppings for Loaded Potato Skins
Loaded potato skins are great because you can top them with many fun things. You can use the classic mix of cheese, bacon, and sour cream. But don’t stop there! Here are some tasty options:
– BBQ Chicken: Add shredded BBQ chicken for a smoky flavor.
– Buffalo Sauce: Drizzle with buffalo sauce for a spicy kick.
– Guacamole: Top with guacamole for a fresh and creamy taste.
– Chili: Use hearty chili for a filling, savory topping.
– Vegetable Medley: Mix in diced bell peppers, corn, and black beans for a colorful twist.
Vegetarian and Vegan Options
You can easily make loaded potato skins fit any diet. For a vegetarian version, swap out bacon for sautéed mushrooms or spinach. Use plant-based cheese to keep it vegetarian or vegan. Here are some ideas:
– Black Bean and Corn: Mix black beans and corn with spices.
– Avocado: Use mashed avocado instead of sour cream.
– Tofu Crumbles: Season crumbled tofu for a protein boost.
Alternative Ingredients for Flavor Customization
Changing the ingredients can make your potato skins unique. Try these ideas for new flavors:
– Cheese Varieties: Use gouda, feta, or goat cheese for different tastes.
– Herbs and Spices: Add fresh herbs like cilantro or dill for freshness.
– Hot Sauce: A drizzle of hot sauce can spice things up.
– Nuts and Seeds: Top with chopped nuts or seeds for crunch.
Feel free to explore and create your perfect loaded potato skins with these variations!
Storage Info
Best Practices for Storing Leftovers
Store any leftover loaded potato skins in an airtight container. Let them cool before sealing. You can keep them in the fridge for up to three days. If you want to keep them longer, freezing is a good option.
Reheating Instructions for Leftover Potato Skins
To reheat, preheat your oven to 350°F (175°C). Place the potato skins on a baking sheet. Heat them for about 10-15 minutes until warm. You can also use the microwave, but the skins may lose their crispiness.
Freezing Loaded Potato Skins: Is It Possible?
Yes, you can freeze loaded potato skins! First, let them cool completely. Then, wrap each skin tightly in plastic wrap. Place them in a freezer bag and remove as much air as possible. They can last up to two months in the freezer. When ready to eat, thaw them in the fridge overnight before reheating. Enjoy your delicious meal anytime!
FAQs
How do you keep potato skins from getting soggy?
To keep potato skins crispy, bake them until they are golden brown. After baking, let them cool for a few minutes. This helps them firm up a bit. Brush the insides with olive oil before adding toppings. This adds flavor and helps with crispiness. Avoid overcrowding the baking sheet. This helps heat circulate around each skin.
Can you make loaded potato skins ahead of time?
Yes, you can prepare potato skins ahead of time. Bake the potatoes and scoop out the insides. Store the skins in an airtight container in the fridge. You can fill them later before baking. Just be sure to add the toppings right before you bake them. This keeps the skins fresh and tasty.
What can I serve with loaded potato skins?
You can serve many things with loaded potato skins. They pair well with a simple salad or a bowl of chili. For a fun twist, try serving them with a spicy salsa or guacamole. You might also serve a selection of dips like ranch or blue cheese. These options make your meal more exciting and delicious.
In this article, we covered key ingredients for loaded potato skins and their substitutes. I shared step-by-step instructions for preparation, baking, and assembly. You learned tips for cooking and presenting your dish without common mistakes. We also explored topping variations and storage methods for leftovers.
Remember, with some creativity, you can make this dish your own while ensuring it stays delicious. Enjoy making loaded potato skins that will impress every guest!


![Creating Peach and Basil Flatbread is simple and fun. Here’s what you need: - Pre-made flatbread or naan - Ripe peaches - Fresh mozzarella cheese - Fresh basil leaves - Olive oil - Balsamic glaze (optional) - Salt and pepper - Red pepper flakes (optional) Each ingredient adds its own flair. The flatbread or naan forms a sturdy base. Ripe peaches bring sweetness. Fresh mozzarella melts beautifully, creating a rich layer. Fresh basil adds a burst of flavor that ties everything together. Olive oil enhances the taste and helps with crispness. Balsamic glaze can heighten the sweet and tangy notes. Remember to season with salt and pepper for balance. If you like some heat, sprinkle red pepper flakes on top. This mix of ingredients makes for a delightful summer treat. You can find the full recipe to guide you through the steps. 1. Preheat your oven to 425°F (220°C). This helps the flatbread bake evenly. 2. Line a baking sheet with parchment paper. This keeps the flatbread from sticking. Place your flatbread or naan on the lined sheet. 3. Brush the flatbread with olive oil using a spoon or brush. This adds flavor and helps it crisp up. 4. Spread the shredded mozzarella cheese evenly over the flatbread. This creates a creamy base. 5. Layer the thinly sliced peaches on top of the cheese. Make sure each slice is well-placed for the best taste. 6. Season with salt, pepper, and red pepper flakes if you like some heat. This adds extra flavor. 1. Bake the flatbread in the oven for 10-12 minutes. Keep an eye on it until the cheese melts and bubbles. 2. Watch for the cheese to brown lightly. This gives the flatbread a nice, toasty flavor. 1. After baking, take the flatbread out of the oven. Sprinkle the torn basil leaves on top while it's hot. This brings out the fresh aroma. 2. If you want, drizzle balsamic glaze over the flatbread for extra flavor. This adds a sweet and tangy twist. 3. Let the flatbread cool for a couple of minutes. Then slice it up for sharing or enjoying by yourself. This method makes a Peach and Basil Flatbread that bursts with flavor, perfect for summer. For the complete recipe, check [Full Recipe]. - Selecting ripe peaches for the best flavor Choose peaches that feel slightly soft but are not mushy. Look for a rich color, usually yellow or orange, indicating ripeness. The aroma should be sweet and fragrant. These factors ensure your flatbread bursts with juicy flavor. - Cheese melting tips for a creamy texture Use fresh mozzarella for the best melt. Shred it yourself for a creamier texture. Spread the cheese evenly on the flatbread, ensuring each bite has that gooey goodness. Bake until bubbly and golden for added richness. - Seasoning tricks for additional flavor enhancement Season your flatbread with salt and pepper. Add red pepper flakes for a spicy kick if you like heat. A drizzle of balsamic glaze at the end gives a sweet tang. These little touches elevate the dish. - Best sides or drinks to pair with the dish Serve with a fresh green salad or a cool cucumber salad. A chilled white wine or sparkling water pairs nicely. These sides balance the sweetness of the peaches and the creaminess of the cheese. - Presentation tips to impress guests Use a wooden board or a large platter for serving. Garnish with extra basil leaves for color. A small bowl of balsamic glaze on the side invites guests to add more if they wish. This presentation makes the dish even more tempting. For the full recipe, you can check out the details above. Enjoy creating your Peach and Basil Flatbread! {{image_4}} You can change the cheese to create new flavors. Goat cheese adds a tangy taste. Feta cheese brings a salty bite. Both pair well with peaches. You can also add proteins to make it heartier. Prosciutto gives a nice savory touch. Grilled chicken adds a juicy element. Both options enhance the flatbread's flavor. Try different toppings to switch things up. Arugula adds peppery notes. Toasted nuts give a crunchy texture. Both add depth and interest to each bite. You can also explore different herbs. Mint offers a refreshing twist, while thyme adds warmth. Each herb changes the flatbread's character, making it unique. For the full recipe, check the details above to get started on this delightful dish! To keep your Peach and Basil Flatbread fresh, store leftovers in the fridge. Wrap the flatbread in plastic wrap or foil. This helps to prevent it from drying out. You can also place it in an airtight container for extra protection. The flatbread lasts for about 2 to 3 days in the fridge. After that, the quality may decline. When reheating, the oven works best for keeping that crispy texture. Preheat your oven to 350°F (175°C). Place the flatbread directly on the oven rack or on a baking sheet. Heat for about 5 to 8 minutes until warm. If you use a microwave, the flatbread may become soggy. To maintain crispness, heat it in short bursts and check often. Enjoy your flatbread just like it was fresh from the oven! How do I know when the peaches are ripe enough? Look for peaches that are slightly soft to the touch. The color should be a warm golden hue. A sweet aroma is a good sign of ripeness too. If they feel hard, give them a few more days at room temperature. Can I use frozen flatbread or naan for this recipe? Yes, you can use frozen flatbread or naan. Just thaw them first. You may need to adjust baking time. Keep an eye on the cheese to avoid burning. What can I substitute for mozzarella cheese? If you don’t have mozzarella, try goat cheese or feta. They add a tangy flavor. You can also use provolone for a similar texture. How do I make this flatbread in advance? You can prepare the flatbread up to the baking step. Assemble it and store it in the fridge. Bake it when you are ready to serve. This keeps the flatbread fresh and tasty. For the best results, use it within a day. In this blog post, we explored how to make delicious Peach and Basil Flatbread. I shared key ingredients, easy steps, and tips for the best results. Remember to use ripe peaches and choose your cheese wisely. You can even mix in proteins or herbs for unique flavors. Storing leftovers properly keeps them fresh. With easy reheating tips, you can enjoy your flatbread again. Try this recipe for a tasty treat and impress your friends and family! Happy cooking!](https://goldendishy.com/wp-content/uploads/2025/07/1088bccc-4c8b-4254-a72a-0cec77bef739-768x768.webp)


![- 2 medium zucchinis, grated - 2 medium carrots, grated - 1/2 cup all-purpose flour - 1/4 cup grated Parmesan cheese - 1 large egg - 2 green onions, finely chopped - 2 cloves garlic, minced - 1 teaspoon dried oregano - 1/2 teaspoon salt - 1/4 teaspoon black pepper - Olive oil for frying These ingredients form the base of your zucchini carrot fritters. The grated zucchini and carrots give them a fresh taste and bright color. The flour and cheese help bind everything together, while the egg adds richness. Don’t forget the seasonings! They bring out all the flavors. - Fresh herbs like parsley or dill - Additional cheese variants such as feta or cheddar These optional ingredients can elevate your fritters. Fresh herbs add a burst of flavor and color. You can also mix in different cheeses for a unique twist. - Gluten-free options: Use almond flour or gluten-free flour - Dairy-free alternatives: Replace cheese with nutritional yeast If you need to make dietary changes, these substitutions work well. Gluten-free flour keeps the fritters light and fluffy. Nutritional yeast adds a cheesy flavor without dairy. You can still enjoy delicious fritters that fit your needs. Check the [Full Recipe] for more details! - Grating Vegetables Start by grating the zucchinis and carrots. I use a box grater for this. It makes the job easy and quick. - Removing Excess Moisture After grating, place the vegetables in a clean kitchen towel. Twist and squeeze to remove as much liquid as possible. This step is key. It helps the fritters stay firm and not soggy. - Combining Dry and Wet Ingredients In a large bowl, mix the drained zucchini and carrot with flour, Parmesan cheese, egg, green onions, garlic, oregano, salt, and pepper. Stir well to combine. You want a smooth and even mixture. - Ensuring a Cohesive Mixture Check that all ingredients are mixed thoroughly. The batter should hold together well. This cohesive mixture is vital for great fritters. - Heating the Skillet Heat a non-stick skillet over medium heat. Add a couple of tablespoons of olive oil. Wait until the oil is hot and shimmering but not smoking. - Frying Tips for Crispiness Scoop about 2 tablespoons of the fritter mix into the skillet. Flatten each scoop gently with a spatula. This helps them cook evenly. Fry each fritter for about 3-4 minutes on each side. Look for a golden brown color and a crispy texture. If needed, fry in batches, adding more oil as you go. Serve them warm, and enjoy the tasty crunch! For the full recipe, check out the [Full Recipe]. To make great zucchini carrot fritters, moisture removal is key. Grated vegetables hold a lot of water. If you don’t squeeze them dry, your fritters turn out soggy. After grating, use a clean kitchen towel. Place the veggies in the towel and twist it tightly. This method gets rid of extra liquid, ensuring crispy fritters. Cooking temperature control is also important. Use medium heat for frying. If the temperature is too low, the fritters will absorb too much oil. If it's too high, they will burn on the outside and stay raw inside. A good test is to add a small bit of batter to the pan. If it sizzles right away, you're ready to go! For dipping sauces, yogurt pairs perfectly. You can also try a spicy mayo or tzatziki. These sauces enhance the flavors and add creaminess. For sides, serve your fritters with a crisp salad or roasted veggies. Both options balance the meal nicely. Adding spices can elevate your fritters. Try a pinch of cayenne for heat or smoked paprika for depth. Herbs like dill or parsley can also add freshness. You can mix in other vegetables too. Finely chopped bell peppers or spinach work well. They add color and nutrition, making your fritters even better. For the full recipe, check out the complete guide above! {{image_4}} You can switch up the flavors in your zucchini carrot fritters to keep things interesting. - Spicy Zucchini Carrot Fritters: Add some heat! Mix in chopped jalapeños or red pepper flakes. This will give your fritters a nice kick. You can also serve them with a spicy dipping sauce. - Mediterranean-Inspired Fritters: Want a fresh twist? Use feta cheese, fresh dill, and olives in your batter. These flavors will transport you to the sunny Mediterranean coast. You can easily modify this recipe to fit your dietary needs. - Vegan Version: Replace the egg with a flaxseed or chia seed mix. Combine 1 tablespoon of seeds with 2.5 tablespoons of water. Let it sit until it becomes gel-like. This will bind your fritters well. - Low-Carb Options: For a low-carb twist, swap all-purpose flour for almond flour. This keeps your fritters tasty and lower in carbs. The shape and size of your fritters can change how you serve them. - Mini Bites for Appetizers: Form smaller fritters for easy snacking. They are perfect for parties and gatherings. Just adjust the cooking time to avoid burning. - Larger Fritters for Main Dishes: Make bigger fritters for a hearty meal. Serve them with a salad for a complete dish. They also hold up nicely on a bun for a veggie burger. You can find the full recipe for zucchini carrot fritters above. Enjoy experimenting with these variations to suit your taste! How do you store leftover fritters? Place them in an airtight container. Use parchment paper between layers to keep them crisp. This helps prevent sogginess. What are the best practices for freshness? Store fritters in the fridge for up to three days. Keep the container sealed tight. This keeps them tasty and prevents drying out. Should you freeze fritters before or after cooking? You can freeze them both ways. For the best texture, freeze them uncooked. It helps keep them crisp when cooked later. What are the thawing and reheating tips? Thaw the fritters in the fridge overnight. Reheat them in a skillet over medium heat. Add a little oil for that crispy edge. How long do refrigerated fritters last? They stay good for about three days in the fridge. After that, the texture and flavor may change. What is the freezer storage timeframe? Frozen fritters can last up to two months. Make sure they are in a sealed bag or container. This protects against freezer burn. For more details, check the [Full Recipe]. Yes, you can use frozen zucchini or carrots. However, they will change the texture and flavor. Frozen veggies often hold more water. This extra moisture can make fritters soggy. If you use frozen, let them thaw and squeeze out the water. After that, they can work well in your fritters. To make fritters crispy, focus on a few key tips. First, remove as much moisture as possible from the grated vegetables. Use a clean towel to squeeze out water. Next, heat your oil until it's hot but not smoking. Fry fritters in small batches and leave space between them. This way, they cook evenly. You have many tasty options for dips. Here are some favorites: - Greek yogurt with lemon juice - Spicy sriracha mayo - Creamy ranch dressing - Simple tzatziki sauce These dips add flavor and complement the fritters well. They enhance the meal, making it even more enjoyable. For a full recipe, check the details above! Zucchini and carrot fritters are simple to make and delicious. We covered essential ingredients, like grated veggies, flour, and cheese. You learned how to prepare, mix, and fry the batter for perfect bites. I shared tips to ensure crispness and flavor, plus variations for diets. Don’t forget to store any extras properly! Now you can enjoy these fritters at any meal, with great dips, or as snacks. Have fun cooking and experimenting with these ideas!](https://goldendishy.com/wp-content/uploads/2025/06/18ed450f-8e43-4a66-9091-0bc3385fc8fe-768x768.webp)
. To start, you need to preheat your grill or oven. If you choose to grill, set it to medium-high heat. This will help create a nice char on the corn. If baking sounds better, preheat your oven to 400°F (200°C). Both methods work well, giving you tasty corn. Next, prepare the garlic butter mixture. In a mixing bowl, combine melted unsalted butter, minced garlic, smoked paprika, sea salt, and black pepper. Whisk this mix together until all the ingredients blend well. The aroma will fill your kitchen, making it hard to wait for the corn! Now, it’s time to coat the corn. Take each ear of corn and brush it with your garlic butter mix. Make sure to cover every kernel. This ensures each bite bursts with flavor. For grilling, place the corn on the grill grates. Rotate it every 2-3 minutes until charred and tender, about 10-12 minutes total. If baking, wrap the corn in aluminum foil and bake for 20-25 minutes, turning halfway. After cooking, sprinkle grated Parmesan cheese on top while it’s still hot. Optionally, drizzle with fresh lemon juice for added flavor. Finally, garnish your corn with chopped parsley for a bright finish. Enjoy your Garlic Parmesan Corn on the Cob! For a complete guide, check out the Full Recipe. Grilling corn on the cob can be fun and easy. First, soak the husked corn in water for 15 minutes before grilling. This helps keep the corn moist. When you're ready, heat your grill to medium-high. Place the corn directly on the grates. Rotate the corn every 2-3 minutes. This gives it even cooking and a nice char. In about 10-12 minutes, the corn will be bright and tender. For the best garlic flavor, use fresh garlic. Mince the cloves finely to release the oils. Mix it well with the melted butter before brushing it on the corn. If you want a stronger taste, let the garlic sit in the butter for a bit. This helps the flavors blend. You can also add a touch of garlic powder if you like more depth. If you prefer a bit of heat, add a pinch of cayenne pepper to your garlic butter. For those who enjoy a milder taste, skip the pepper entirely. You can also adjust the smoked paprika amount. Start with less, then taste as you go. Everyone has different spice levels, so make it your own. Remember, you can always add more spice, but you can’t take it out! For the full recipe, check out the Garlic Parmesan Corn on the Cob section. {{image_4}} To change up the flavor, you can add more spices. Try adding chili powder for heat. You can also mix in some Italian herbs, like oregano or basil. They give a fresh lift. If you love herbs, fresh cilantro is a great choice. Just chop it fine and add it to your garlic butter mix. This will make your corn taste even better! Parmesan is great, but other cheeses can work too. For a creamier taste, use feta cheese. It adds a nice tang. If you want something sharper, try aged cheddar. It gives a bold kick. You can even use vegan cheese if you prefer. Just make sure it melts well. Each cheese choice will give your corn a unique twist. Serving corn on the cob can be fun and playful. Try cutting the corn into smaller pieces for easy sharing. You can also serve it on skewers for a fun touch. Drizzle it with a spicy sauce for extra flavor. If you want a fancy look, sprinkle some microgreens on top. They add color and freshness. For the full recipe, check out the detailed steps to make this dish shine! After enjoying your Garlic Parmesan Corn on the Cob, you may have some left. It’s best to store it in an airtight container. Let the corn cool to room temperature first. Wrap each ear in plastic wrap or foil for extra protection. This keeps it fresh and tasty for later. Store the container in the fridge. It can last about 3 to 4 days. When you’re ready to enjoy the leftover corn, reheating it is simple. You can use the microwave, grill, or oven. For the microwave, place the corn on a plate and cover it with a damp paper towel. Heat in short bursts of 30 seconds. Check to see if it’s warm. If using the grill, wrap the corn in foil to avoid drying out. Heat for about 5 to 7 minutes. For the oven, preheat to 350°F (175°C) and bake wrapped corn for 10 to 15 minutes. Freezing is a great option if you want to save the corn for a long time. Husk the corn and cut the kernels off the cob if you prefer. Place the kernels in a freezer bag, removing as much air as possible. Label the bag with the date. You can also freeze whole cobs. Wrap each cob in plastic wrap and place it in a freezer bag. The corn can last up to 6 months in the freezer. When you’re ready to use it, thaw in the fridge overnight before reheating. You can pair Garlic Parmesan Corn on the Cob with many easy side dishes. Some great options include: - Grilled chicken or fish - Fresh salad with vinaigrette - Coleslaw for crunch - Roasted potatoes for heartiness - Tomato and mozzarella salad for freshness These sides complement the sweet, buttery flavor of the corn. They also create a colorful plate. Yes, you can make Garlic Parmesan Corn on the Cob in the oven. Preheat your oven to 400°F (200°C). Wrap the corn tightly in aluminum foil to keep it moist. Bake for 20-25 minutes. Turn the foil halfway through cooking. This method gives you tender corn, full of flavor. To prevent the corn from sticking to the grill, follow these tips: - Preheat the grill to medium-high heat. - Brush the grill grates with oil before placing the corn. - Make sure to coat the corn with the garlic butter mixture. This keeps it moist and adds flavor. - Rotate the corn every few minutes to avoid sticking. These steps help you achieve perfectly grilled corn every time. Enjoy your cooking! Making Garlic Parmesan Corn on the Cob is simple and fun. We covered the best ingredients, tools, and methods. Preheating is key, and the garlic butter really adds flavor. You learned grilling tips and how to customize with herbs or spices. Don't forget about storage and reheating for later. Enjoy your delicious corn, and share it with friends. Each bite can bring smiles, making it worth the effort. Now, get cooking!](https://goldendishy.com/wp-content/uploads/2025/07/bd43f489-c25e-441e-8123-0082a4d55c21-768x768.webp)