Lemon Poppy Seed Pound Cake Irresistible and Moist

Are you ready for a slice of sunshine? My Lemon Poppy Seed Pound Cake is the perfect blend of zest and moisture. With simple ingredients like fresh lemons and Greek yogurt, this cake shines at any gathering. I’ll share tips to make it irresistible and tricks to keep it moist. Join me as we bake the cake that everyone will crave! Let’s get started!
Why I Love This Recipe
- Bright and Zesty Flavor: This pound cake bursts with fresh lemon flavor, making each bite a refreshing treat that’s perfect for any occasion.
- Moist and Tender Texture: The addition of Greek yogurt ensures this cake remains moist and tender, creating a delightful mouthfeel.
- Easy to Make: With simple ingredients and straightforward steps, this recipe is accessible for bakers of all skill levels.
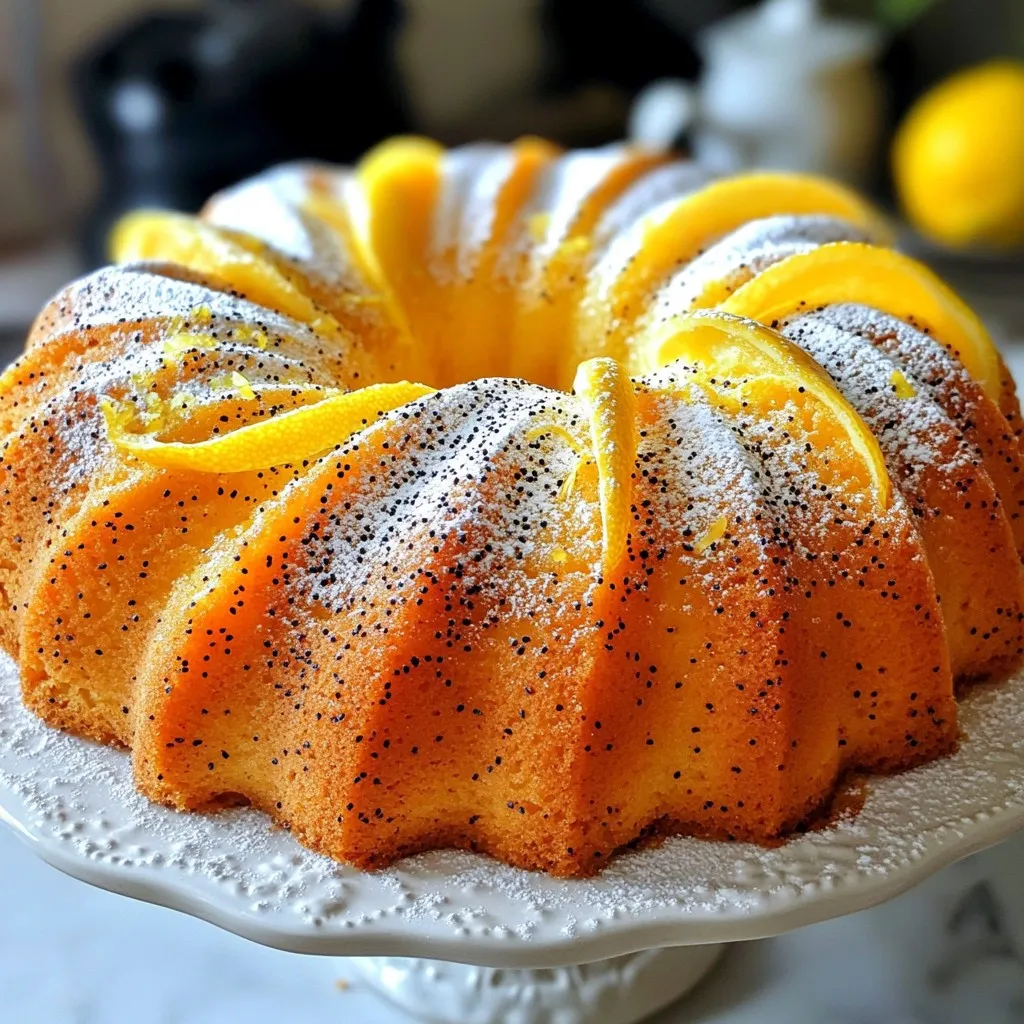
- Versatile Presentation: This cake looks stunning on any table, especially when garnished with fresh lemon slices and a dusting of powdered sugar.
Ingredients
List of Ingredients
– 1 cup unsalted butter
– 2 cups granulated sugar
– 4 large eggs
– 1 tablespoon lemon zest
– 1/4 cup lemon juice
– 3 cups all-purpose flour
– 1 teaspoon baking powder
– 1/2 teaspoon baking soda
– 1 teaspoon kosher salt
– 1/2 cup poppy seeds
– 1 cup plain Greek yogurt
Measurement Conversions
– Cups to grams:
– 1 cup of unsalted butter = 227 grams
– 1 cup of granulated sugar = 200 grams
– 1 cup of plain Greek yogurt = 245 grams
– Tablespoons to teaspoons:
– 1 tablespoon = 3 teaspoons
Quality Ingredient Tips
– Choosing fresh lemons: Look for lemons that are bright and firm. The skin should be smooth, not wrinkled. Fresh lemons have more juice and zest, enhancing the flavor of your cake.
– Selecting poppy seeds: Choose fresh, whole poppy seeds for the best flavor. Check the color; they should be a rich blue or black. Avoid any seeds that look dull or old, as they won’t add the same delightful crunch or flavor.
Using high-quality ingredients makes your Lemon Poppy Seed Pound Cake truly shine. Each bite bursts with zesty lemon flavor and the unique crunch of poppy seeds. Enjoy baking!

Step-by-Step Instructions
Prepping the Oven and Pan
First, set your oven to 350°F (175°C). This will ensure even baking. You need to prepare your pan too. Use a 10-inch bundt pan or a standard loaf pan. Grease it well with butter, then dust it with flour. This step helps the cake slide out easily after baking. Set the prepared pan aside for later.
Making the Batter
Now, let’s make the batter. In a large mixing bowl, use an electric mixer to cream 1 cup of softened butter and 2 cups of granulated sugar together. Mix until the mix turns light and fluffy. This takes about 3-4 minutes. Next, add 4 large eggs one at a time. Mix well after each egg. Then, add 1 tablespoon of freshly grated lemon zest and 1/4 cup of freshly squeezed lemon juice. Combine these ingredients well until everything is mixed.
Combining Dry and Wet Ingredients
In another bowl, whisk together 3 cups of sifted all-purpose flour, 1 teaspoon of baking powder, 1/2 teaspoon of baking soda, and 1 teaspoon of kosher salt. This is your dry mix. You will now add this dry mix to your wet mix. Do this in parts, alternating with 1 cup of plain Greek yogurt. Start and end with the dry mix. Mix until just combined. Be careful not to overmix. This helps keep your cake tender.
Baking and Cooling
Pour the batter into your prepared pan, smoothing the top with a spatula. Bake in your preheated oven for about 50-60 minutes. To check for doneness, insert a toothpick into the center. If it comes out clean or with a few moist crumbs, the cake is ready. Once baked, pull the cake from the oven. Let it cool in the pan for about 10-15 minutes. After that, gently move it to a wire rack to cool completely. Enjoy the aroma while the cake cools!
Tips & Tricks
Essential Baking Tips
To make your Lemon Poppy Seed Pound Cake light and fluffy, follow these steps:
– Use room temperature ingredients. This means butter, eggs, and yogurt. They mix better and help the cake rise.
– Cream your butter and sugar well. Mix them for about 3-4 minutes until light and fluffy. This adds air to the batter.
Common Mistakes to Avoid
Some mistakes can ruin your cake:
– Overmixing the batter. Mix just until combined. Too much mixing makes the cake dense.
– Not measuring ingredients accurately. Use a scale for precision. This ensures the best results.
Enhancing Flavor
Want to boost the lemon flavor? Here are some ideas:
– Add more lemon zest. Use zest from extra lemons for a brighter taste.
– Try flavored yogurt. Use lemon or vanilla yogurt instead of plain. It gives a nice twist to the flavor.
Pro Tips
- Use Room Temperature Ingredients: Ensure your butter, eggs, and yogurt are at room temperature for a smoother batter and better rise.
- Don’t Overmix: Mix the batter until just combined to avoid a dense cake. A few lumps are okay!
- Check for Doneness: Use a toothpick to test the center of the cake; it should come out clean or with a few moist crumbs.
- Enhance the Flavor: For an extra burst of lemon flavor, add a teaspoon of lemon extract to the batter.

Variations
Flavor Tweaks
You can easily change the taste of your Lemon Poppy Seed Pound Cake. Adding blueberries or raspberries gives a fruity twist. Just fold in one cup of fresh or frozen berries. The berries add color and a burst of flavor. You can also add a teaspoon of vanilla extract. This gives the cake a warm, sweet note. The vanilla and lemon mix well together for a rich taste.
Dietary Substitutions
If you need gluten-free options, use gluten-free flour. Look for a blend that works for baking. This way, everyone can enjoy the cake. For vegan adaptations, replace the eggs with applesauce or flaxseed meal. Use a plant-based yogurt instead of Greek yogurt. These swaps keep the cake moist and tasty without dairy or eggs.
Serving Suggestions
This cake is amazing on its own, but you can enhance it. Serve it with a scoop of ice cream or a dollop of whipped cream. The creamy toppings balance the zesty cake. For a pretty presentation, garnish the top with fresh lemon slices and a sprinkle of poppy seeds. This makes your dessert not just tasty but also beautiful.
Storage Info
Proper Storage Techniques
To store leftover cake, wrap it well in plastic wrap. This keeps air out and moisture in. You can also place it in an airtight container. This helps the cake stay soft and fresh. For added moisture, I like to place a slice of bread in the container. The bread absorbs air and keeps the cake moist.
Freezing the Cake
To freeze the cake, let it cool completely. Wrap it tightly in plastic wrap, then in foil. This double wrap helps prevent freezer burn. You can freeze it for up to three months. When you want to enjoy it, move the cake to the fridge overnight. Let it thaw slowly for the best flavor. If you’re in a hurry, you can thaw it at room temperature for a few hours.
Shelf Life
At room temperature, Lemon Poppy Seed Pound Cake lasts about three days. Keep it covered to avoid drying out. If you put it in the fridge, it can last up to a week. However, refrigeration can change the cake’s texture, making it a bit denser. For the best taste and texture, enjoy it at room temperature.
FAQs
What can I substitute for Greek yogurt?
You can use several items in place of Greek yogurt. Here are some options:
– Sour cream: Use a 1:1 ratio.
– Plain yogurt: This works well too, just make sure it’s plain.
– Cottage cheese: Blend until smooth, use 1 cup for 1 cup.
– Buttermilk: Use 1 cup for 1 cup, but reduce liquid in the recipe slightly.
Each of these can give a nice texture to your Lemon Poppy Seed Pound Cake.
Can I make this cake in advance?
Yes, you can make this cake ahead of time. Here are some tips:
– Baking in advance: Bake the cake up to three days before you serve it.
– Storage: Keep it wrapped in plastic wrap to stay fresh.
– Freezing: You can freeze the cake for up to three months. Wrap it tightly in plastic wrap and foil.
– Thawing: Thaw in the fridge overnight before serving.
This way, you can enjoy the cake without stress on the day of your event.
How can I tell when the cake is done?
You can tell when your cake is done by using these simple methods:
– Toothpick test: Insert a toothpick in the center. If it comes out clean or with a few crumbs, it’s ready.
– Visual cues: The cake should be golden brown and pull slightly from the pan sides.
– Spring test: Gently press the top. If it springs back, it’s done.
Checking these signs helps you avoid overbaking.
What’s the best way to serve Lemon Poppy Seed Pound Cake?
Serving your cake beautifully makes it even more special. Here are some tips:
– Presentation: Use a decorative cake stand for a nice touch.
– Garnish: Add fresh lemon slices and a sprinkle of poppy seeds on top.
– Pairings: It goes well with whipped cream or a scoop of vanilla ice cream.
These ideas will impress your guests and elevate your cake’s look!
This blog post covered the key ingredients and steps to make Lemon Poppy Seed Pound Cake. We discussed the right ingredients, measurement tips, and common mistakes to avoid. You can create a moist, flavorful cake by following these steps. Remember to experiment with flavors and adaptations if needed. Proper storage keeps your cake fresh for longer. Enjoy sharing this treat, and don’t forget to try new serving ideas. Happy bakin

Luscious Lemon Poppy Seed Pound Cake
Ingredients
- 1 cup unsalted butter, softened to room temperature
- 2 cups granulated sugar
- 4 large eggs, at room temperature
- 1 tablespoon freshly grated lemon zest (from about 2 lemons)
- 1/4 cup freshly squeezed lemon juice
- 3 cups all-purpose flour, sifted
- 1 teaspoon baking powder
- 1/2 teaspoon baking soda
- 1 teaspoon kosher salt
- 1/2 cup poppy seeds
- 1 cup plain Greek yogurt, at room temperature
Instructions
- Preheat your oven to 350°F (175°C). Prepare a 10-inch bundt pan or a standard loaf pan by greasing it thoroughly with butter and dusting it with flour. Set the prepared pan aside.
- In a large mixing bowl, use an electric mixer to cream the softened butter and granulated sugar together until the mixture is light, fluffy, and pale in color, approximately 3-4 minutes.
- Add the eggs to the butter-sugar mixture one at a time, ensuring to mix well after each addition until fully incorporated. Next, mix in the lemon zest and freshly squeezed lemon juice until combined.
- In a separate bowl, whisk together the sifted flour, baking powder, baking soda, and kosher salt until evenly blended.
- Gradually incorporate the dry mixture into the wet ingredients, alternating with the Greek yogurt. Begin and end with the dry ingredients, mixing until just combined—be careful not to overmix to maintain a tender cake.
- Gently fold in the poppy seeds with a spatula, ensuring they are evenly distributed throughout the batter without overworking the mixture.
- Carefully pour the batter into the prepared baking pan, smoothing the top with a spatula for an even surface.
- Bake in the preheated oven for approximately 50-60 minutes, or until a toothpick inserted into the center of the cake comes out clean or with a few moist crumbs.
- Once baked, pull the cake from the oven and allow it to cool in the pan for about 10-15 minutes. Afterward, gently transfer the cake to a wire rack to cool completely.
- Optional: For a delightful finishing touch, dust the cooled cake with powdered sugar or drizzle a simple glaze made from equal parts lemon juice and powdered sugar over the top before serving.


![- 2 cups fresh blueberries, rinsed and drained - 2 cups ripe peaches, diced (approximately 3 medium-sized peaches) - 1 tablespoon freshly squeezed lemon juice - 1/2 cup granulated sugar (adjust based on your sweetness preference) - 1 tablespoon cornstarch - 1 teaspoon pure vanilla extract - 1 1/2 cups rolled oats - 1 cup all-purpose flour - 1/2 cup packed brown sugar - 1/2 teaspoon baking powder - 1/4 teaspoon fine salt - 1/2 cup unsalted butter, melted and slightly cooled - 1 teaspoon ground cinnamon (optional, for added warmth) These simple ingredients create a tasty balance of sweet and tart flavors. The fresh blueberries and ripe peaches shine in each bite. You can change the sugar to fit your taste. I often add a bit more if the fruit is not very sweet. I love using oats for texture; they give a nice chewiness. This recipe is so flexible. You can swap out fruit or adjust flavors based on what you have at home. For example, try adding a pinch of nutmeg for a warm spice twist. This recipe takes only 15 minutes to prepare. It bakes in about 30 to 35 minutes. You will get about 12 bars from this batch, perfect for sharing with friends or family. If you want the full recipe, check the section below. - Preheat your oven to 350°F (175°C). - Grease a 9x13-inch baking dish or line it with parchment paper. - In a medium mixing bowl, combine 2 cups of fresh blueberries, 2 cups of diced peaches, 1 tablespoon of lemon juice, 1/2 cup of granulated sugar, 1 tablespoon of cornstarch, and 1 teaspoon of vanilla extract. - Gently mix the ingredients until the fruit is coated. Let it sit for a few minutes to enhance the flavor. - In a large mixing bowl, whisk together 1 1/2 cups of rolled oats, 1 cup of all-purpose flour, 1/2 cup of brown sugar, 1/2 teaspoon of baking powder, 1/4 teaspoon of salt, and 1 teaspoon of cinnamon if desired. - This mixture will give your bars that perfect crumb texture. - Pour 1/2 cup of melted butter into the dry mixture and stir until it looks like coarse crumbs. - Reserve about 1 cup of this crumb mixture for later. - Press the remaining crumb mixture into the bottom of your greased dish to form the crust. - Spread the fruit mixture evenly over the crust, then sprinkle the reserved crumbs on top. - Bake in your preheated oven for about 30-35 minutes. - Look for golden brown color and bubbling filling to know it's done. - Once baked, let the bars cool on a wire rack for 15-20 minutes before slicing into squares. - This cooling time helps the bars set well for easy serving. Enjoy making these Blueberry Peach Crumble Bars with the [Full Recipe]. - Check for doneness by ensuring the filling is bubbling and the top is golden brown. - Letting the bars cool completely aids in easier slicing. This step prevents squishing the filling and keeps the layers intact. - Use frozen blueberries or peaches if fresh ones are unavailable. Frozen fruit works well and saves time. - Substitute brown sugar with coconut sugar for a healthier option. Coconut sugar adds a nice depth to the flavor. - Serve warm or at room temperature. This allows the flavors to shine. - Pair with vanilla ice cream or whipped cream. This adds a creamy texture that balances the tartness of the fruit. For an extra touch, garnish with fresh blueberries or peach slices. You can find the Full Recipe above for detailed instructions on making these delightful bars! {{image_4}} You can mix things up with different fruits. For a fresh twist, switch blueberries and peaches for raspberries and apples. The tartness of raspberries pairs well with sweet apples. You can also try plums or cherries. Both add their unique flavors and keep the bars fun and exciting. Want to make these bars gluten-free? No problem! Just replace all-purpose flour with a gluten-free flour blend. Many good mixes are available at stores. Also, ensure that your oats are certified gluten-free. This small change lets everyone enjoy this tasty dessert. For a vegan version, swap unsalted butter for coconut oil or vegan butter. Both options work well and keep the bars rich and tasty. If your recipe includes eggs, you can use flax eggs instead. To make a flax egg, mix one tablespoon of ground flaxseed with two and a half tablespoons of water. Let it sit for five minutes. This creates a great egg substitute that still binds everything together. Store your Blueberry Peach Crumble Bars in an airtight container. They stay fresh at room temperature for up to 3 days. This makes them great for quick snacks or dessert. To keep them longer, refrigerate the bars. They will stay fresh for up to a week. For even longer storage, you can freeze the bars. Wrap them tightly in plastic wrap or aluminum foil. They can be frozen for up to 3 months. When you're ready to enjoy your frozen bars, reheating is easy. Simply pop them in the microwave for a few seconds. You can also warm them in the oven at 350°F (175°C). This brings back their delicious taste and texture. For the full recipe and tips, check out the detailed instructions above. Enjoy your tasty treat! Yes, you can make these bars a day in advance. Just store them in the fridge. This helps the flavors blend nicely. Look for bubbling filling and a golden brown topping. This shows they are ready to eat. Yes, you can add chopped nuts like almonds or walnuts. They give the bars extra crunch and flavor. I love pairing them with a scoop of ice cream or yogurt. It makes a delicious treat. Store them in an airtight container at room temperature. You can also refrigerate them for up to a week. - Blueberry Peach Crumble Bars 🫐 To make these delicious Blueberry Peach Crumble Bars, you need simple, fresh ingredients. Here’s what you will need: - 2 cups fresh blueberries, rinsed and drained - 2 cups ripe peaches, diced (approximately 3 medium-sized peaches) - 1 tablespoon freshly squeezed lemon juice - 1/2 cup granulated sugar (adjust based on your sweetness preference) - 1 tablespoon cornstarch - 1 teaspoon pure vanilla extract - 1 1/2 cups rolled oats - 1 cup all-purpose flour - 1/2 cup packed brown sugar - 1/2 teaspoon baking powder - 1/4 teaspoon fine salt - 1/2 cup unsalted butter, melted and slightly cooled - 1 teaspoon ground cinnamon (optional, for added warmth) These ingredients come together to create a wonderful balance of sweet and tart flavors. The fresh blueberries and peaches mix well with the lemon juice. This adds a nice zing to the bars. The sugar and cornstarch help create a thick, juicy filling. The crumble topping is a blend of oats, flour, and sugars. It gives the bars a crunchy texture that pairs perfectly with the soft fruit layer. The butter adds richness, while the cinnamon gives a warm, cozy vibe to each bite. If you want to try this recipe, check the Full Recipe for step-by-step instructions. You'll love making and sharing these bars! These Blueberry Peach Crumble Bars are easy to make and full of flavor. You learned about the key ingredients, simple steps, and different variations. Remember, you can swap fruits or adjust sweetness to fit your taste. Store leftovers in a container for later. Enjoy these bars warm or with ice cream for a tasty treat. Happy baking!](https://goldendishy.com/wp-content/uploads/2025/06/77e155cd-d820-4acd-a50c-b849e6ba2e1e-768x768.webp)
