Lemon Blueberry Muffins Bakery Style Delight Recipe

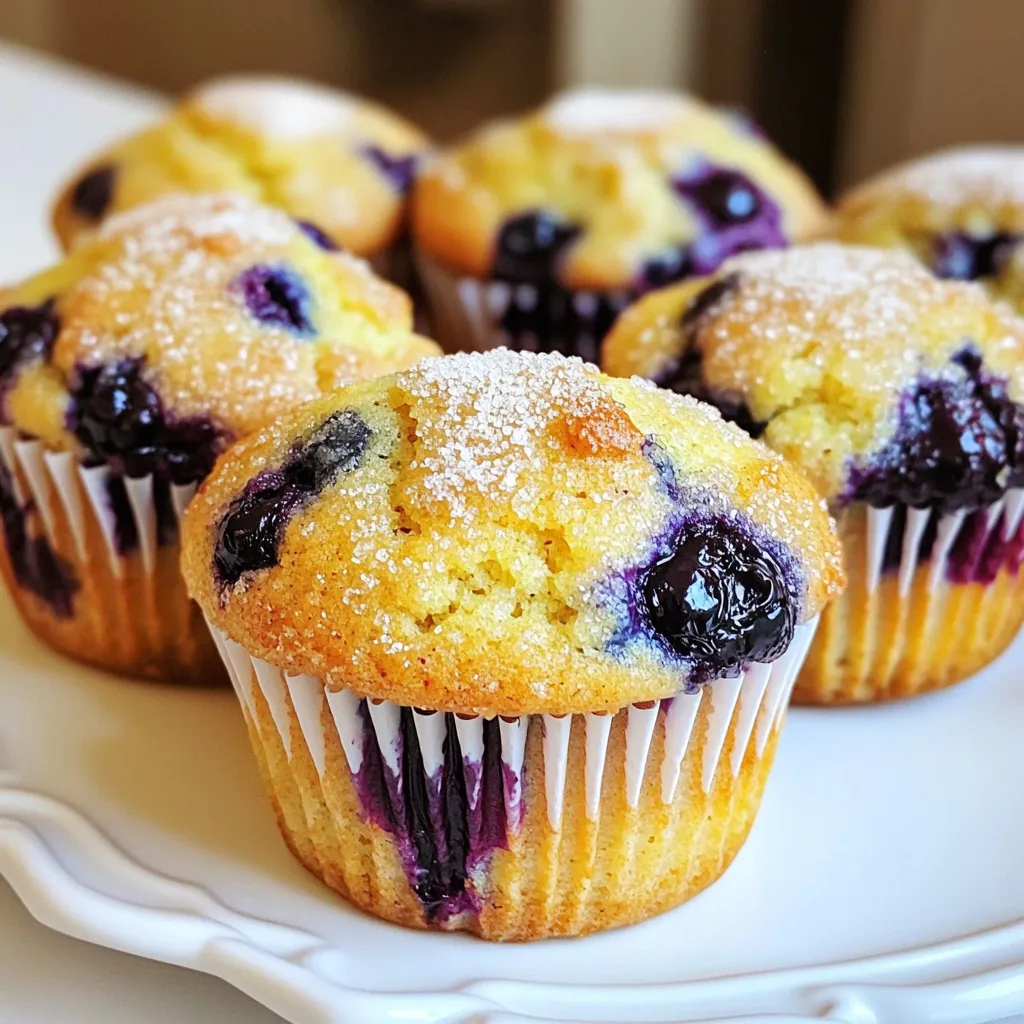
Craving a sweet treat that brings the charm of a bakery right to your home? In this Lemon Blueberry Muffins Bakery Style Delight Recipe, I’ll guide you through creating soft, fluffy muffins bursting with fresh flavors. You’ll learn how to master the perfect balance of zesty lemon and juicy blueberries, making every bite a delight. Get ready to impress your friends and family with this easy, fun recipe that’s perfect for any occasion!
Ingredients
When I make Lemon Blueberry Muffins, I use simple, fresh ingredients. Each one plays a key role in creating that delightful bakery-style taste. Here’s what you’ll need:
– 1 ½ cups all-purpose flour
– ½ cup granulated sugar
– 1 tablespoon baking powder
– ¼ teaspoon salt
– ¼ cup unsalted butter, melted and slightly cooled
– 1 large egg, at room temperature
– ½ cup buttermilk
– Zest and juice of 1 lemon
– 1 cup fresh blueberries
– 1 teaspoon pure vanilla extract
– Optional: Coarse sugar for topping
These ingredients blend to form a batter that’s both fluffy and moist. The lemon zest and juice bring a bright flavor. Fresh blueberries add sweetness and a pop of color. You can use frozen blueberries, too, if fresh ones are hard to find. Just remember to fold them gently into the batter to keep them intact.
Using buttermilk gives the muffins a tender crumb. If you don’t have buttermilk, you can mix yogurt with milk. The melted butter should be warm but not hot to avoid cooking the egg. This combination of flavors and textures makes every bite a treat!
Step-by-Step Instructions
Preheat and Prepare
– Preheat the oven to 375°F (190°C).
– Prepare a muffin tin with liners or grease it well.
Mixing Dry Ingredients
– In a large bowl, sift together:
– 1 ½ cups all-purpose flour
– ½ cup granulated sugar
– 1 tablespoon baking powder
– ¼ teaspoon salt
Combining Wet Ingredients
– In another bowl, whisk together:
– ¼ cup unsalted butter, melted and slightly cooled
– 1 large egg
– ½ cup buttermilk
– Zest of 1 lemon
– 2 tablespoons freshly squeezed lemon juice
– 1 teaspoon pure vanilla extract
Mixing Batter
– Pour the wet mixture into the dry ingredients.
– Gently mix using a spatula or wooden spoon.
– Do not overmix. A few lumps are okay.
– Carefully fold in 1 cup fresh blueberries. Distribute them evenly without breaking.
Baking Process
– Use a spoon or ice cream scoop to fill muffin cups about three-quarters full.
– Sprinkle with coarse sugar for extra crunch if desired.
– Bake for 18-20 minutes. Check doneness with a toothpick; it should come out clean.
Cooling and Serving
– Cool the muffins in the pan for about 5 minutes.
– Transfer them to a wire rack to cool completely.
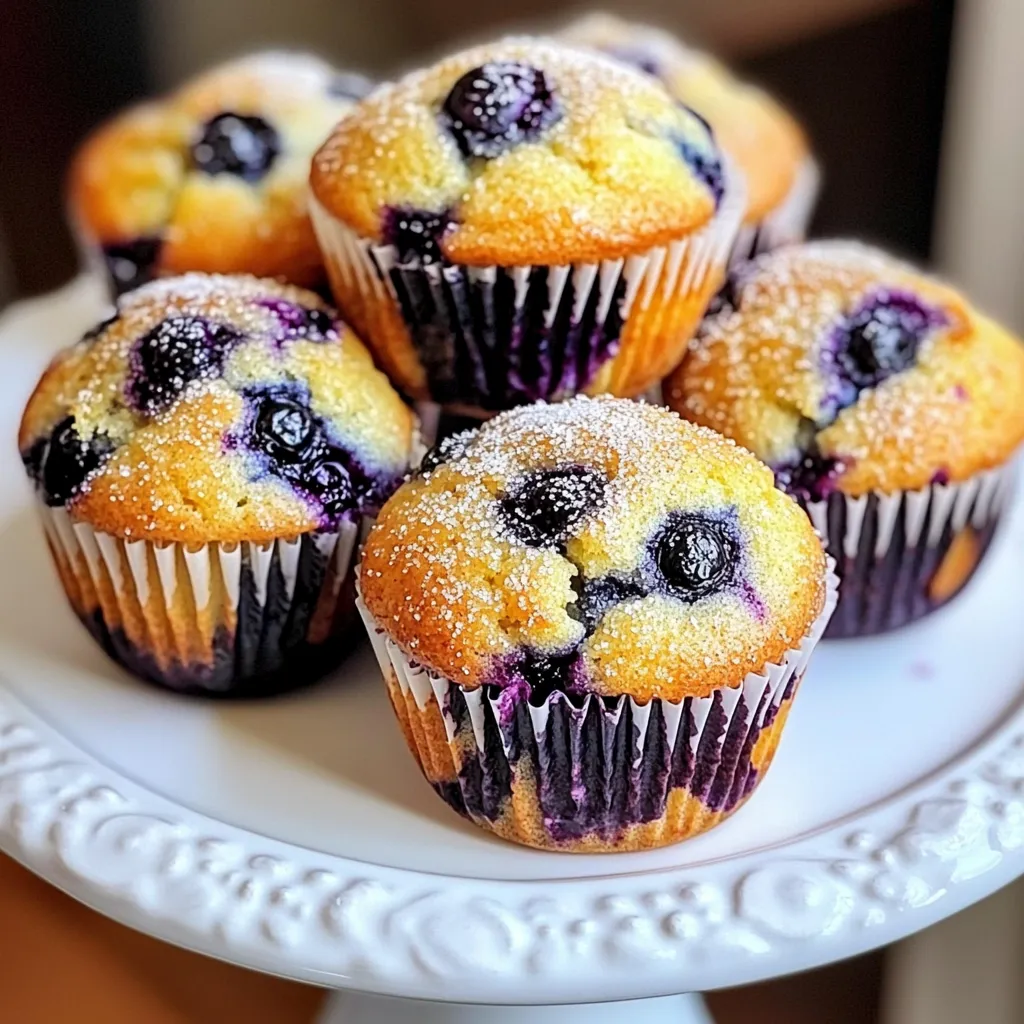
– For a lovely touch, dust with powdered sugar before serving. Enjoy the delightful mix of lemon and blueberry!
Tips & Tricks
Achieving Bakery-Style Muffins
To make perfect bakery-style muffins, avoid overmixing. When you mix too much, the muffins become tough. Mix just until the dry and wet ingredients come together. It’s okay if there are lumps.
Tempering butter is also key. Let the melted butter cool slightly. If it’s too hot, it can cook the egg. A cooler butter helps create a light texture.
Blueberry Tips
Choosing the right blueberries matters. Fresh blueberries work best, but frozen ones are fine too. If using frozen, do not thaw them. This keeps their shape and color.
To stop blueberries from sinking, toss them in flour before adding them to the batter. This simple trick helps them stay suspended in your muffins.
Enhancing Texture and Flavor
Using buttermilk is a great choice. It adds moisture and a tender crumb. If you don’t have buttermilk, mix yogurt and milk instead. This gives you a similar creamy texture.
Adding lemon zest boosts the flavor. Use zest from one lemon to make the muffins bright and fresh. The zest brings out the lemon’s oil, giving your muffins a lovely aroma.

Variations
Flavor Variations
You can switch up the flavors in these muffins. Try lemon poppy seed muffins. Just add two tablespoons of poppy seeds to the batter. This gives a nice crunch and flavor. Another great option is blueberry lemon cream cheese muffins. Add dollops of cream cheese into the batter for a creamy surprise. The tanginess pairs well with lemon and blueberries.
Dietary Adjustments
If you need gluten-free muffins, use almond or coconut flour. These flours work well and keep the muffins light. For vegan options, replace the egg with a flax egg. Mix one tablespoon of ground flaxseed with three tablespoons of water and let it sit. You can also use plant-based milk instead of buttermilk for a creamy texture.
Add-ins
You can boost the texture and flavor with add-ins. Consider adding chopped nuts like walnuts or pecans. They add a nice crunch. Seeds like chia or sunflower seeds also work great. For a sweet touch, mix in chocolate chips. Dark chocolate pairs well with the tartness of the lemon and blueberries. Each option gives the muffins a unique twist to enjoy.
Storage Info
Short-term Storage
To store leftover muffins, keep them at room temperature. Place them in a basket or on a plate. Cover them with a clean kitchen towel. This keeps them fresh for up to three days. Avoid plastic wrap, as it can make the muffins soggy.
Long-term Storage
For future enjoyment, you can freeze muffins. Let them cool completely first. Wrap each muffin in plastic wrap or foil. Then, place them in a freezer bag. They can last up to three months in the freezer.
When you want to enjoy one, simply take it out of the freezer. For best results, let it sit at room temperature for about 30 minutes. You can also reheat it in the microwave for about 15-20 seconds. This will bring back their soft texture.
Best Storage Practices
Use airtight containers or freezer bags for storage. This prevents air from drying them out. Label the bags with the date you made the muffins. This way, you can keep track of how long they have been stored.
FAQs
How do I know when my muffins are done?
To check if your muffins are done, use a toothpick. Insert it into the center of a muffin. If it comes out clean or with a few moist crumbs, they are ready. This quick test helps you avoid overbaking. Overbaked muffins can become dry. Keep an eye on them during the last few minutes of baking.
Can I use frozen blueberries in this recipe?
Yes, you can use frozen blueberries. When using frozen fruit, there are a few tips. First, do not thaw them before adding them to the batter. This keeps the muffins from turning purple. Second, add them straight from the freezer. This helps keep the muffins light and fluffy. Just be gentle when folding them in.
What’s the best way to keep muffins moist?
To keep your muffins moist, use buttermilk or yogurt. These ingredients add rich flavor and moisture. Store muffins in an airtight container. This helps keep them fresh for days. For extra moisture, place a slice of bread in the container. The bread absorbs air and keeps muffins soft.
Can these muffins be made ahead of time?
Yes, you can make these muffins ahead of time. Bake them and let them cool completely. Store them in an airtight container for up to three days. You can also freeze them for longer storage. Just wrap each muffin in plastic wrap and foil. When ready, thaw them overnight in the fridge. Reheat in the oven or microwave for a warm treat.
In this blog post, you learned how to make delicious blueberry muffins from scratch. We covered each step, from mixing ingredients to baking and cooling. I shared tips for perfect texture and flavor, plus fun variations to try.
Baking is fun and can be a tasty way to spend time. Enjoy your muffins and get creative with flavors! Each bite brings joy, and sharing them makes it even better. Happy baking!


![To bake a delicious Raspberry Lemon Loaf, you need these key ingredients: - 1 ½ cups all-purpose flour - 1 teaspoon baking powder - ½ teaspoon baking soda - ¼ teaspoon salt - ½ cup unsalted butter, softened - 1 cup granulated sugar - 2 large eggs, at room temperature - 1 teaspoon pure vanilla extract - Zest of 1 lemon, finely grated - ½ cup freshly squeezed lemon juice - 1 cup fresh raspberries (or frozen, thawed, and drained) - ¼ cup powdered sugar for glazing - 1 tablespoon freshly squeezed lemon juice for glazing You can add extra flavor or texture with these options: - ½ cup chopped nuts, like walnuts or almonds - ½ teaspoon almond extract for a nutty taste - Lemon zest can be increased for a stronger flavor - A handful of blueberries can mix well with raspberries If you run out of an ingredient, here are some swaps: - Use coconut oil instead of butter for a dairy-free version - Applesauce can replace eggs for a vegan loaf - If you lack lemon juice, use lime juice instead - Whole wheat flour can stand in for all-purpose flour, but it may change the texture With these ingredients and options, you can customize your Raspberry Lemon Loaf to fit your taste! Start by preheating your oven to 350°F (175°C). Grab a 9x5 inch loaf pan. Grease it with butter and lightly dust it with flour. This will help the loaf come out easily. In a medium bowl, whisk together the following: - 1 ½ cups all-purpose flour - 1 teaspoon baking powder - ½ teaspoon baking soda - ¼ teaspoon salt Set this mixture aside for later use. This step ensures the leavening agents are evenly distributed. In a large mixing bowl, use an electric mixer to cream together: - ½ cup unsalted butter, softened - 1 cup granulated sugar Beat them for about 3-5 minutes. The mixture should turn light and fluffy. This helps air to blend into the butter. Now, add 2 large eggs one at a time. Mix well after each addition. Next, stir in: - 1 teaspoon pure vanilla extract - Zest of 1 lemon Make sure everything combines fully. This adds a nice flavor to your loaf. Slowly pour in ½ cup of freshly squeezed lemon juice. Mix gently until it blends well with the other wet ingredients. This step gives your loaf a bright, zesty taste. Gradually add the dry mixture to the wet mix. Stir gently until just combined. Be careful not to overmix. This keeps your loaf light and airy. Now, it’s time to add the fun part! Gently fold in 1 cup of fresh raspberries. If you use frozen ones, coat them lightly in flour. This helps them stay suspended in the batter. Pour the batter into your prepared loaf pan. Smooth the top with a spatula. Bake in the preheated oven for 50-60 minutes. Check for doneness by inserting a toothpick in the center. It should come out clean. Once baked, let the loaf cool in the pan for about 10 minutes. Then transfer it to a wire rack to cool completely. For glazing, mix together: - ¼ cup powdered sugar - 1 tablespoon freshly squeezed lemon juice Drizzle this glaze over the cooled loaf for a sweet finish. Slice the loaf into generous pieces. Enjoy the burst of raspberry and lemon flavors in every bite! You can serve it on pretty plates. Garnish with fresh raspberries and a sprinkle of lemon zest for an elegant touch. This loaf is perfect for breakfast or a sweet snack! For the Full Recipe, check out the detailed instructions. One big mistake is overmixing the batter. This can make the loaf tough. Mix until just combined for a light texture. Another mistake is not checking the oven temperature. An oven thermometer can help ensure accuracy. Also, if you forget to grease your pan, the loaf may stick. Always prepare your pan before pouring in the batter. For a soft and moist loaf, use room temperature ingredients. Cold butter or eggs can lead to uneven mixing. When folding in raspberries, do it gently. This helps keep them whole and prevents a mushy loaf. Make sure your oven is fully preheated. This ensures even baking and a perfect rise. To boost flavor, add more lemon zest. This can brighten the taste. You can also mix in a dash of almond extract for a unique twist. If you want a sweeter glaze, add more powdered sugar. For a touch of spice, a pinch of cinnamon can be delightful. Enjoy experimenting with flavors to find your perfect blend! {{image_4}} To make a gluten-free version, swap the all-purpose flour with a gluten-free blend. Use one that works well for baking. The texture may change slightly, but the taste will still shine. This version is just as delicious and perfect for those with gluten issues. For a vegan twist, replace the eggs with flax eggs. Mix one tablespoon of ground flaxseed with three tablespoons of water. Let it sit for five minutes. Use a plant-based butter instead of regular butter. This keeps the loaf moist and tasty while being dairy-free. You can switch out the raspberries for other fruits! Blueberries or strawberries work well. For a tropical touch, try diced pineapple or mango. Each fruit brings its own flavor, making your loaf unique. Experiment and find your favorite mix! For the full recipe, refer to the section above. After you bake your Raspberry Lemon Loaf, let it cool completely. Wrap it tightly in plastic wrap or foil. You can also place it in an airtight container. Store it at room temperature for up to three days. If you prefer, keep it in the fridge for about a week. This helps keep it fresh and moist. To freeze the loaf, first cool it completely. Then, slice it into even pieces. Wrap each slice in plastic wrap. Next, place the wrapped slices in a freezer-safe bag. You can freeze them for up to three months. When you’re ready to enjoy a slice, thaw it in the fridge overnight or let it sit at room temperature for a few hours. Reheating is simple. You can use a microwave or an oven. For the microwave, heat a slice for about 15-20 seconds. Check if it’s warm enough. If you use the oven, preheat it to 350°F (175°C). Place the slice on a baking sheet for about 5-10 minutes. This method keeps the loaf soft and tasty. Enjoy your Raspberry Lemon Loaf warm with a cup of tea or coffee! You can check if your loaf is done by inserting a toothpick in the center. If it comes out clean or with just a few crumbs, your loaf is ready. You can also look for a golden-brown crust and a slight spring back when you gently press the top. Yes, you can use frozen raspberries! Just make sure to thaw them and drain off any extra liquid. Toss them in some flour before folding them into the batter. This helps to keep them from sinking to the bottom while baking. If you don't have lemon juice, you can use lime juice or even apple cider vinegar. Both options will give a nice tang to your loaf. Just remember that the flavor will change slightly. The Raspberry Lemon Loaf will stay fresh for about 3-4 days at room temperature if stored in an airtight container. It also freezes well for up to 3 months. Just wrap it tightly before freezing. Absolutely! You can make the loaf a day or two ahead of time. Store it in an airtight container to keep it moist. You can also prepare the batter in advance and bake it later for a fresh treat. Be sure to check the [Full Recipe] for more tips! Here is the full recipe for Raspberry Lemon Dream Loaf. This treat is bright, sweet, and tangy. You will want to make it again and again. Ingredients: - 1 ½ cups all-purpose flour - 1 teaspoon baking powder - ½ teaspoon baking soda - ¼ teaspoon salt - ½ cup unsalted butter, softened to room temperature - 1 cup granulated sugar - 2 large eggs, at room temperature - 1 teaspoon pure vanilla extract - Zest of 1 lemon, finely grated - ½ cup freshly squeezed lemon juice - 1 cup fresh raspberries (or frozen raspberries, thawed and drained) - ¼ cup powdered sugar for glazing - 1 tablespoon freshly squeezed lemon juice for glazing This loaf serves about 10 people. Each slice has around 200 calories. You get a nice mix of carbs, fat, and protein. The fresh raspberries add fiber and vitamins, too. Slice the loaf into thick pieces. Each slice is perfect for a dessert or a snack. You can serve it on its own or with a cup of tea. The bright flavors make it a crowd-pleaser. For a fancy touch, add a few raspberries on top. Enjoy every bite! In this article, we explored the essential ingredients for a Raspberry Lemon Loaf, including optional add-ins and substitutions. I provided clear, step-by-step instructions to guide you from mixing to baking. We discussed tips for avoiding mistakes and achieving the right texture. You also learned about variations, storage methods, and answers to common questions. Now, with these insights, you can create a delicious loaf that suits your taste and needs. Enjoy baking and sharing this delightful treat!](https://goldendishy.com/wp-content/uploads/2025/07/83025fd5-21c0-4ee2-bbe4-d247d9a88122-768x768.webp)


![To make Lemon Blueberry Overnight Oats, you need: - 1 cup rolled oats - 1 cup milk (dairy or any plant-based alternative) - 1/2 cup Greek yogurt (or plant-based yogurt) - 1/2 cup fresh blueberries (or frozen, thawed) - Zest of 1 medium lemon - 2 tablespoons fresh lemon juice - 1 tablespoon maple syrup (optional for sweetness) - 1/2 teaspoon pure vanilla extract - Pinch of salt - Toppings: extra fresh blueberries, sliced almonds, and chia seeds You can switch out some ingredients if needed: - Use almond milk or oat milk instead of dairy milk. - Swap Greek yogurt for coconut yogurt for a dairy-free option. - Replace maple syrup with honey or agave for sweetness. - If you don’t have fresh blueberries, frozen ones work great too. Each ingredient plays a key role in this recipe: - Rolled oats provide the base. They soak up the liquid and become soft. - Milk adds creaminess and helps oats absorb flavors. - Greek yogurt offers protein and a nice texture. - Blueberries add sweetness and antioxidants. - Lemon zest and juice bring brightness and a fresh taste. - Maple syrup sweetens the dish naturally. - Vanilla extract enhances the overall flavor. - Salt balances the sweetness. - Toppings like almonds and chia seeds add crunch and nutrients. These ingredients come together to create a tasty and healthy breakfast. For the full recipe, refer to the earlier section. First, gather all your ingredients. You need rolled oats, milk, Greek yogurt, blueberries, lemon zest, lemon juice, maple syrup, vanilla extract, and salt. This simple mix brings bright flavors to your morning. It takes just ten minutes to prep. In a medium bowl, combine the rolled oats, Greek yogurt, and milk. Add in the lemon zest, lemon juice, maple syrup, vanilla extract, and a pinch of salt. Use a spoon or spatula to mix everything well. Make sure the oats soak up the liquid. This step is key for the best texture. Once mixed, gently fold in the fresh blueberries. Be careful not to mash them. Now, divide the oat mixture into two glass jars or containers. Make sure each jar has an even amount. Seal the jars tightly and place them in the fridge. Let them chill overnight or for at least four hours. This waiting time allows the oats to soften and soak in all those tasty flavors. In the morning, stir the oats. If they are too thick, add a splash of milk. Top with extra blueberries, sliced almonds, and chia seeds. Enjoy this delicious, healthy breakfast! For the full recipe, check out the provided instructions. To get the best texture, use rolled oats. They soak well and stay chewy. Mix your oats with yogurt and milk in a bowl. This makes them creamy. You can add lemon zest and juice for a bright taste. If you want more sweetness, a little maple syrup works great. Stir the mixture until it is smooth, and the oats are well covered. Don’t forget to gently fold in the blueberries. This keeps them intact, adding bursts of flavor. When serving, use clear jars to show off the colors. A sprinkle of sliced almonds gives a nice crunch. You can top it with extra blueberries for freshness. A few chia seeds add a fun texture and more nutrients. For a zesty look, place a lemon slice on the jar’s edge. This makes your oats not just tasty but also pretty! To boost nutrition, consider adding nuts or seeds. Almonds and chia seeds are great options. They add healthy fats and protein. You can also swap regular yogurt for Greek yogurt for extra protein. If you want a vegan option, use plant-based yogurt and milk. This keeps it creamy and dairy-free. By adding these ingredients, you can make your overnight oats even healthier while still enjoying the delicious flavor. For the complete recipe, check out the Full Recipe section. {{image_4}} You can switch the blueberries for other fruits. Try strawberries, raspberries, or peaches. Each fruit brings its own flavor and texture. You can also mix fruits for a fun twist. Just keep the same amount of fruit to match the recipe. If you want a different sweet taste, use honey or agave syrup. You can also skip sweeteners altogether if you prefer a tart flavor. Adjust the amount to suit your taste. Remember, the fruit adds natural sweetness too! Add spices for extra flavor. Cinnamon or nutmeg can give warmth. You might also try adding a teaspoon of almond extract for a nutty twist. If you like it creamy, add more Greek yogurt. For crunch, mix in nuts or seeds. These simple changes can make your oats unique and delicious. For the full recipe, check out the instructions above! Store your lemon blueberry overnight oats in airtight containers. This keeps them fresh and prevents spills. Glass jars work great. They also show off the beautiful layers. Always seal them tightly. Your oats will stay good in the fridge for up to five days. The flavors will blend better as they sit. Check for any off smells before eating. If they look or smell funny, toss them out. You can eat these oats cold, right from the fridge. If you prefer them warm, heat them in the microwave. Add a splash of milk if they seem too thick. Heat for about 30 seconds, then stir. Enjoy your creamy, zesty oats! Check the [Full Recipe] for details on how to make them. Yes, you can use quick oats. They will cook faster than rolled oats. Quick oats may make your mixture creamier. However, they might lose some texture. Rolled oats offer a nice chewiness. I have found that rolled oats work best for overnight oats. These oats last about 3 to 5 days in the fridge. Store them in airtight containers. This keeps them fresh and tasty. Just stir before eating. You may need to add a splash of milk if they seem thick. Yes, you can easily make these oats vegan. Use plant-based milk and yogurt. Maple syrup is a great sweetener. This keeps the recipe delicious. You won’t lose any flavor. Check the Full Recipe for more tips! This article covered the key ingredients and their roles in making Lemon Blueberry Overnight Oats. We explored step-by-step methods for mixing and chilling. Tips and tricks helped improve texture and flavor. Variations allow customization to suit your taste. Lastly, we discussed storage details to keep your oats fresh. Overall, making overnight oats is easy and flexible. Enjoy experimenting with different flavors and ingredients!](https://goldendishy.com/wp-content/uploads/2025/06/368f6847-7d49-481c-8601-ff06e206830f-768x768.webp)
