Lemon Basil Zucchini Orzo Flavorful and Fresh Meal
![For Lemon Basil Zucchini Orzo, you will need: - 1 cup of orzo pasta - 2 medium zucchinis, diced into bite-sized cubes - 1 cup of vegetable broth - 1 tablespoon of extra-virgin olive oil - 3 cloves of garlic, finely minced - Zest and juice of 1 large lemon - 1/4 cup of fresh basil leaves, chopped roughly - 1/4 teaspoon of red pepper flakes (adjust to taste) - Salt and freshly cracked black pepper, to taste - Grated Parmesan cheese, for garnish (optional) You can make your dish pop with these garnishes: - Extra fresh basil leaves - A sprinkle of lemon zest - A drizzle of olive oil These will add color and flavor to your meal. To make this dish, gather these tools: - A medium-sized pot for cooking orzo - A large skillet for sautéing - A colander for draining orzo - A sharp knife for chopping - A cutting board for prepping ingredients Having these on hand will make your cooking easier and more fun. For the full recipe, follow the steps carefully to enjoy a tasty, fresh meal. Start by boiling water in a medium pot. You need about 4 cups of water. When it boils, add 1 cup of orzo pasta. Cook it for 9 to 11 minutes, following the package instructions. You want it to be al dente, so check it often. Once it's cooked, drain the orzo in a colander and set it aside. This pasta adds a nice texture to your meal. Next, grab a large skillet and heat 1 tablespoon of extra-virgin olive oil over medium heat. Once the oil is hot, add 3 cloves of minced garlic. Sauté for about 1 minute. You want it fragrant, but don’t let it brown. After that, toss in 2 medium zucchinis, diced into bite-sized cubes. Stir them together for 4 to 5 minutes. The zucchinis should soften but still have some crunch. If you like it spicy, add 1/4 teaspoon of red pepper flakes at this point. Now it's time to bring it all together. Pour in 1 cup of vegetable broth and squeeze the juice of 1 large lemon into the skillet. Let it simmer gently for 3 to 4 minutes. This helps the flavors mix well. After that, stir in the cooked orzo pasta, zest from the lemon, and 1/4 cup of roughly chopped fresh basil leaves. Season it all with salt and freshly cracked black pepper to taste. Mix thoroughly. If the dish seems a bit dry, add a splash more vegetable broth for a creamy finish. Finally, let it cook on low heat for another 2 to 3 minutes before serving. For the full recipe, check out the instructions above. To get the best texture in your Lemon Basil Zucchini Orzo, cook the orzo just right. Follow the package time closely, aiming for al dente. This means it should be firm but not hard. After cooking, drain it well. Avoid overcooking the zucchini. Sauté them until they are tender but still have a little bite. This keeps your dish fresh and exciting. You can boost the flavor in this dish easily. Fresh lemon juice gives a bright taste. Adding lemon zest will enhance this citrus flavor even more. For a bit of heat, use red pepper flakes, but adjust to your taste. If you want a richer flavor, sprinkle on some grated Parmesan cheese before serving. Fresh basil is key too; it adds a deep, herbal note that ties everything together. Serve your Lemon Basil Zucchini Orzo in shallow bowls for a lovely look. Add a few extra basil leaves on top for color. A sprinkle of lemon zest makes it pop, adding brightness to the dish. You can also drizzle a little olive oil on top for a nice finish. Don't forget to use your best bowls; good presentation makes the dish even more appealing. For the full recipe, check out the earlier section. {{image_4}} You can make this dish vegan by skipping the cheese. Use nutritional yeast instead for a cheesy taste. This works well with the lemon and basil. You can add more veggies like bell peppers or spinach for extra flavor. To make this dish gluten-free, swap the orzo with gluten-free pasta. Rice or quinoa can also work well. These options keep the dish light and fresh. Always check labels to ensure they are gluten-free. If you want to add protein, consider chickpeas or lentils. They pair nicely with the lemon and basil. Grilled chicken or shrimp are also great choices. Just cook them separately and mix them in at the end. This makes the meal hearty and satisfying. For the full recipe, check the Full Recipe section. Store any leftover Lemon Basil Zucchini Orzo in an airtight container. Place it in the fridge. It stays fresh for up to 3 days. Before serving again, check for any signs of spoilage. If it smells off or has changed color, toss it out. You can freeze Lemon Basil Zucchini Orzo, but with a few tips. Let the dish cool completely before freezing. Use a freezer-safe container or bag. It can last up to 2 months in the freezer. When you're ready to eat, thaw it in the fridge overnight. To reheat, use a skillet over low heat. Add a splash of broth to help it stay creamy. Stir frequently until it's warmed through. You can also use the microwave. Heat in short bursts, stirring in between, until hot. Enjoy your meal just like it was fresh! For the full recipe, check out the original. Yes, you can use other pasta types. Try penne or farfalle for a twist. Both will work well with the flavors in this dish. Just remember to adjust the cooking time as needed. Check the package for the best cooking instructions. To add heat, sprinkle in red pepper flakes. You can also add diced jalapeños or a dash of hot sauce. Start with a small amount and taste as you go. This way, you can find the perfect level of spice that suits your taste. Zucchini is low in calories and full of vitamins. It helps keep you hydrated and is a good source of fiber. Basil has anti-inflammatory properties and is rich in antioxidants. This herb can boost your immune system and enhance your mood. Together, they make a nutritious choice for any meal. For a full recipe, check the [Full Recipe]. This blog post covered the key ingredients and steps to make a tasty dish. You learned about cooking orzo, sautéing garlic and zucchini, and combining flavors. Tips helped achieve great texture and presentation. Variations offered vegan and gluten-free options. Remember to store leftovers properly and reheat them well. Use these insights to create a meal you love. Enjoy the process and make it your own! With some practice, you'll impress everyone with your cooking skills.](https://goldendishy.com/wp-content/uploads/2025/07/61f764e1-906e-4d38-9844-2e2d556314ee.webp)
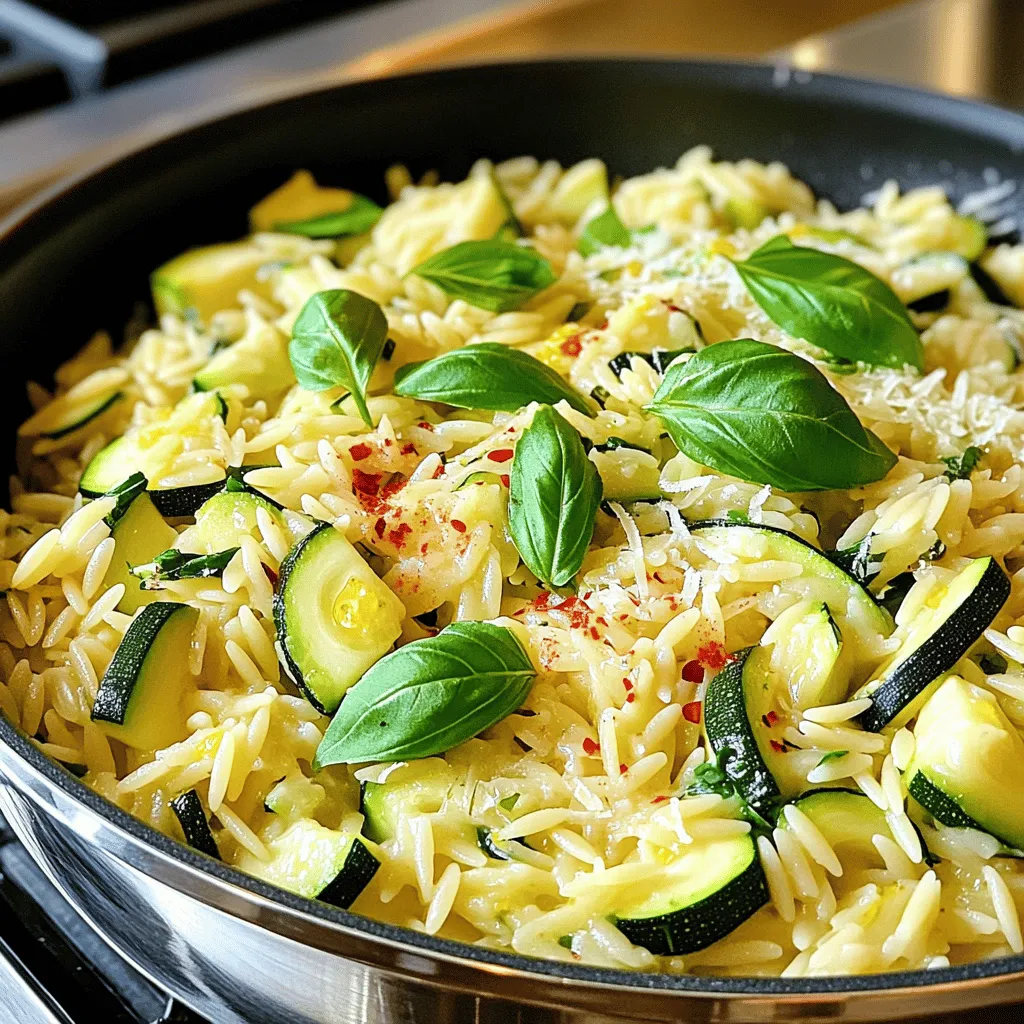
Looking for a fresh and bright meal to lift your spirits? My Lemon Basil Zucchini Orzo is the perfect choice! This dish combines the crunch of zucchini with zesty lemon and fragrant basil. It’s simple to make, full of flavor, and great for any occasion. Plus, you can adjust it to fit your diet needs. Let’s dive into the ingredients and get cooking!
Ingredients
List of Ingredients
For Lemon Basil Zucchini Orzo, you will need:
– 1 cup of orzo pasta
– 2 medium zucchinis, diced into bite-sized cubes
– 1 cup of vegetable broth
– 1 tablespoon of extra-virgin olive oil
– 3 cloves of garlic, finely minced
– Zest and juice of 1 large lemon
– 1/4 cup of fresh basil leaves, chopped roughly
– 1/4 teaspoon of red pepper flakes (adjust to taste)
– Salt and freshly cracked black pepper, to taste
– Grated Parmesan cheese, for garnish (optional)
Optional Garnishes
You can make your dish pop with these garnishes:
– Extra fresh basil leaves
– A sprinkle of lemon zest
– A drizzle of olive oil
These will add color and flavor to your meal.
Recommended Tools
To make this dish, gather these tools:
– A medium-sized pot for cooking orzo
– A large skillet for sautéing
– A colander for draining orzo
– A sharp knife for chopping
– A cutting board for prepping ingredients
Having these on hand will make your cooking easier and more fun.
Step-by-Step Instructions
Cooking the Orzo
Start by boiling water in a medium pot. You need about 4 cups of water. When it boils, add 1 cup of orzo pasta. Cook it for 9 to 11 minutes, following the package instructions. You want it to be al dente, so check it often. Once it’s cooked, drain the orzo in a colander and set it aside. This pasta adds a nice texture to your meal.
Sautéing the Garlic and Zucchini
Next, grab a large skillet and heat 1 tablespoon of extra-virgin olive oil over medium heat. Once the oil is hot, add 3 cloves of minced garlic. Sauté for about 1 minute. You want it fragrant, but don’t let it brown. After that, toss in 2 medium zucchinis, diced into bite-sized cubes. Stir them together for 4 to 5 minutes. The zucchinis should soften but still have some crunch. If you like it spicy, add 1/4 teaspoon of red pepper flakes at this point.
Combining Key Ingredients
Now it’s time to bring it all together. Pour in 1 cup of vegetable broth and squeeze the juice of 1 large lemon into the skillet. Let it simmer gently for 3 to 4 minutes. This helps the flavors mix well. After that, stir in the cooked orzo pasta, zest from the lemon, and 1/4 cup of roughly chopped fresh basil leaves. Season it all with salt and freshly cracked black pepper to taste. Mix thoroughly. If the dish seems a bit dry, add a splash more vegetable broth for a creamy finish. Finally, let it cook on low heat for another 2 to 3 minutes before serving.
Tips & Tricks
Achieving the Perfect Texture
To get the best texture in your Lemon Basil Zucchini Orzo, cook the orzo just right. Follow the package time closely, aiming for al dente. This means it should be firm but not hard. After cooking, drain it well. Avoid overcooking the zucchini. Sauté them until they are tender but still have a little bite. This keeps your dish fresh and exciting.
Flavor Enhancements
You can boost the flavor in this dish easily. Fresh lemon juice gives a bright taste. Adding lemon zest will enhance this citrus flavor even more. For a bit of heat, use red pepper flakes, but adjust to your taste. If you want a richer flavor, sprinkle on some grated Parmesan cheese before serving. Fresh basil is key too; it adds a deep, herbal note that ties everything together.
Presentation Suggestions
Serve your Lemon Basil Zucchini Orzo in shallow bowls for a lovely look. Add a few extra basil leaves on top for color. A sprinkle of lemon zest makes it pop, adding brightness to the dish. You can also drizzle a little olive oil on top for a nice finish. Don’t forget to use your best bowls; good presentation makes the dish even more appealing.

Variations
Vegan Options
You can make this dish vegan by skipping the cheese. Use nutritional yeast instead for a cheesy taste. This works well with the lemon and basil. You can add more veggies like bell peppers or spinach for extra flavor.
Gluten-Free Substitutes
To make this dish gluten-free, swap the orzo with gluten-free pasta. Rice or quinoa can also work well. These options keep the dish light and fresh. Always check labels to ensure they are gluten-free.
Adding Protein
If you want to add protein, consider chickpeas or lentils. They pair nicely with the lemon and basil. Grilled chicken or shrimp are also great choices. Just cook them separately and mix them in at the end. This makes the meal hearty and satisfying.
Storage Info
Refrigeration Guidelines
Store any leftover Lemon Basil Zucchini Orzo in an airtight container. Place it in the fridge. It stays fresh for up to 3 days. Before serving again, check for any signs of spoilage. If it smells off or has changed color, toss it out.
Freezing Instructions
You can freeze Lemon Basil Zucchini Orzo, but with a few tips. Let the dish cool completely before freezing. Use a freezer-safe container or bag. It can last up to 2 months in the freezer. When you’re ready to eat, thaw it in the fridge overnight.
Reheating Tips
To reheat, use a skillet over low heat. Add a splash of broth to help it stay creamy. Stir frequently until it’s warmed through. You can also use the microwave. Heat in short bursts, stirring in between, until hot. Enjoy your meal just like it was fresh!
FAQs
Can I use a different type of pasta?
Yes, you can use other pasta types. Try penne or farfalle for a twist. Both will work well with the flavors in this dish. Just remember to adjust the cooking time as needed. Check the package for the best cooking instructions.
How can I make this dish spicier?
To add heat, sprinkle in red pepper flakes. You can also add diced jalapeños or a dash of hot sauce. Start with a small amount and taste as you go. This way, you can find the perfect level of spice that suits your taste.
What are the health benefits of zucchini and basil?
Zucchini is low in calories and full of vitamins. It helps keep you hydrated and is a good source of fiber. Basil has anti-inflammatory properties and is rich in antioxidants. This herb can boost your immune system and enhance your mood. Together, they make a nutritious choice for any meal.
This blog post covered the key ingredients and steps to make a tasty dish. You learned about cooking orzo, sautéing garlic and zucchini, and combining flavors. Tips helped achieve great texture and presentation. Variations offered vegan and gluten-free options. Remember to store leftovers properly and reheat them well. Use these insights to create a meal you love. Enjoy the process and make it your own! With some practice, you’ll impress everyone with your cooking skills.
![For Lemon Basil Zucchini Orzo, you will need: - 1 cup of orzo pasta - 2 medium zucchinis, diced into bite-sized cubes - 1 cup of vegetable broth - 1 tablespoon of extra-virgin olive oil - 3 cloves of garlic, finely minced - Zest and juice of 1 large lemon - 1/4 cup of fresh basil leaves, chopped roughly - 1/4 teaspoon of red pepper flakes (adjust to taste) - Salt and freshly cracked black pepper, to taste - Grated Parmesan cheese, for garnish (optional) You can make your dish pop with these garnishes: - Extra fresh basil leaves - A sprinkle of lemon zest - A drizzle of olive oil These will add color and flavor to your meal. To make this dish, gather these tools: - A medium-sized pot for cooking orzo - A large skillet for sautéing - A colander for draining orzo - A sharp knife for chopping - A cutting board for prepping ingredients Having these on hand will make your cooking easier and more fun. For the full recipe, follow the steps carefully to enjoy a tasty, fresh meal. Start by boiling water in a medium pot. You need about 4 cups of water. When it boils, add 1 cup of orzo pasta. Cook it for 9 to 11 minutes, following the package instructions. You want it to be al dente, so check it often. Once it's cooked, drain the orzo in a colander and set it aside. This pasta adds a nice texture to your meal. Next, grab a large skillet and heat 1 tablespoon of extra-virgin olive oil over medium heat. Once the oil is hot, add 3 cloves of minced garlic. Sauté for about 1 minute. You want it fragrant, but don’t let it brown. After that, toss in 2 medium zucchinis, diced into bite-sized cubes. Stir them together for 4 to 5 minutes. The zucchinis should soften but still have some crunch. If you like it spicy, add 1/4 teaspoon of red pepper flakes at this point. Now it's time to bring it all together. Pour in 1 cup of vegetable broth and squeeze the juice of 1 large lemon into the skillet. Let it simmer gently for 3 to 4 minutes. This helps the flavors mix well. After that, stir in the cooked orzo pasta, zest from the lemon, and 1/4 cup of roughly chopped fresh basil leaves. Season it all with salt and freshly cracked black pepper to taste. Mix thoroughly. If the dish seems a bit dry, add a splash more vegetable broth for a creamy finish. Finally, let it cook on low heat for another 2 to 3 minutes before serving. For the full recipe, check out the instructions above. To get the best texture in your Lemon Basil Zucchini Orzo, cook the orzo just right. Follow the package time closely, aiming for al dente. This means it should be firm but not hard. After cooking, drain it well. Avoid overcooking the zucchini. Sauté them until they are tender but still have a little bite. This keeps your dish fresh and exciting. You can boost the flavor in this dish easily. Fresh lemon juice gives a bright taste. Adding lemon zest will enhance this citrus flavor even more. For a bit of heat, use red pepper flakes, but adjust to your taste. If you want a richer flavor, sprinkle on some grated Parmesan cheese before serving. Fresh basil is key too; it adds a deep, herbal note that ties everything together. Serve your Lemon Basil Zucchini Orzo in shallow bowls for a lovely look. Add a few extra basil leaves on top for color. A sprinkle of lemon zest makes it pop, adding brightness to the dish. You can also drizzle a little olive oil on top for a nice finish. Don't forget to use your best bowls; good presentation makes the dish even more appealing. For the full recipe, check out the earlier section. {{image_4}} You can make this dish vegan by skipping the cheese. Use nutritional yeast instead for a cheesy taste. This works well with the lemon and basil. You can add more veggies like bell peppers or spinach for extra flavor. To make this dish gluten-free, swap the orzo with gluten-free pasta. Rice or quinoa can also work well. These options keep the dish light and fresh. Always check labels to ensure they are gluten-free. If you want to add protein, consider chickpeas or lentils. They pair nicely with the lemon and basil. Grilled chicken or shrimp are also great choices. Just cook them separately and mix them in at the end. This makes the meal hearty and satisfying. For the full recipe, check the Full Recipe section. Store any leftover Lemon Basil Zucchini Orzo in an airtight container. Place it in the fridge. It stays fresh for up to 3 days. Before serving again, check for any signs of spoilage. If it smells off or has changed color, toss it out. You can freeze Lemon Basil Zucchini Orzo, but with a few tips. Let the dish cool completely before freezing. Use a freezer-safe container or bag. It can last up to 2 months in the freezer. When you're ready to eat, thaw it in the fridge overnight. To reheat, use a skillet over low heat. Add a splash of broth to help it stay creamy. Stir frequently until it's warmed through. You can also use the microwave. Heat in short bursts, stirring in between, until hot. Enjoy your meal just like it was fresh! For the full recipe, check out the original. Yes, you can use other pasta types. Try penne or farfalle for a twist. Both will work well with the flavors in this dish. Just remember to adjust the cooking time as needed. Check the package for the best cooking instructions. To add heat, sprinkle in red pepper flakes. You can also add diced jalapeños or a dash of hot sauce. Start with a small amount and taste as you go. This way, you can find the perfect level of spice that suits your taste. Zucchini is low in calories and full of vitamins. It helps keep you hydrated and is a good source of fiber. Basil has anti-inflammatory properties and is rich in antioxidants. This herb can boost your immune system and enhance your mood. Together, they make a nutritious choice for any meal. For a full recipe, check the [Full Recipe]. This blog post covered the key ingredients and steps to make a tasty dish. You learned about cooking orzo, sautéing garlic and zucchini, and combining flavors. Tips helped achieve great texture and presentation. Variations offered vegan and gluten-free options. Remember to store leftovers properly and reheat them well. Use these insights to create a meal you love. Enjoy the process and make it your own! With some practice, you'll impress everyone with your cooking skills.](https://goldendishy.com/wp-content/uploads/2025/07/61f764e1-906e-4d38-9844-2e2d556314ee-300x300.webp)


![- 2 cups cooked rice (white or brown) - 1 pound boneless, skinless chicken breasts, diced - 2 cups broccoli florets (fresh or frozen) - 1 can (10.5 oz) cream of mushroom soup (or any creamy soup of your choice) - 1 cup shredded cheddar cheese, divided - 1/2 cup milk - 1 teaspoon garlic powder - 1/2 teaspoon onion powder - 1 teaspoon dried thyme - Salt and pepper to taste - 1/2 cup breadcrumbs (optional, for topping) - 2 tablespoons olive oil I love using fresh ingredients when I make this casserole. The chicken gives it protein. Broccoli adds a nice crunch and color. You can use frozen broccoli if fresh isn’t available. It works just as well! I recommend using cream of mushroom soup for a rich flavor. You can swap it with any creamy soup you enjoy. The cheddar cheese is key for that melty goodness on top. Split the cheese; half goes in the mix, and half stays for the topping. For seasoning, garlic powder and dried thyme bring out the best taste. Adjust salt and pepper to fit your palate. If you want a crunchy top, add breadcrumbs for texture. Drizzle olive oil to keep it all moist and flavorful. This combination makes a cozy, tasty meal. You’ll love how easy it is to prepare. Check the [Full Recipe] for all the steps to make this dish shine! First, preheat your oven to 350°F (175°C). This step is key. A hot oven helps your casserole cook evenly. While it heats, prepare your baking dish. Grease a 9x13-inch dish with olive oil or cooking spray. This prevents sticking and makes for easy cleanup. Next, we cook the chicken. In a large skillet, heat 2 tablespoons of olive oil over medium heat. Once the oil is hot, add the diced chicken. Season the chicken with 1 teaspoon of garlic powder, 1/2 teaspoon of onion powder, 1 teaspoon of dried thyme, and salt and pepper to taste. Sauté it for about 5-7 minutes. Stir the chicken often to ensure even cooking. You want it to be fully cooked and lightly browned. In a large mixing bowl, combine your cooked rice, steamed broccoli florets, a can of cream of mushroom soup, and 1/2 cup of milk. Add half of your shredded cheddar cheese too. Mix these ingredients well until the mixture looks creamy. This step is important. A well-mixed casserole ensures every bite is full of flavor. Once your chicken is cooked, add it to the rice and broccoli mixture. Stir gently to combine everything evenly. Now, it’s time to bake. Spread the chicken and rice mixture in your greased baking dish. Sprinkle the remaining cheddar cheese over the top. If you want a crunchy topping, add 1/2 cup of breadcrumbs. Cover the dish tightly with aluminum foil. This keeps moisture in while baking. Place it in the preheated oven and bake for 25 minutes. After that, carefully remove the foil. Bake for an additional 10-15 minutes. You want the top to be golden brown and the cheese to be bubbling. When it's done, let the casserole rest for about 5 minutes. This helps the layers set before you serve. To make your chicken tender and moist, start with good-quality chicken. Sauté the diced chicken in olive oil over medium heat. Season it well with garlic powder, onion powder, thyme, salt, and pepper. Cook until it is no longer pink. This usually takes about 5-7 minutes. Stir it often for even cooking. For casserole success, preheat your oven to 350°F (175°C) before baking. Cover the dish with foil for the first part of baking. This keeps the dish moist. Remove the foil for the last 10-15 minutes to brown the cheese and breadcrumbs. For an appealing look, garnish your casserole with fresh parsley or chives. This adds a bright color and fresh flavor. You can also use individual ramekins for serving. This makes it easy to serve and adds a cozy touch to your table. Store leftovers in an airtight container in the fridge. They will last up to 3-4 days. If you want to freeze the casserole, wrap it tightly in foil or plastic wrap. It can last up to 3 months in the freezer. When reheating, you have two options: the microwave or the oven. For the microwave, heat in short bursts to avoid drying it out. Stir occasionally to heat evenly. For oven reheating, cover with foil and bake at 350°F (175°C) for about 20 minutes, or until heated through. {{image_4}} For a gluten-free option, swap the cream of mushroom soup with a gluten-free brand. You can also use gluten-free breadcrumbs or skip them altogether. For a low-fat version, cut back on cheese and milk. Use low-fat milk and just half the cheese. This keeps the dish tasty while reducing calories. You can change the flavor by adding different veggies. Carrots and bell peppers work great. They add color and crunch too! If you want a cheese twist, try mozzarella or pepper jack for a spicy kick. Each cheese brings its own unique taste, making each casserole a new experience. Using leftover rotisserie chicken is a smart time-saver. Just shred it and mix it in. For rice, consider quinoa or cauliflower rice for a low-carb option. Cauliflower rice is light and absorbs flavors well. It’s a great way to sneak in more veggies into your meal. Feel free to get creative. This dish is versatile, and you can tailor it to your taste! Chicken Broccoli Rice Casserole shines on its own, but you can enhance your meal with sides. Here are some tasty options: - Garlic Bread: Crisp and buttery, it pairs well with the creamy casserole. - Steamed Vegetables: Lightly steamed carrots or green beans add color and crunch. - Simple Salad: A fresh garden salad with lettuce, tomatoes, and cucumbers balances the rich flavors. For a quick salad, mix leafy greens with olive oil and lemon juice. This adds a refreshing touch to your meal. To complete your dinner, consider drinks that match the flavors of the casserole: - White Wine: A chilled Chardonnay or Sauvignon Blanc complements the dish well. - Sparkling Water: For a non-alcoholic option, sparkling water with lemon is refreshing. For kids, serve some apple juice or lemonade. These drinks are fun and pair nicely with the casserole's flavors. How long does it take to cook chicken in the casserole? It takes about 5 to 7 minutes to cook the chicken in the skillet. You want it cooked through and lightly browned. This step is key for flavor. Once you add the chicken to the casserole, it will bake for about 35 minutes. This helps all the flavors blend well. Can I prepare this dish ahead and refrigerate it? Yes, you can prepare the casserole ahead of time. Just mix all the ingredients as usual. Then, cover it and place it in the fridge. It’s best to bake it within 24 hours for best taste. What can I use instead of cream of mushroom soup? If you don’t have cream of mushroom soup, you can use cream of chicken soup. You can also make a homemade creamy base using sour cream or Greek yogurt mixed with milk. This keeps the dish rich and smooth. How do I store leftovers? To store leftovers, let the casserole cool first. Then, place it in an airtight container. It will stay fresh in the fridge for up to 3 days. Make sure to reheat only the portion you plan to eat. Can I freeze Chicken Broccoli Rice Casserole for future meals? Yes, you can freeze the casserole. Just cover it tightly with plastic wrap or foil. It will last in the freezer for up to 2 months. When ready to eat, thaw it in the fridge overnight before baking. For more details, check out the [Full Recipe]. It’s a great way to ensure you have all the steps at hand! In this article, we explored the key ingredients for Chicken Broccoli Rice Casserole and shared easy steps to make it. You learned about cooking tips, variations, and serving suggestions to enhance your meal. Remember, this dish is not only tasty but also nutritious. Try different ingredients to suit your taste or dietary needs. Enjoy creating this delicious casserole and share it with your family. You’ll love how simple and fun it is to prepare!](https://goldendishy.com/wp-content/uploads/2025/07/8f73cfa4-d8c9-44a2-908a-c2367089e61b-768x768.webp)

![- 8 oz fettuccine pasta - 1 lb large shrimp, peeled and deveined - 2 tablespoons Cajun seasoning - 2 tablespoons olive oil - 3 cloves of garlic, minced - 1 cup heavy cream - 1 cup grated Parmesan cheese - 1/2 cup cream cheese, softened - Salt and pepper to taste - 2 tablespoons chopped fresh parsley (for garnish) - Zest of 1 lemon (for brightness) When I make Cajun Shrimp Alfredo, I love how rich and creamy it is. The fettuccine pasta serves as a perfect base for the dish. You can choose any pasta you like, but fettuccine offers a great texture that holds the sauce well. The shrimp is the star of this recipe. I always prefer large shrimp because they have a great bite and flavor. Make sure to peel and devein them for the best experience. The Cajun seasoning adds a warm kick that makes this dish pop. For the sauce, I use both heavy cream and cream cheese. They blend together to create a smooth and thick sauce. Parmesan cheese adds that salty, nutty flavor that ties everything together. Fresh garlic enhances the aroma, making your kitchen smell divine while cooking. I finish the dish with fresh parsley and lemon zest. The parsley brings a bright color, while the lemon zest adds a hint of freshness. This combination makes every bite a flavorful delight. You can find the Full Recipe to guide you through the cooking process. Enjoy creating this scrumptious meal! Start by bringing a large pot of salted water to a boil. The salt helps flavor the pasta. Once the water is boiling, add 8 ounces of fettuccine. Cook the pasta until it is al dente, which usually takes about 8 to 10 minutes. You want it firm, not mushy. After cooking, drain the pasta but save 1/2 cup of the water for later. Next, take 1 pound of large shrimp, peeled and deveined. In a bowl, sprinkle 2 tablespoons of Cajun seasoning over the shrimp. Toss them well so every piece is coated. This gives the shrimp a nice, bold taste. Heat 2 tablespoons of olive oil in a large skillet over medium-high heat. When hot, add the shrimp and sauté for 2 to 3 minutes per side. Cook until they turn pink and opaque. Once done, remove them from the skillet and set aside. In the same skillet, lower the heat a bit. Add 3 cloves of minced garlic to the skillet. Sauté the garlic for about 30 seconds. You want it fragrant but not burnt. Then, pour in 1 cup of heavy cream. Stir gently and let it come to a gentle simmer. Add in 1/2 cup of softened cream cheese, stirring until it melts. Now, gradually mix in 1 cup of grated Parmesan cheese. Stir vigorously to make the sauce creamy. If it’s too thick, add some of the reserved pasta water until you reach the right consistency. Now it’s time to bring everything together. Return the sautéed shrimp to the skillet with the creamy sauce. Add the cooked fettuccine next. Toss all the ingredients gently so the pasta and shrimp are well-coated. Taste and season with salt and pepper as needed. For a bright touch, add the zest of 1 lemon, mixing it in for extra flavor. Enjoy this flavorful creamy delight! For a complete recipe, check out the [Full Recipe]. - Avoid overcooking shrimp: Cook shrimp for only 2-3 minutes per side. They should be pink and opaque. Overcooked shrimp can turn rubbery. Keep a close eye on them as they cook. - How to achieve a silky sauce: To make a smooth sauce, stir the heavy cream gently as it heats. Add cream cheese and Parmesan slowly. If the sauce is too thick, use reserved pasta water to thin it out. - Suggesting additional spices: Try adding a pinch of cayenne for extra heat. Smoked paprika can add a nice depth. Experiment with flavors that excite your taste buds. - Importance of fresh herbs for garnishing: Fresh parsley adds color and brightness to the dish. You can also use basil or chives for a different twist. Fresh herbs make every plate look and taste better. - Pairing with a side salad or garlic bread: A crisp side salad balances the rich flavors of the Alfredo. Garlic bread is a perfect complement too. It helps soak up the creamy sauce. - Creative plating ideas: Swirl the fettuccine into a nest on the plate. Top it with shrimp and a sprinkle of parsley. Adding lemon zest on top gives it a fresh look and flavor. For added flair, drizzle some sauce around the plate. For the complete process of making this dish, check out the Full Recipe. {{image_4}} For those with dietary needs, there are great options. You can use gluten-free pasta. Many brands offer tasty versions made from rice or corn. These options cook well and hold sauce nicely. If you need a dairy-free choice, try cashew cream or almond milk. These alternatives give a creamy texture that works well in Alfredo. Both options keep your dish rich and full of flavor. Cajun seasoning can be adjusted to fit your taste. If you love spice, add more seasoning. For a milder dish, use less. You can also mix in smoked paprika for a smoky flavor. Adding vegetables can boost nutrition. Bell peppers, spinach, or zucchini blend well into the sauce. They add color, taste, and extra vitamins. Just sauté them with the shrimp for a quick mix. If you prefer a different protein, chicken works great. Simply swap shrimp for diced chicken breast. Cook it the same way until golden and cooked through. Tofu is another excellent option for a vegetarian twist. Firm tofu absorbs flavors well. Just cube it and sauté until crispy. For a seafood twist, try adding fish. Salmon or scallops can add rich flavor. Cook them gently to keep them tender. These variations keep the dish fun and tasty while catering to different diets. Enjoy mixing it up! For the full recipe, check out Cajun Shrimp Alfredo Delight. To keep your Cajun Shrimp Alfredo fresh, store leftovers in the fridge. Use airtight containers to avoid moisture loss. It’s best to cool the dish before sealing it. This helps maintain the creamy texture. Try to eat the leftovers within 2 to 3 days for the best taste. When reheating, use low heat on the stove or microwave. Stir the dish gently to avoid breaking the creamy sauce. Add a splash of milk or cream to refresh the texture. This will help revive the dish and keep it smooth. Remember to heat just until warm, so you don’t overcook the shrimp. If you want to freeze Cajun Shrimp Alfredo, cool it completely first. Use freezer-safe containers and leave some space for expansion. The dish will last about 2 to 3 months in the freezer. When you’re ready to eat, thaw it in the fridge overnight. Reheat slowly on the stove, adding a bit of cream if needed for a creamy finish. Cajun Shrimp Alfredo is a creamy pasta dish with bold flavors. It features fettuccine pasta and shrimp coated in a rich Alfredo sauce. The Cajun seasoning adds warmth and a bit of spice. This dish balances creamy texture with savory notes from garlic and cheese. You will taste hints of lemon zest, which brighten the flavors. It's a perfect mix of comfort food and exciting cuisine that can impress anyone. To add extra heat to your Cajun Shrimp Alfredo, try these options: - Use more Cajun seasoning than the recipe calls for. - Add a pinch of cayenne pepper or crushed red pepper flakes. - Incorporate diced jalapeños or fresh chili peppers into the shrimp. - Serve with a drizzle of hot sauce on top for a spicy kick. Yes, you can use frozen shrimp. Here are some best practices: - Thaw the shrimp in cold water for about 15-20 minutes before cooking. - Pat them dry with a paper towel to remove excess moisture. - Ensure you sauté them until fully cooked, which usually takes 2-3 minutes per side. Using frozen shrimp can save time and still give you great flavor. To keep your Alfredo sauce smooth and creamy: - Use low heat when making the sauce. - Stir continuously to help the cheese melt evenly. - Gradually add the cream and cheese, mixing well each time. - If the sauce gets too thick, slowly add reserved pasta water until it reaches the desired texture. Following these tips will help maintain a silky sauce that clings perfectly to your pasta. Cajun Shrimp Alfredo is a rich and tasty dish that you can easily make at home. You learned about key ingredients, cooking steps, and helpful tips. Variations allow you to adapt this dish to your diet or taste. Proper storage ensures your leftovers stay delicious. Remember, you can always customize flavors and ingredients to suit your needs. Enjoy creating this meal and impressing your family or friends. It’s all about the simple joys of cooking and sharing great food.](https://goldendishy.com/wp-content/uploads/2025/07/5d1dc84f-c815-4e1a-a64f-ea492bbf0a6c-768x768.webp)
![- 2 chicken breasts, sliced into thin strips - 1 ripe, juicy mango, diced into small cubes - 1 red bell pepper, sliced into thin strips - 1 yellow bell pepper, sliced into thin strips - 1 cup snap peas, trimmed - 2 cloves garlic, finely minced - 1 tablespoon fresh ginger, grated - 3 tablespoons soy sauce (low sodium recommended) - 1 tablespoon honey (or maple syrup for a vegan option) - 1 tablespoon olive oil or sesame oil - Fresh cilantro leaves for garnish - Cooked jasmine rice or your choice of rice (for serving) The magic of Mango Chicken Stir Fry comes from simple, fresh ingredients. Chicken breasts form the base, bringing protein to your meal. The ripe mango adds sweetness. Bell peppers bring color and crunch. Snap peas give that crisp bite. Aromatics like garlic and ginger add depth. Soy sauce gives a savory touch, while honey balances it out with sweetness. For extra richness, use olive or sesame oil. Fresh cilantro adds a burst of flavor. Jasmine rice makes the perfect bed for this dish. Check out the Full Recipe to gather everything you need! To start, take your chicken breasts and slice them into thin strips. Aim for even cuts so they cook uniformly. Once sliced, season the chicken with salt and pepper. This simple step adds great flavor to the dish. Now, let’s heat the oil. In a large skillet or wok, pour in your olive oil. Set the heat to medium-high and wait until the oil shimmers. This means it’s ready for cooking. Next, add the sliced chicken to the hot pan. Cook the chicken for about 5-7 minutes. Stir frequently to ensure it browns nicely and cooks all the way through. After cooking, remove the chicken from the pan and set it aside on a plate. In the same pan, it’s time for aromatics. Add minced garlic and grated ginger. Sauté these for about 30 seconds. The smell will be amazing, but be careful not to burn them! Now, let’s add the vibrant vegetables. Toss in your sliced red and yellow bell peppers along with the snap peas. Stir-fry them for about 3-4 minutes. You want them tender but still crisp. Return the cooked chicken to the pan. Gently fold in the diced mango to mix everything together. The sweet mango will balance the savory chicken perfectly. Next, let’s make the sauce. In a small bowl, whisk together soy sauce and honey. Pour this mixture over your chicken and veggies. Stir well to coat everything evenly. Let it cook together for an additional 2 minutes. This allows all the flavors to meld. Once done, remove the stir-fry from the heat. It’s now ready to serve. Enjoy your Mango Chicken Stir Fry over cooked jasmine rice. Don’t forget to garnish with fresh cilantro for that extra pop of flavor! For the full recipe, check out the details above. To get the best results, pay close attention to your heat. Use high heat to sear the chicken and veggies. This helps keep the food juicy and full of flavor. If your pan isn't hot enough, the chicken will steam instead of sear. Avoid overcooking your vegetables. Cook them just until they are bright and crisp. This usually takes about 3-4 minutes. If you let them cook too long, they will lose their crunch and color. To add more depth, try spices like cumin or paprika. These can give your dish a unique twist. You can also add a pinch of red pepper flakes for heat. If you want a different sauce, consider teriyaki or sweet chili sauce. These can add a different layer of flavor that pairs well with mango. When serving, place your stir-fry over a bed of fluffy jasmine rice. This adds a nice base and absorbs the sauce. For garnishing, sprinkle fresh cilantro on top. You can also add lime wedges on the side. This adds color and a zesty kick. For the complete experience, check out the Full Recipe. Enjoy your cooking! {{image_4}} You can easily make this dish vegetarian. Use tofu instead of chicken. Firm tofu works best. Press it to remove excess water. Cut it into cubes and sauté until golden. For sauce, you can swap honey with maple syrup. This keeps it vegan-friendly. You might also try tamari instead of soy sauce. It’s gluten-free and tastes great. If you want more protein, shrimp or beef are great choices. For shrimp, cook them for about 3-4 minutes. The shrimp turn pink when done. If you use beef, slice it thinly. Cook it for about 5-7 minutes. Always check it’s fully cooked. You can use flank steak or sirloin for the best flavor. You can switch out fruits and veggies based on the season. In summer, try peaches or pineapple for a juicy twist. Winter calls for hearty vegetables like carrots or broccoli. Adding seasonal greens like kale or spinach boosts nutrition too. Get creative with what you have. This keeps your Mango Chicken Stir Fry fresh and exciting. For the full recipe, check above! To keep your Mango Chicken Stir Fry fresh, store leftovers in an airtight container. Let the stir-fry cool before sealing. It stays good for up to three days in the fridge. Always label your container with the date. This helps you keep track of freshness. When you want to enjoy your stir-fry again, reheat it carefully. You can use a microwave or a skillet. If using a microwave, heat in short bursts. Stir between heating to ensure even warmth. If using a skillet, add a splash of water to keep it moist. Always make sure it reaches a safe temperature of 165°F (74°C) before eating. You can freeze Mango Chicken Stir Fry if you want to store it longer. Place it in a freezer-safe container and leave some space for expansion. It can last up to three months in the freezer. To thaw, move it to the fridge overnight. For reheating, use a skillet or microwave, just like before. This method helps maintain the flavors and textures well. Check the [Full Recipe] for more details on making this dish. Mango Chicken Stir Fry lasts about 3 to 4 days in the fridge. Store it in an airtight container to keep it fresh. Make sure to cool it down before putting it in the fridge. This helps keep the texture and flavor. Yes, you can use frozen mango in this recipe. Frozen mango works well when fresh mango is not available. Just thaw the mango before adding it to the stir-fry. This will help it blend well with the other ingredients. Fresh mango offers a firmer texture and brighter flavor, but frozen is a great alternative. You can serve this dish with jasmine rice, quinoa, or even noodles. These sides soak up all the tasty sauce. You can also add a simple salad on the side. A cucumber salad or a green bean salad pairs nicely with the stir-fry. Yes, the recipe can be made gluten-free. Use tamari or coconut aminos instead of soy sauce. These options give a similar taste without gluten. Always check the labels to ensure there are no hidden gluten ingredients. This blog post covered everything you need to make a tasty Mango Chicken Stir Fry. We explored key ingredients like chicken, mango, and veggies. I provided step-by-step instructions to help you cook with confidence. You learned tips for perfecting the dish, plus variations to keep things fresh. In short, this recipe is fun and easy to customize. Get creative in the kitchen and enjoy your stir-fry!](https://goldendishy.com/wp-content/uploads/2025/06/67704695-6c72-4914-a503-47315e3cdcd3-768x768.webp)
