Jalapeño Lime Hummus Flavorful and Fresh Dip

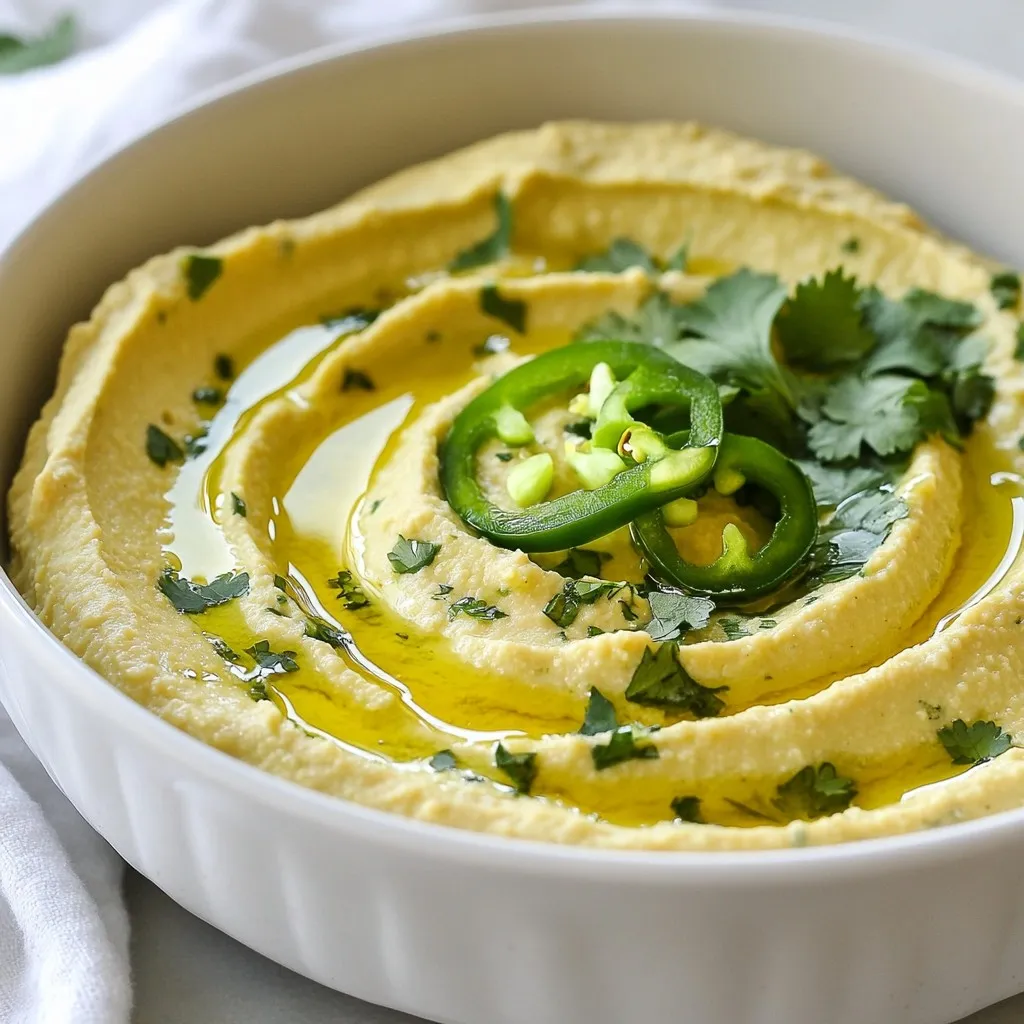
Looking for a dip that packs a punch? My Jalapeño Lime Hummus is both flavorful and fresh! This zesty blend of chickpeas, jalapeños, and lime juice will elevate your snack time. Whether you’re hosting a party or just craving a healthy treat, this hummus is your perfect companion. Stick around as I guide you through the simple steps to create this delicious dip and share tips for making it your own!
Why I Love This Recipe
- Bold Flavor Profile: This hummus packs a spicy punch from the jalapeño combined with zesty lime, making it a standout dip for any occasion.
- Easy to Make: With just a few ingredients and a food processor, you can whip up this delicious hummus in under 10 minutes.
- Customizable: You can adjust the spice level by adding more or less jalapeño, or even experiment with different herbs for a unique twist.
- Healthy Snack: Chickpeas are a great source of protein and fiber, making this hummus a nutritious choice for snacking.
Ingredients
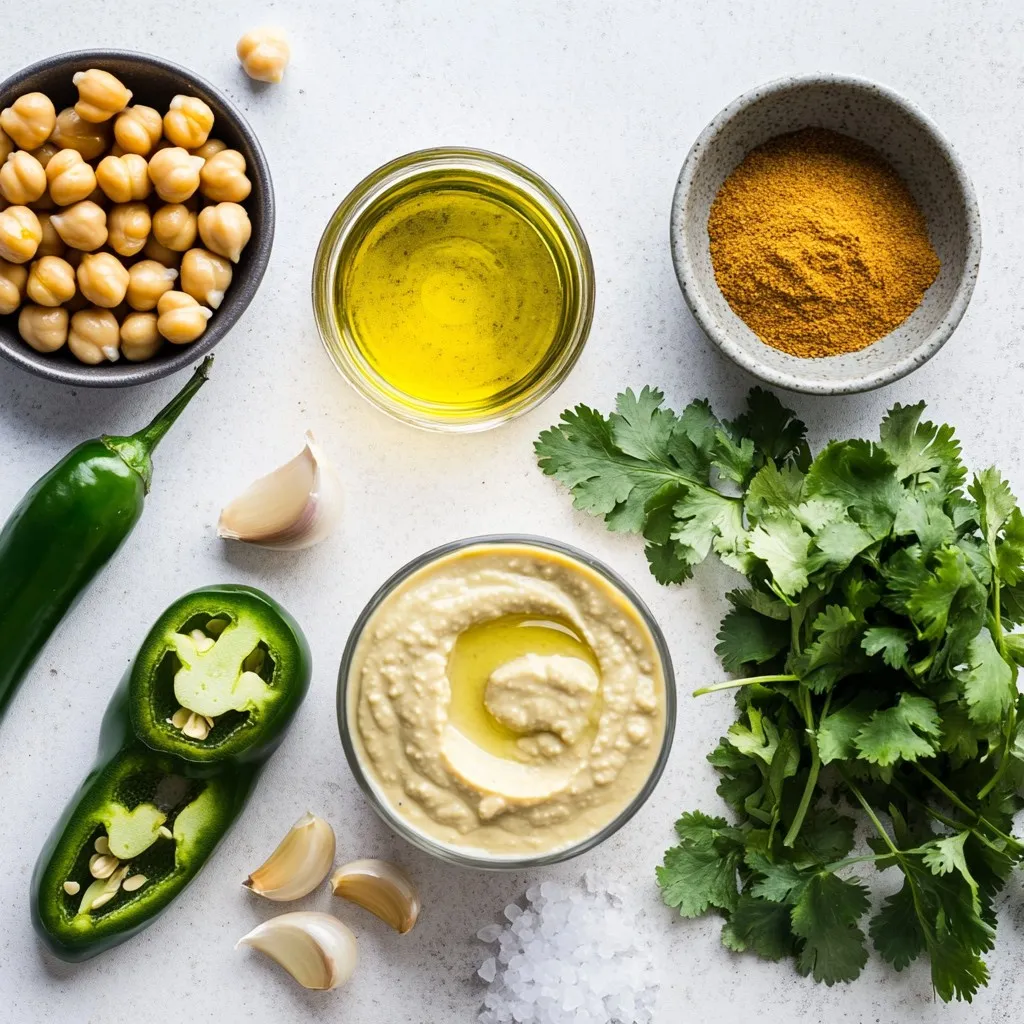
To make Jalapeño Lime Hummus, you need simple ingredients that pack a punch. Here’s what to gather:
– 1 can (15 oz) chickpeas, drained and rinsed
– 1/4 cup tahini
– 1 jalapeño, seeds removed and roughly chopped
– 2 tablespoons fresh lime juice
– 2 tablespoons extra virgin olive oil
– 2 cloves garlic, minced
– 1/2 teaspoon ground cumin
– Salt to taste
– Water as needed (about 2-4 tablespoons)
– Fresh cilantro, finely chopped, for garnish (optional)
Each ingredient plays a key role in the flavor and texture of the hummus.
Chickpeas form the base, giving a creamy feel. Tahini adds richness and depth. The jalapeño brings heat and a fresh taste. Fresh lime juice brightens the hummus, while olive oil adds smoothness. Garlic gives it a nice kick, and ground cumin adds warmth. Salt balances all the flavors. Water adjusts the consistency to your liking, making it as thick or smooth as you want.
For a pretty finish, you can add cilantro on top. It looks nice and adds a fresh touch. Each bite delivers a burst of flavor that’s hard to resist.

Step-by-Step Instructions
Preparing the Ingredients
First, gather all your ingredients. You will need a can of chickpeas, tahini, a jalapeño, lime juice, olive oil, garlic, ground cumin, salt, and some water. For garnish, consider fresh cilantro. Rinse the chickpeas under cold water and drain them well. Remove the seeds from the jalapeño for less heat. Chop it roughly so it blends well.
Blending the Mixture
Now, put all the prepared ingredients into a food processor. Add the chickpeas, tahini, jalapeño, lime juice, olive oil, garlic, and cumin. Blend these on high speed until you achieve a smooth paste. This step is key. It makes the hummus creamy and rich.
Adjusting Consistency and Seasoning
After blending, check the texture. If the hummus is too thick, add water. Start with one tablespoon at a time. Blend again until it feels just right. Next, taste your hummus. Add salt based on your preference. Blend briefly to mix in the salt. Your hummus should now be smooth, creamy, and full of flavor.
Tips & Tricks
Achieving the Perfect Texture
To get a great texture for your hummus, focus on the blending. Start with the chickpeas, tahini, and other ingredients in a food processor. Pulse until you see a smooth paste. If it feels thick, add water slowly. Start with one tablespoon. Blend until creamy. This helps to achieve that nice, velvety feel. You want your hummus easy to scoop but not runny.
Flavor Enhancement Tips
To boost the flavor, consider adding more lime juice or garlic. The lime juice gives a fresh taste that brightens the dish. If you love spice, keep some jalapeño seeds. They add heat! Another option is to mix in roasted peppers. This adds depth to your hummus. Don’t forget to taste as you go. Season with salt until it feels just right.
Presentation Ideas
Make your hummus look as good as it tastes! Serve it in a decorative bowl. Drizzle olive oil on top for shine. You can also sprinkle chili flakes or lime zest for color. Surround the bowl with colorful veggie sticks or pita chips. This makes it fun and inviting. A little fresh cilantro on top adds a nice touch too!
Pro Tips
- Adjusting Spice Level: If you want a milder hummus, consider using only half of the jalapeño or removing the seeds to lessen the heat.
- Add Creaminess: For an ultra-creamy texture, try adding a bit of Greek yogurt or more tahini to the mix.
- Flavor Variations: Experiment with other herbs, such as parsley or dill, for a unique twist on the flavor profile.
- Storing Hummus: Store any leftovers in an airtight container in the refrigerator for up to a week; drizzle with olive oil before serving again.

Variations
Spice Level Adjustments
You can control the heat in your Jalapeño Lime Hummus. If you love spice, keep the seeds from the jalapeño. This will make the hummus hotter. If you prefer a milder taste, take out all the seeds. You can also add more jalapeño for extra heat or use a different pepper, like a poblano.
Ingredient Swaps
Feel free to swap ingredients to fit your taste. Don’t have tahini? Use Greek yogurt for a creamy texture. You can also try black beans instead of chickpeas. This will give your hummus a different flavor. For a twist, mix in avocado for a rich, smooth dip.
Additional Flavor Inspirations
You can boost the flavor with herbs and spices. Try adding smoked paprika for a smoky taste. Fresh herbs like basil or parsley can add brightness. You can even mix in roasted red peppers for a sweet touch. Each of these ideas can make your hummus unique and fun!
Storage Info
How to Store Leftovers
You can store leftover jalapeño lime hummus in an airtight container. Make sure the lid is on tight to keep it fresh. Place it in the fridge. It stays good for about 3 to 5 days. If you see any change in color or smell, it’s best to toss it.
Freezing Tips
If you want to keep your hummus longer, freezing is a great option. To freeze, put the hummus in a freezer-safe container. Leave some space at the top because it will expand as it freezes. You can also use ice cube trays for smaller portions. Just pop out a cube when you want a quick snack!
Best Used By Timeline
For the best flavor and quality, use your frozen hummus within 3 months. When you’re ready to eat, thaw it overnight in the fridge. Stir well before serving to mix the texture back together. Enjoy your tasty dip!
FAQs
Can I make Jalapeño Lime Hummus ahead of time?
Yes, you can make Jalapeño Lime Hummus a day or two before serving. It tastes great when chilled. Just store it in an airtight container in the fridge. The flavors meld and get better over time. When you are ready to serve, give it a quick stir. You might need to add a bit of water to loosen it up.
What can I serve with this hummus?
You can serve Jalapeño Lime Hummus with many tasty items. Here are some ideas to try:
– Fresh vegetable sticks like carrots, celery, or bell peppers
– Pita chips or pita bread
– Crackers or breadsticks
– Tortilla chips
– Grilled chicken or shrimp for a protein boost
This hummus also pairs well as a spread on sandwiches or wraps.
Is this hummus gluten-free?
Yes, this hummus is gluten-free! All the ingredients, like chickpeas and tahini, are safe for those avoiding gluten. Just make sure any dippers you choose are also gluten-free. Enjoy this dip without worry.
You learned how to make Jalapeño Lime Hummus, starting with simple, fresh ingredients. We covered preparing, blending, and adjusting the texture and flavor. I shared tips for perfecting your hummus and offered fun variations. Storing and enjoying leftovers is easy with my guidelines.
Enjoy your hummus with friends and family. It’s healthy, tasty, and fun to mak

Spicy Jalapeño Lime Hummus
Ingredients
- 1 can chickpeas, drained and rinsed
- 0.25 cup tahini
- 1 whole jalapeño, seeds removed and roughly chopped
- 2 tablespoons fresh lime juice
- 2 tablespoons extra virgin olive oil
- 2 cloves garlic, minced
- 0.5 teaspoon ground cumin
- to taste salt salt
- 2 tablespoons water as needed
- optional fresh cilantro, finely chopped, for garnish
Instructions
- Start by preparing your ingredients. In a food processor, combine the drained and rinsed chickpeas, tahini, roughly chopped jalapeño, fresh lime juice, extra virgin olive oil, minced garlic, and ground cumin.
- Pulse the mixture on high speed until it transforms into a smooth paste. If you find the hummus is too thick for your liking, slowly add water (one tablespoon at a time) and blend until the texture reaches your desired creaminess.
- Taste your hummus and season it with salt according to your preference. Blend again briefly to ensure the seasoning is well incorporated.
- Once your hummus is perfectly smooth and creamy, transfer it to a decorative serving bowl.
- For an added touch, drizzle some extra olive oil on top and sprinkle with finely chopped fresh cilantro, if desired.


![- 2 cups cooked chicken breast, shredded - 1 ripe avocado, mashed until smooth - 1/4 cup smooth Greek yogurt - 1 tablespoon freshly squeezed lemon juice - 1/4 cup red onion, finely chopped - 1/2 cup cherry tomatoes, halved - 1/4 cup celery, finely diced - 1/4 teaspoon garlic powder - Salt and freshly ground black pepper to taste - Fresh cilantro or parsley, chopped, for garnish The ingredients in creamy avocado chicken salad make it tasty and healthy. The chicken provides protein, while avocado adds healthy fats. Greek yogurt makes it creamy without extra calories. Fresh veggies like tomatoes and celery give a nice crunch. Using fresh ingredients is key. This brings out the best flavors. You can adjust the amounts based on what you like. For example, add more tomatoes if you love them. Don’t forget the seasoning! Salt and pepper enhance the taste. Fresh herbs like cilantro or parsley top it off perfectly. They add color and flavor. I recommend checking the full recipe for detailed steps. Enjoy making this delicious dish! - Combine mashed avocado, Greek yogurt, and lemon juice in a bowl. - Mix until smooth using a fork or whisk. To make the creamy dressing, start with a ripe avocado. Mash it in a bowl until it is smooth. Next, add 1/4 cup of Greek yogurt. This adds creaminess and protein. Then, squeeze in 1 tablespoon of lemon juice. This will brighten the flavor. Mix these three ingredients well with a fork or whisk. You want a creamy and smooth texture. This creamy dressing is the base of your salad and full of healthy fats. - Add shredded chicken to the avocado mixture. - Stir thoroughly to coat the chicken evenly. Now it’s time to add in the chicken. Use 2 cups of cooked chicken breast, shredded. You can use leftover chicken or rotisserie chicken for ease. Add the chicken to the creamy dressing. Stir well so every piece of chicken is coated. This adds protein and makes the salad filling. The creamy dressing brings all the flavors together. - Gently fold in red onion, cherry tomatoes, and celery. - Season with garlic powder, salt, and black pepper to taste. Next, let’s add some crunch and color. Gently fold in 1/4 cup of finely chopped red onion, 1/2 cup of halved cherry tomatoes, and 1/4 cup of diced celery. These veggies add freshness and texture. Now, season your salad. Add a pinch of garlic powder, salt, and freshly ground black pepper. Taste it and adjust the seasoning as needed. Mix gently so you don’t break the veggies. Now, your creamy avocado chicken salad is ready to serve! Check out the Full Recipe for more details. - Look for avocados that yield slightly to pressure. - Check the color; ripe avocados usually have a darker skin. Selecting the perfect avocado is key for your creamy avocado chicken salad. When you gently press the avocado, it should give a bit. This tells you it is ripe and ready to use. A darker skin tone often means ripeness, but don't rely on color alone. Always feel for that slight softness! - Use rotisserie chicken for convenience. - Ensure chicken is fully cooked; internal temperature should reach 165°F (75°C). Cooking the chicken can take time, but using rotisserie chicken saves you effort. It offers great flavor and saves cooking time. If you cook your own chicken, make sure to check the internal temperature. It needs to reach 165°F (75°C) to be safe to eat. - Serve in individual bowls, atop lettuce leaves, or in a wrap. - Consider a lemon wedge on the side for added flavor. Serving your salad can be fun! You can use individual bowls or place it on crisp lettuce leaves. If you want a wrap, that works too. A lemon wedge on the side brightens the meal and adds a zesty kick. For the full experience, try the [Full Recipe]. Enjoy your tasty and healthy choice! {{image_4}} You can make your creamy avocado chicken salad even better by adding fruits. Diced apples or grapes bring a nice sweetness. They also add a nice crunch. If you want a tropical twist, try adding mango. Its juicy flavor blends well with creamy avocado. Not in the mood for chicken? You can easily swap it out. Canned tuna or chickpeas work well for a vegetarian option. Both of these options add protein and flavor. If you love seafood, consider using grilled shrimp. It adds a fresh, light taste to the salad. Want to spice things up? Adding spices can really boost the flavor. Try cumin or smoked paprika for a warm kick. If you like heat, toss in some jalapeños. These will give your salad a spicy edge that keeps it exciting. Feel free to get creative with your mix-ins! Each variation gives you a new twist on this delicious dish. Check out the Full Recipe for more ideas. Store your creamy avocado chicken salad in an airtight container in the refrigerator. It will stay fresh for up to 2 days. I suggest enjoying it right after you make it. However, if you keep the ingredients separate, it can last a little longer. This way, you keep the textures nice. Do not freeze the salad. Avocado gets mushy when frozen. If you want to prepare ahead, consider freezing the chicken on its own. This will keep it fresh and ready for your salad. Prep your ingredients ahead of time. Store them separately to mix later. This salad is a great option for busy weeks. You can have a tasty meal ready in minutes! For the full recipe, check out the detailed instructions above. Typically lasts for about 2 days when stored properly. I recommend using an airtight container. This helps keep your salad fresh and tasty. After two days, the avocado may brown and lose its creamy texture. Yes, but it’s best to combine the ingredients just before serving to maintain freshness. If you prepare it early, store the salad components separately. This way, the avocado stays bright and creamy. Great with whole-grain bread, crackers, or a side of fruit. I love serving it on toast for a hearty lunch. Pairing it with fresh fruit offers a nice, sweet contrast. You can also use it as a filling in wraps for a tasty twist. For the full recipe, check out the detailed steps above. This creamy avocado chicken salad is easy to make and full of flavor. We covered the main ingredients, steps, and tips to perfect it. You learned how to mix chicken with creamy dressing and fresh veggies. Remember to store leftovers properly for the best taste. Enjoy this salad as a quick meal or snack. Feel free to customize with your favorite ingredients. With these simple tips, you can create a dish that is both healthy and delicious.](https://goldendishy.com/wp-content/uploads/2025/06/50306de2-9119-4a0c-8cb7-3da0c4c0a2a4-768x768.webp)
![To make the best roasted garlic hummus, gather these key ingredients: - 1 can (15 oz) chickpeas, thoroughly drained and rinsed - 1/4 cup creamy tahini - 1/4 cup high-quality olive oil, plus extra for drizzling - 4 cloves of roasted garlic - 2 tablespoons freshly squeezed lemon juice - 1/2 teaspoon ground cumin - Sea salt, to taste - Water, as needed for desired consistency - Sweet paprika and finely chopped fresh parsley for garnish These ingredients create a rich and creamy dip that bursts with flavor. The roasted garlic adds a sweet, mellow taste that enhances the overall profile of the hummus. You can customize your hummus with these optional ingredients: - Spices like smoked paprika or cayenne for heat - Fresh herbs such as basil or cilantro for added freshness - A splash of balsamic vinegar for depth - Roasted red peppers for a sweet and smoky twist These additions can help you explore new flavors and keep your hummus exciting. Here’s a quick look at the health benefits of the main ingredients: - Chickpeas: High in protein and fiber, they help keep you full. - Tahini: Made from sesame seeds, it provides healthy fats and calcium. - Olive oil: A heart-healthy fat that can lower bad cholesterol levels. - Garlic: Known for its immune-boosting properties and flavor. - Lemon juice: Adds vitamin C and brightens the flavor. This hummus is not just tasty; it’s also packed with nutrients. You can enjoy it guilt-free as a snack or appetizer. For the complete recipe, check out the full recipe section. To roast garlic, first, preheat your oven to 400°F (200°C). Take your garlic cloves and wrap them in aluminum foil. Drizzle a little olive oil over the cloves before sealing the packet. Place the foil packet in the oven and roast for about 30-35 minutes. The garlic should turn soft and golden brown. After roasting, let it cool for a few minutes before you touch it. This step brings out the sweet, rich flavor of the garlic. In a food processor, add the following ingredients: - 1 can (15 oz) chickpeas, thoroughly drained and rinsed - 1/4 cup creamy tahini - 1/4 cup high-quality olive oil, plus extra for drizzling - 4 cloves of roasted garlic - 2 tablespoons freshly squeezed lemon juice - 1/2 teaspoon ground cumin - Sea salt, to taste Blend these ingredients until they become silky smooth. You may need to stop and scrape down the sides to ensure even mixing. This step creates a rich and creamy base for your hummus. If your hummus is too thick, add water a little at a time. Start with one tablespoon and blend again until you reach your preferred creamy texture. Taste your hummus and adjust the seasoning. You might want more sea salt, lemon juice, or roasted garlic to suit your taste. For the full recipe, refer to the provided instructions. Enjoy making this delicious dip! To make your hummus extra creamy, use dry chickpeas. Soak them overnight and cook until soft. This gives a smoother texture. If you use canned chickpeas, rinse them well. It helps remove some of the canning liquid, which can make hummus taste tinny. Always blend your mixture well. Stop and scrape the sides of the bowl as needed. This step ensures every bit gets mixed in. Roasting garlic is easy and adds great flavor. Start by preheating your oven to 400°F (200°C). Wrap the garlic cloves in aluminum foil. Drizzle a little olive oil on top. Seal the foil tightly and bake for about 30-35 minutes. The cloves should be soft and golden brown. Let them cool before you handle them. You can use the roasted garlic in your hummus or on bread for a tasty treat. Roasted garlic hummus is very versatile. You can serve it with fresh veggie sticks like carrots, cucumbers, and bell peppers. Pita bread, toasted or soft, makes a great dipper too. For a fun twist, try pairing it with warm pita chips. Add a sprinkle of sweet paprika and fresh parsley on top for color. This makes your dish look beautiful and tasty. Don't forget to check out the Full Recipe for more details! {{image_4}} You can boost the taste of your roasted garlic hummus with spices and herbs. Try adding paprika for a smoky kick or chili powder for heat. Fresh herbs like cilantro or basil can add a bright touch. A pinch of za'atar brings an earthy flavor, while a dash of black pepper enhances the taste. Mix and match to find your favorite combination! Though chickpeas are classic, other beans and peas work well too. White beans like cannellini add creaminess and a mild taste. Black beans give a rich color and unique flavor. You can even use peas for a sweet twist. Each option brings its own character, so experiment to discover what you love! Roasted garlic hummus shines as a dip, but it can do much more. Spread it on sandwiches or wraps for a flavorful layer. Use it as a base for veggie pizzas or flatbreads. Pair it with crackers or pita chips for a fun snack. You can even dollop it on salads for added creaminess. The options are endless! For the full recipe, check out the detailed steps to make your own roasted garlic hummus. To keep your roasted garlic hummus fresh, place it in an airtight container. Make sure to press a piece of plastic wrap against the hummus before sealing. This helps to keep the air out and maintain its creamy texture. Store it in the fridge for up to one week. Always use a clean spoon when scooping out hummus. This avoids introducing bacteria that can spoil your dip. You can freeze roasted garlic hummus for longer storage. Use a freezer-safe container or a resealable bag. Leave some space at the top, as the hummus may expand when frozen. It can last for about three months in the freezer. To use, thaw it overnight in the fridge before serving. Stir well after thawing to restore its smooth consistency. Homemade hummus can last for about a week when stored correctly in the fridge. If you notice any off smells or changes in color, it’s best to discard it. Always trust your senses. Freshness is key for the best flavor. If you made a big batch, consider freezing a portion for later use. Check the [Full Recipe] for tips on making the perfect hummus. You can easily make roasted garlic hummus vegan. The main ingredients are already plant-based. Just use chickpeas, roasted garlic, olive oil, lemon juice, and seasoning. Ensure your tahini is vegan too. Most brands are, but it’s good to check the label. If you don’t have tahini, don’t worry! You can use sunflower seed butter or almond butter. These will change the flavor a bit, but they still taste great. You can also skip it entirely. Just add a bit more olive oil for creaminess. Check the texture while blending. If the hummus feels hard to mix, it’s too thick. Add water, one tablespoon at a time, until it smooths out. If it’s runny, add more chickpeas or tahini to thicken it. Always taste as you go! For the full recipe and precise steps, check the Full Recipe section. Roasted garlic hummus is simple to make and enjoy. You learned about key ingredients, how to roast garlic, and tips for creamy texture. Variations add excitement to the dish, while proper storage keeps it fresh. This tasty dip fits many diets and pairs well with many foods. Now, it’s time to get creative in the kitchen. Make your version and share it with friends. You’ll love the flavor and fun it brings! Enjoy your hummus journey!](https://goldendishy.com/wp-content/uploads/2025/07/73315b96-5df4-4df6-b272-95a468d12cec-768x768.webp)

![- 2 medium zucchinis, grated - 1 cup feta cheese, crumbled - 1/2 cup all-purpose flour - 1 teaspoon salt - 1/2 teaspoon black pepper - 1/2 teaspoon garlic powder - 1/2 cup fresh dill, chopped - 1/2 cup green onions, finely chopped - 2 large eggs - Olive oil, for frying To make Greek zucchini fritters, you need fresh and simple ingredients. Start with two medium zucchinis. Grate them finely and set them aside. This step is crucial because zucchini holds a lot of water. Next, grab a cup of feta cheese. Crumble it into small pieces to add a salty, creamy punch. You will also need half a cup of all-purpose flour. This helps bind the fritters together. For seasoning, use one teaspoon of salt, half a teaspoon of black pepper, and half a teaspoon of garlic powder. This mixture will give your fritters a nice flavor. Don’t forget the herbs! A half cup of fresh dill and a half cup of finely chopped green onions add freshness. Finally, you need two large eggs to hold everything together. For frying, have olive oil on hand. These ingredients come together to create a dish that is tasty and simple. For the full recipe, check the detailed instructions. First, grate the zucchinis into a large bowl. Sprinkle 1 teaspoon of salt over the grated zucchini. Let it rest for about 10 minutes. This step helps pull out moisture from the zucchini, which is key for great fritters. After 10 minutes, take a clean kitchen towel. Wrap the zucchini and squeeze it gently. Remove as much liquid as you can. This makes the fritters crispier. In another bowl, mix the squeezed zucchini with crumbled feta cheese, chopped dill, and finely chopped green onions. Add the flour, eggs, black pepper, and garlic powder. Stir everything well until you have a smooth batter. Now, heat about 1/4 inch of olive oil in a skillet over medium heat. The oil should be hot enough that a small drop of batter sizzles when added. Using a spoon, drop spoonfuls of the batter into the hot oil. Flatten each fritter slightly with the back of the spoon. Be careful not to overcrowd the pan; fry in batches if needed. Cook for about 3-4 minutes on each side. You want them to be golden brown and crispy. Once done, place the fritters on a plate lined with paper towels to soak up extra oil. Serve them warm. For extra flavor, top with more crumbled feta and a dollop of Greek yogurt or tzatziki sauce. Enjoy your tasty Greek Zucchini Fritters! For the full recipe, check [Full Recipe]. To make great Greek zucchini fritters, start by squeezing out excess moisture from the grated zucchini. After salting, let the zucchini sit for ten minutes. This helps draw out the water. Next, use a clean towel to squeeze the zucchini until it feels dry. If you skip this step, the fritters might turn out soggy. Adjust cooking time for crispiness. Fry the fritters for three to four minutes on each side. If your fritters are not crispy, try increasing the heat slightly. But be careful! Too high a heat can burn them. Garnishing can elevate your fritters. Try crumbled feta cheese on top. Fresh dill adds a nice touch too. A dollop of Greek yogurt or tzatziki sauce pairs perfectly. These add creaminess and flavor. For side dishes, think about serving a light salad. A fresh cucumber salad or a simple tomato salad works well. These sides balance the rich flavors of the fritters. Using the right frying pan is key. A non-stick skillet helps with even cooking. It also makes flipping the fritters easier. For shaping and flipping, have a spatula handy. A spoon works well for dropping the batter into the oil. If you want uniform fritters, use an ice cream scoop. This helps you get the same size every time. For the full recipe, check out the details above. Enjoy your cooking! {{image_4}} You can switch up the cheese in your fritters. Goat cheese adds a tangy flavor that pairs well with zucchini. If you want a milder taste, use mozzarella. Fresh herbs can also change the taste. Adding parsley gives a fresh touch, while mint adds a sweet note. Experiment with both for a unique twist! You can bake your fritters instead of frying them. This method cuts down the oil and keeps them light. Preheat your oven to 400°F (200°C). Place the fritters on a baking sheet and lightly spray them with oil. Bake for around 20 minutes, flipping halfway for an even cook. If you own an air fryer, use it for a crispier finish. Set your air fryer to 375°F (190°C). Cook the fritters in a single layer for about 10 minutes. Shake the basket halfway through to ensure they cook evenly. Serve your fritters on a bed of fresh salad. This adds crunch and freshness to your meal. You can top them with diced tomatoes, cucumber, and a drizzle of olive oil. Pair your fritters with different dipping sauces. Tzatziki is a classic choice, but you can try a spicy yogurt dip or a sweet chili sauce. These sauces will elevate the flavors and make your dish even more enjoyable. For the full recipe, check out the complete guide on Greek Zucchini Fritters! To store your Greek zucchini fritters, first let them cool completely. Place them in an airtight container. This keeps them fresh and tasty. Refrigerate the fritters for up to three days. If you want to keep them longer, freezing is a great option. To reheat your fritters, use an oven or skillet. Preheat your oven to 350°F (175°C). Place the fritters on a baking sheet for about 10 minutes. This will keep them crispy. If you use a skillet, add a bit of olive oil. Heat on medium until they are warm and crispy. Avoid microwaving, as this can make them soggy. You can freeze the fritters before or after cooking. To freeze before cooking, shape the fritters and place them on a baking sheet. Freeze them for about an hour. Then, transfer them to a freezer bag. To freeze after cooking, let them cool completely first. Then, store them in an airtight container. For thawing, place them in the fridge overnight. Reheat them in the oven or skillet for best results. Enjoy your Greek zucchini fritters any time! For the complete recipe, check the Full Recipe. To keep your zucchini fritters from falling apart, you must remove excess moisture. Grate the zucchinis and sprinkle them with salt. Let them rest for about 10 minutes. This helps draw out water. Afterward, use a clean towel to squeeze out the liquid. The drier the zucchini, the better the fritters will hold together. Next, bind the mixture well. Use enough flour and eggs to hold everything together. The flour acts as a glue, while the eggs provide structure. If your batter feels too loose, add a bit more flour until it thickens. Yes, you can make the batter ahead of time. Store it in the fridge for up to two hours. This way, you save time when you are ready to fry. Just remember that fresh batter is best for frying. If you wait too long, the zucchini may release more moisture. Give the batter a quick stir before cooking. Greek zucchini fritters are great with several sides. You can serve them with Greek yogurt or tzatziki sauce. These dips add a cool and creamy contrast. A simple salad with tomatoes and cucumbers pairs well too. For a heartier meal, try serving them with grilled chicken or lamb. To make gluten-free zucchini fritters, swap the all-purpose flour for a gluten-free flour blend. You can also use almond flour or chickpea flour. These options work well and provide a nice flavor. Just keep in mind that different flours absorb moisture differently. You may need to adjust the amount based on your chosen flour. Start with the same amount and tweak as needed for the right batter consistency. For the best results, follow the Full Recipe for guidance. In this article, we explored making delicious Greek zucchini fritters. You learned about key ingredients, preparation steps, and helpful tips. I also shared variations to suit your taste and how to store leftovers. These fritters are easy to make and can be adjusted for different diets. Enjoy the tasty result and impress your family or friends. Happy cooking!](https://goldendishy.com/wp-content/uploads/2025/07/cb7a2661-c5f6-4b7c-b480-ad49d75e704d-768x768.webp)

