Jalapeno Cheddar Cornbread Flavorful and Simple Recipe
. You learned how to make Jalapeno Cheddar Cornbread step by step. This recipe includes a complete ingredient list, tips for substitutions, and ways to adjust spice levels. You also discovered how to achieve the best texture and flavor. Finally, I shared variations, storage info, and answers to common questions. Now, enjoy this tasty cornbread at your next meal. It pairs well with soups or stews and is perfect for sharing. Happy baking!](https://goldendishy.com/wp-content/uploads/2025/06/9d5f618c-dadf-46fc-a447-7ca9d5a4ec71.webp)
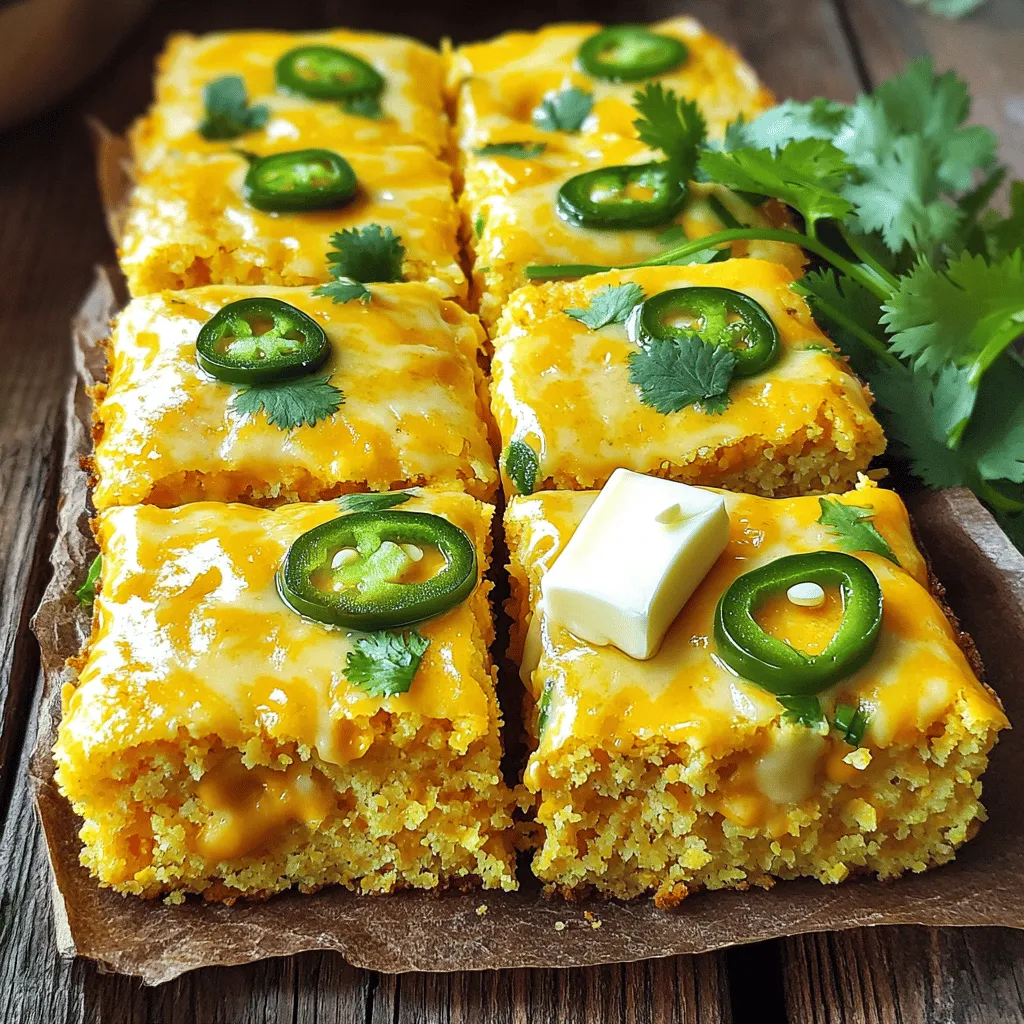
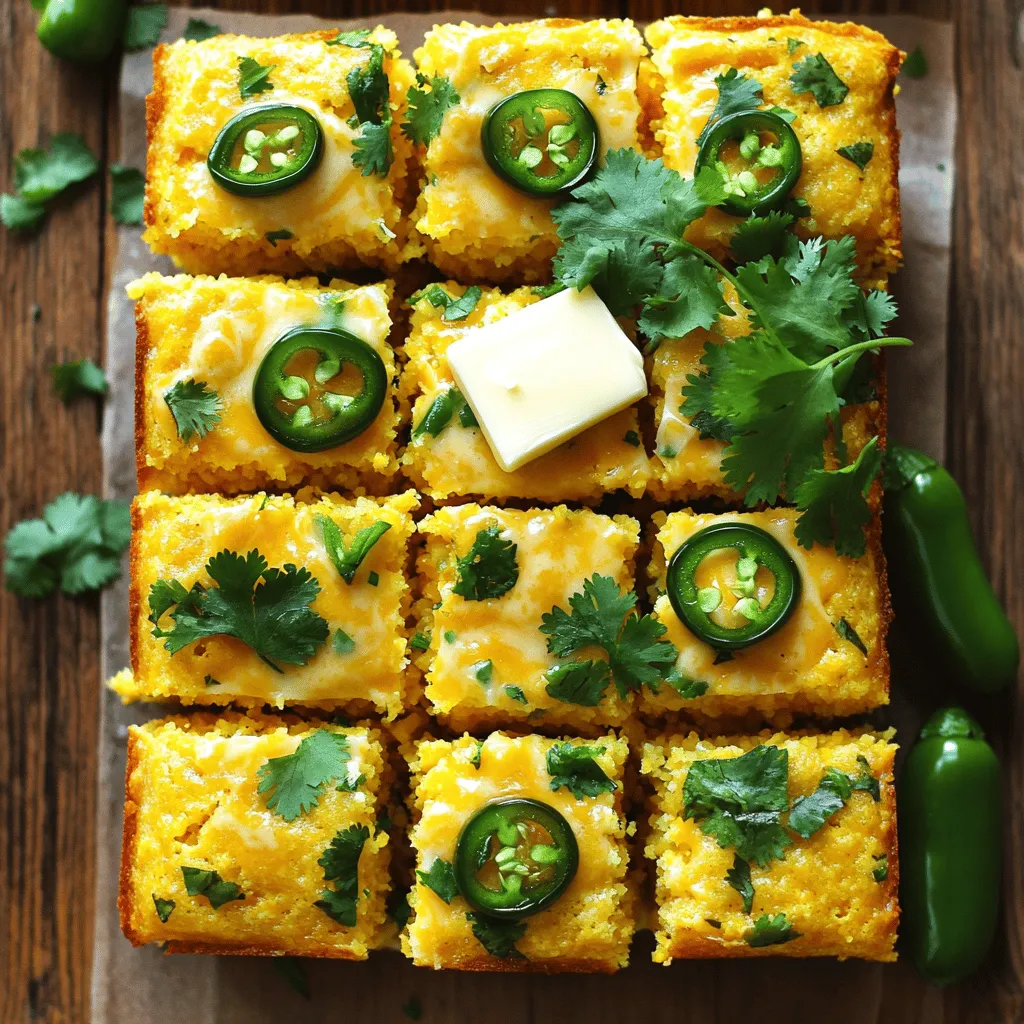
Looking for a tasty twist on classic cornbread? This Jalapeno Cheddar Cornbread is packed with flavor and super easy to make! You’ll love how spicy jalapeños blend with sharp cheddar cheese in this warm, fluffy bread. Whether you’re a fan of bold flavors or just want a comforting side for your meals, this recipe is perfect for you. Let’s dive into the fun of making this delicious treat!
Ingredients
Complete Ingredient List
– 1 cup cornmeal
– 1 cup all-purpose flour
– 1 tablespoon baking powder
– 1/2 teaspoon salt
– 1/4 teaspoon cayenne pepper (optional)
– 1 cup buttermilk
– 2 large eggs
– 1/4 cup unsalted butter, melted
– 1 cup shredded sharp cheddar cheese
– 1-2 fresh jalapeños, seeded and finely diced
– 2 tablespoons honey (optional)
When making jalapeño cheddar cornbread, I love the mix of flavors. The cornmeal gives it a great texture. The cheddar adds a rich taste. Jalapeños bring a nice kick. This simple list covers everything you need.
Ingredient Substitutions
You can switch the all-purpose flour for a gluten-free option. Almond flour or a gluten-free mix works well. For the buttermilk, use almond milk or soy milk with a splash of vinegar. This keeps the recipe creamy without dairy.
Spice Level Adjustments
Jalapeños can vary in heat. For a mild flavor, use a fresh poblano instead. If you want more heat, look for serrano peppers. You can also add spices like cumin or smoked paprika to boost the flavor even more.
Step-by-Step Instructions
Preparation Steps
First, preheat your oven to 400°F (200°C). This step helps the cornbread rise well. Next, get your 8-inch square baking dish ready. You can grease it with butter or line it with parchment paper. This makes it easier to take out the cornbread later.
Mixing Dry Ingredients
In a large bowl, mix the dry ingredients. Combine 1 cup of cornmeal, 1 cup of all-purpose flour, 1 tablespoon of baking powder, 1/2 teaspoon of salt, and 1/4 teaspoon of cayenne pepper if you want some heat. Whisk these together until they are well blended. This ensures an even flavor in your cornbread.
Combining Wet Ingredients
Now, in another bowl, whisk together your wet ingredients. Use 1 cup of buttermilk, 2 large eggs, and 1/4 cup of melted butter. Mix until smooth. If you like a hint of sweetness, add 2 tablespoons of honey and stir until it dissolves. This step brings all the flavors together.
Folding and Baking
Pour the wet mixture into the dry ingredients. Stir gently until just combined. It’s okay if there are some lumps; avoid over-mixing. This keeps your cornbread fluffy. Next, fold in 1 cup of shredded sharp cheddar cheese and 1-2 finely diced jalapeños. Make sure they spread evenly throughout the batter.
Transfer the batter to your prepared baking dish. Use a spatula to smooth the top. Bake in your preheated oven for 20-25 minutes. Watch for a golden brown top. To check if it’s done, insert a toothpick in the center. If it comes out clean, your cornbread is ready. Let it cool for a few minutes before cutting into squares. Enjoy your delicious Jalapeno Cheddar Cornbread!
Tips & Tricks
Achieving Perfect Texture
To make cornbread fluffy, avoid over-mixing. When you mix the wet and dry ingredients, stir gently. A few lumps in the batter are fine. Over-mixing makes the cornbread dense. You want that nice, light texture.
Flavor Enhancement Tips
Use high-quality cheese and fresh ingredients. Sharp cheddar cheese adds depth of flavor. Fresh jalapeños give a bright, spicy kick. I always recommend grating your own cheese for the best taste. Store-bought cheese may not melt as well.
Baking Variations
You can use different baking dishes or sizes. A cast iron skillet adds a crispy edge. Muffin tins create individual servings. Adjust the baking time depending on the dish. Smaller pans may bake faster, while larger pans need more time. Always check for that golden top!

Variations
Additional Ingredients
You can make jalapeño cheddar cornbread even better with some fun extras.
– Adding corn kernels: Toss in a cup of fresh or canned corn. It gives your cornbread a sweet bite and a nice texture.
– Incorporating herbs or spices: Try adding fresh herbs like cilantro or chives. A sprinkle of smoked paprika can also add depth and warmth to the flavor.
Plating and Serving Suggestions
Think about how you serve your cornbread. It can elevate your meal.
– Pairing cornbread with soups and stews: Cornbread goes well with chili or chicken soup. The warm bread soaks up the broth, making each bite delightful.
– Serving with dips or spreads: Try it with honey butter or a spicy salsa. This adds a new layer of flavor, making every bite more exciting.
Dietary Modifications
Want to make this dish fit more diets? Here are some tips.
– Vegan-friendly adaptations for the recipe: Substitute buttermilk with plant milk mixed with vinegar. Use flax eggs instead of regular eggs. This keeps the flavor while making it vegan.
With these variations, you can cater to different tastes and needs while enjoying this delicious cornbread.
Storage Info
Short-term Storage
After making your Jalapeño Cheddar Cornbread, let it cool. Once cooled, wrap the cornbread tightly in plastic wrap. This keeps it fresh for about 3 to 5 days. You can also store it in an airtight container. Place it in the fridge to maintain its flavor and texture. If you want to add a bit of moisture, consider placing a damp paper towel in the container.
Long-term Storage
For long-term storage, freezing is your best friend. Cut the cornbread into squares. Wrap each piece in plastic wrap, then place them in a freezer bag. Remove as much air as you can before sealing. This helps prevent freezer burn. You can keep the cornbread in the freezer for up to 3 months. When you’re ready to eat it, just thaw it overnight in the fridge.
Reheating Tips
To reheat your cornbread, use the oven for the best results. Preheat your oven to 350°F (180°C). Place the cornbread on a baking sheet. For added moisture, cover it with foil. Heat for about 10 to 15 minutes. You can also use the microwave for a quick option. Place a piece of cornbread on a microwave-safe plate. Add a small bowl of water next to it. Heat for 30 seconds to 1 minute. This method helps keep the cornbread soft.
FAQs
How do I know when my cornbread is done?
Your cornbread is done when it is golden brown on top. You can also test with a toothpick. Insert it into the center of the cornbread. If it comes out clean, it’s ready! Another sign is a slight spring when you touch the top.
Can I make cornbread in advance?
Yes, you can make cornbread ahead of time. Bake it and let it cool completely. Then wrap it tightly in plastic wrap or foil. It can stay in the fridge for up to three days. To serve, just reheat it in the oven.
What can I serve with Jalapeno Cheddar Cornbread?
Jalapeno cheddar cornbread pairs well with many dishes. You can serve it with chili, soup, or barbecue. It also goes great with a fresh salad. For drinks, try it with iced tea or a light beer.
You learned how to make Jalapeno Cheddar Cornbread step by step. This recipe includes a complete ingredient list, tips for substitutions, and ways to adjust spice levels. You also discovered how to achieve the best texture and flavor. Finally, I shared variations, storage info, and answers to common questions.
Now, enjoy this tasty cornbread at your next meal. It pairs well with soups or stews and is perfect for sharing. Happy baking!
. You learned how to make Jalapeno Cheddar Cornbread step by step. This recipe includes a complete ingredient list, tips for substitutions, and ways to adjust spice levels. You also discovered how to achieve the best texture and flavor. Finally, I shared variations, storage info, and answers to common questions. Now, enjoy this tasty cornbread at your next meal. It pairs well with soups or stews and is perfect for sharing. Happy baking!](https://goldendishy.com/wp-content/uploads/2025/06/9d5f618c-dadf-46fc-a447-7ca9d5a4ec71-300x300.webp)


![- 1 pre-made pie crust - 2 medium zucchinis, grated - 2 cups fresh spinach, chopped - 1 small onion, finely chopped - 3 large eggs - 1 cup milk I love using a pre-made pie crust for this quiche. It saves time and effort. The zucchinis bring a fresh taste, while the spinach adds color and nutrients. Eggs and milk create a rich, creamy texture that binds everything together. - 1 teaspoon garlic powder - Salt and pepper to taste - 1 tablespoon olive oil Garlic powder gives this dish a warm flavor. I always add salt and pepper to enhance the taste. Olive oil is perfect for cooking the veggies and adds a nice depth of flavor. - 1 cup shredded mozzarella cheese - 1/2 cup grated Parmesan cheese Cheese is key for a tasty quiche. Mozzarella melts beautifully, while Parmesan adds a sharp, salty kick. Together, they create a delightful flavor mix that elevates your dish. Don't forget to check the full recipe for complete details! First, heat olive oil in a skillet over medium heat. Add the finely chopped onion. Sauté it for about 3-4 minutes until it turns soft and clear. Next, add the grated zucchini and chopped spinach. Stir often and cook for about 5 minutes. The veggies should become tender, and any extra water will cook off. I love adding garlic powder, salt, and pepper to boost the flavor. After cooking, take it off the heat and let it cool for a moment. In a large bowl, whisk together the eggs and milk until they blend smoothly. This is where the magic begins! Next, add in the shredded mozzarella and grated Parmesan cheese. Fold them in gently. This mixture will bring richness to your quiche. It’s important that the cheese mixes well but still keeps some texture. Now, pour the vegetable and egg mixture into the prepared pie crust. Spread it out evenly to help it cook well. Place the quiche in your preheated oven. Bake for 30-35 minutes. You’ll know it’s ready when the edges turn golden brown and a toothpick inserted in the center comes out clean. Let it cool for about 10 minutes before slicing. This resting time helps enhance the flavors. You can find the full recipe in the previous section for all these steps! To get the best texture for your quiche, you must control moisture. Zucchini has a lot of water, which can make your quiche soggy. To fix this, grate the zucchini and lightly salt it. Let it sit for 10 minutes, then squeeze out the excess liquid. This step is key to a firm quiche. The cooking time can vary based on your oven. I find that checking it a few minutes early helps. If the edges look golden and a toothpick comes out clean, it's ready! For more flavor, consider adding fresh herbs like thyme or basil. A pinch of red pepper flakes can add a nice kick. You can also play with spices, like paprika or onion powder. Each of these can change the taste in a fun way. Cheese is another way to boost flavor. While mozzarella and Parmesan are great, try using feta or goat cheese for a tangy twist. These types add both creaminess and a bit of zest to the dish. When serving your zucchini spinach quiche, aim for a bright plate. A colorful plate makes a dish look more appealing. Add fresh basil or parsley on top for an eye-catching touch. You can also serve it with a light salad drizzled with citrus vinaigrette. This adds freshness and balance. For a photo-worthy presentation, slice the quiche into neat pieces. Arrange them in a circle on the plate. This simple trick makes your dish look polished and ready for sharing. Don't forget to snap a picture before you dig in! For the complete recipe, check out the [Full Recipe]. {{image_4}} You can switch up the veggies in your quiche. Broccoli, bell peppers, or mushrooms work great. Each veggie brings its own taste and texture. You can also try seasonal additions. In spring, add asparagus, and in fall, use roasted squash. This keeps your quiche fresh and exciting. If you need a gluten-free quiche, use a gluten-free crust. Many stores sell these now, or you can make your own. If you make your crust, use almond flour or coconut flour for a nice texture. You may need to adjust the liquid in the filling. This helps keep the quiche moist and tasty. Making mini quiches is fun and easy. You can use a muffin tin for individual servings. Just pour the mixture into each cup and fill them about three-quarters full. Bake for about 20-25 minutes. Keep an eye on them to avoid burning. These mini quiches are perfect for snacks or brunch. You can even freeze them for later! Check out the Full Recipe for more details. To keep your quiche fresh, store it in an airtight container. This helps keep moisture out. It stays fresh in the fridge for up to three days. If you plan to eat it later, cover it tightly with plastic wrap or foil. You can freeze your quiche before or after baking. If freezing before baking, wrap it well. This way, you can bake it fresh later. For freezing after baking, let it cool completely first. Store it in an airtight container. It can last up to three months in the freezer. When ready to eat, thaw it in the fridge overnight. For the best taste, reheat your quiche in the oven. Set it to 350°F (175°C) and heat for about 15-20 minutes. This keeps the crust crispy. You can also use a microwave for quick heating. However, the crust may not stay as crunchy. Heat slices for about 1-2 minutes. Always check that it's hot in the middle before serving. You can tell the quiche is done by looking for a few key signs. The edges should be golden brown, and the center should be firm. If you gently shake the quiche, it should not jiggle. Another great way to check is with a toothpick. Insert it into the center of the quiche. If it comes out clean, your quiche is ready to enjoy. Yes, you can use frozen spinach in this recipe. However, it’s important to make a few adjustments. First, thaw the spinach completely and drain any excess water. This helps prevent the quiche from becoming too watery. You may also want to chop the spinach further after thawing. This ensures even distribution in your quiche. Zucchini spinach quiche pairs well with many side dishes. A simple green salad with a light vinaigrette works great. You can also serve it with roasted vegetables for added flavor. If you want something heartier, serve it alongside a bowl of creamy tomato soup. This combination makes for a balanced and tasty meal. This blog post covers how to make a tasty zucchini and spinach quiche. You learned about the main ingredients, like pre-made crust and eggs, plus the best seasonings. I shared step-by-step instructions for preparing and baking. You also got tips for perfecting texture and ideas for variations. Making this dish can be easy and fun. Enjoy experimenting with flavors and ingredients. Whether you serve it for breakfast or dinner, this quiche will impress. Get cooking and enjoy your delicious creation!](https://goldendishy.com/wp-content/uploads/2025/06/2284a9f2-dfec-450d-ba9a-23981f99d5f6-768x768.webp)