Jalapeño Cheddar Cornbread Flavorful and Easy Recipe

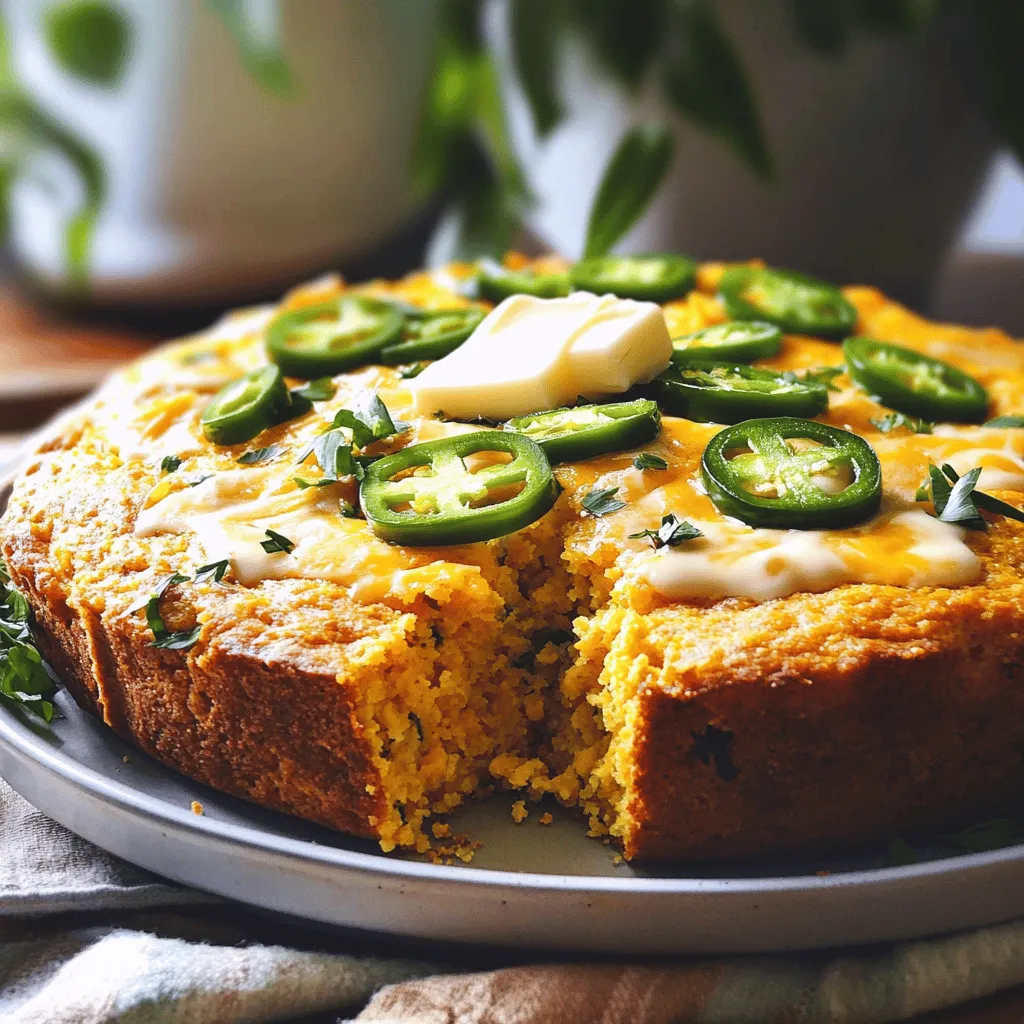
Are you ready to spice up your bread game? My Jalapeño Cheddar Cornbread recipe is packed with flavor and easy to make. Imagine warm, fluffy cornbread with a kick, perfect for any meal. You can enjoy it on its own or pair it with soups and chili. Let’s dive into the simple steps and ingredients that will have you baking like a pro in no time!
Ingredients
Dry Ingredients
– 1 cup cornmeal
– 1 cup all-purpose flour
– 1 tablespoon baking powder
– 1/2 teaspoon salt
– 1/4 teaspoon baking soda
Wet Ingredients
– 1 cup buttermilk (or milk with vinegar)
– 1/4 cup unsalted butter, melted
– 2 large eggs
Flavor Enhancers
– 1 cup shredded sharp cheddar cheese
– 2-3 jalapeños, finely chopped (remove seeds for milder flavor)
– 1/4 cup honey (optional)
This mix of ingredients makes the cornbread rich and tasty. You start with the dry items. Cornmeal gives a nice texture. The all-purpose flour helps it rise. The baking powder is key for fluffiness. Salt enhances all the flavors, while baking soda balances the acidity of buttermilk.
Next, we have the wet ingredients. Buttermilk adds moisture and tang. If you can’t find buttermilk, you can mix milk with a bit of vinegar. The melted butter adds richness. Eggs bind everything together, making the cornbread soft.
Now for the flavor boosters! Sharp cheddar cheese gives a bold taste. Jalapeños add a kick. If you want less heat, just remove the seeds. Honey is optional, but it adds a touch of sweetness that balances the spice.
Step-by-Step Instructions
Preparation Steps
– Preheat the Oven: Set to 400°F (200°C). This step ensures even cooking.
– Prepare Baking Dish: Grease an 8×8-inch dish or cast-iron skillet. A well-greased pan helps prevent sticking.
Mixing Dry Ingredients
– Combine Ingredients: In a large bowl, mix cornmeal, flour, baking powder, salt, and baking soda. Use a whisk to blend them well. This mix forms the base of your cornbread.
Mixing Wet Ingredients
– Whisk Together: In another bowl, whisk buttermilk, melted butter, and eggs. If you like sweetness, add honey now and mix. This adds moisture and flavor.
Combine and Prepare Batter
– Mix Together: Pour the wet ingredients into the bowl with dry ingredients. Stir gently until just combined; some lumps are okay. Overmixing could make your cornbread dense.
– Add Cheese and Jalapeños: Carefully fold in cheese and jalapeños. This step adds delicious flavor and spice.
Baking the Cornbread
– Pour Batter: Transfer the mixture into the greased dish. Use a spatula to smooth the top. This helps it bake evenly.
– Bake: Place in the oven and bake for 20-25 minutes. It’s ready when the top is golden brown and a toothpick comes out clean.
Cooling Instructions
– Cool Before Slicing: Let the cornbread cool for about 10 minutes. This makes slicing easier and lets the flavors settle. Enjoy your warm, spicy treat!
Tips & Tricks
Perfecting the Texture
To get light and fluffy cornbread, avoid overmixing. When you combine the wet and dry ingredients, mix just until you see no dry flour. A few lumps are okay. Overmixing makes the cornbread dense and tough. You want it to rise nicely and stay soft.
Flavor Enhancement Tips
You can switch up the cheese for more flavor. Try using pepper jack cheese for a spicy kick. If you prefer less heat, adjust the jalapeño quantity. Start with one jalapeño and taste the batter. You can always add more if you want extra spice. This way, you control the heat level in your cornbread.
Serving Suggestions
Serve the cornbread warm for the best taste. A pat of butter on top makes it rich and creamy. You can also add toppings like honey or jam for sweetness. This adds a nice contrast to the spicy jalapeños. Enjoy your cornbread as a side with chili or soup for a great meal.

Variations
Ingredient Substitutions
You can modify this recipe to fit your needs. For a gluten-free option, use a gluten-free flour blend. This will keep the texture nice while making it safe for those with gluten issues. If you’re looking for a vegan option, you can substitute the eggs with flaxseed meal mixed with water. Replace buttermilk with almond milk mixed with a bit of vinegar. These swaps keep the cornbread tasty and friendly for various diets.
Additional Flavor Ideas
Want to boost the flavor? Add corn kernels to the batter for a sweet crunch. You might also like to include chopped herbs like cilantro or green onions. These herbs add freshness to each bite. Feel free to experiment with flavors that you love.
Creating a Tex-Mex Twist
For a heartier version, mix in cooked chorizo or crispy bacon. This adds a savory kick and extra protein to your cornbread. The rich flavors of these meats pair well with the cheese and jalapeños. You can also try adding a blend of spices, like cumin or smoked paprika, for even more depth.
Storage Info
Short-Term Storage
You can store leftover jalapeño cheddar cornbread in an airtight container. Keep it at room temperature for up to three days. This way, it stays fresh and ready to enjoy.
Long-Term Storage
For longer storage, you can refrigerate the cornbread. It lasts up to a week in the fridge. If you want to keep it even longer, freeze the cornbread. Wrap it well in plastic wrap or foil before placing it in a freezer bag. This method ensures it stays tasty for up to three months.
Reheating Tips
When you’re ready to enjoy your cornbread again, reheat it for the best flavor. You can use the oven or microwave. For the oven, set it to 350°F (175°C) and heat for about 10-15 minutes. If using the microwave, heat each slice for about 20-30 seconds. This way, your cornbread stays warm and delicious.
FAQs
What can I serve with Jalapeño Cheddar Cornbread?
You can serve this cornbread with many dishes. Best pairings include chili, soups, or grilled meats. The cornbread’s spice and cheese make it a great side. It balances well with savory flavors.
Can I make this cornbread ahead of time?
Yes, you can make this cornbread ahead of time. Bake it, then cool it completely. Store it in an airtight container. It stays fresh for a few days. You can also freeze it for longer storage. Just reheat it when you’re ready to serve.
Is it possible to make this recipe spicier?
Absolutely! You can make this recipe spicier. Add more jalapeños to the batter. You can also use spicier peppers, like serranos. This will enhance the heat without losing flavor. Adjust it to your taste for a fun twist.
You now have a simple and tasty cornbread recipe. We explored dry and wet ingredients, and how to mix and bake them. Don’t forget to try different flavors and toppings to make your cornbread unique.
Whether you want it sweet or spicy, this recipe is flexible. Enjoy it fresh or store some for later. Keep experimenting to find what you love. Happy baking!


![- 2 boneless, skinless chicken breasts - 8 oz fettuccine pasta - 2 cups fresh spinach, roughly chopped - 1 cup heavy cream - 1 cup finely grated Parmesan cheese - 2 tablespoons olive oil - 2 cloves garlic, minced - Salt and freshly ground black pepper, to taste - Fresh basil leaves, for garnish (optional) - Red pepper flakes, for a spicy kick (optional) When I cook Chicken and Spinach Alfredo, I gather these key ingredients first. The chicken breasts are a must because they add protein and flavor. I prefer fettuccine pasta for its wide shape, which holds the creamy sauce well. Fresh spinach adds a pop of green and nutrients, making the dish feel lighter. Next, I grab heavy cream. It’s the star of the sauce, bringing that rich, smooth texture. Of course, Parmesan cheese can't be skipped. It gives depth and a savory taste that blends perfectly with the cream. In the additional ingredients, olive oil is essential for cooking. It adds a nice flavor base. Minced garlic brings a wonderful aroma and a bit of zing. I always keep salt and pepper handy to season the dish just right. Lastly, I suggest garnishing with fresh basil for that extra flair. A sprinkle of red pepper flakes can bring heat if you like a spicy bite. For the full list of ingredients, check out the Full Recipe. First, I boil a large pot of salted water. Once it bubbles, I add the fettuccine. I cook it until it's al dente, which takes about 8-10 minutes. After cooking, I drain the pasta but keep a small cup of the pasta water for later. While the pasta cooks, I heat olive oil in a skillet over medium heat. I take the chicken breasts and season them with salt and pepper on both sides. I place the chicken in the hot skillet and cook for about 6-7 minutes on each side. When they turn golden brown and are fully cooked, I remove them from the skillet. I let them rest for a few minutes before slicing them into thin strips. In the same skillet, I lower the heat and add minced garlic. I sauté it for about 30 seconds until it smells amazing. Then, I slowly pour in heavy cream while stirring. I let it simmer gently, making sure it doesn’t boil. Next, I whisk in grated Parmesan cheese until the sauce is smooth and creamy. I add the chopped spinach and let it cook for 1-2 minutes until it wilts. Now, I carefully fold the cooked fettuccine into the creamy sauce. I mix it well so each strand is coated. If the sauce is too thick, I add a bit of the reserved pasta water to get the right consistency. Finally, I arrange the sliced chicken on top of the pasta. If I want a spicy touch, I sprinkle some red pepper flakes over everything. For the full recipe, check out the earlier section. - Adjusting seasoning: Start by tasting your sauce as you cook. Add more salt or pepper if needed. A pinch of nutmeg can also enhance the flavor. This small touch makes a big difference. - Whisking technique for smooth sauce: When you add the cream and cheese, whisk constantly. This helps to blend everything smoothly. It prevents lumps and ensures a creamy texture. - Presentation tips: Serve the Chicken and Spinach Alfredo in shallow bowls. Drizzle extra sauce on top for a rich look. Finish with freshly grated Parmesan and a basil sprig. This adds color and makes the dish pop. - Best accompaniments: Garlic bread or a fresh salad pairs perfectly. The crunch of the salad balances the creaminess of the dish. A glass of white wine complements the flavors well too. - Multitasking during prep: While the pasta cooks, focus on the chicken. Season it and cook it in the same skillet. This saves time and adds flavor to the sauce. Always keep an eye on the pasta so it doesn’t overcook. By using these tips, you can make your Chicken and Spinach Alfredo even better. Each step adds to the dish's overall experience, making it truly enjoyable. Enjoy the process and get creative! {{image_4}} You can switch out the chicken for other proteins. Shrimp works great in this dish. It adds a nice flavor and cooks quickly. Tofu is a good option for a vegetarian meal. Just make sure to season it well before cooking. For pasta, fettuccine is classic, but you can try penne or whole wheat. Penne holds the sauce well due to its shape. Whole wheat adds a nutty flavor and more fiber. Want to boost nutrition? Add seasonal vegetables. Broccoli brings crunch and color. You can steam it lightly before adding. Bell peppers add sweetness and vibrancy. Slice them thinly to mix in easily. Feel free to experiment! Seasonal vegetables can change the dish each time. Enhancing flavor is simple. You can add herbs like Italian seasoning for a savory kick. A sprinkle of lemon zest brightens the dish and adds freshness. For a bit of heat, red pepper flakes are great. Just a pinch goes a long way. These variations keep your Chicken and Spinach Alfredo fun and fresh. Check out the Full Recipe to get started! After you enjoy your Chicken and Spinach Alfredo, store any leftovers in the fridge. Use an airtight container to keep it fresh. You can keep it for about 3 to 4 days. To reheat, put the pasta in a pan over low heat. Add a splash of water or cream to help it warm evenly. Stir often to keep it creamy and avoid burning. If you want to keep it longer, you can freeze Chicken and Spinach Alfredo. Place it in a freezer-safe container or bag. Make sure to remove as much air as possible. It can last in the freezer for up to 2 months. When you are ready to eat it, take it out and thaw it in the fridge overnight. To reheat, warm it in a pan over low heat, adding a bit of water or cream to restore its creaminess. For the complete recipe, check the [Full Recipe]. Chicken and Spinach Alfredo lasts about 3 to 4 days in the fridge. Store it in an airtight container to keep it fresh. Make sure to cool it down before placing it in the fridge. This helps prevent condensation, which can make the dish soggy. Yes, you can make this recipe ahead of time. Cook the pasta and chicken in advance. Store them separately from the sauce. When you’re ready to eat, just heat everything together. This keeps the pasta from getting mushy. For the best taste, try to eat it within a few days. You can use half-and-half for a lighter option. If you want a dairy-free choice, try coconut cream or cashew cream. Both options give a nice creamy texture. You may need to adjust the seasonings to match your taste. Yes, you can make this dish gluten-free. Use gluten-free pasta such as rice or corn pasta. For the sauce, just check the labels on your cream and cheese. Most are gluten-free, but it’s good to be sure. This way, everyone can enjoy your Chicken and Spinach Alfredo. For the full recipe, check the details above! This blog post covered the key ingredients and steps for making Chicken and Spinach Alfredo. We discussed how to prepare the pasta, cook the chicken, and create a creamy sauce. Plus, I shared tips for enhancing flavors and serving. Remember, you can mix it up with different proteins and veggies. Also, I provided storage advice to keep your meal fresh. Embrace your creativity in the kitchen. Enjoy a tasty meal and share it with friends or family!](https://goldendishy.com/wp-content/uploads/2025/06/ee4d0533-23fd-4fc4-b715-1820a1e3e494-768x768.webp)

![- 12 oz fettuccine or pappardelle pasta - 2 cups butternut squash, peeled and cubed - 1 tablespoon olive oil The base of this dish is fettuccine or pappardelle pasta. I love these shapes as they hold the creamy sauce well. You will also need fresh butternut squash. It gives the dish a warm color and sweet flavor. Using olive oil helps with roasting and adds richness to the pasta. - 1 small onion, diced - 2 cloves garlic, minced - 1 teaspoon freshly grated nutmeg Onions and garlic add depth to the sauce. Dicing the onion makes it cook evenly. Minced garlic gives a punch of flavor. Nutmeg brings warmth and a hint of spice, making the dish cozy and inviting. - 1 cup vegetable broth - 1 cup coconut milk (or heavy cream for a non-vegan option) - ½ cup grated Parmesan cheese (optional) For the sauce, you need vegetable broth for a savory base. Coconut milk adds creaminess and a hint of sweetness. If you prefer, heavy cream works too. Adding Parmesan cheese can enhance the flavor, but it's optional. - Salt and freshly cracked pepper to taste - Fresh sage leaves for garnish Season with salt and cracked pepper to bring everything together. Fresh sage leaves add a lovely touch. They not only look nice but also add an aromatic flavor that complements the dish well. These ingredients create a lovely balance of flavors in the creamy butternut squash pasta. For the full recipe, check out the detailed instructions to make this delicious meal. - Preheat your oven to 400°F (200°C). - Toss the cubed butternut squash in olive oil, salt, and pepper. - Spread the squash on a baking sheet. Roast for 20-25 minutes. The squash should be tender and have a light caramel color. - Bring a large pot of salted water to a boil. - Add the pasta and cook it as per package instructions. - Before draining, reserve 1 cup of the pasta water. This helps adjust your sauce later. - Heat olive oil in a large skillet over medium heat. - Add diced onion and sauté until soft, about 5 minutes. - Stir in minced garlic and cook for about 1 minute. - Blend the roasted squash with the sautéed onion, garlic, vegetable broth, and coconut milk. Use an immersion blender or a regular blender. - Return the blended sauce to the skillet and heat on low. - Add the cooked pasta and gradually mix in the reserved pasta water. - Stir well until the pasta is coated with the sauce. - If you like, stir in the Parmesan cheese. - Taste and adjust seasoning with salt and pepper as needed. - Plate the pasta in shallow bowls for a nice look. - Garnish with fresh sage leaves and drizzle a little olive oil on top. For a detailed guide, check out the Full Recipe. Enjoy your creamy butternut squash pasta! To get a creamy consistency, blend the roasted butternut squash well. You want it smooth. Use an immersion blender for easy mixing. If it’s too thick, add a splash of pasta water. This helps the sauce cling to the noodles. Want to add more flavor? Try spices like cinnamon or a pinch of chili powder. Fresh herbs, such as thyme or rosemary, can boost taste too. You can also add veggies like spinach or kale for added nutrition. They cook quickly and blend well with the sauce. Pair creamy butternut squash pasta with a simple salad. A mix of greens with a light vinaigrette works well. For drinks, a glass of white wine like Sauvignon Blanc complements the dish nicely. If you prefer non-alcoholic options, try sparkling water with a slice of lemon. These sides enhance the meal and make it even more enjoyable. For the full recipe, check out [Full Recipe]. {{image_4}} You can easily adjust creamy butternut squash pasta to fit different diets. For a vegan option, swap heavy cream with coconut milk and skip the cheese. This change still gives you a creamy sauce that tastes great. If you need gluten-free pasta, use rice or corn-based noodles. These options keep the dish light and tasty. Experimenting with different ingredients can make this dish exciting. Instead of butternut squash, try using acorn or delicata squash. Each type has its unique flavor and texture. For cheese, you can use feta for a tangy twist or goat cheese for a creamy finish. These swaps let you create new flavor combinations that keep things fresh. To make this dish more seasonal, add roasted vegetables like Brussels sprouts or carrots. This not only enhances the flavor but also adds color. Making creamy butternut squash pasta in fall is perfect. You can enjoy the warmth of the season with every bite. Try using spices like cinnamon or cloves for a cozy feel. For the full recipe, check out the complete guide and enjoy the rich flavors! To store leftover creamy butternut squash pasta, let it cool first. Then, place it in an airtight container. Glass or BPA-free plastic containers work best. Make sure to seal them tightly to keep the air out. This helps keep the pasta fresh and tasty. Store the container in the fridge for up to four days. Yes, you can freeze this dish! To do this, use a freezer-safe container. Leave some space at the top for expansion. It is best to freeze the pasta without the cheese added. This helps keep the texture right. When you are ready to eat, move the container to the fridge to thaw overnight. To reheat, use a skillet over low heat. Add a splash of vegetable broth or water to help it warm up evenly. In the fridge, creamy butternut squash pasta lasts for about four days. After that, the taste and quality may drop. Always check for signs of spoilage. If the pasta smells sour or has a strange texture, it’s best to throw it away. Enjoy your creamy butternut squash pasta fresh! For the full recipe, visit [Full Recipe]. It takes about 40 minutes to make creamy butternut squash pasta. The prep time is 10 minutes. Cooking the dish takes about 30 minutes. You will spend 20-25 minutes roasting the squash. Boiling the pasta adds another 10-12 minutes. This dish is quick and easy for a weeknight meal! Yes, you can use many types of pasta. Fettuccine and pappardelle work well for this sauce. You can also try penne or rigatoni for a fun twist. Each shape holds the sauce differently, so feel free to experiment! Absolutely! To make it nut-free, use coconut milk instead of cream. If you want a non-vegan option, use heavy cream instead. You can skip any nuts in the garnish. This keeps the dish creamy and delicious without nuts. You can serve this dish with many sides. A crisp green salad pairs well. Try a side of garlic bread for extra comfort. For dessert, pumpkin pie or apple crisp can be great choices. These options enhance the cozy vibe of the meal. To reheat, use a skillet over low heat. Add a splash of water or broth to the pasta. This helps keep the sauce creamy. Stir until heated through. You can also use the microwave, but stir halfway for even heating. Enjoy your leftovers just as much! This creamy butternut squash pasta combines hearty flavors and texture. We roasted the squash and blended it with garlic and onion to create a rich sauce. You learned how to make it creamy, adjust seasoning, and even swap ingredients. In the end, this dish is versatile and perfect for any meal. Enjoy experimenting with flavors and sharing this delightful recipe with friends and family.](https://goldendishy.com/wp-content/uploads/2025/07/000431ad-92db-4f90-88d6-bb841745a08c-768x768.webp)
![- 1 can (15 oz) black beans, drained and rinsed - 1/2 cup cooked quinoa, cooled - 1/2 cup breadcrumbs (gluten-free option available) - 1 small red onion, finely diced - 2 cloves garlic, minced - 1 small jalapeño, minced (seeds removed for less heat) - 1 tablespoon chili powder - 1 teaspoon ground cumin - 1/2 teaspoon smoked paprika - Sea salt and black pepper, to taste - 2 tablespoons fresh cilantro, finely chopped - 1 large egg (or for a vegan option, mix 1 tablespoon ground flaxseed with 2.5 tablespoons water) - Olive oil for frying To make these spicy black bean burgers, choose fresh ingredients when you can. Fresh veggies add great flavor and crunch. However, pantry staples like canned black beans and quinoa work well too. When picking black beans, look for those with a firm texture. Check the can for any damage. Good beans should have a clean label with no added preservatives. For a gluten-free option, look for gluten-free breadcrumbs at your store. They are easy to find and useful in many dishes. You can also use oats or crushed corn chips if needed. This recipe is not just tasty but also easy to prepare. It allows you to explore new flavors while making a healthy meal. For the full recipe, check the instructions provided above. 1. Mashing black beans for ideal texture: Start with a large bowl. Use a fork or potato masher to mash the black beans. Aim for a mix of smooth and chunky. This gives your burger a great texture. 2. Mixing all ingredients thoroughly: After mashing, add the cooked quinoa, breadcrumbs, diced onion, minced garlic, chopped jalapeño, chili powder, cumin, smoked paprika, salt, pepper, and cilantro. Mix everything well. You want each bite to have a burst of flavor. 3. Tips for shaping patties consistently: To shape patties, wet your hands slightly. This helps the mixture stick less. Form about four to six patties, depending on your size preference. Make them even in thickness for even cooking. 1. Heating the skillet correctly: Pour a good drizzle of olive oil into a non-stick skillet. Heat it on medium. Wait until the oil shimmers before adding patties. This step is key for crispiness. 2. Cooking times for achieving crispy patties: Cook each patty for 5 to 6 minutes. Check for a golden brown color before flipping. This ensures a nice crust forms. 3. How to avoid breakage while flipping: Use a spatula to gently lift each patty. Flip them carefully to keep them intact. If they feel too soft, let them cook a bit longer. To get the right texture, add ingredients in the right order. Start with the black beans. Mash them well, but leave some chunks. This gives your burger a nice bite. Next, mix in the quinoa and breadcrumbs. These help bind your burger. If you want a firmer burger, add more breadcrumbs. For a softer burger, reduce them. Use olive oil for frying. It adds great flavor and helps the patties crisp up nicely. Spice up your burgers with extra spices. Consider adding cayenne for heat or oregano for earthiness. You can make a homemade spicy mayo. Mix mayo with hot sauce and lime juice. This makes a great dip too! Pair your burgers with tasty sides. Sweet potato fries or a fresh salad work well. These add color and flavor to your meal. For the full recipe, check out [Full Recipe]. {{image_4}} You can easily change this recipe to suit your taste. Here are a few ideas: - Different Beans or Grains: If you want a twist, try using kidney beans or chickpeas. You can also swap quinoa for brown rice or oats. Each option brings a unique flavor and texture. - Adding Cheese: For a creamy touch, mix in some cheese. Cheddar or pepper jack adds great flavor. If you prefer a vegan option, use vegan cheese or nutritional yeast. Both will give a cheesy taste without dairy. - Adjusting Spice Levels: Want it milder? Skip the jalapeño or use less chili powder. If you love heat, double the spices or add hot sauce. Make it just right for you. Take your spicy black bean burgers to the next level with these fun ideas: - Unique Toppings: Try avocado slices, pickled onions, or spicy slaw. Fresh herbs like cilantro or basil add a bright touch too. Experiment and find your favorite combo! - Suggested Sides: Pair your burgers with sweet potato fries, a crisp salad, or coleslaw. These sides add crunch and flavor to your meal. - Creative Presentation: Stack your burger high with colorful veggies. Serve it on a wooden board for a rustic look. Use fun plates to make your dish pop. Your guests will love it! For the full recipe, check out the [Full Recipe]. After enjoying your spicy black bean burgers, store leftovers in the fridge. Place cooked patties in an airtight container. They stay fresh for about three to four days. For uncooked patties, wrap them tightly in plastic wrap or place them in a freezer-safe bag. This way, you can freeze them for up to three months. To reheat, heat a skillet over medium heat. Add a little olive oil and cook the patties for about five minutes on each side. This will keep them crispy. You can also use an oven. Preheat it to 350°F (175°C) and bake for about 10-15 minutes. Cooked spicy black bean burgers last for up to four days in the fridge. If you freeze them, they can last for about three months. Look for signs of spoilage, like an off smell or a change in color. If the burgers feel slimy or dry, it's best to throw them away. Always trust your senses to keep your food safe! Can I make these burgers ahead of time? Yes, you can make these spicy black bean burgers ahead of time. Shape the patties and store them in the fridge for up to a day. This saves time on busy nights. You can also freeze them for up to three months. Just make sure to separate them with parchment paper. Are spicy black bean burgers gluten-free? Yes, they can be gluten-free! Use gluten-free breadcrumbs instead of regular ones. Many brands offer tasty options that work well in this recipe. Always check the label for hidden gluten. What can I use as a binder if I can’t use eggs? If you can’t use eggs, try a flax egg. Mix 1 tablespoon of ground flaxseed with 2.5 tablespoons of water. Let it sit for about five minutes until it thickens. This works great to hold the burger together. How can I make these burgers spicier? To add more heat, include extra jalapeños or use a spicier pepper like serrano. You can also add hot sauce or cayenne pepper to the mixture. Experiment to find your perfect spice level! Can I cook these on a grill instead? Absolutely! Grilling adds a nice smoky flavor. Preheat your grill and lightly oil the grates. Cook the patties for about 5-6 minutes on each side, just like in a skillet. What are the best buns to use for black bean burgers? I recommend whole wheat or brioche buns for great flavor. Lettuce wraps are an option too for a low-carb meal. Choose what fits your taste and diet best! Tips for meal prepping these burgers for the week. Make a large batch of patties and store them in the fridge or freezer. You can reheat them quickly for lunch or dinner. Pair with fresh toppings for a nice meal. Having these ready to go makes weeknight cooking easier! You learned how to make delicious black bean burgers. We covered key ingredients, step-by-step instructions, and great tips. Remember to choose fresh ingredients for the best flavor. Mix your beans well to get the right texture. Don’t forget to try different variations and toppings to suit your taste. Proper storage will help you enjoy leftovers later. With these tips, you can impress anyone at your next meal. Enjoy creating your perfect black bean burger!](https://goldendishy.com/wp-content/uploads/2025/06/68a5a06a-1097-44cf-8076-380ecc54e2d9-768x768.webp)