Instant Pot Teriyaki Beef Flavorful and Easy Recipe

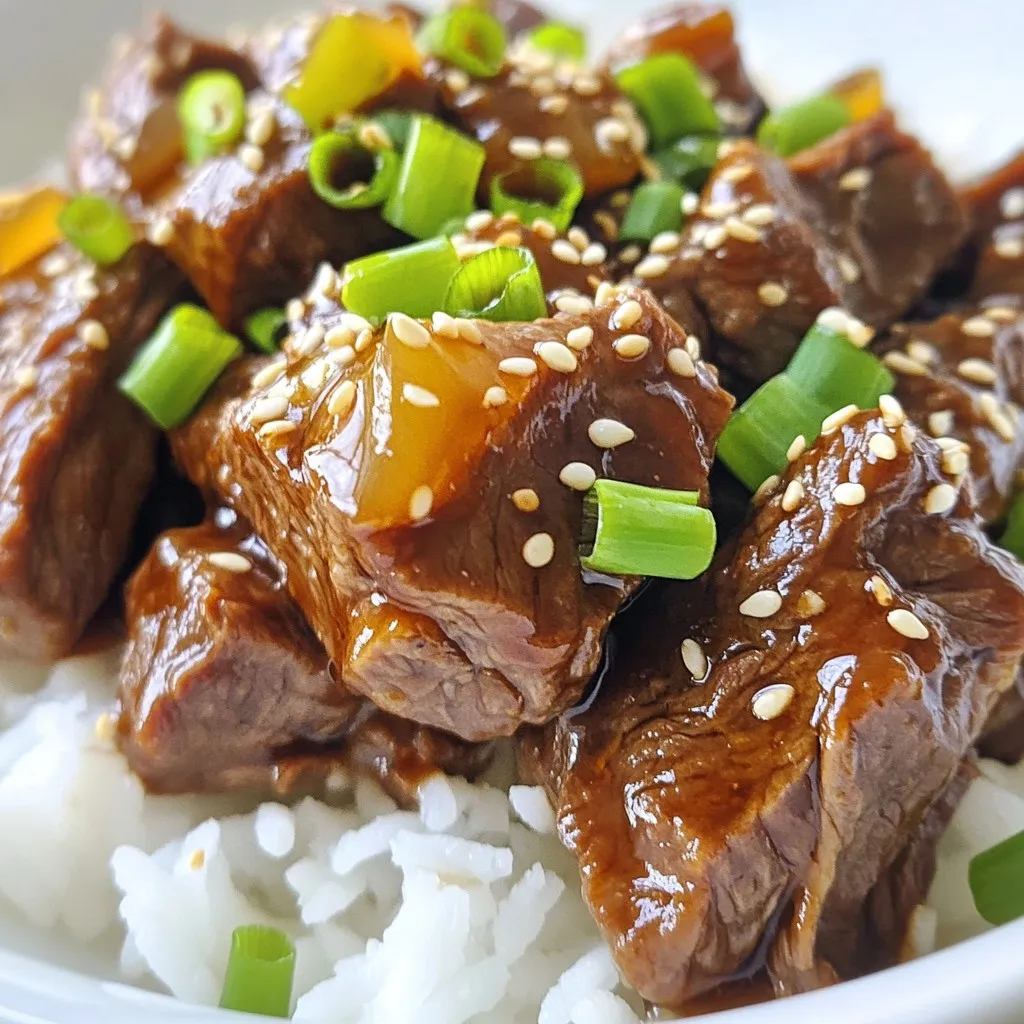
If you’re craving a dish that’s packed with flavor and super easy to make, you’ve come to the right place. My Instant Pot Teriyaki Beef recipe combines tender beef with a sweet and savory sauce that you’ll love. With just a few simple ingredients, you’ll have a mouthwatering meal ready in no time. Let’s dive into how to create this delicious dish that’s perfect for any weeknight!
Why I Love This Recipe
- Tender and Flavorful: This Instant Pot teriyaki beef becomes incredibly tender, allowing the flavors of the marinade to infuse each piece of meat beautifully.
- Quick and Easy: The Instant Pot significantly reduces cooking time, making this a convenient option for busy weeknights without sacrificing flavor.
- Versatile Serving Options: It pairs wonderfully with rice or noodles, giving you flexibility in how you present this dish for different occasions.
- Beautiful Presentation: With garnishes like green onions and sesame seeds, this dish not only tastes great but also looks stunning on the table.
Ingredients
Main Ingredients
– 1.5 pounds beef chuck roast
– 1 cup low-sodium soy sauce
– 1/2 cup brown sugar
– 1/4 cup rice vinegar
– 2 tablespoons sesame oil
Aromatics and Garnishes
– 3 cloves garlic, minced
– 1 tablespoon fresh ginger, grated
– 1 green onion, sliced (for garnish)
– Sesame seeds (for garnish)
Cooking Essentials
– 1 cup beef broth
– 2 tablespoons cornstarch
– 2 tablespoons cold water
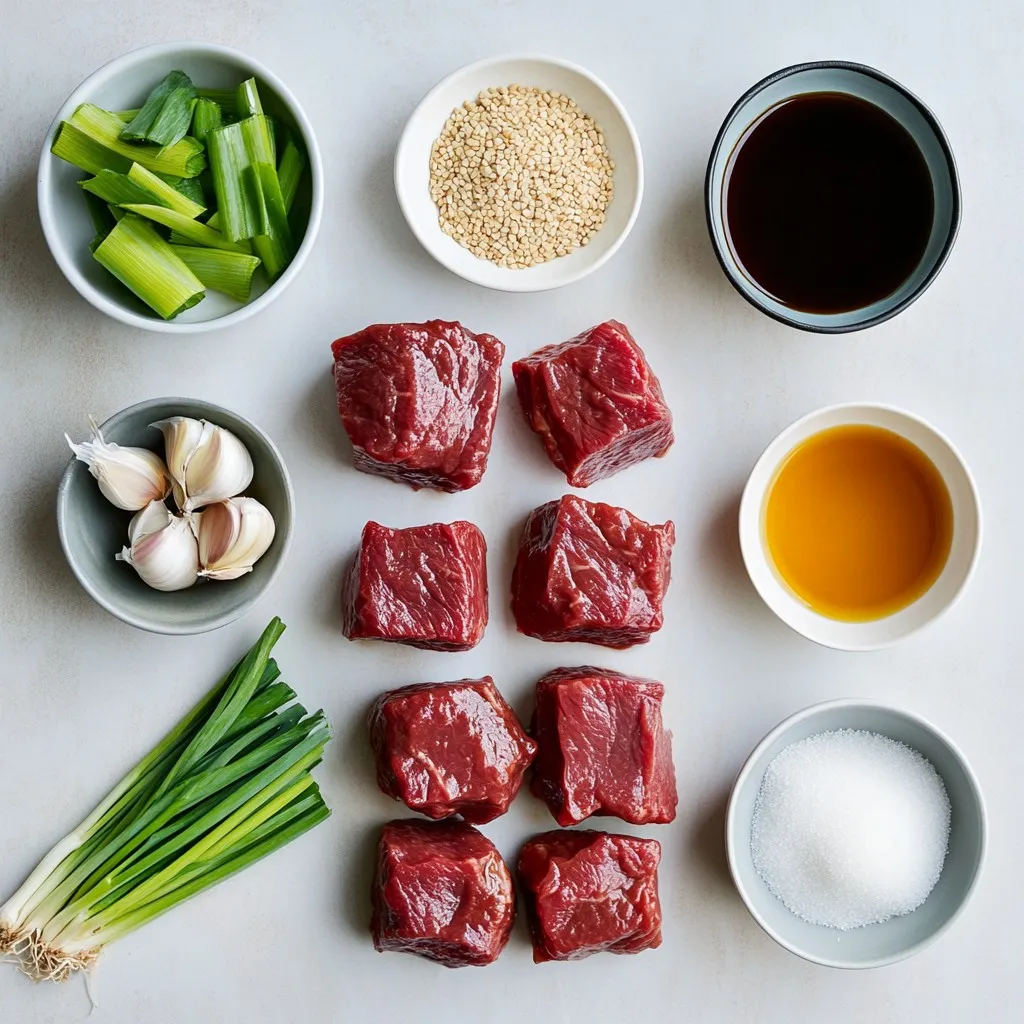
The main ingredients for this dish are simple but full of flavor. I use beef chuck roast because it becomes tender and juicy when cooked. The soy sauce gives a deep umami taste, while brown sugar adds a sweet touch. Rice vinegar brightens the sauce, and sesame oil gives it richness.
Aromatics make this dish special. Fresh garlic and ginger add warmth and depth. I love to top it with sliced green onions and sesame seeds for a nice crunch.
For cooking, beef broth helps create a rich base. Cornstarch thickens the sauce to make it sticky. Cold water mixes with cornstarch for a smooth slurry. This combination makes the dish hearty and satisfying.
Gather these ingredients, and you’re ready to create a delicious meal!

Step-by-Step Instructions
Preparation Steps
Start by patting the beef dry with paper towels. This step is key. It helps the beef sear nicely. Then, season the beef with salt and pepper on all sides. This will boost the flavor and make it taste great. Next, set your Instant Pot to Sauté mode. Let it heat up for a minute. This will get the oil nice and hot.
Cooking the Beef
Now, it’s time to brown the beef cubes. Add the beef in batches to the pot. Brown each batch for 3 to 4 minutes. You want all sides to get a nice crust. Once done, remove the beef and set it aside on a plate. In the same pot, add the minced garlic and grated ginger. Sauté them for about 30 seconds. Stir constantly until they smell great.
Combining and Cooking
Next, we need to mix the sauce ingredients. Pour in the soy sauce, brown sugar, rice vinegar, and beef broth. Stir everything until the sugar dissolves. Once mixed, return the browned beef to the pot. Make sure the beef is submerged in the sauce. Now, close the lid securely and set the Instant Pot to Manual mode. Cook for 35 minutes to make the beef tender.
Finalizing the Dish
After the cooking time is up, allow for a natural pressure release for about 10 minutes. This helps the beef stay juicy. Then, switch the vent to quick release to let out any remaining steam. For the sauce, whisk the cornstarch and cold water in a small bowl. Stir this mix into the pot. Switch the Instant Pot back to Sauté mode. Cook for 3 to 5 minutes, stirring often, until the sauce thickens to your liking.
Serving Suggestions
Serve the teriyaki beef over fluffy rice or noodles. This will soak up the tasty sauce. Top it off with sliced green onions and sesame seeds for a nice touch. For a pretty look, use deep bowls. Create a little well in the rice for the beef. Drizzle some extra sauce over the top and enjoy your meal!
Tips & Tricks
Best Practices for Flavor
To make your teriyaki beef tasty, you should season the beef well. Use salt and pepper to coat all sides of the beef cubes. This step boosts the flavor and helps the beef brown nicely.
Using low-sodium soy sauce is key. It gives you that classic teriyaki taste without too much salt. This balance makes the dish taste fresh and bright. You can always add more seasoning later if you want.
Cooking Adjustments
The cooking time can change based on the beef cut. Beef chuck roasts work well, but if you use a tougher cut, increase the cooking time to 45 minutes. If you prefer a leaner cut, like sirloin, you can reduce the time to about 30 minutes.
If you want to use frozen beef, don’t worry! You can still make this recipe. Just add 5 more minutes to the cooking time. This will ensure the beef cooks through and becomes tender.
Presentation Tips
To serve your teriyaki beef elegantly, use deep bowls. Start by placing fluffy rice or noodles in the bowl. Make a small well in the center for the beef.
Drizzle some of the sauce over the beef to add shine. Top it off with sliced green onions and sesame seeds for a nice crunch. This simple touch makes your dish look beautiful and inviting. Enjoy your meal!
Pro Tips
- Pat the Beef Dry: Ensuring the beef is dry before searing helps create a beautiful crust and enhances flavor.
- Use Low-Sodium Soy Sauce: This allows you to control the saltiness of the dish while still achieving that classic teriyaki flavor.
- Natural Pressure Release: Allowing for a natural pressure release helps the meat retain its juices, resulting in more tender beef.
- Customize the Thickeners: Feel free to adjust the amount of cornstarch for a thicker or thinner sauce according to your preference.

Variations
Alternative Protein Options
You can swap the beef for chicken or pork in this teriyaki recipe. Both choices work well with the sweet and savory sauce. Chicken thighs or pork shoulder add great flavor. Just be sure to adjust the cooking time slightly. For chicken, cook for about 25 minutes. For pork, aim for 30 minutes.
If you prefer a vegetarian option, try using tofu. Firm tofu absorbs the sauce nicely. Cut it into cubes and sauté it in sesame oil until golden. Then, follow the same steps for the sauce and cooking.
Flavor Enhancements
You can make this dish even better with some extra flavors. Adding fresh vegetables can boost nutrition and color. Bell peppers, broccoli, or snap peas add crunch and taste. Toss them in during the last few minutes of cooking.
Want some heat? Sprinkle in red pepper flakes. Start with a small amount, and add more if you like it spicy. This simple change can take your teriyaki beef to a whole new level.
Storage Info
Short-Term Storage
To keep your leftover teriyaki beef fresh, refrigerate it right away. Place the beef in an airtight container. This helps prevent moisture loss and keeps the flavors intact. You can store it for about three to four days in the fridge. Glass or plastic containers work well. Make sure they have tight seals to keep your meal tasty.
Long-Term Storage
If you want to save your teriyaki beef for later, freezing is a great option. Let the beef cool down before placing it in a freezer-safe bag or container. Squeeze out any extra air to prevent freezer burn. You can freeze it for up to three months.
When you’re ready to eat, take the beef out of the freezer. Place it in the fridge to thaw overnight. If you’re in a hurry, you can use the microwave on the defrost setting. Once thawed, reheat it on the stove or in the microwave. Make sure it gets hot all the way through before serving.
FAQs
Common Questions
How long does it take to cook Instant Pot teriyaki beef?
It takes about 35 minutes to cook the beef under pressure. Add 10 minutes for the natural release. So, the total time is about 1 hour.
Can I use regular soy sauce instead of low-sodium?
Yes, you can use regular soy sauce. Just note that it may make the dish saltier.
What sides pair well with teriyaki beef?
Serve teriyaki beef with rice or noodles. Steamed vegetables, like broccoli or snap peas, also work great.
How do I know when beef is tender?
Beef is tender when it breaks apart easily with a fork. If it’s still tough, cook it a bit longer.
Can this recipe be doubled in an Instant Pot?
Yes, you can double the recipe. Just make sure not to exceed the pot’s maximum fill line. Adjust the cooking time if needed.
In this post, I covered how to make delicious Instant Pot teriyaki beef. We discussed the main ingredients, tips for better flavor, and tasty variations. I shared helpful cooking steps and storage tips to keep your dish fresh.
Using this recipe, you can enjoy a savory meal at home. Don’t hesitate to experiment with flavors or proteins to suit your taste. Happy cookin

Instant Pot Teriyaki Beef
Ingredients
- 1.5 pounds beef chuck roast, cut into 1-inch cubes
- 1 cup low-sodium soy sauce
- 0.5 cup brown sugar
- 0.25 cup rice vinegar
- 2 tablespoons sesame oil
- 3 cloves garlic, minced
- 1 tablespoon fresh ginger, grated
- 1 cup beef broth
- 2 tablespoons cornstarch
- 2 tablespoons cold water
- 1 green onion sliced (for garnish)
- none Sesame seeds (for garnish)
Instructions
- Start by patting the beef cubes dry with paper towels and seasoning them generously with salt and pepper on all sides.
- Set your Instant Pot to the Sauté mode. Once hot, add the sesame oil, allowing it to warm for about a minute.
- Working in batches, add the beef cubes to the pot. Brown each batch for approximately 3-4 minutes on all sides until they develop a nice crust. Once browned, remove the beef and set it aside on a plate.
- In the same pot, add the minced garlic and grated ginger. Sauté for about 30 seconds, stirring constantly, until fragrant.
- Carefully pour in the soy sauce, brown sugar, rice vinegar, and beef broth. Stir everything together until the sugar is dissolved and well mixed.
- Place the browned beef back into the Instant Pot, ensuring the pieces are well submerged in the sauce.
- Close the lid securely on the Instant Pot and set it to Manual mode. Adjust the time to cook for 35 minutes.
- Once the cooking cycle completes, allow for a natural pressure release for about 10 minutes. Then, switch the vent to quick release to release any remaining steam.
- In a small bowl, whisk together the cornstarch and cold water to create a slurry. Stir this mixture into the sauce in the pot; then, switch the Instant Pot back to Sauté mode. Cook for an additional 3-5 minutes, stirring frequently, until the sauce thickens to your desired consistency.
- Dish out the teriyaki beef while hot, serving it over fluffy cooked rice or noodles. Finish with a sprinkle of sliced green onions and sesame seeds.


![For this tasty dish, gather the following main ingredients: - 4 boneless, skinless chicken breasts - 1 cup dill pickle juice (for marinating) - 1 cup ranch dressing - 1 cup breadcrumbs (Italian or panko) - 1 cup grated Parmesan cheese - 1 cup marinara sauce - 1 cup shredded mozzarella cheese These ingredients make the base of your chicken parmesan. The chicken stays juicy from the pickle juice, and the ranch dressing adds a creamy flavor. Next, you will need these seasonings: - 1 tablespoon olive oil - 1 teaspoon garlic powder - 1 teaspoon Italian seasoning - Salt and pepper to taste These seasonings give your chicken a great taste. The garlic powder and Italian seasoning work together to create a cozy flavor. The salt and pepper help balance everything. For a more colorful dish, consider these garnishes: - Fresh parsley for garnish (optional) You can also serve your chicken with sides like: - Pasta - Fresh green salad These sides add color and texture to your meal. They keep things fresh and light. For the complete cooking steps, check out the Full Recipe. To start, take 4 boneless, skinless chicken breasts. Place them in a resealable plastic bag. Pour 1 cup of dill pickle juice over the chicken. Make sure they are fully submerged. Seal the bag tight. Put it in the fridge and let it marinate for at least 1 hour. If you want a stronger taste, let it sit for up to 4 hours. Next, preheat your oven to 400°F (200°C). In a shallow dish, mix 1 cup of breadcrumbs, 1 cup of grated Parmesan cheese, 1 teaspoon of garlic powder, and 1 teaspoon of Italian seasoning. Add a pinch of salt and pepper to taste. Stir these dry ingredients well. This mix gives the chicken a tasty and crunchy coat. After marinating, take the chicken out and pat it dry with paper towels. Dip each piece into 1 cup of ranch dressing, coating both sides well. Then, dredge the chicken in the breadcrumb mix. Press lightly to ensure it sticks. In a large, oven-safe skillet, heat 1 tablespoon of olive oil over medium heat. Once it shines, add the coated chicken breasts. Sear each side for about 3-4 minutes. They should turn a nice golden brown. After searing, pour 1 cup of marinara sauce over the chicken. Make sure each piece is covered. Then, sprinkle 1 cup of shredded mozzarella cheese on top. This adds a gooey touch. Now, transfer the skillet to your preheated oven. Bake for 20-25 minutes. Ensure the chicken reaches an internal temperature of 165°F (75°C). The cheese should be melted and slightly golden brown. Once done, take the skillet out and let it cool for a few minutes. If you like, sprinkle fresh parsley on top for a burst of color and flavor. Serve it up and enjoy the delicious blend of flavors in your pickle ranch chicken parmesan. For the full recipe, check the earlier sections! To get the best crust on your chicken, start with dry chicken. After marinating, pat the chicken dry with paper towels. This helps the coating stick well. Next, dip the chicken in ranch dressing. Make sure to coat both sides. Then, dredge it in the breadcrumb mix. Press down lightly to pack on that flavor. For extra crunch, you can double-coat the chicken. Just repeat the ranch and breadcrumbs steps. If you have leftovers, store them in an airtight container. This keeps the chicken fresh. Place the chicken in the fridge and eat it within three days. To reheat, use an oven or air fryer. This way, you keep that crispy texture. Avoid the microwave, as it can make the coating soggy. To boost flavor, try adding spices to your breadcrumb mix. A pinch of cayenne pepper adds heat. You might even try smoked paprika for a smoky taste. Another option is to mix in some chopped herbs. Fresh basil or oregano can really brighten up the dish. Don't forget to drizzle some extra ranch on top just before serving. These small changes can make your Pickle Ranch Chicken Parmesan even more tasty! For complete cooking steps and ingredient details, check the [Full Recipe]. {{image_4}} You can easily adapt this recipe for various diets. Here are some ideas: - Gluten-Free: Use gluten-free breadcrumbs or crushed cornflakes. - Dairy-Free: Substitute the ranch dressing with a dairy-free version. Try coconut yogurt or a cashew-based alternative. - Low-Carb: Replace breadcrumbs with crushed nuts or pork rinds for a crunchy topping. Want to boost flavors? Consider these add-ins: - Spices: Add cayenne pepper for heat or smoked paprika for depth. - Herbs: Mix in fresh basil or oregano to the marinara for freshness. - Veggies: Layer sliced bell peppers or mushrooms under the cheese for added taste and texture. Not in the mood to bake? Try these methods instead: - Air Fryer: Cook at 375°F (190°C) for about 15-18 minutes, flipping halfway. - Grill: Grill the marinated chicken on medium heat for 5-7 minutes per side. Add the sauce and cheese in the last few minutes to melt. - Slow Cooker: Cook on low for 4-6 hours with sauce and cheese on top for a tender dish. These variations make the recipe fit your lifestyle. Enjoy customizing your Pickle Ranch Chicken Parmesan! For the full details, check the Full Recipe. To keep your Pickle Ranch Chicken Parmesan fresh, store it in an airtight container. Let the chicken cool to room temperature first. Once cooled, transfer it to the container and seal tightly. It can last in the fridge for 3 to 4 days. To keep flavors intact, try to use it up within that time. When it's time to enjoy leftovers, preheat your oven to 350°F (175°C). Place the chicken in an oven-safe dish. Cover it with foil to prevent drying out. Heat for about 15 to 20 minutes, or until it's warmed through. You can also reheat in the microwave, but the oven keeps the chicken crispy. If you want to save some for later, freezing is a great option. Wrap each chicken breast tightly in plastic wrap and then in foil. This helps prevent freezer burn. You can freeze it for up to 3 months. To reheat, thaw in the fridge overnight, then follow the reheating instructions. Enjoy your meal anytime! You should marinate the chicken for at least 1 hour. This helps the meat soak up the pickle juice. For even more flavor, try marinating for up to 4 hours. This longer time allows the tangy taste to infuse deeper. Yes, you can prepare this dish ahead of time. Marinate the chicken and coat it as directed. Then, store it in the fridge for up to 24 hours before baking. When ready, just bake it as per the recipe. There are many tasty sides that go well with Pickle Ranch Chicken Parmesan. Here are some ideas: - Garlic bread - Pasta with marinara sauce - A fresh green salad - Roasted vegetables - Mashed potatoes Feel free to mix and match to find your favorite pairings! For the full recipe, check out the earlier section. We've covered how to make Pickle Ranch Chicken Parmesan. We discussed key ingredients, step-by-step instructions, and helpful tips. You learned about storage and variations to fit your taste. Remember, this dish is fun and easy to customize. Enjoy exploring new flavors and methods in your cooking. With practice, you'll master this recipe and impress others. Ready to make your own? Now, it’s your turn to get creative in the kitchen!](https://goldendishy.com/wp-content/uploads/2025/07/3835c891-434d-4cb2-bcdb-f0268378baad-768x768.webp)


